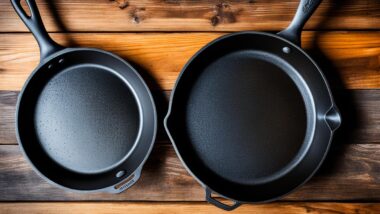
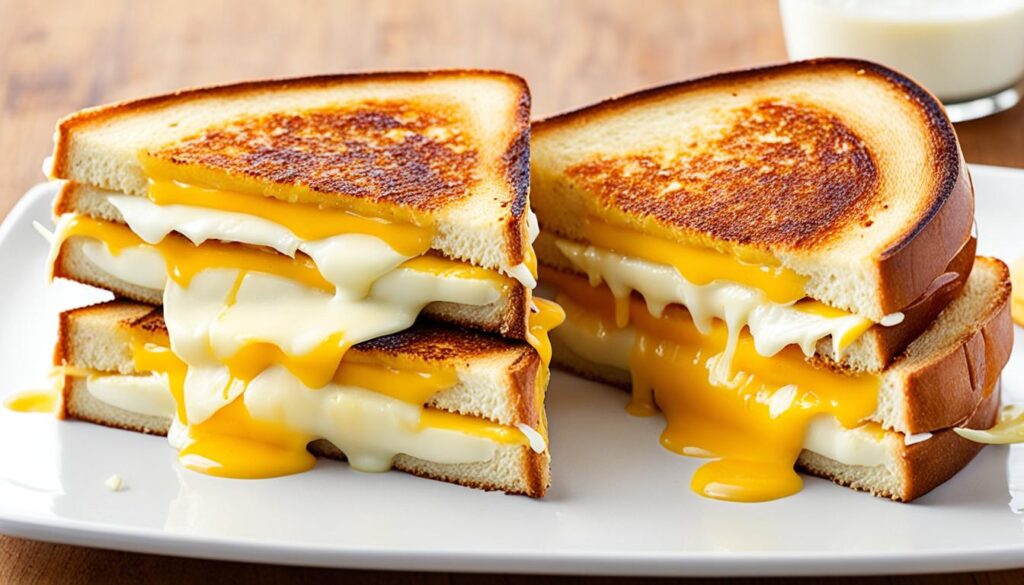
Cast iron is the best tool for grilled cheese — full stop. The even heat, the natural seasoning built up over years of cooking, the way it creates a crust that a nonstick pan simply can’t touch. I’ve made grilled cheese on every surface imaginable, and nothing comes close.
Table of Contents
- 1 The Magic of Cast Iron for Perfect Grilled Cheese
- 2 Essential Ingredients for Gourmet Grilled Cheese
- 3 Prepping Your Cast Iron Skillet for Grilled Cheese Success
- 4 The Art of Layering: Building the Ultimate Sandwich
- 5 Cast Iron Skillet Grilled Cheese Sandwich Recipes
- 6 Classic Cheddar and Gruyère Melt
- 7 Spicy Pepper Jack and Tomato Grilled Cheese
- 8 Gourmet Brie and Apple Grilled Cheese
- 9 Mediterranean-Inspired Feta and Olive Melt
- 10 Smoky Gouda and Caramelized Onion Delight
- 11 Veggie Lover’s Grilled Cheese with Roasted Peppers
- 12 Breakfast Grilled Cheese with Egg and Bacon
- 13 Sweet and Savory Fig and Manchego Grilled Cheese
- 14 Buffalo Chicken Grilled Cheese Sensation
- 15 Tips for Achieving the Perfect Crispy Exterior
- 16 Best Sides and Soups to Serve with Grilled Cheese
- 17 How to Store and Reheat Cast Iron Grilled Cheese
- 18 Caring for Your Cast Iron Skillet After Cooking
The Magic of Cast Iron for Perfect Grilled Cheese
Cast iron gives you two things no other pan can: consistent, retained heat and a surface that gets better the more you use it. When you drop a sandwich into a well-seasoned skillet, it hits the pan evenly — no hot spots ruining one corner while the other side sits pale. That’s the whole game with grilled cheese. You want a deep, even golden crust with cheese that’s fully melted by the time the bread is done.
Here’s the thing — cast iron also holds heat when you lift the lid or press the sandwich down. Other pans lose that heat fast. Cast iron doesn’t. It keeps working.
Another thing I keep coming back to: the weight. A heavy pan means better contact between bread and surface. Better contact means better browning. That’s it.
Essential Ingredients for Gourmet Grilled Cheese
Not all cheese melts the same way. That matters more than most people think.
- High-moisture cheeses (mozzarella, brie, fontina) melt fast and get gooey quick — great for a pull-shot effect, not always great for structure
- Aged, low-moisture cheeses (sharp cheddar, gruyère, manchego) melt slower but build incredible flavor depth — worth the patience
- Semi-firm cheeses (gouda, pepper jack, provolone) are the sweet spot — they melt well and hold their shape long enough to slice cleanly
Bread matters too. Sourdough is my default. Thick-cut, slightly stale. The moisture has dried out just enough that it toasts without steaming. Pullman loaf works great for the breakfast version. Brioche for the sweet ones — it caramelizes fast, so watch it.
Butter vs. mayo: I butter the outside of the bread. Always. Some people swear by mayo for browning and I get it — the emulsification does something interesting — but butter tastes better and I’m not interested in the debate.
Prepping Your Cast Iron Skillet for Grilled Cheese Success
If you need to season your cast iron skillet before cooking, do that first. A poorly seasoned pan will stick, and a stuck sandwich is a ruined sandwich.
Preheat matters. Set your burner to medium-low and let the pan sit for 3-4 minutes before anything touches it. This is the step people skip. They put the sandwich in a cold pan, crank the heat, and wonder why the outside burns before the cheese melts. Don’t do that.
Once it’s preheated, you should be able to hold your hand an inch above the surface and feel steady, even warmth — not a spike of heat from one spot. That’s when it’s ready.
The Art of Layering: Building the Ultimate Sandwich
Layer order changes everything, especially for multi-cheese recipes.
Put the meltier cheese closest to the bread on both sides. The idea is that the outer cheeses start melting from the bread’s heat first, which helps bind the whole thing together. Firmer cheeses, stronger ingredients — caramelized onions, roasted peppers — go in the middle.
Press the sandwich gently once it’s in the pan. Not hard enough to squeeze everything out, just enough to ensure even contact. A second cast iron pan works perfectly for this. Or a spatula with some body weight behind it.
Lid on for the first flip. Put a lid or a piece of foil over the pan for the first 2 minutes after flipping. That trapped steam helps the cheese finish melting without over-browning the second side. Pull the lid off for the last minute so the crust firms back up.
Cast Iron Skillet Grilled Cheese Sandwich Recipes
These ten recipes are the ones I keep coming back to — some classic, some unexpected, all genuinely good.
Classic Cheddar and Gruyère Melt
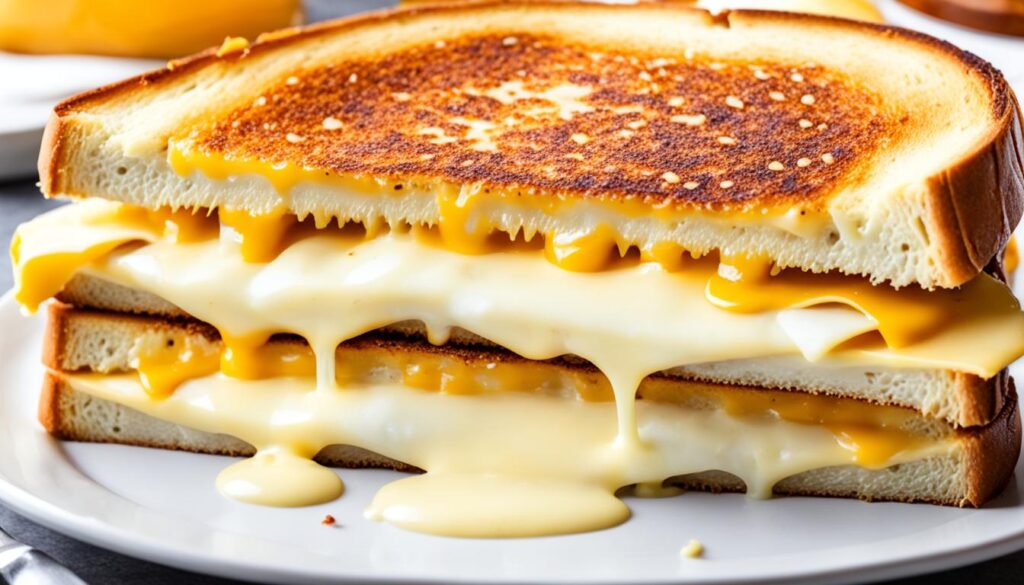
This is the one I’d make on a Tuesday night without thinking twice. Sharp cheddar for flavor, gruyère for that nutty, slightly funky melt — together they hit every note a grilled cheese is supposed to hit. Simple. Reliable. Better than it has any right to be.
Ingredients
- 8 slices sourdough bread (thick-cut)
- 6 oz sharp cheddar, sliced
- 6 oz gruyère, sliced
- 4 tbsp unsalted butter, softened
- 1/2 tsp garlic powder
- Salt and black pepper to taste
Instructions
Step 1. Mix the softened butter with garlic powder — it should look pale and uniform, no streaks of plain butter left. Spread it across one side of each bread slice, going all the way to the edges.
Step 2. Preheat your cast iron over medium-low. Lay two slices butter-side down. The pan should sizzle gently when the bread hits it — not aggressively, not silently. Gently.
Step 3. Layer 1-1/2 oz of cheddar on each slice, then 1-1/2 oz of gruyère on top. The cheese will look like too much at first. It isn’t.
Step 4. Cap each sandwich with a second slice, butter-side up. Cook for about 3-4 minutes until the bottom is deep golden brown — lift a corner to check.
Step 5. Flip carefully, cover loosely with foil, and cook another 2-3 minutes. The cheese should be visibly melted and starting to ooze at the edges. Pull the foil for the last minute. Slice and serve.
Nutritional Information (Per Serving)
| Nutrient | Amount per Serving |
|---|---|
| Calories | 610 |
| Carbohydrates | 42g |
| Protein | 28g |
| Fat | 36g |
| Fiber | 2g |
| Sodium | 780mg |
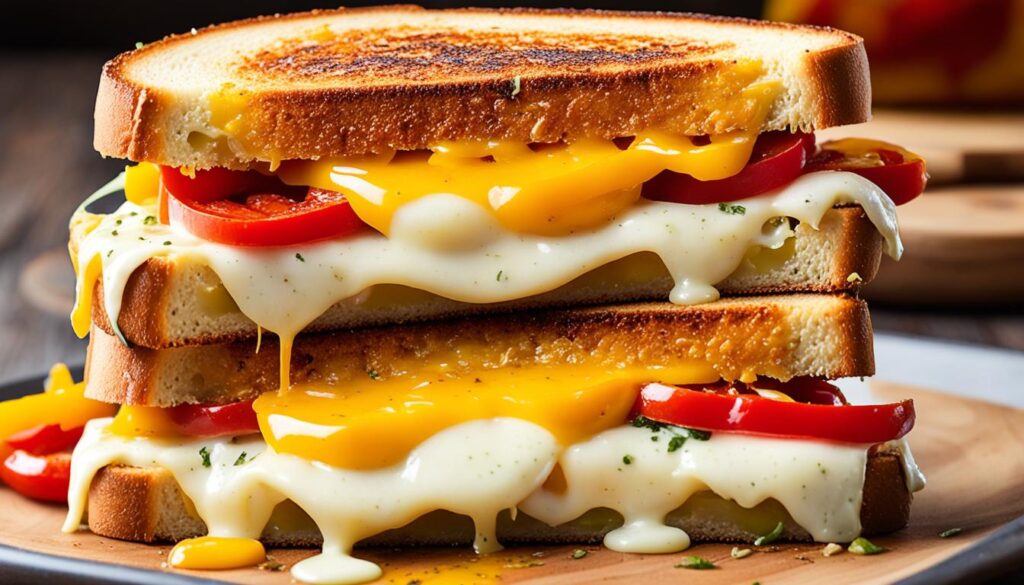
Spicy Pepper Jack and Tomato Grilled Cheese

I make this when I want something with some heat. Pepper jack is sneaky — it doesn’t look spicy, it doesn’t smell spicy, and then you take a bite. The tomato cuts right through the richness and adds just enough acid to keep things from getting heavy.
Ingredients
- 8 slices sourdough bread
- 8 oz pepper jack cheese, sliced
- 2 medium roma tomatoes, sliced thin (about 12-16 slices)
- 4 tbsp butter, softened
- 1 tsp smoked paprika
- 1/4 tsp cayenne pepper
- Salt to taste
Instructions
Step 1. Mix butter with smoked paprika and cayenne. Spread it on one side of each bread slice — this is the flavor layer, so don’t rush it.
Step 2. Lay the tomato slices on a paper towel. Press another towel on top. Let them sit for 5 minutes. Wet tomatoes make soggy bread, and soggy bread is a loss.
Step 3. Preheat your skillet over medium-low. Place bread slices butter-side down. The paprika butter will start to smell incredible almost immediately.
Step 4. Layer 2 oz of pepper jack on each slice. Arrange 3-4 tomato slices on top of the cheese. Cap with the second slice, butter-side up.
Step 5. Cook 3-4 minutes per side until deeply golden. The tomatoes will have softened and integrated into the cheese by the time you flip — you’ll feel the sandwich become more cohesive when you press it gently.
Nutritional Information (Per Serving)
| Nutrient | Amount per Serving |
|---|---|
| Calories | 580 |
| Carbohydrates | 44g |
| Protein | 24g |
| Fat | 33g |
| Fiber | 3g |
| Sodium | 810mg |
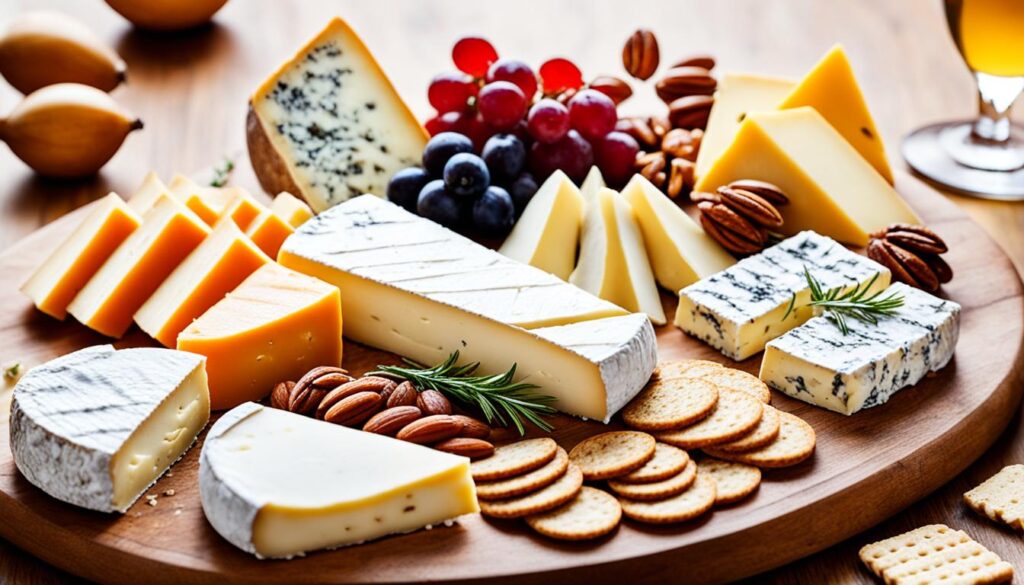
Gourmet Brie and Apple Grilled Cheese
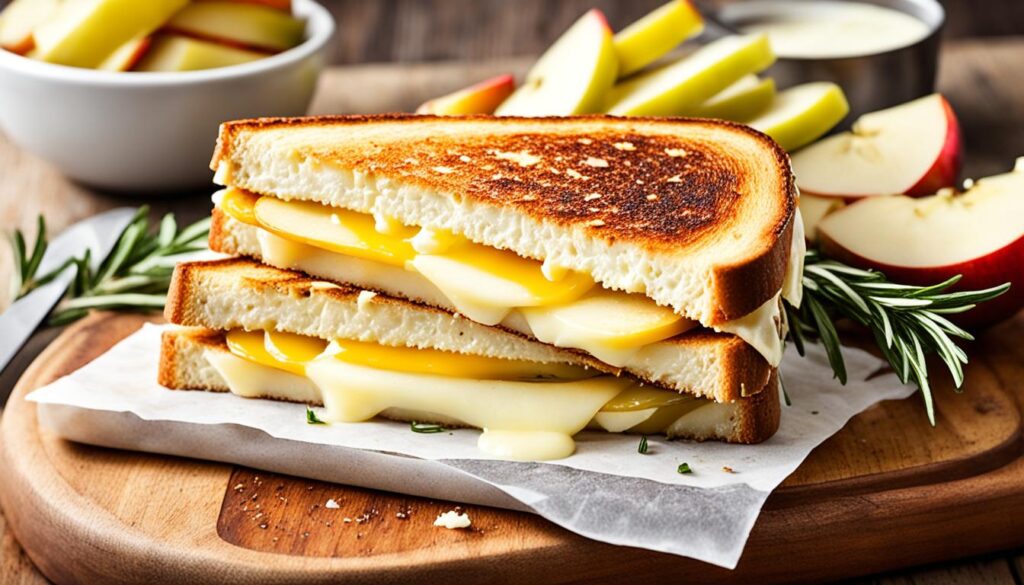
Of all ten recipes on this list, this is the one I’d serve to guests. Brie melts into something almost liquid, the apple brings sweetness and crunch, and the whole thing on brioche tastes like something you’d pay $18 for at a restaurant. It’s a showoff sandwich.
Ingredients
- 8 slices brioche bread
- 8 oz brie, rind removed, sliced
- 2 medium Honeycrisp apples, cored and sliced thin
- 2 tbsp honey
- 4 tbsp butter, softened
- 1 tsp fresh thyme leaves
- Pinch of black pepper
Instructions
Step 1. Preheat the skillet over medium-low — brioche browns fast, so you want lower heat than usual. Trust me on this.
Step 2. Butter one side of each brioche slice. The bread is already rich and soft. It’ll go golden quickly, so keep a close eye on it.
Step 3. Place bread butter-side down. Layer 2 oz of brie on each slice — it’ll look lumpy and uneven. That’s fine. It melts into itself.
Step 4. Arrange apple slices on top of the brie. Drizzle honey over the apples. Add a few thyme leaves and a crack of black pepper.
Step 5. Cap, cook 2-3 minutes per side. Brioche will be golden — almost amber — when it’s right. The brie should have fully melted and be puddling slightly at the edges.
Nutritional Information (Per Serving)
| Nutrient | Amount per Serving |
|---|---|
| Calories | 650 |
| Carbohydrates | 58g |
| Protein | 20g |
| Fat | 38g |
| Fiber | 3g |
| Sodium | 620mg |
Mediterranean-Inspired Feta and Olive Melt


Feta doesn’t melt the way cheddar does — it softens and gets creamy, but it holds its shape more than you’d expect. Which is actually great here. You get pockets of salty, tangy cheese mixed with olives and sun-dried tomatoes that don’t collapse into mush. It’s different. I like different.
Ingredients
- 8 slices sourdough bread
- 8 oz feta cheese, crumbled
- 4 oz mozzarella, sliced (for melt cohesion)
- 1/2 cup kalamata olives, pitted and roughly chopped
- 1/3 cup sun-dried tomatoes, oil-packed, drained and chopped
- 4 tbsp butter, softened
- 1 tsp dried oregano
- 1/2 tsp red pepper flakes
Instructions
Step 1. Mix butter with oregano and red pepper flakes. Spread on one side of each bread slice.
Step 2. In a small bowl, combine feta, olives, and sun-dried tomatoes. Stir until roughly mixed — it won’t look neat. It doesn’t need to.
Step 3. Place bread slices butter-side down in the preheated skillet. Layer mozzarella first — it’ll act as the binding agent. Spoon the feta mixture on top, about 3-4 tablespoons per sandwich.
Step 4. Cap with the second slice butter-side up. Press gently. The filling will feel chunky under your spatula. That’s right.
Step 5. Cook 3-4 minutes per side. The mozzarella will be fully melted and pulling the feta mixture with it when you cut through — you’ll see the stretch.
Nutritional Information (Per Serving)
| Nutrient | Amount per Serving |
|---|---|
| Calories | 560 |
| Carbohydrates | 46g |
| Protein | 22g |
| Fat | 32g |
| Fiber | 3g |
| Sodium | 1020mg |
Smoky Gouda and Caramelized Onion Delight
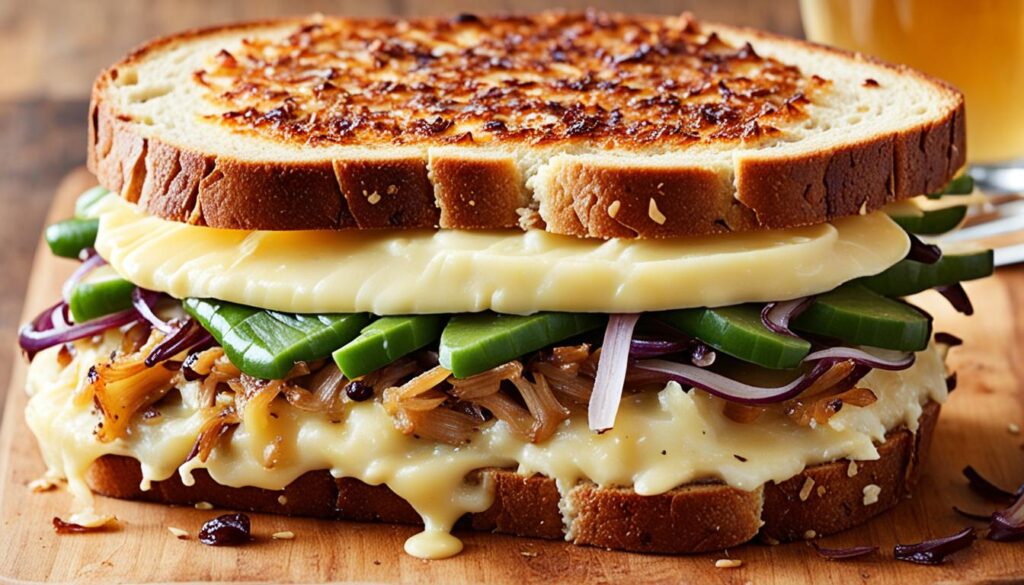
This one takes the most time because of the onions — you can’t rush caramelized onions, and if anyone tells you 10 minutes is enough, they’re wrong. But once those onions are done? Deeply sweet, almost jammy, with that smoky gouda doing the heavy lifting. One of my favorites, hands down.
Ingredients
- 8 slices sourdough bread
- 8 oz smoked gouda, sliced
- 3 large yellow onions, thinly sliced
- 3 tbsp butter (for onions) + 4 tbsp butter (for bread)
- 1 tbsp olive oil
- 1 tbsp balsamic vinegar
- 1 tsp fresh thyme
- Salt and pepper to taste
Instructions
Step 1. Heat 3 tbsp butter and olive oil in your cast iron over medium. Add the onions. They’ll fill the pan — that’s okay, they’ll shrink dramatically. Stir occasionally.
Step 2. After 20 minutes, the onions should be golden and significantly reduced. Add balsamic vinegar, thyme, salt, and pepper. Cook another 5-10 minutes until the liquid is absorbed and the onions are jammy and dark brown.
Step 3. Transfer onions to a bowl. Wipe the pan clean and return to medium-low heat.
Step 4. Butter one side of each bread slice. Place butter-side down in the pan. Layer gouda — about 2 oz per sandwich — then pile on the caramelized onions. Don’t be stingy.
Step 5. Cap, cook 3-4 minutes per side. The gouda melts quickly and the onions will press into it as the sandwich cooks. When you cut it, the onions should be fully integrated with the cheese — you won’t be able to tell where one ends and the other begins.
Nutritional Information (Per Serving)
| Nutrient | Amount per Serving |
|---|---|
| Calories | 630 |
| Carbohydrates | 52g |
| Protein | 24g |
| Fat | 37g |
| Fiber | 4g |
| Sodium | 850mg |
Veggie Lover’s Grilled Cheese with Roasted Peppers
I didn’t expect to like this one as much as I do. Roasted red peppers bring sweetness and smokiness at the same time, the spinach wilts into the cheese, and the whole thing is — honestly — more satisfying than most meat sandwiches. The provolone is key here. It melts without going greasy.
Ingredients
- 8 slices sourdough bread
- 6 oz provolone, sliced
- 4 oz fontina, sliced
- 2 large red bell peppers, roasted and sliced (or 1 jar roasted peppers, drained)
- 2 cups fresh baby spinach
- 1/2 cup marinated artichoke hearts, drained and roughly chopped
- 4 tbsp butter, softened
- 1 tsp Italian seasoning
Instructions
Step 1. If roasting your own peppers: char them directly over a gas flame or under the broiler until blackened all over. Seal in a bowl with plastic wrap for 10 minutes, then peel, seed, and slice. If using jarred — pat them dry first.
Step 2. Mix butter with Italian seasoning. Spread on one side of each bread slice.
Step 3. Heat the skillet over medium-low. Place bread butter-side down. Layer provolone first, then fontina. The fontina will melt faster and create the base.
Step 4. Add roasted pepper slices, a small handful of spinach, and some artichoke on top of the cheese. The spinach looks like a lot — it’ll wilt down to almost nothing once the sandwich heats.
Step 5. Cap, press gently, cook 3-4 minutes per side. The vegetables will compress and meld into the cheese. Check by lifting the edge — deep golden brown means it’s ready.
Nutritional Information (Per Serving)
| Nutrient | Amount per Serving |
|---|---|
| Calories | 540 |
| Carbohydrates | 48g |
| Protein | 24g |
| Fat | 29g |
| Fiber | 5g |
| Sodium | 820mg |
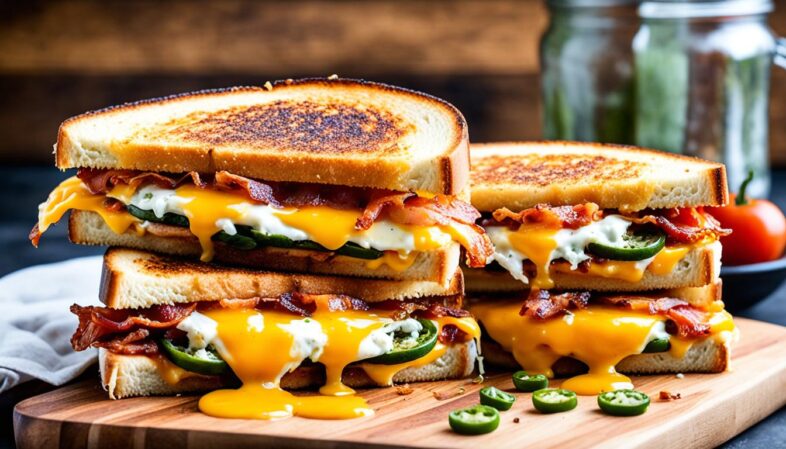
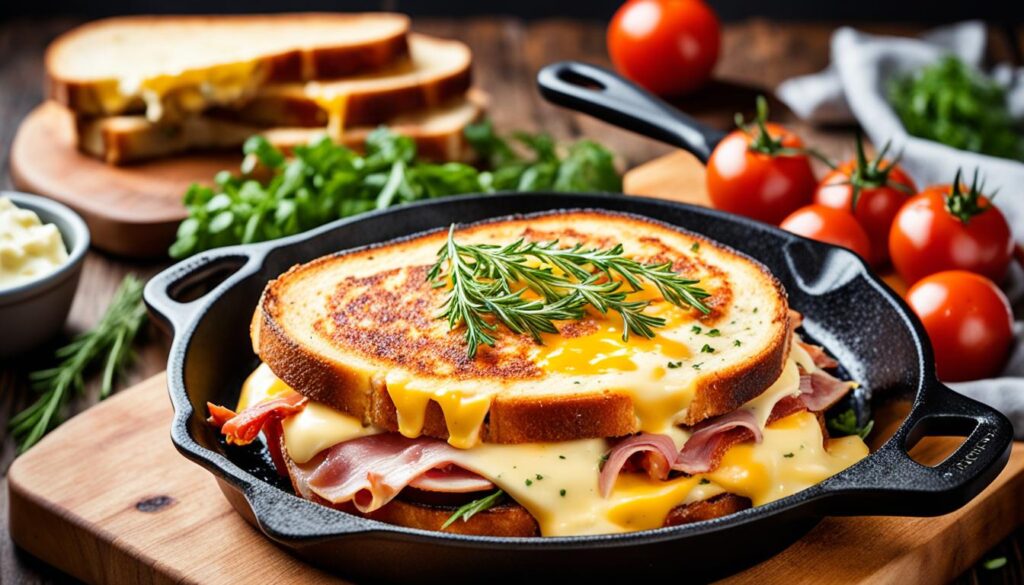
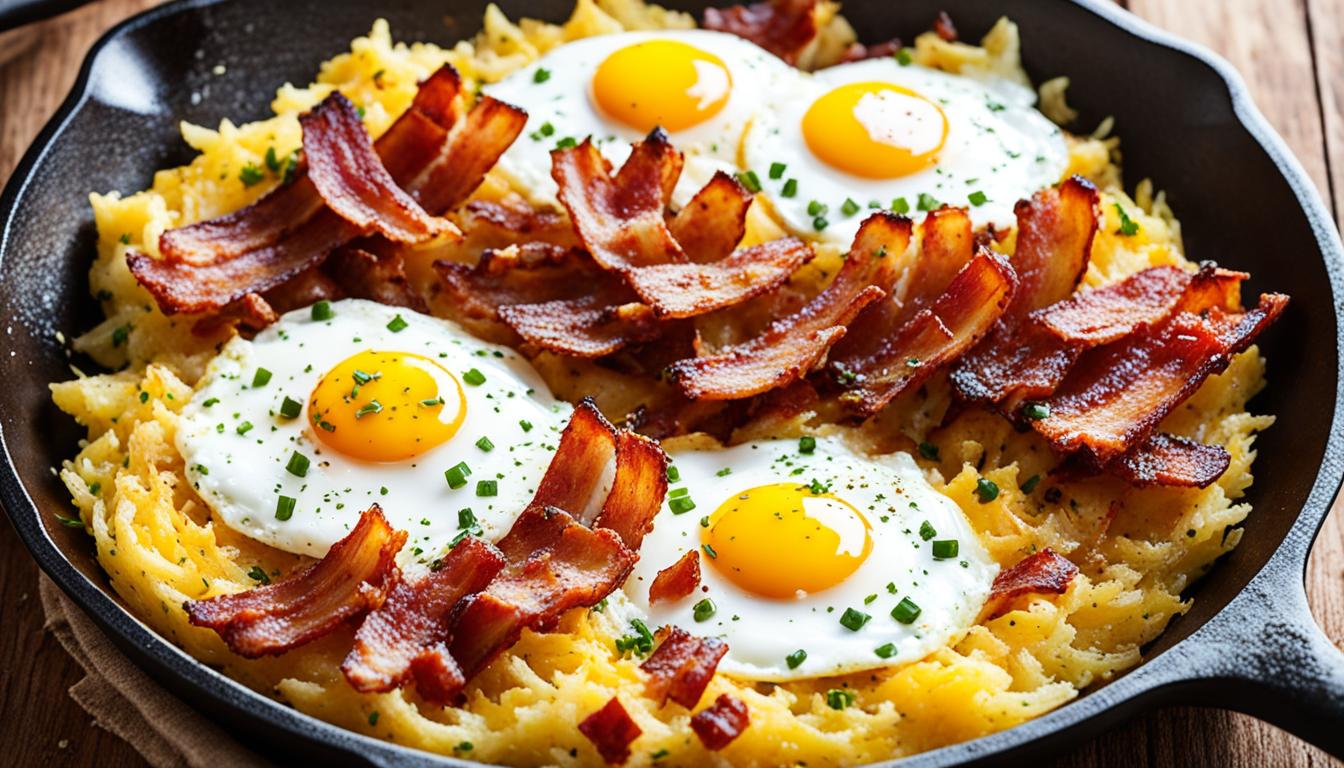
Breakfast Grilled Cheese with Egg and Bacon
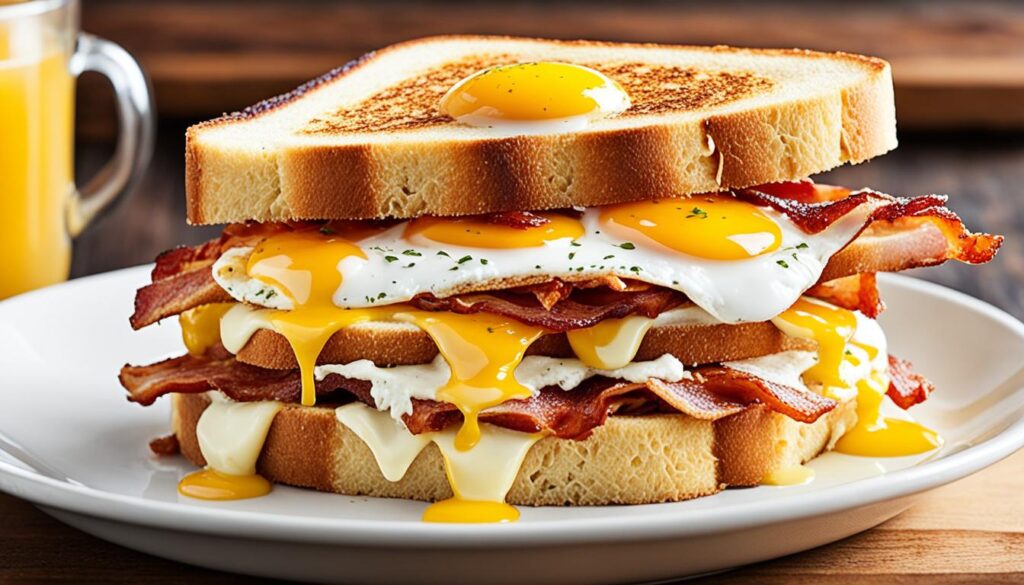
This is the weekend move. I make this when there’s no rush, when the coffee is already brewed, and when I want something that feels like an actual meal rather than a snack. The egg stays runny inside — barely. The bacon adds crunch. Everything else is just cheese doing what cheese does.
Ingredients
- 8 slices pullman or Texas toast bread
- 6 oz sharp cheddar, sliced
- 4 oz American cheese, sliced (for melt)
- 8 strips thick-cut bacon
- 4 large eggs
- 4 tbsp butter, softened
- Salt, black pepper, and hot sauce to taste
Instructions
Step 1. Cook bacon in the cast iron over medium until crispy. Transfer to a paper towel-lined plate. Pour off most of the bacon fat — leave just a thin film.
Step 2. Crack eggs into the pan over medium-low. Season immediately. Cook until whites are just set but yolks are still soft — you want them jammy, not rubbery. Remove and set aside.
Step 3. Wipe the pan, return to medium-low. Butter the bread and place butter-side down.
Step 4. Layer American cheese first — it melts immediately and coats the bread. Add cheddar on top, then 2 strips of bacon per sandwich, then one egg.
Step 5. Cap carefully — the egg will shift. Cook 2-3 minutes per side. Gentle pressure only. The egg yolk should still be soft when you bite in — that’s the whole point.
Nutritional Information (Per Serving)
| Nutrient | Amount per Serving |
|---|---|
| Calories | 720 |
| Carbohydrates | 40g |
| Protein | 38g |
| Fat | 46g |
| Fiber | 1g |
| Sodium | 1180mg |
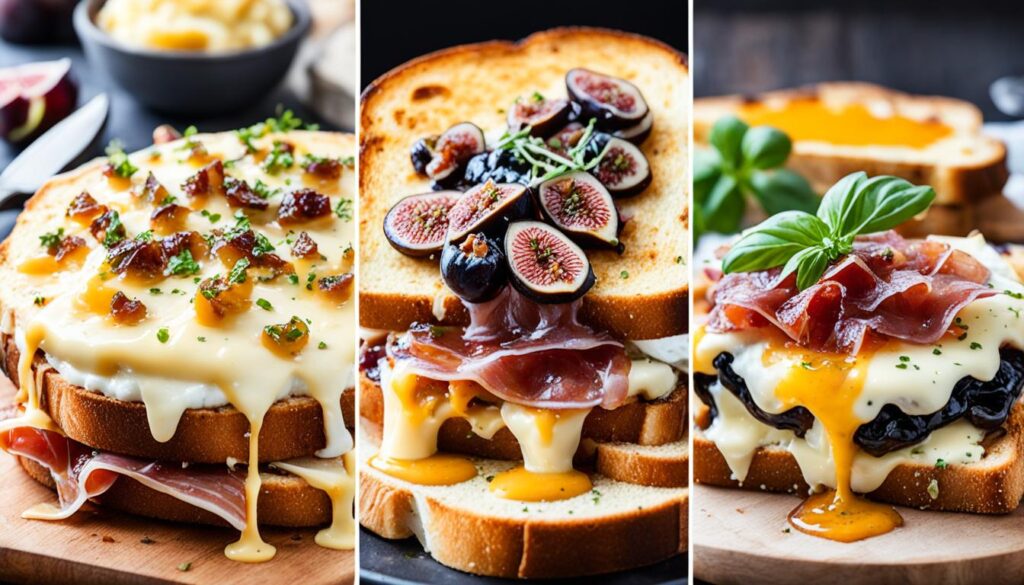
Sweet and Savory Fig and Manchego Grilled Cheese

Manchego is sharp and slightly salty, which makes it the perfect foil for fig jam. Sweet against savory, soft jam against firm cheese. I’ll add a few arugula leaves sometimes — the peppery bite cuts through the sweetness just enough. This one surprises people.
Ingredients
- 8 slices sourdough bread
- 8 oz manchego cheese, sliced thin
- 1/2 cup fig jam
- 2 cups fresh arugula
- 4 tbsp butter, softened
- 1 tbsp fresh rosemary, finely minced
- Pinch of flaky sea salt
Instructions
Step 1. Mix butter with minced rosemary. Spread on one side of each bread slice. The herb infusion is subtle but it ties everything together.
Step 2. Place bread butter-side down in a preheated skillet over medium-low. Layer manchego slices — about 2 oz per sandwich. Manchego slices a bit stiff but melts into something creamy and smooth.
Step 3. Spread 2 tablespoons of fig jam directly on the cheese. It’ll look glossy and dark. Let it sit for a minute — the heat from the pan will start softening it.
Step 4. Add a small handful of arugula on top of the jam. It’ll wilt slightly in the heat.
Step 5. Cap, cook 3 minutes per side. These go a bit faster because manchego melts at a lower temperature than most hard cheeses. Finish with a pinch of flaky sea salt on top before serving.
Nutritional Information (Per Serving)
| Nutrient | Amount per Serving |
|---|---|
| Calories | 590 |
| Carbohydrates | 60g |
| Protein | 22g |
| Fat | 30g |
| Fiber | 2g |
| Sodium | 690mg |
Buffalo Chicken Grilled Cheese Sensation
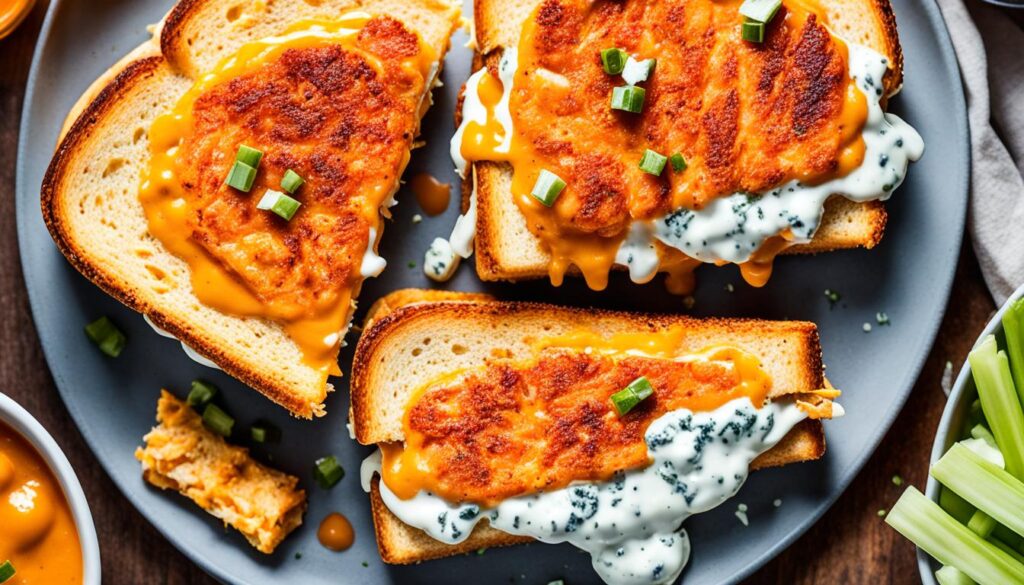
This isn’t subtle and it’s not trying to be. Buffalo sauce, tender shredded chicken, blue cheese crumbles, and a sharp cheddar holding it together — this is the grilled cheese you make when you want something bold. I make it with leftover rotisserie chicken half the time. Works perfectly.
Ingredients
- 8 slices sourdough bread
- 2 cups cooked chicken, shredded
- 1/3 cup buffalo sauce (Frank’s RedHot works well)
- 6 oz sharp cheddar, sliced
- 2 oz blue cheese crumbles
- 4 tbsp butter, softened
- 1/4 cup celery, finely diced
- 2 tbsp ranch dressing (optional but good)
Instructions
Step 1. In a bowl, toss shredded chicken with buffalo sauce until fully coated. The chicken should look orange-red and glistening. Taste it — adjust heat with more sauce if you want.
Step 2. Butter one side of each bread slice. Preheat the skillet over medium-low.
Step 3. Place bread butter-side down. Layer cheddar first — about 1-1/2 oz per sandwich. Then spoon about 1/2 cup of the buffalo chicken on top. Scatter celery and blue cheese over it.
Step 4. If using ranch, drizzle a little over the filling before capping. It sounds like a lot going on. It is. It works.
Step 5. Cap with the second slice butter-side up. Cook 4 minutes per side — this one runs slightly hotter and needs more time because of the chicken filling. The outside should be deeply golden and the cheese visibly melted when you cut through.
Nutritional Information (Per Serving)
| Nutrient | Amount per Serving |
|---|---|
| Calories | 670 |
| Carbohydrates | 44g |
| Protein | 42g |
| Fat | 34g |
| Fiber | 2g |
| Sodium | 1250mg |
Tips for Achieving the Perfect Crispy Exterior
A few things I’ve learned the hard way:
- Medium-low is the right heat. Always. Medium sounds right but it burns the bread before the cheese melts. Medium-low sounds slow but it produces a better crust.
- Don’t move the sandwich during the first 2 minutes. Let it sit. Let the crust develop. You’ll know it’s ready to flip when the bread releases from the pan without sticking.
- The cover trick — foil or a lid over the pan for the first 2 minutes after flipping — traps steam and finishes the cheese. Pull it off for the last minute to firm the crust back up.
- Butter all the way to the edges. Every time. Bare edges = pale, soft bread at the corners. That’s a miss.
- Press lightly and consistently. Not once hard. Light, repeated pressure as it cooks.
Best Sides and Soups to Serve with Grilled Cheese
Tomato soup. Obviously. But a few other things work just as well:
- Roasted tomato bisque — richer than canned, pairs with almost every recipe here
- Dill pickle spears on the side — the acidity cuts through the fat perfectly
- A simple green salad with lemon vinaigrette — especially good with the brie and apple sandwich
- Sweet potato fries for the buffalo chicken version — the sweetness balances the heat
- Classic coleslaw next to the breakfast version — more brunch-appropriate than it sounds
How to Store and Reheat Cast Iron Grilled Cheese
Grilled cheese is best the moment it comes off the pan. But if you have leftovers:
Wrap tightly in foil. Refrigerate for up to 2 days. To reheat — and this is important — put it back in a cast iron skillet over medium-low. Not the microwave. The microwave steams the bread and turns it soft. The skillet gives you back something close to the original crust. 3-4 minutes per side, covered for the first half.
Caring for Your Cast Iron Skillet After Cooking
Don’t overthink this. Cleaning your cast iron after use is simpler than most people make it.
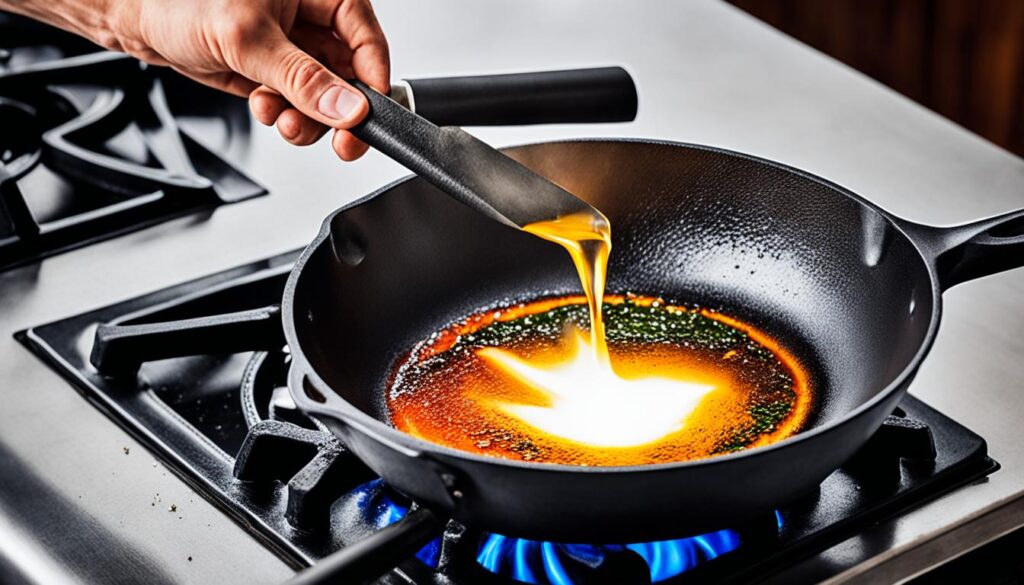
While the pan is still warm: rinse it with hot water, scrub with a stiff brush or chain mail scrubber. No soap. Dry it completely — either on the stove over low heat for a minute or with a clean towel. Then rub a thin layer of neutral oil over the surface while it’s still warm. That’s it.
The pan gets better every time you cook with it. Grilled cheese especially — the butter and cheese residue builds up the seasoning over time. After a few dozen sandwiches, this pan will be practically nonstick.