Table of Contents
- 1 Yes, You Can Season Cast Iron in a Toaster Oven (Here’s How)
- 2 Understanding Cast Iron Seasoning Basics
- 3 Preparing Your Cast Iron Skillet for Toaster Oven Seasoning
- 4 Step-by-Step Guide: Seasoning a Cast Iron Skillet in a Toaster Oven
- 5 Toaster Oven vs. Regular Oven for Seasoning Cast Iron
- 6 Troubleshooting Common Issues When Seasoning in a Toaster Oven
- 7 Maintaining Your Seasoning After Using a Toaster Oven
- 8 Alternative Methods for Seasoning Small Cast Iron Cookware
- 9 Best Practices for Seasoning Cast Iron in a Toaster Oven
- 10 Types of Cast Iron Cookware Suitable for Toaster Oven Seasoning
Yes, You Can Season Cast Iron in a Toaster Oven (Here’s How)
Yes, you can absolutely season a cast iron skillet in a toaster oven—works great for smaller pans (8 inches or less) that actually fit inside.
Here’s the thing. Most people don’t realize their toaster oven can handle this. But it can.
The process is basically identical to using a regular oven. Heat oil. Bake it. Build up layers. Done.
What You Need to Know Before Seasoning Cast Iron in a Toaster Oven
Before you start seasoning your cast iron in a toaster oven, you’ll need to check three critical things that’ll determine whether this method works for your setup or becomes a frustrating waste of time.
The deal-breakers:
- Your skillet has to actually fit (sounds obvious, right?)
- Toaster oven needs to hit 450°F minimum
- You need at least 1-2 inches of clearance above the pan
- Heating elements can’t touch the cookware
Skip the measurement step and you’re asking for problems.
Temperature Requirements for Seasoning Cast Iron
Your toaster oven needs to reach 450°F to 500°F for proper cast iron seasoning—anything lower won’t polymerize the oil correctly, leaving you with sticky, gummy residue instead of that hard, glassy finish you’re after.
Why these temps? Because polymerization (the chemical process that creates seasoning) requires heat above the oil’s smoke point. Most seasoning oils smoke between 400°F and 450°F. You need to go higher than that smoke point to actually transform the oil into seasoning.
Not all toaster ovens hit 500°F. Check yours.
Some max out at 450°F. That’ll work—just barely—but you might need longer baking times. Others cap at 400°F or 425°F. Those won’t cut it for proper seasoning. Period.

Temperature accuracy matters too. Toaster ovens can run 25-50 degrees cooler than the dial says. Get an oven thermometer (costs like $8) and verify the actual temperature before you start.
Size Limitations of Toaster Ovens
Size limitations are the biggest obstacle when seasoning cast iron in a toaster oven—most models can only accommodate skillets 8 inches or smaller, and even then you need to measure the interior dimensions, not just assume it’ll fit.
Measure these specific things:
- Interior width: Skillet diameter plus 1 inch minimum
- Interior height: Skillet height plus 2 inches (for clearance from heating elements)
- Depth: Front to back, especially if your skillet has a long handle
That 10-inch or 12-inch skillet you’re thinking about? Not happening in a standard toaster oven.
Here’s what actually fits:
| Skillet Size | Toaster Oven Compatibility |
|---|---|
| 6-inch | Fits in most toaster ovens easily |
| 8-inch | Fits in medium to large toaster ovens |
| 10-inch | Too large for most (some extra-large models only) |
| 12-inch | Forget it—use your regular oven |
The handle adds length too. A 6-inch skillet with handle might need 12+ inches of depth.
Best Toaster Oven Settings for Cast Iron Seasoning
The best toaster oven setting for seasoning cast iron is the bake function at 450-500°F with convection turned off (if your model has it), because you want steady, even heat rather than rapid air circulation that can cool the pan unevenly.
Settings breakdown:
- Function: Bake (not broil, not convection)
- Temperature: 475°F is the sweet spot
- Rack position: Middle (furthest from heating elements)
- Timer: Set for 60-90 minutes per layer
Why turn off convection? Moving air can create temperature fluctuations. You want consistent heat. Boring. Steady. Predictable.
Some toaster ovens only have one heating element (top or bottom). Those work but heat less evenly. You might need to rotate the pan halfway through—annoying, but doable.
Understanding Cast Iron Seasoning Basics
What Is Cast Iron Seasoning?

Cast iron seasoning is a hard, protective coating created when oil is heated to high temperatures and bonds to the metal surface through polymerization, transforming liquid fat into a slick, non-stick layer that protects against rust and improves with use.
Think of it like this. You’re not just coating the pan with oil. You’re chemically changing the oil into something else entirely.
That something else? A polymer. Similar to plastic (sort of). Forms a molecular bond with the iron. Becomes part of the pan itself.
This isn’t optional maintenance. It’s literally the difference between a functional cast iron skillet and a rusty paperweight.
How Polymerization Creates a Non-Stick Surface
Polymerization creates a non-stick surface on cast iron by heating fat molecules until they break apart and reorganize into hard, interconnected chains that bond directly to the iron’s porous surface, building up layer by layer into that signature black, glossy finish.
Here’s what’s actually happening:
When you heat oil past its smoke point, the triglycerides break down. The fatty acids separate. Free radicals form. Those free radicals cross-link with each other and grab onto the iron molecules in the pan’s surface.
The process:
- Oil heats up (350°F and climbing)
- Reaches smoke point (starts breaking down)
- Temperature keeps rising (450°F+)
- Molecules reorganize into polymers
- Polymers bond to iron and to each other
- Cooling locks everything in place
One layer isn’t enough though. Too thin. Too fragile. You need multiple coats—usually 3-6—before the surface becomes truly non-stick.
And yeah, this is why you can’t just wipe oil on a cold pan and call it seasoned. Chemistry doesn’t work that way.
Why Proper Seasoning Matters for Your Skillet
Proper seasoning matters because it’s the only thing standing between your cast iron and rust, plus it determines whether food slides off easily or sticks like cement—skimp on seasoning and you’ll spend your cooking time scraping and scrubbing instead of actually enjoying the pan.

What good seasoning does:
- Prevents rust (iron + water + oxygen = disaster)
- Creates non-stick cooking surface
- Adds flavor over time (subtle, but it’s there)
- Protects the metal from acidic foods
- Makes cleanup actually bearable
Bad seasoning? Means sticky eggs. Rust spots appearing overnight. Food with metallic taste. Having to re-season every few months because nothing’s sticking properly to the pan itself.
The difference between well-seasoned and poorly-seasoned cast iron is night and day. One’s a pleasure to cook with. The other’s a chore.
The Science Behind Seasoning a Cast Iron Skillet
How Heat Transforms Oil into Seasoning
Heat transforms oil into seasoning by breaking down fatty acid chains at temperatures above 400°F, causing them to oxidize and cross-link into a hard, resin-like coating that’s completely different from the liquid oil you started with—it’s irreversible chemistry happening right in your toaster oven.
The technical term is “drying.” Like how linseed oil dries on wood furniture. But faster, because of the heat.
What makes an oil “dry”? Polyunsaturated fats. More double bonds in the molecular structure. More places for cross-linking to occur. Flaxseed oil has tons. Olive oil has fewer. Coconut oil barely has any.
Temperature accelerates everything. Room temperature? Might take weeks for oil to polymerize (if it even can). 450°F? Happens in an hour.
The transformation timeline:
- 0-15 minutes: Oil heats up, starts smoking
- 15-30 minutes: Polymerization begins, coating turns brown
- 30-60 minutes: Polymers cross-link, surface hardens
- 60+ minutes: Coating fully cures, turns dark brown/black
You can actually see the change. Starts wet and shiny. Becomes matte. Then glossy again but harder. Different glossy.
The Role of Temperature in Building Seasoning Layers
Temperature plays a critical role in building seasoning layers because too low (under 400°F) leaves sticky residue, too high (over 550°F) can burn the coating, and the sweet spot of 450-500°F creates the hard, durable finish that actually lasts through cooking.
This is where people mess up most often.
They set their toaster oven to 350°F or 375°F (because that seems “hot enough”). It’s not. Oil just sits there, partially polymerized, tacky to the touch. Doesn’t cure properly.

Or they crank it to max—like 500°F+ on a powerful toaster oven—and burn the seasoning before it can form correctly. Creates a fragile layer that flakes off.
Temperature effects:
| Temperature | Result | What It Means |
|---|---|---|
| Under 400°F | Sticky, gummy coating | Oil doesn’t fully polymerize—doesn’t work |
| 400-425°F | Slow polymerization | Works but takes longer (90+ minutes) |
| 450-500°F | Ideal seasoning | Sweet spot for most oils |
| 550°F+ | Risk of burning | Coating can crack or become brittle |
Consistency matters too. Temperature swings—oven cycling on and off dramatically—create uneven seasoning. Some spots cure perfectly. Others don’t.
This is why preheating is non-negotiable.
Preparing Your Cast Iron Skillet for Toaster Oven Seasoning
Cleaning Your Skillet Before Seasoning
You need to clean your cast iron skillet down to bare metal before seasoning it in a toaster oven—any old seasoning, rust, food residue, or factory coating will prevent the new layers from bonding properly, leaving you with patchy, flaking results that waste your time.
Start from scratch. Every time you’re doing a full seasoning (not just maintenance).
“But there’s already some seasoning on there.” Doesn’t matter. Strip it.
New pans come with factory coating (usually wax or protective oil). Used pans have degraded seasoning, stuck-on food bits, rust. All of it needs to go.
Removing Rust and Old Seasoning
Remove rust and old seasoning by scrubbing with steel wool or using the self-cleaning oven method—for minor rust, coarse salt and oil works, but for heavily damaged pans, you’ll need to strip everything down to bare grey metal before building up fresh layers.
Methods ranked by intensity:
Light cleaning (minimal rust, decent existing seasoning):
- Scrub with coarse salt and vegetable oil
- Use steel wool or scrubby sponge
- Rinse and dry immediately
Medium cleaning (some rust, flaking seasoning):
- Soak in 50/50 white vinegar and water (30-60 minutes max)
- Scrub with steel wool
- Neutralize with baking soda rinse
- Dry immediately (will rust in minutes)
Heavy duty (major rust, complete re-season needed):
- Use yellow cap Easy-Off oven cleaner in a trash bag (24 hours)
- Or run through self-cleaning oven cycle if it fits
- Scrub away residue with steel wool
- Wash, dry, season immediately
Don’t leave a stripped pan sitting around. Bare iron rusts fast. Like, same-day fast.
Washing and Drying Techniques
Wash your stripped cast iron with hot water and dish soap (yes, soap is fine), scrub thoroughly with a stiff brush, then dry it immediately and completely—any moisture left behind will cause rust spots that’ll ruin your seasoning before you even start.
The “never use soap” rule? Outdated. Old soaps had lye that stripped seasoning. Modern dish soap doesn’t.
But you’re stripping the pan anyway at this point, so it really doesn’t matter.
Drying is where people screw up:
Just towel-drying isn’t enough. Looks dry. Isn’t dry. Water hides in the pores of the metal.
Proper drying:
- Towel dry thoroughly
- Put on stovetop over medium heat for 2-3 minutes
- Let it get hot enough that water evaporates completely
- You’ll see it change from slightly grey to lighter (that’s moisture leaving)
- Remove from heat and let cool slightly before oiling
Some people skip the stovetop step. Then wonder why they get rust spots under their seasoning. That’s why.
Choosing the Right Oil for Seasoning Cast Iron in a Toaster Oven
The right oil for seasoning cast iron in a toaster oven is one with a high smoke point and plenty of polyunsaturated fats—vegetable oil, canola oil, and grapeseed oil are reliable choices that’ll give you durable seasoning without breaking the bank.
Oil choice matters less than people think. But it still matters.
Best Oils for Cast Iron Seasoning
The best oils for seasoning cast iron are grapeseed oil, vegetable oil, and canola oil because they have high smoke points (400°F+), polymerize reliably at standard seasoning temperatures, and create durable, stick-resistant coatings without weird smells or excessive smoking.
Top choices:
- Grapeseed oil – Smoke point 420°F, polymerizes beautifully, clean finish
- Canola oil – Smoke point 400°F, cheap, readily available, consistent results
- Vegetable oil – Smoke point 400-450°F, works great, probably already in your pantry
- Avocado oil – Smoke point 520°F, bit pricey but excellent for seasoning
Decent but not ideal:
- Flaxseed oil – Creates beautiful initial finish but can flake (too brittle)
- Crisco/shortening – Old school method, works fine, bit messy
Honestly? Grab whatever high-heat oil you’ve got. Don’t overthink it.
I’ve seasoned pans with cheap vegetable oil that lasted years. And I’ve seen $20 bottles of specialty oil create finishes that flaked off in months.
Smoke Points and Why They Matter
Smoke points matter for cast iron seasoning because you need to heat the oil above its smoke point to trigger polymerization—if you’re baking at 475°F, your oil needs to start smoking somewhere below that temperature, typically in the 400-450°F range for best results.
Why this number matters:
Below the smoke point? Oil just sits there. Liquid. Wet. Doesn’t transform into seasoning.
At the smoke point? Oil starts breaking down. Smoking. That smoke is literally the fat molecules coming apart and rearranging. You want this.
Above the smoke point by 25-75 degrees? Perfect. Polymerization happens fast and complete.
Common oils and their smoke points:
| Oil Type | Smoke Point | Good for Seasoning? |
|---|---|---|
| Grapeseed | 420°F | Yes—ideal |
| Canola | 400°F | Yes—very good |
| Vegetable | 400-450°F | Yes—depends on blend |
| Avocado | 520°F | Yes but overkill |
| Olive | 350-410°F | Okay (extra virgin too low) |
| Coconut | 350°F | No—too low, wrong fat profile |
| Flaxseed | 225°F | Special case (works but brittle) |
Here’s the weird thing about flaxseed. Super low smoke point. But high in polyunsaturated fats. So it actually polymerizes well—just becomes too hard and cracks easily.
Oils to Avoid When Seasoning
Avoid butter, olive oil (extra virgin), and coconut oil when seasoning cast iron because they have low smoke points, wrong fat compositions, or will leave you with a sticky mess instead of a proper polymerized coating.
Skip these:
- Butter – Burns, doesn’t polymerize, leaves sticky residue (also milk solids cause problems)
- Extra virgin olive oil – Too low smoke point (325-375°F), won’t cure properly at seasoning temps
- Coconut oil – Wrong type of fats (saturated), doesn’t cross-link well
- Lard – Can work but inconsistent, sometimes goes rancid-smelling
- Motor oil – Yeah, old-timers did this, but c’mon, you’re cooking on this thing
The internet loves to argue about oils. Flaxseed versus canola versus grapeseed. Hours of debate.
Truth? The application technique matters way more than the oil type. Thin layers. High heat. Multiple coats. Get those right and cheap vegetable oil beats expensive specialty oil applied wrong.
Step-by-Step Guide: Seasoning a Cast Iron Skillet in a Toaster Oven
Step 1: Preheat Your Toaster Oven
Preheat your toaster oven to 450-475°F for at least 10-15 minutes before putting your cast iron inside—this ensures stable temperature throughout the baking process and prevents temperature drops that’ll mess up the polymerization.
Don’t skip preheating. Seriously.
Putting a room-temperature pan into a cold oven, then heating both together? Creates uneven results. Some parts of the seasoning cure before others. Makes the coating fragile.
Ideal Temperature Range (450°F to 500°F)
The ideal temperature range for seasoning cast iron in a toaster oven is 450°F to 500°F, with 475°F being the sweet spot that works reliably with most oils and gives you consistently durable seasoning without burning.
Lower than 450°F and you’re in the “maybe it’ll work” zone. Might get lucky. Might end up with tackiness.
Higher than 500°F and you risk burning the oil before it polymerizes correctly. Creates a brittle coating that chips.
Temperature strategy:
- First-time seasoning: Use 475°F (safer, more forgiving)
- Maintenance coats: Can push to 500°F for faster results
- Thick pans: Go to 500°F (more metal mass to heat)
- Thin pans: Stick to 450-475°F (heat faster, easier to burn)
Your toaster oven’s actual temp might not match the dial. That $8 oven thermometer I mentioned earlier? Now’s when it pays off.
Why Preheating Is Essential
Preheating is essential because it stabilizes your toaster oven’s temperature and ensures consistent heat from the moment your oiled skillet goes in—without it, you’ll get temperature fluctuations during the critical first 15-20 minutes when polymerization starts, leading to uneven or incomplete seasoning.
Cold oven + oiled pan = the oven’s working to heat itself AND the pan. Temperature’s all over the place. Heating elements cycling constantly. Not ideal.
Preheated oven + oiled pan = stable temp, even heat, predictable results.
Also? Your toaster oven needs time to heat evenly. The air might hit 450°F in 5 minutes. But the walls, the rack, everything else? Takes longer. You want it all heat-soaked before your pan goes in.
Step 2: Apply a Thin Layer of Oil
Apply a thin layer of oil by rubbing a small amount (like a quarter-sized dollop) all over the pan with a paper towel or cloth, then wipe it off aggressively until the surface looks almost dry—seriously, if it looks wet or shiny, you’ve used too much and you’ll end up with sticky seasoning.
This is the step where everyone messes up.
How Much Oil to Use
Use way less oil than you think you need—start with about 1/4 teaspoon for a small skillet, rub it everywhere, then wipe off so much that you’re thinking “there’s no way this is enough oil,” because that’s actually the right amount.
The rule: If you can see wetness, it’s too much.
The oil needs to be a molecular-thin layer. Microscopically thin. You’re not coating the pan. You’re staining it with oil.
Think about it. You’re building a polymer coating. Multiple thin layers stack up strong. One thick layer? Just gums up and stays sticky.
Visual guide:
- Too much: Shiny, wet-looking, pools in corners
- Too little: Completely dry (you went too far, add a tiny bit back)
- Just right: Matte finish, barely any sheen, looks almost uncoated
I’ve re-seasoned dozens of pans. The single biggest mistake people make? Too much oil. Every single time.
Proper Application Techniques
Proper application technique means coating every surface—inside, outside, handle, bottom—with oil using a lint-free cloth or paper towel, rubbing it in thoroughly, then buffing it back off until you’re convinced you’ve removed all of it.
The process:
- Pour small amount of oil on paper towel (not on pan)
- Rub oil onto all surfaces of the pan
- Make sure you hit corners, handle, bottom, everything
- Now take a clean paper towel
- Wipe it all off (yep, really)
- Keep wiping until it looks dry
- Wipe some more
- One more time for good measure
Your arm should be tired from wiping. That’s how you know you did enough.
Pro move: After you think you’re done wiping, take one more clean paper towel and do another full wipe-down. You’ll be surprised how much oil comes off.
Wiping Away Excess Oil
Wipe away excess oil more aggressively than seems necessary—the goal is to remove almost all visible oil while leaving behind just a microscopic film that’ll polymerize into seasoning rather than a thick layer that stays sticky and gummy.
This feels wrong. You’re removing the thing you just applied. Seems counterproductive.
But it’s not. The oil absorbed into the pan’s pores is plenty for seasoning. The oil sitting on top? That’s what causes problems.
Common mistakes:
- Stopping when the pan still looks shiny (keep wiping)
- Using fresh oil-soaked towels to “even out” the coating (makes it worse)
- Thinking “more oil = better seasoning” (opposite is true)
- Leaving pools of oil anywhere (guaranteed sticky spots)
If you’re not sure whether you wiped enough, you didn’t wipe enough.
Step 3: Place Your Skillet in the Toaster Oven
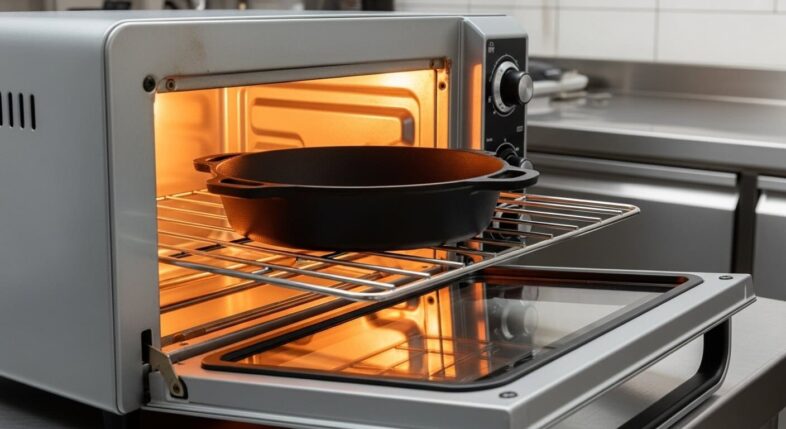
Place your oiled skillet in the preheated toaster oven upside-down on the middle rack with aluminum foil on the rack below to catch any drips—this prevents oil from pooling on the cooking surface and ensures even seasoning across the entire pan.
Upside-down prevents gravity from working against you.
Correct Positioning (Upside Down vs. Right Side Up)
Position your cast iron skillet upside-down in the toaster oven for seasoning because this lets excess oil drip away from the cooking surface rather than pooling in the bottom, which would create an uneven, sticky mess instead of a smooth finish.
Right-side-up seasoning works only if you’ve wiped the oil to absolute perfection. And even then, gravity pulls any remaining oil to the lowest point. Creates a thick spot in the middle. Thin spots on the sides.
Upside-down? Any excess oil drips down and off. Can’t pool anywhere. Even coating all around.
The setup:
- Middle rack position (away from heating elements)
- Pan upside-down (cooking surface facing down)
- Handle hanging off to the side if needed
- Foil on rack below (catches drips)
Some toaster ovens have racks that aren’t quite flat. Pan might wobble. That’s fine. As long as it’s stable and upside-down, you’re good.
Using Foil to Catch Drips
Use aluminum foil on the rack below your skillet to catch oil drips during seasoning, because even with proper wiping, some oil will drip off the pan as it heats up, and you don’t want burnt oil coating the inside of your toaster oven or creating smoke.
Foil setup:
- Place on rack directly below the skillet
- Don’t cover the entire rack (blocks airflow)
- Make a loose tray shape to catch drips
- Leave space around the edges for heat circulation
The drips won’t be much if you wiped properly. Maybe a few drops. But those few drops burn onto whatever they hit. Easier to throw away foil than scrub your toaster oven.
Also—those drips smell. Burnt oil smoke. Not terrible but not pleasant. Catching them on foil reduces the smell somewhat.
Step 4: Bake Your Cast Iron Skillet
Bake your oiled cast iron skillet in the toaster oven at 450-475°F for 60 to 90 minutes, during which the oil will smoke initially (that’s normal), then stop smoking as it fully polymerizes into a hard, dark coating bonded to the metal.
Set a timer. Walk away.
Timing Guidelines (60-90 Minutes)
Time your seasoning for 60 to 90 minutes at temperature—smaller, thinner skillets (6-inch) can be done in 60 minutes, while thicker 8-inch pans benefit from the full 90 minutes to ensure complete polymerization all the way through.
Timing breakdown:
| Pan Size/Type | Minimum Time | Ideal Time |
|---|---|---|
| 6-inch skillet | 60 minutes | 75 minutes |
| 8-inch skillet | 75 minutes | 90 minutes |
| Thin pans (<5mm) | 60 minutes | 75 minutes |
| Thick pans (>5mm) | 75 minutes | 90 minutes |
Don’t pull it early. “It looks done at 45 minutes.” Maybe the surface is done. But seasoning needs to cure all the way through. Incomplete curing = weak bond = seasoning flakes off later.
On the flip side, going way over time (like 2+ hours) doesn’t really help. After 90 minutes at proper temp, the polymerization is complete. Extra time just burns energy.
What to Expect During the Process
Expect your toaster oven to smoke during the first 10-20 minutes of seasoning as the oil reaches its smoke point and begins polymerizing—this is completely normal and will decrease as the oil transforms into solid seasoning, though your kitchen will smell like hot oil for a bit.
The timeline of what you’ll see (and smell):
Minutes 0-10:
- Not much happening visually
- Oil starts heating up
- Maybe light smoke appearing
Minutes 10-20:
- Smoke increases (this is the smoke point being reached)
- Might get pretty smoky (open a window)
- Smell of hot oil fills the kitchen
Minutes 20-40:
- Smoking decreases
- Oil turning brown/dark on the pan
- Smell becomes more like baking than frying
Minutes 40-90:
- Minimal smoke
- Coating darkening to black
- Just waiting for cure to complete
The smoke isn’t dangerous. Just oil vapor. But it triggers smoke alarms sometimes. Fair warning.
And if your toaster oven is smoking heavily for the entire 90 minutes? You used too much oil. (Told you to wipe more.)
Step 5: Cool Down and Repeat
Let your seasoned skillet cool completely inside the turned-off toaster oven—this gradual cooling prevents thermal shock and helps the seasoning cure fully—then repeat the oil application and baking process at least 2-3 more times to build up durable, multi-layer seasoning.
One coat isn’t enough. Not even close.
How Many Layers You Need
You need at least 3-4 layers of seasoning for a functional non-stick surface, though 5-6 layers will give you more durable results that hold up better to cooking—each additional layer fills in microscopic gaps and strengthens the coating’s bond to the iron.
Layer strategy:
- Minimum (3 layers): Basic protection, okay non-stick, needs careful use
- Standard (4-5 layers): Good non-stick, handles most cooking, durable
- Ideal (6+ layers): Excellent non-stick, very durable, well-protected
After each layer, the pan gets darker. Shinier. Smoother to the touch.
First layer? Might be brown or mottled. Looks uneven. That’s fine.
Third layer? Getting darker, more uniform.
Sixth layer? Deep black, glossy, feels slick.
Can you do more than 6? Sure. Won’t hurt. But diminishing returns after that. The first few layers matter most.
Cooling Between Coats
Cool your skillet completely between seasoning coats—leave it in the turned-off toaster oven for at least an hour (preferably until it reaches room temperature) because applying oil to a hot pan creates uneven coating and can cause the new layer to bubble or separate.
Cooling process:
- Turn off toaster oven after timer goes off
- Leave door closed
- Let pan cool inside for 1-2 hours
- Remove only when cool enough to handle comfortably
- Apply next oil layer
- Repeat baking process
Why not speed it up by removing the hot pan? Thermal shock. Rapid temperature change can cause seasoning to crack or metal to warp (less likely with cast iron, but still).
Also, hot pan + oil application = oil smokes off before you even get it in the oven. Wastes oil, creates mess, doesn’t season properly.
Some people do all their seasoning coats in one day. Doable if you’ve got 8-10 hours. Others do one coat per day over a week. Both work fine.
Toaster Oven vs. Regular Oven for Seasoning Cast Iron
Advantages of Using a Toaster Oven to Season Cast Iron
The main advantages of using a toaster oven for seasoning cast iron are energy efficiency, less heat dumped into your kitchen, and the ability to season small pans without firing up your full-size oven—perfect for summer seasoning sessions or if you’re just maintaining one small skillet.
Regular oven for a 6-inch pan? Overkill. Like driving a semi-truck to pick up groceries.
Energy Efficiency Benefits
Toaster ovens use 50-70% less energy than full-size ovens for seasoning cast iron because they heat a much smaller space to the same temperature—you’re looking at maybe 1,500 watts for a toaster oven versus 3,000-4,000 watts for a standard oven running for 90 minutes.
The math:
Regular oven running at 475°F for 90 minutes (1.5 hours):
- Uses roughly 4.5 kWh of electricity
- Costs about $0.60-0.70 per seasoning session
Toaster oven at same temp and time:
- Uses roughly 2.25 kWh
- Costs about $0.30-0.35 per session
One seasoning? Doesn’t matter. But if you’re seasoning multiple pans or doing regular maintenance, it adds up.
Plus environmental impact if that matters to you. Less electricity = smaller carbon footprint.
Less Heat in Your Kitchen
A toaster oven dumps way less heat into your kitchen than a regular oven—instead of heating a 5-cubic-foot oven box (and radiating that heat into your kitchen for 90 minutes), you’re heating maybe 0.5 cubic feet, which makes summer seasoning sessions actually tolerable.
Ever seasoned cast iron in July with your full oven? Miserable.
Your kitchen hits 85-90°F. You’re sweating. The AC’s running full blast fighting the oven. Not fun.
Toaster oven? Still adds some heat. But manageable. Doesn’t turn your kitchen into a sauna.
Heat output comparison:
- Regular oven: Radiates 3,000+ BTU/hour into kitchen
- Toaster oven: Radiates 500-1,000 BTU/hour
- Your comfort level: Noticeably different
This alone makes toaster ovens worth it for warm weather seasoning.
Perfect for Small Skillets
Toaster ovens are perfectly sized for small skillets (6-8 inches), giving you better heat circulation around the pan compared to a tiny skillet lost in the massive cavity of a full-size oven where heat might not reach all surfaces evenly.
Small pan in big oven = lots of empty space. Heat has to circulate around that space. Less efficient. Can create hot and cool zones.
Small pan in small toaster oven = pan fills most of the space. Heat surrounds it more evenly. Better results.
Think about it. A 6-inch skillet in a standard oven is like… 5% of the oven’s volume. The other 95% is just empty air you’re heating for no reason.
Same pan in a toaster oven? Takes up maybe 30-40% of the space. Heat works more directly on the pan.
Limitations of Seasoning Cast Iron Skillets in Toaster Ovens
The main limitations of seasoning cast iron in toaster ovens are size restrictions (nothing over 8 inches fits), potential temperature accuracy issues (some models run cooler than displayed), and heating elements positioned too close to the pan, which can cause uneven seasoning or hot spots.
Not all toaster ovens work equally well for this.
Size Restrictions for Larger Pans
Size restrictions are the biggest limitation—most toaster ovens can’t fit pans larger than 8 inches in diameter, and even some 8-inch skillets with long handles won’t fit depending on the toaster oven’s interior depth and shape.
What actually fits:
Most compact toaster ovens (0.3-0.5 cu ft):
- 6-inch pans: Yes, easily
- 8-inch pans: Maybe (tight fit)
- 10-inch pans: No
Large toaster ovens (0.6-0.9 cu ft):
- 6-inch pans: Yes, plenty of room
- 8-inch pans: Yes
- 10-inch pans: Sometimes (check dimensions)
- 12-inch pans: Probably not
Your 10-inch or 12-inch daily driver? Use your regular oven. Don’t force it into a toaster oven that’s too small. Poor heat circulation, risk of touching heating elements, just not worth it.
Temperature Accuracy Concerns
Temperature accuracy can be a problem with toaster ovens because many run 25-50 degrees cooler than the dial indicates—so when you set 475°F, you might actually be getting 425°F or 450°F, which isn’t hot enough for proper seasoning polymerization.
Cheap toaster ovens are the worst offenders. That $30 model? Temp’s all over the place.
Mid-range ones ($80-150) usually better but still inconsistent.
High-end toaster ovens ($200+) with digital controls generally more accurate.
Solution: Get an oven thermometer. The kind you hang from a rack. Check what temp you’re actually getting. Adjust the dial accordingly.
If your toaster oven reads 475°F but the thermometer says 440°F, crank the dial up until the thermometer reads 475°F. Problem solved.
Heating Element Proximity Issues
Heating elements in toaster ovens sit much closer to the food (or in this case, your skillet) than in regular ovens—sometimes as close as 2-3 inches—which can create intense hot spots on the pan’s surface that lead to uneven seasoning or even burnt spots if the elements radiate directly onto the metal.
The problem:
Top heating element radiates heat downward. If your pan’s too close, the top surface gets way hotter than the bottom. Uneven seasoning. Maybe even damaged seasoning on that top surface.
How to minimize this:
- Use middle rack position (furthest from elements)
- Check clearance before starting (2+ inches minimum)
- Rotate pan halfway through if needed
- Consider lowering temp 25 degrees if elements are close
Some toaster ovens have heating elements on top, bottom, AND back. Others just top and bottom. The ones with more elements usually heat more evenly.
When to Use a Regular Oven Instead
Use a regular oven for seasoning cast iron when your skillet is larger than 8 inches, when you’re seasoning multiple pans at once, or when your toaster oven doesn’t reach 450°F reliably—basically, anytime the limitations of toaster oven size or temperature make the process more difficult than helpful.
Regular oven makes more sense when:
- Pan is 10+ inches in diameter
- You’re seasoning 3+ pans at once (stack them)
- Toaster oven maxes out below 450°F
- Pan doesn’t fit with adequate clearance
- You need super even heating (high-end regular ovens)
Also? If you’re already using your regular oven for something else, toss the cast iron in there during the baking process. Free seasoning while you’re cooking dinner.
But for a single 6-inch skillet? Toaster oven all the way.
Troubleshooting Common Issues When Seasoning in a Toaster Oven
Sticky or Tacky Seasoning After Baking
Sticky or tacky seasoning after baking means the oil didn’t fully polymerize—usually because you used too much oil, didn’t reach high enough temperature, or pulled the pan out before the process completed—and the fix is to put it back in at 475°F for another 60-90 minutes or start over with less oil.
This is fixable. Annoying, but fixable.
Too Much Oil Applied
Too much oil is the number one cause of sticky seasoning—that thick, wet coat you applied looked like it’d create amazing seasoning, but instead it’s just sitting there as a gummy, tacky layer that never hardened properly because polymerization can’t happen to oil that’s too thick.
The fix:
Don’t strip the pan completely. Just wipe it down with a paper towel soaked in fresh oil. Yeah, sounds backwards. But the fresh oil picks up the sticky stuff.
Then wipe it dry. Like, aggressively dry. Get all that tackiness off.
Now apply oil the right way (super thin). Bake again at 475°F for 90 minutes.
One more coat should fix it.
Prevention: Remember—if it looks wet, it’s too much. Wipe until you think there’s no oil left. Then wipe once more.
Insufficient Baking Time
Insufficient baking time leaves partially polymerized oil on your pan—it started the chemical transformation but didn’t finish—resulting in a coating that’s hard in some spots but still slightly tacky in others because the molecules didn’t fully cross-link.
Did you pull it at 45 minutes because it looked done? Put it back.
The fix is easy: Just bake it longer.
Put the tacky pan back in at 475°F. Give it another 60 minutes. Let it cure fully.
Don’t keep opening the door to check on it. That drops the temperature. Makes the problem worse.
Set timer. Leave it alone. Pull it when timer goes off.
If it’s still tacky after that? Either temp’s too low or oil was too thick. See previous sections.
Temperature Too Low
Temperature too low (under 425°F) prevents oil from reaching full polymerization—it might partially cure or stay liquid, creating a sticky surface that never hardens into proper seasoning no matter how long you bake it because the chemical transformation requires higher heat.
Check your actual oven temp with a thermometer.
If you’ve been seasoning at 400°F thinking it’s “close enough,” it’s not. Bump it to 475°F minimum.
Signs your temp’s too low:
- Pan’s been in for 90+ minutes but seasoning’s still tacky
- Coating feels soft or rubbery instead of hard
- No smoke during the process (should smoke for first 10-20 min)
- Pan doesn’t darken properly
Can’t get your toaster oven hot enough? Then you can’t use it for seasoning. Use your regular oven instead.
Uneven Seasoning on Your Skillet
Uneven seasoning shows up as light and dark patches on your cast iron—some areas look properly blackened while others stay brown or grey—caused by inconsistent oil application, toaster oven hot spots, or the pan sitting too close to heating elements.
Looks blotchy. Works okay but not great.
Hot Spots in Toaster Ovens
Hot spots in toaster ovens happen because heating elements create concentrated heat zones—directly above or below an element gets way hotter than areas between elements, leading to darker, sometimes over-baked seasoning in those spots while other areas barely cure.
Common hot spot locations:
- Directly under top heating element
- Directly above bottom element
- Back corners (if there’s a rear element)
- Center (if all elements focus there)
Solutions:
Rotate the pan halfway through. At 45 minutes, carefully open the oven, turn the pan 180 degrees, close it, finish the cycle.
Or lower the temp slightly (450°F instead of 475°F) to reduce the intensity of those hot spots.
Or position the pan more carefully. Keep it centered between elements.
Poor Oil Distribution
Poor oil distribution—where you missed spots or applied oil unevenly—causes light patches where barely any seasoning built up compared to darker areas that got more oil, and the fix is just better technique: apply oil everywhere, wipe everywhere, check for missed spots before baking.
Where people commonly miss:
- The handle (especially where it meets the pan)
- Pour spouts on the sides
- The very center of the bottom
- Edges and corners
- Underside lip
Before putting the pan in the oven, look at it under good light. See any dry patches? Hit them with oil. Wipe again.
The more even your oil application, the more even your final seasoning.
Solutions for Even Coverage
For even coverage, apply oil in circular motions covering every surface, check your work under bright light to spot missed areas, then wipe down in the same circular pattern to distribute oil uniformly before baking at a moderate temperature (450-475°F) in a preheated toaster oven.
The technique:
- Oil on paper towel (not pan)
- Circular rubbing motions, overlap each circle
- Cover every square millimeter
- Check under bright light
- Wipe off in circular motions
- Check again
- Fix any light spots
- Final wipe-down
Takes an extra 2-3 minutes. Worth it for even results.
Also—rotate during baking if your toaster oven has hot spots. Hedges your bets.
Smoking and Odor During the Seasoning Process
Why Your Toaster Oven Smokes When Seasoning Cast Iron
Your toaster oven smokes when seasoning cast iron because the oil is reaching its smoke point and vaporizing as part of the polymerization process—this is completely normal and actually indicates that the chemical transformation from liquid oil to solid seasoning is happening.
No smoke? You’re probably not hot enough.
Too much smoke? Too much oil.
Normal smoke: Appears around 10-15 minutes in. Moderate amount. Decreases after 20-30 minutes. Smells like hot oil.
Excessive smoke: Starts immediately. Heavy smoke. Continues entire time. Might trigger alarms. Smells acrid. Means too much oil.
No smoke: Either temp’s too low or you wiped the oil too aggressively (which is rare—usually people don’t wipe enough).
Ventilation Tips
For ventilation during seasoning, open a window near your toaster oven, turn on your kitchen exhaust fan if you have one, and consider pointing a small fan toward an open door to pull smoke out of the kitchen—this prevents smoke buildup that might trigger alarms or leave lingering smells.
Setup for minimal smoke issues:
- Place toaster oven near window if possible
- Open window before starting
- Turn on exhaust fan (even if toaster oven isn’t under it)
- Crack a second window or door for cross-breeze
- Remove smoke detector batteries if it’s super sensitive (remember to put them back)
The smell lingers. That hot oil scent. Sticks to curtains, upholstery. Not terrible but not great.
Ventilation helps. Won’t eliminate it. But definitely helps.
Is Smoking Normal?
Yes, smoking is completely normal when seasoning cast iron—if your toaster oven isn’t producing some smoke during the first 20-30 minutes, your temperature might be too low for proper polymerization—the smoke is literally the oil molecules breaking down and reorganizing into the polymer coating you want.
What’s normal versus concerning:
Normal:
- Light to moderate smoke for 10-30 minutes
- Smoke decreases over time
- Oil smell
- Toaster oven interior gets a bit hazy
Concerning:
- Thick, heavy smoke the entire 90 minutes (too much oil)
- Acrid, burning smell (temperature too high or oil burning)
- Smoke that increases over time instead of decreasing
- Visible flames (stop immediately—something’s wrong)
Never leave seasoning unattended. Especially the first time in a new toaster oven. Stay nearby. Check on it periodically.
Seasoning Flaking or Peeling Off
Seasoning that flakes or peels off indicates poor bonding between the oil and the metal—usually caused by seasoning over dirty surfaces, using the wrong type of oil (like flaxseed), building layers too thick, or thermal shock from rapid temperature changes.
Frustrating when this happens after all that work.
Common causes:
Pan wasn’t clean: Old seasoning or residue under new layers. Creates weak bond. New seasoning pops off.
Wrong oil: Flaxseed is notorious for this. Creates beautiful finish initially. Flakes off months later. Too brittle.
Too much oil per coat: Thick layers don’t bond well. Chip off easier than thin layers.
Thermal shock: Putting hot pan in cold water. Or cold pan on hot burner. Creates stress cracks in seasoning.
The fix:
Strip the flaking seasoning. Get down to whatever’s still bonded well (or bare metal). Re-season properly with thin coats of canola or grapeseed oil.
Prevention: Clean thoroughly before seasoning. Use appropriate oils. Apply thin coats. Avoid thermal shock. Handle the pan gently for the first few uses while seasoning establishes itself.
Maintaining Your Seasoning After Using a Toaster Oven
Daily Care for Seasoned Cast Iron
Daily care for seasoned cast iron means cleaning with hot water (and soap if needed), drying completely on the stovetop or with a towel, then applying a super-thin layer of oil while the pan’s still warm—this routine takes about 5 minutes and keeps your toaster-oven-seasoned finish in great shape for years.
Not complicated. Just consistent.
Proper Cleaning Methods
Proper cleaning methods for seasoned cast iron involve washing with hot water and a stiff brush or scrubby sponge while the pan’s still warm, using dish soap if necessary (it won’t hurt modern seasoning), then drying immediately and thoroughly to prevent any rust formation.
The routine:
- Clean while pan’s still warm (not hot, just warm)
- Hot water + scrubby sponge or brush
- Add soap if there’s stuck-on food (it’s fine)
- Scrub until clean
- Rinse well
- Dry with towel immediately
- Put on stovetop over medium heat for 2-3 minutes
- Let water fully evaporate
- Wipe with tiny bit of oil while warm
- Store
Takes 5 minutes tops.
Tools that work:
- Stiff brush
- Scrubby sponge (not steel wool for daily cleaning)
- Chain mail scrubber (great for stuck bits)
- Plastic scraper for really stuck stuff
Tools to avoid:
- Metal scouring pads (too aggressive for daily use)
- Harsh abrasive cleaners
- Dishwasher (just don’t)
What Not to Do
Don’t soak your cast iron in water, put it in the dishwasher, use metal scouring pads for routine cleaning, or leave it wet after washing—these habits will destroy even the best toaster-oven-applied seasoning and create rust spots that force you to re-season from scratch.
The don’ts:
Don’t soak it. Even for “just a few minutes.” Water + iron = rust. Happens fast.
Don’t dishwasher it. Extended water exposure. Harsh detergents. Kills seasoning. Creates rust. Just no.
Don’t let it air dry. Won’t dry completely. Rust forms overnight. Always hand dry and heat dry.
Don’t use metal scrapers aggressively. Occasional use for stuck food is fine. Daily aggressive scraping damages seasoning.
Don’t store it wet. Seems obvious. People still do it. Then wonder why there’s rust.
Don’t cook acidic foods for extended periods (first few uses). Tomato sauce, vinegar-based dishes. They can strip new seasoning. Once seasoning’s established (6+ layers, several months of use), acidic foods are fine in moderation.
Re-Seasoning: When and How Often
Re-seasoning is needed when food starts sticking consistently, rust spots appear, or the surface looks dull and patchy instead of smooth and glossy—well-maintained cast iron might only need touch-up seasoning once or twice a year, while heavily-used pans might need full re-seasoning every few years.
Signs you need to re-season:
- Food sticks where it used to slide
- Rust spots appearing
- Dull, grey patches in the cooking surface
- Seasoning flaking in spots
- Pan looking dry instead of slightly glossy
How often:
Light use (few times a month): Maybe re-season every 2-3 years
Regular use (few times a week): Touch-ups every 6-12 months, full re-season every 3-5 years
Heavy use (daily): Touch-ups every few months, full re-season every 1-2 years
Depends entirely on how you use it and maintain it.
Signs Your Skillet Needs Re-Seasoning
Your skillet needs re-seasoning when eggs stick consistently even with oil, the surface looks grey or brown instead of black, you see rust forming anywhere, or when water drops don’t bead up and sizzle off the surface anymore—these indicate the protective polymer coating has degraded.
The tests:
Water bead test: Drop water on cold pan. Should bead up. If it spreads out flat, seasoning’s compromised.
Egg test: Fry egg with bit of oil. Should slide around. Sticks stubbornly? Time to re-season.
Visual check: Good seasoning is dark (brown to black), slightly glossy, smooth. Bad seasoning is grey, patchy, dull, rough.
Rust check: Any rust = needs attention. Spot rust can be cleaned and touched up. Widespread rust needs full strip and re-season.
One or two of these signs? Maybe just needs a touch-up coat. All of them? Full re-season.
Touch-Up Seasoning vs. Complete Re-Seasoning
Touch-up seasoning means adding 1-2 fresh coats over existing seasoning when the surface looks slightly worn—just clean, oil, and bake once or twice in your toaster oven—while complete re-seasoning requires stripping everything down to bare metal and rebuilding all layers from scratch.
Touch-up (the easier option):
When to do it: Minor dull spots, slight loss of non-stick, light wear
Process:
- Clean pan thoroughly
- Dry completely
- Apply thin oil layer
- Bake at 475°F for 60-90 minutes
- Repeat if needed (1-2 coats usually enough)
Complete re-season (the nuclear option):
When to do it: Rust, flaking seasoning, major sticking issues, want to start fresh
Process:
- Strip all old seasoning (Easy-Off method or self-clean cycle)
- Get down to bare metal
- Clean and dry
- Build up 4-6 fresh coats
- Basically start over from scratch
Touch-ups are maintenance. Complete re-seasoning is repair.
Building Seasoning Through Cooking
Building seasoning through cooking happens naturally every time you use oil or fat to cook—frying, sautéing, roasting with oil all add microscopic layers to your pan—making cooking one of the best ways to maintain and strengthen the seasoning you built in your toaster oven.
Best cooking methods for building seasoning:
- Pan-frying (chicken, pork chops, fish)
- Sautéing vegetables in oil or butter
- Cooking bacon (the fat really seasons well)
- Roasting in the oven with oil
- Cornbread (classic cast iron use, adds good seasoning)
Methods that don’t help (or hurt):
- Boiling water (doesn’t add seasoning)
- Cooking acidic foods (can strip light seasoning)
- Steaming (water exposure without protective oil)
- Simmering watery sauces (extended water contact)
Use your pan. That’s the secret. A cast iron skillet sitting in a cabinet doesn’t develop seasoning. One that’s cooking regularly gets better over time.
Alternative Methods for Seasoning Small Cast Iron Cookware
Stovetop Seasoning Method
The stovetop seasoning method involves heating your oiled cast iron skillet directly on a burner until it smokes and the oil polymerizes—it’s faster than toaster oven seasoning (about 15-20 minutes per coat) but requires more attention and only seasons the bottom and lower sides effectively.
Works in a pinch. Not ideal for complete seasoning.
How It Compares to Toaster Oven Seasoning
Stovetop seasoning is faster per coat (15-20 minutes versus 60-90 minutes) but only seasons the surfaces exposed to direct heat, while toaster oven seasoning takes longer but coats the entire pan evenly including the handle, sides, and bottom in one session.
Stovetop pros:
- Much faster
- Don’t need to heat up an oven
- Can watch the process directly
- Good for quick touch-ups
- Works for the cooking surface specifically
Stovetop cons:
- Only heats bottom and lower sides
- Top rim and handle don’t get seasoned
- Requires constant attention
- Easy to overheat and burn the oil
- Smoke goes directly into kitchen
Toaster oven pros:
- Seasons entire pan evenly
- Set it and forget it
- Consistent temperature
- Every surface gets coated
Toaster oven cons:
- Takes 60-90 minutes per coat
- Uses more energy than stovetop
- Heats up kitchen somewhat
For complete, even seasoning? Toaster oven wins. For quick cooking-surface touch-ups? Stovetop works fine.
Best Practices for Stovetop Seasoning
For stovetop seasoning, use medium to medium-high heat, apply a super-thin oil layer to the pan’s bottom and sides, heat until the oil stops smoking (about 10-15 minutes), then let it cool and repeat—this method works best for maintaining the cooking surface between full oven seasonings.
The process:
- Clean and dry pan
- Apply thin oil layer to bottom and sides (inside only)
- Place on burner, medium heat
- Let heat gradually (don’t rush)
- Oil will start smoking around 5-7 minutes
- Keep heating until smoking stops (another 5-10 min)
- Turn off heat, let pan cool on burner
- Wipe out any excess
- Repeat for another coat if needed
Watch for:
- Oil pooling (wipe it out immediately)
- Excessive smoke (heat’s too high)
- Burnt smell (you overheated it)
- Uneven heating (rotate pan on burner)
Electric stoves work better for this than gas (more even heat). Gas creates hot spots where the flames hit.
Grill Seasoning for Cast Iron
Grill seasoning works similarly to oven seasoning—put your oiled cast iron on a grill heated to 450-500°F, close the lid, and let it bake for 60-90 minutes—and it’s perfect for summer when you don’t want to heat up your kitchen with a toaster oven or regular oven.
Setup:
- Preheat grill to 450-500°F
- Oil your pan (thin layer, wipe off excess)
- Place pan on grill grate (upside-down if possible)
- Close lid
- Wait 60-90 minutes
- Turn off grill, let pan cool inside
Works best with:
- Gas grills (easier temperature control)
- Larger grills (more even heat)
- Two-burner setup (indirect heat)
Challenges:
- Temperature control harder than oven
- Heat distribution can be uneven
- Weather affects results (wind, cold)
- Smoke might bother neighbors
But if you’re already grilling? Toss the cast iron on there. Multi-task.
Best Practices for Seasoning Cast Iron in a Toaster Oven
Safety Considerations
Safety considerations for toaster oven seasoning include ensuring adequate ventilation to handle smoke, keeping at least 2 inches clearance between the pan and heating elements, placing the toaster oven on a heat-resistant surface, and never leaving the process unattended for the full 90 minutes.
Don’t burn your house down over a skillet.
Toaster Oven Capacity and Ventilation
Check your toaster oven’s capacity before seasoning—if the pan barely fits or touches the walls or heating elements, it’s too big and creates fire risk—and ensure proper ventilation by opening windows and running fans because 90 minutes of smoke in an enclosed kitchen gets overwhelming fast.
Capacity checklist:
- Pan fits with 1+ inch clearance on all sides?
- 2+ inches clearance from heating elements?
- Door closes completely without forcing?
- Pan sits stable on rack?
All “yes”? Good to go. Any “no”? Don’t do it.
Ventilation setup:
- Open at least one window
- Run kitchen exhaust fan
- Consider a box fan pointed outside
- Clear area around toaster oven (smoke detectors especially)
Smoke detectors and seasoning cast iron don’t get along. Either move the toaster oven farther away, disable the detector temporarily (remember to re-enable), or accept that it might go off.
Avoiding Fire Hazards
Avoid fire hazards by removing any drips or spills from previous toaster oven use before seasoning (they’ll smoke and potentially ignite), ensuring no flammable materials are near the toaster oven, using a foil drip tray to catch oil, and staying nearby to monitor the process.
Fire prevention:
- Clean toaster oven interior first (old crumbs can smoke/ignite)
- Place on granite, tile, or stove top (not wood counters)
- Clear 12+ inches around toaster oven
- Don’t put anything on top of it
- Keep paper towels, towels away
- Have oven mitt ready
- Know where fire extinguisher is
If it catches fire:
- Turn off toaster oven
- Keep door closed (starves oxygen)
- Unplug if safe to do so
- Use fire extinguisher if flames visible
- Don’t use water (oil fire)
Honestly? Fire is rare if you follow the guidelines. But good to be prepared.
Heat-Resistant Surfaces
Place your toaster oven on heat-resistant surfaces like granite countertops, tile, stainless steel, or your stovetop—never on wood counters, plastic cutting boards, or laminate surfaces that can scorch, melt, or catch fire from the radiant heat during 90 minutes of high-temperature seasoning.
Good surfaces:
- Granite or quartz counters
- Tile counters
- Stainless steel work surface
- Your regular stovetop (if you have counter space issues)
- Heat-resistant cutting board (specifically rated for 500°F+)
Bad surfaces:
- Wood counters (will scorch)
- Laminate (can melt or discolor)
- Plastic anything
- Paper or cardboard (obvious)
The bottom of your toaster oven gets hot. Like, very hot. After 90 minutes at 475°F, it’s radiating serious heat.
Don’t find out the hard way that your nice wood counter now has a rectangular burn mark.
Maximizing Your Results
Multiple Thin Coats vs. One Thick Coat
Multiple thin coats create stronger, more durable seasoning than one thick coat—three or four super-thin layers bonded together beat one thick gloppy layer every time because thin coats polymerize completely while thick coats stay sticky or flake off.
Think layers of paint. Multiple thin coats = smooth professional finish. One thick coat = drips and uneven coverage.
Same principle.
Why thin coats work better:
- Each layer bonds fully to the one below
- No thick spots that stay gummy
- Builds up gradually into smooth surface
- More durable (flexes with metal instead of cracking)
- Less likely to flake
Why thick coats fail:
- Surface might cure but inside stays liquid
- Creates tacky, sticky finish
- Pools unevenly
- Weak bond to pan
- Flakes off during cooking
Time investment is higher with multiple coats. 4 coats × 90 minutes = 6 hours of oven time (spread over days). But the results last years instead of months.
Worth it.
Optimal Timing Between Layers
The optimal timing between seasoning layers is at least 60-90 minutes of cooling time—let the pan cool completely to room temperature inside the turned-off toaster oven before applying the next oil coat, because trying to oil a hot pan creates uneven application and can cause the new layer to cook too fast.
Cooling timeline:
- After 90-minute bake: Pan’s at 475°F
- Turn off oven, leave door closed
- 30 minutes: Still very hot (~300°F)
- 60 minutes: Warm to touch (~150°F)
- 90 minutes: Barely warm (~100°F)
- 120 minutes: Room temperature
Safe to handle and re-oil? Around 90 minutes.
Some people get impatient. Pull the pan at 30 minutes. Try to apply oil. Oil smokes off instantly. Wastes time and oil.
Just wait. Read a book. Watch TV. Let it cool properly.
Can you speed it up? Remove the pan from the oven after 60 minutes and let it cool on a wire rack. Faster but risks thermal shock. Not recommended for beginners.
Testing Your Seasoning
Test your seasoning by sprinkling a few drops of water on the cold pan (they should bead up and roll off easily), or by frying an egg with a small amount of oil (it should slide around freely without sticking)—if either test fails, you need another seasoning coat or two.
The tests:
Water bead test (quick check):
- Drop 3-4 water drops on cold pan
- Good seasoning: Beads up into balls
- Bad seasoning: Spreads flat, gets absorbed
Egg test (real-world check):
- Heat pan over medium
- Add small pat of butter or oil
- Crack in an egg
- Good seasoning: Egg slides around, releases easily
- Bad seasoning: Sticks, tears when you try to flip
Visual test:
- Good: Deep brown to black, slight gloss, smooth
- Bad: Grey, patchy, dull, rough texture
Don’t expect perfect non-stick after 3 coats. It gets better with more coats and use. After 6 coats plus a few months of cooking? Should be slick.
Types of Cast Iron Cookware Suitable for Toaster Oven Seasoning
Small Skillets (6-8 Inches)
Small skillets in the 6-8 inch range are perfect for toaster oven seasoning—they fit easily in most toaster ovens with room for heat circulation, make great single-serving pans for eggs or small meals, and the compact size means faster heating and more even seasoning results.
The ideal candidates:
6-inch skillets:
- Fit in virtually any toaster oven
- Perfect for one egg, small portions
- Quick to heat, easy to handle
- Common brands: Lodge, Victoria, Stargazer
8-inch skillets:
- Fit in medium to large toaster ovens
- Two-egg capacity, small meals for one or two
- Most popular size for toaster oven seasoning
- Might need clearance check in smaller toasters
These sizes are workhorses. Not too big for the toaster oven. Not too small to be useless.
Cast Iron Pans That Fit in Toaster Ovens
Cast iron pans that fit in toaster ovens include not just small skillets but also mini griddles, small square grill pans (8-inch or less), shallow fry pans, and even some specialty items like 6-inch pie pans—basically anything with dimensions under 8 inches in diameter or width.
Good fits:
| Pan Type | Max Size | Notes |
|---|---|---|
| Round skillet | 8 inches | Most common for toaster ovens |
| Square grill pan | 8×8 inches | Check diagonal measurement too |
| Mini griddle | 8×10 inches | Depends on toaster depth |
| Shallow pan | 8 inches | Easier fit than deep pans |
Measurements to check:
- Diameter or width
- Height with handle up
- Handle length (front to back)
- Diagonal (for square pans)
A square 8×8 pan has a diagonal of about 11.3 inches. Might not fit even if the sides do.
Specialty Cast Iron Items
Mini Dutch Ovens
Mini Dutch ovens (1-2 quart size) can be seasoned in larger toaster ovens if you remove the lid and season the pot and lid separately—check that both pieces fit with adequate clearance because these tend to be taller than skillets and might not work in compact toaster ovens.
Considerations:
- Height is the issue (not diameter)
- Season pot and lid separately
- Pot upside-down, lid right-side-up (or vice versa)
- Need large toaster oven (0.6+ cu ft)
- May need two seasoning sessions (pot first, then lid)
Most 2-quart mini Dutch ovens are about 7-8 inches diameter but 4-5 inches tall. That height plus clearance needs = might not fit.
Measure before you commit.
Cornbread Pans
Cornbread pans (the wedge-shaped ones or stick pans) season great in toaster ovens because they’re shallow, fit easily, and the divided sections don’t affect the process—just oil the whole thing, wipe it down, and bake normally.
These definitely work:
- Wedge cornbread pans (usually 9 inches across)
- Cornbread stick pans
- Muffin pans (6-count mini versions)
The shape doesn’t matter for seasoning. As long as it fits with clearance, same process applies.
Griddles and Flat Pans
Griddles and flat pans work in toaster ovens only if they’re small (under 10 inches wide) and the toaster oven is deep enough front-to-back—round griddles season easier than rectangular ones because they typically have smaller overall dimensions.
Griddle challenges:
Rectangular griddles are often 10×18 inches or similar. Way too big.
Round griddles come in 8-10 inch sizes. The 8-inch ones fit. The 10-inch are borderline.
Flat pans (like plancha-style) have the same issues. Length is usually the problem.
If it fits:
Season same as skillets. Upside-down (flat side up). Oil thin. Bake. Done.
If it doesn’t:
Use your regular oven. Or the grill method. Or stovetop for just the cooking surface.
Your toaster oven can absolutely season cast iron. Just keep the pans small, the oil thin, and the temperature high. Three or four coats later? You’ve got a perfectly seasoned skillet without heating up your whole kitchen or wasting energy on a big oven.
Not complicated. Just methodical.