The best way to season a cast iron skillet is to apply a thin layer of high-smoke-point oil and bake it upside down in a 450–500°F oven for an hour — repeat this 3–6 times for a solid, durable base coat.
That’s the short answer. But there’s more to it — the oil you pick, how you prep the pan, and how you cook with it daily all affect whether that seasoning actually lasts. Here’s everything you need to know.
What Does Seasoning a Cast Iron Skillet Mean?
Seasoning is the polymerized oil layer baked into your skillet’s surface — it’s what makes non-stick cast iron actually work.
Here’s the science (simplified): when you heat oil past its smoke point on metal, it polymerizes — meaning the molecules bond together and to the iron itself, forming a hard, slick coating. Not a greasy film. An actual bonded layer.
Why does it matter?
- Rust prevention. Bare cast iron oxidizes fast. Seasoning seals out moisture.
- Non-stick surface. A well-seasoned skillet rivals Teflon for eggs, fish, and pancakes.
- Flavor. Over years of use, the seasoning builds character. It’s part of what makes cast iron cooking distinct.
- Durability. Properly maintained, seasoning lasts decades. Some people cook on their grandmother’s skillets.
The coating isn’t permanent, though. It wears, chips, and erodes. That’s why knowing how to build it — and rebuild it — matters.
Choosing the Right Cast Iron Skillet
The best skillet to season is one you’ll actually use — quality matters, but so does fit for your cooking style.
A few things to consider before you start seasoning anything:
New vs. pre-seasoned. Most skillets sold today come with a factory seasoning. It’s thin and often uneven. You’ll want to add several coats before relying on it.
Brand matters more than you’d think. Lodge is the most widely available option in the US — solid quality, reasonable price. Stargazer and Field Company make lighter, smoother pans with tighter grain, which take seasoning better. Vintage Griswold or Wagner? If you find one, grab it. The old machined surfaces are exceptional.
Size. A 10-inch skillet handles most cooking tasks. 12-inch if you cook for a family or want more room. Check out best ceramic electric skillets if you’re also weighing other skillet options for your kitchen.
Weight. Cast iron is heavy by nature. Some pans run heavier than others. If you’ve got wrist or shoulder issues, lighter options like Stargazer are worth the price premium.
Don’t obsess over finding the “perfect” pan before you start. Any cast iron is improvable with good seasoning.
Preparing an Unseasoned or Rusty Skillet
Before you season anything, the surface has to be clean, bare, and dry. Completely.
For a Brand-New Skillet
Wash it with warm, soapy water. Yes, soap — just this once. You’re removing the factory coating and any shipping residue. Rinse thoroughly, then dry it immediately and completely. Put it on the stovetop over low heat for a few minutes to drive off any remaining moisture. Done.
For a Rusty or Neglected Skillet
This takes more work. Here’s the process:
- Scrub with steel wool or a chain mail scrubber. Get all the rust off. Don’t stop when it looks “mostly clean” — get it all.
- Wash with soap and water. Remove the debris.
- Dry completely. Towel dry, then stovetop heat.
- Optional: vinegar soak for heavy rust. Mix equal parts water and white vinegar, soak for no more than 30 minutes. Any longer and you risk pitting the iron. Scrub, rinse immediately, dry.
If you’re dealing with something seriously corroded — flaking, deep pitting, old seasoning that’s completely broken down — you may need to strip it entirely. Options include the self-cleaning oven cycle, a lye bath, or electrolysis. These are advanced methods. For most people, aggressive scrubbing gets the job done.
And if you’re just starting to think about finding the perfect electric skillet size for your kitchen setup, cast iron isn’t the only option — but it’s hard to beat for longevity once it’s properly seasoned.
Best Oils for Seasoning Cast Iron
The right oil makes a significant difference — not all fats polymerize equally.
What you want: high smoke point, neutral flavor, good polymerization. Here’s how the common options stack up:
| Oil | Smoke Point | Seasoning Quality | Notes |
|---|---|---|---|
| Flaxseed oil | ~225°F | Excellent | Polymerizes well, flakes with heavy use |
| Crisco/vegetable shortening | ~360°F | Very good | Classic choice, widely recommended |
| Canola oil | ~400°F | Good | Accessible, affordable, reliable |
| Grapeseed oil | ~420°F | Very good | Light, clean, popular with seasoning enthusiasts |
| Avocado oil | ~520°F | Excellent | Best high-heat option |
| Lard/bacon grease | ~370°F | Good | Traditional, adds flavor |
| Coconut oil | ~350°F | Decent | Tends to go rancid, not ideal |
| Olive oil | ~375°F | Mediocre | Too low smoke point, sticky results |
The bottom line: Crisco, grapeseed, canola, and avocado oil are all solid picks. Flaxseed oil was popular for a while but has a reputation for flaking. Olive oil is the one to avoid — it doesn’t polymerize cleanly.
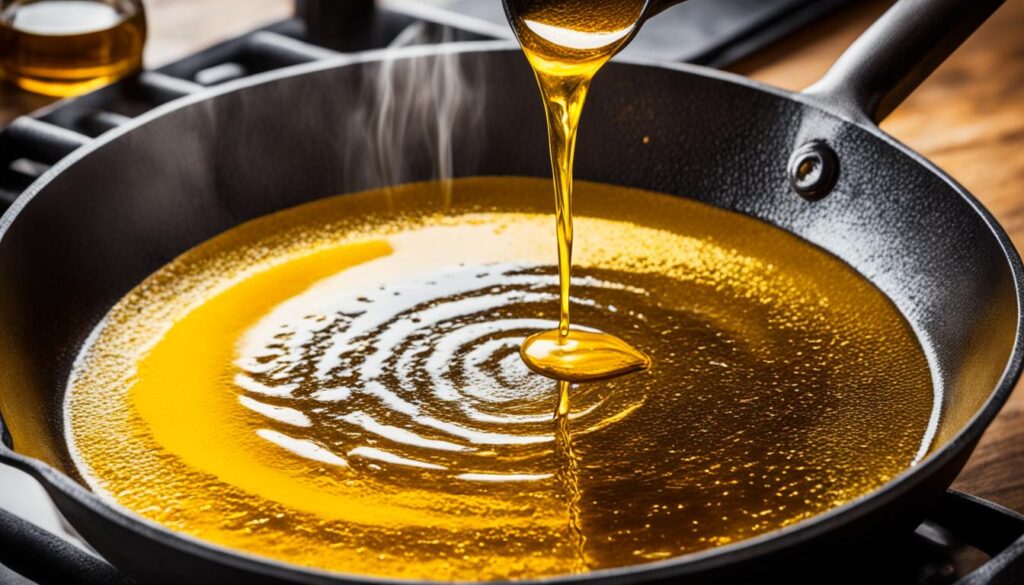
Whatever you choose, use less than you think you need. A thin, even coat beats a heavy one every time. Too much oil = sticky, gummy coating. Wipe on, then wipe most of it back off.
Oven Seasoning Process
Oven seasoning is the gold standard — it’s the most consistent, even method for building base layers of seasoning.

This is also the method to use when you’re restoring a cast iron pan with a removable handle or after stripping it down.
Step-by-Step
1. Preheat your oven to 450–500°F.
Higher temps ensure the oil polymerizes fully rather than just baking on as a greasy layer.
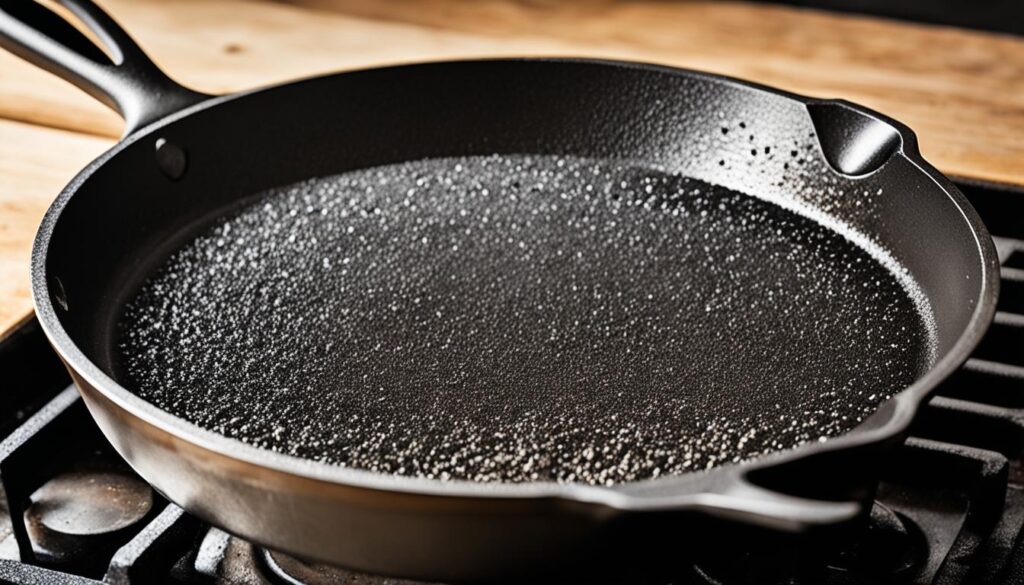
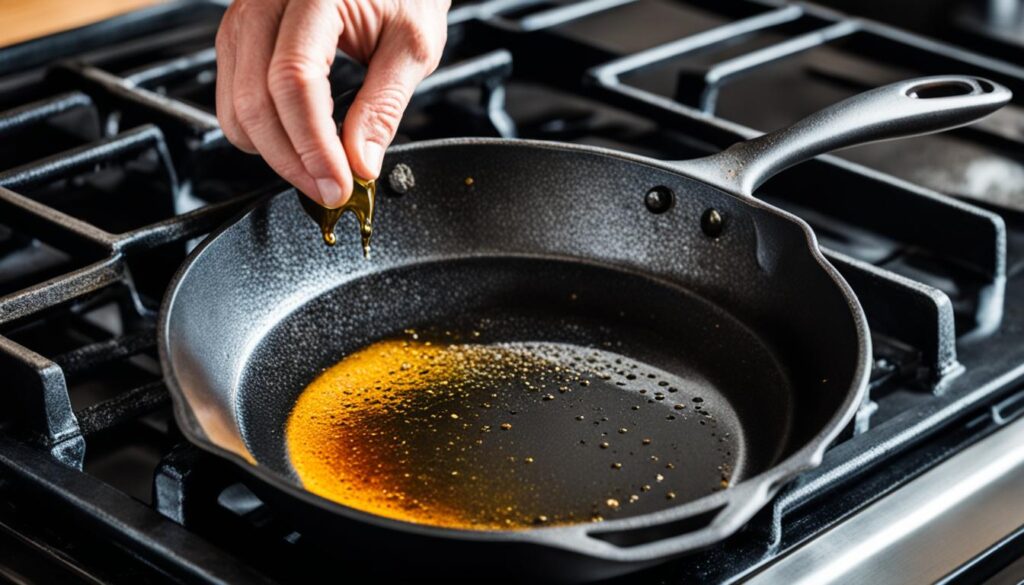
2. Apply oil to the entire pan.
Inside, outside, handle — all of it. Use a paper towel or lint-free cloth. Then wipe most of it off. You want a layer so thin it almost looks dry. This is the most common mistake. People use too much oil.
3. Place the skillet upside down on the center rack.
Put foil or a baking sheet on the rack below to catch any drips.
4. Bake for 1 hour.
Don’t open the oven. Let it do its thing.
5. Turn off the oven. Let the pan cool inside.
Don’t rush this. Cooling slowly inside the oven helps the seasoning harden.
6. Repeat 3–6 times.
One coat isn’t enough. Each layer builds on the last. After 3 rounds minimum, you’ve got something workable. After 6, you’ve got a solid non-stick base.
The whole process takes a few hours of oven time spread across a day or two. Worth it.
Stovetop Seasoning Method
Stovetop seasoning is faster and works well for quick touch-ups — it’s not a replacement for oven seasoning, but it’s useful.
Here’s when it makes sense:
- After cooking bacon or other fatty foods (the residual fat naturally conditions the pan)
- Quick touch-up between full oven seasoning sessions
- When you don’t want to heat up the whole oven
How to do it:
- Heat the pan over medium-low heat until it’s warm.
- Add a tiny amount of oil — maybe half a teaspoon — and rub it in with a paper towel.
- Keep heating until the oil just barely starts to smoke.
- Wipe off any excess. Let it cool.
That’s it. It’s not building deep layers like the oven method — but it’s better than nothing, and done consistently after every cook session, it adds up.
One thing to watch: don’t overheat an empty pan on a high burner. You can crack it, warp it, or destroy existing seasoning. Preheat gradually.
Maintaining Seasoning with Regular Use
Honestly? Cooking with your cast iron is the best thing you can do for the seasoning.
Certain foods actively help build seasoning:
- Bacon and other fatty meats. The fat polymerizes right into the surface.
- Pan-seared steaks. High-heat fat renders and bonds.
- Fried potatoes. A classic cast iron seasoning food for a reason.
- Cornbread. The fat in the batter works in your favor.
And some foods actively strip seasoning. Avoid these, especially on a newer pan:
- Acidic foods. Tomatoes, citrus, vinegar-based dishes — acid breaks down the polymerized layer fast.
- Long simmers in water or broth. Moisture is the enemy.
- Soap every time you clean. Occasional soap is fine. Regular soap use isn’t.
The simple rule: cook fatty foods, avoid acidic ones, keep it dry. Do that consistently and your seasoning builds itself over time.
How to Clean a Seasoned Cast Iron Skillet
Proper cleaning preserves the seasoning you’ve built — and it’s simpler than most people make it.
Check out a full breakdown on best ways to clean a cast iron skillet if you want more detail. But here’s the quick version:
After Normal Cooking
- While still warm (not scorching hot), rinse under hot water.
- Scrub with a stiff brush or chain mail scrubber. No steel wool — that’s for rust removal only.
- Dry immediately and completely. Paper towels, then stovetop heat.
- Apply a tiny amount of oil, wipe it in, wipe most of it back off.
- Store in a dry place.
Stubborn Stuck Food
- Add a little water to the pan while it’s still warm and let it simmer for a minute. Most stuck food releases.
- Coarse salt works as an abrasive. Add a tablespoon with a paper towel and scrub.
- Chain mail scrubber for anything more serious.
What Not to Do
- Don’t soak it. Ever. Even briefly.
- Don’t put it in the dishwasher. It strips everything.
- Don’t let it air dry. Rust forms faster than you’d think.
- Don’t use soap after every cook. Occasional soap on a well-seasoned pan is fine. Daily soap is not.
Signs of Eroding Seasoning
Catching seasoning loss early means a quick fix instead of a full strip-and-reseason job.
Watch for these:
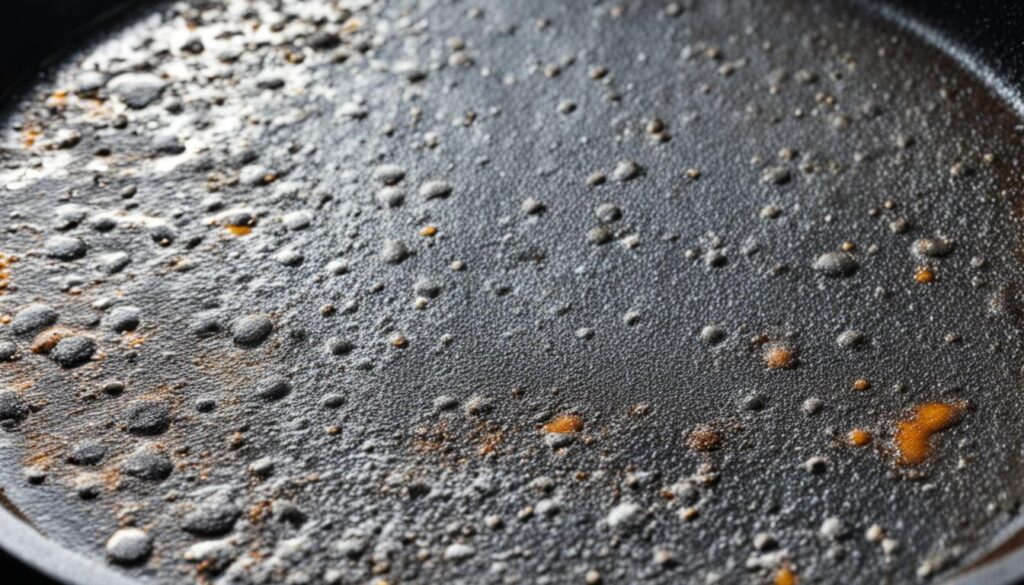
Dull, grayish surface. A healthy seasoned pan has a dark, semi-gloss or matte sheen. Gray and patchy means it’s thinning.
Food sticking more than usual. The whole point of seasoning is non-stick cooking. If eggs are gluing themselves to the pan, the coating is compromised somewhere.
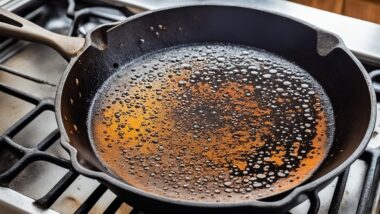
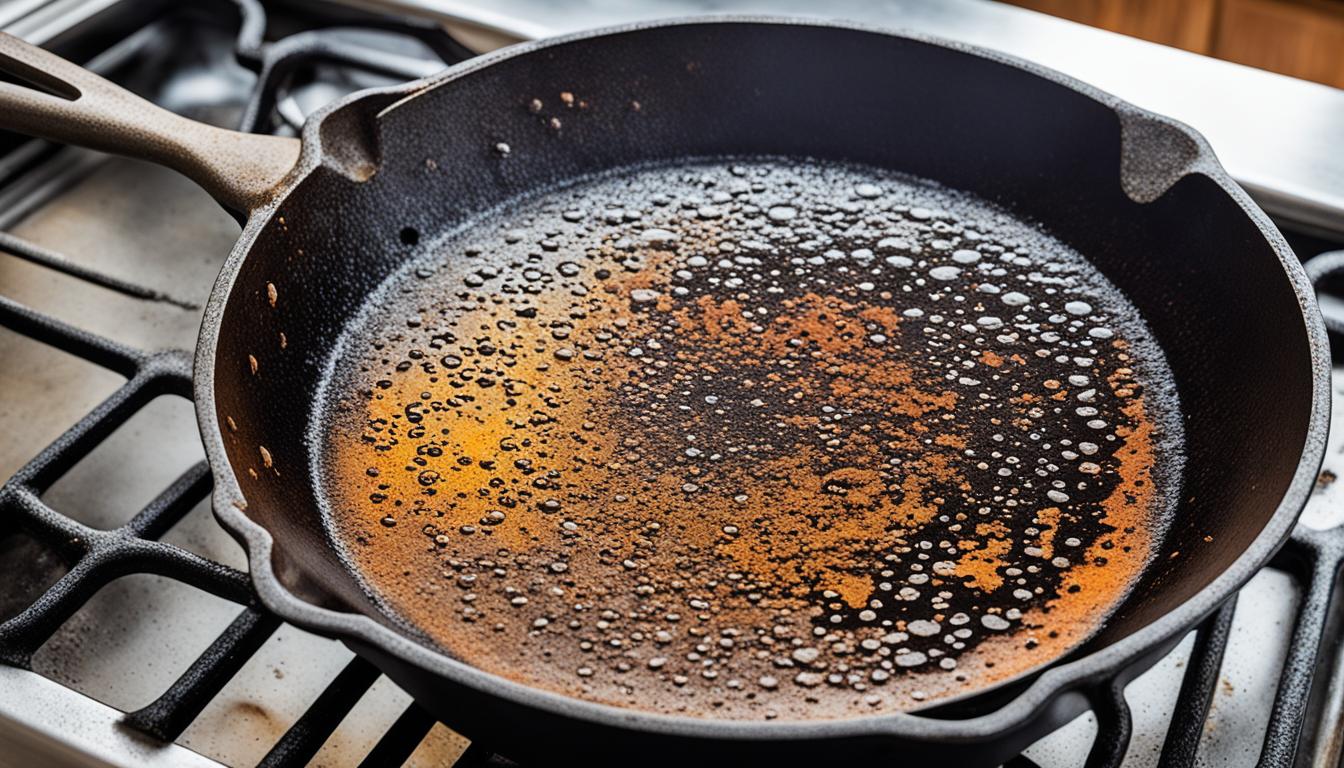
Small rust spots. Tiny orange-brown specks appearing after washing or storage. Early-stage rust is easy to address — catch it before it spreads.
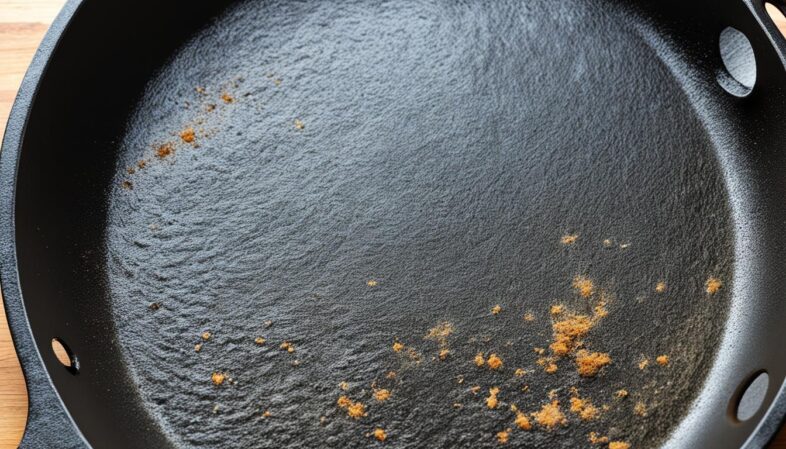
Flaking black bits in food. This one’s unpleasant. Means the seasoning isn’t bonded properly — usually from applying too much oil during previous seasoning attempts, or from seasoning at too low a temperature.
Water absorbing instead of beading. Drop a bit of water in a well-seasoned pan and it should bead up and roll. If it sinks in and sits flat, the surface is compromised.
None of these mean the pan is ruined. They mean it needs attention.
Restoring Flaking or Lost Seasoning
Restoration is straightforward — start from bare metal and rebuild.
If It’s Partial Loss
Small rust spots or dull patches don’t require stripping the whole pan. Here’s what to do:
- Scrub the affected area with fine steel wool or a chain mail scrubber until you’re back to clean metal.
- Wash and dry the pan completely.
- Apply a thin oil coat to the entire pan.
- Run 2–3 oven seasoning cycles.
That’s usually enough. The repaired area will blend into the existing seasoning after a few cooks.
If It’s Major — Flaking, Heavy Rust, Sticky Buildup
Full strip and restart.
Option 1: Self-cleaning oven cycle. Put the pan in the oven and run the self-cleaning cycle. It burns everything off completely. The pan will look rough and orange-ish after — that’s normal. Cool completely, then start fresh with the oven seasoning process.
Option 2: Lye bath. Very effective for stripping without heat damage. Requires proper safety gear — gloves, eye protection — and careful handling. Not for beginners.
Option 3: Electrolysis. The most thorough method for serious rust. Requires a plastic bucket, washing soda, a battery charger, and a sacrificial piece of steel. Time-intensive but it works extremely well on heavily rusted pans.
After any full strip:
- Dry thoroughly, heat on stovetop to drive off moisture
- Apply first oil coat within minutes of drying — bare cast iron rusts almost immediately
- Run 5–6 oven seasoning cycles before cooking
A stripped and reseasoned pan performs just as well as a new one. Sometimes better, depending on the original quality of the iron. The process is worth doing right.