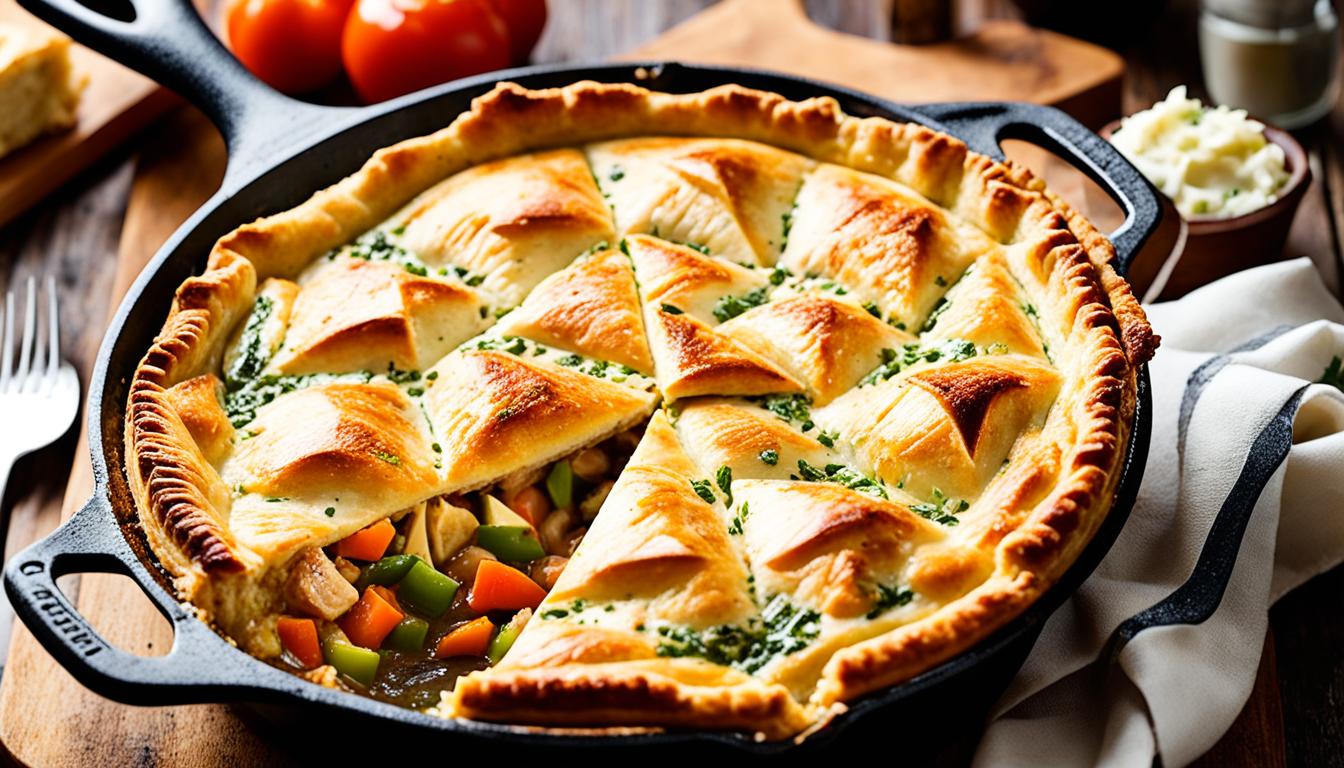
Cast iron skillet chicken and vegetable recipes give you a genuinely complete dinner in one pan — real browning on the chicken, vegetables that actually caramelize instead of steam, and the kind of flavor that comes from fond and drippings staying in the same pan from start to finish. These 10 recipes serve four. A few take 30 minutes. The rosemary garlic butter whole chicken takes closer to two hours — but most of that is the oven doing the work, not you.
The skillet is doing real work in every recipe here. Not just holding the food. Actually improving it.
Table of Contents
- 1 Getting Started with Cast Iron Skillet Cooking
- 2 Benefits of Using a Cast Iron Skillet for Chicken and Vegetables
- 3 Essential Tools and Ingredients for Cast Iron Skillet Recipes
- 4 Preparing Your Cast Iron Skillet for Cooking
- 5 Rosemary Garlic Butter Chicken with Root Vegetables
- 6 One-Pan Italian Herb Chicken and Potatoes
- 7 Skillet Lemon Thyme Chicken with Zucchini and Peppers
- 8 Honey Mustard Glazed Chicken with Roasted Brussels Sprouts
- 9 Mediterranean-Inspired Chicken with Olives and Cherry Tomatoes
- 10 Spicy Cajun Chicken with Bell Peppers and Onions
- 11 Creamy Garlic Parmesan Chicken with Spinach and Mushrooms
- 12 Teriyaki Chicken Stir-Fry with Mixed Vegetables
- 13 Barbecue Ranch Chicken with Corn and Green Beans
- 14 Tips for Achieving Perfectly Cooked Chicken in a Cast Iron Skillet
- 15 Adapting Cast Iron Skillet Recipes for Different Dietary Needs
Getting Started with Cast Iron Skillet Cooking
Cast iron skillet cooking has been producing better sears and more flavorful chicken than most other cookware since the 1830s — and the core reason hasn’t changed.
Heat retention. That’s it. When cold chicken hits cast iron that’s been preheating for five minutes, the temperature barely drops. Contact is immediate, browning happens fast, and you get a crust that actually has flavor rather than a pale grey surface from a pan that gave up its heat the second food touched it.
A few things to apply across every recipe in this article:
Dry your chicken before it goes in the pan. Pat it with paper towels — wet chicken steams on contact instead of searing, and steamed chicken in a recipe designed around browning is a noticeably worse result. Season it before the pan. Not in the pan, not after. On the chicken, before it goes anywhere near heat.
Preheat the skillet 5 minutes before adding oil or chicken. Cold skillets mean sticking, uneven heat, and a temperature recovery time that’s too slow when you’re trying to get a crust on protein. A 12-inch skillet is the right size here — one pound of chicken in a 10-inch pan is crowded, and crowded chicken steams instead of sears.
Good cast iron care is what makes the pan improve with every use. Proper cleaning and maintenance keeps the surface building over time instead of degrading.
Benefits of Using a Cast Iron Skillet for Chicken and Vegetables
Cast iron produces better one-pan chicken and vegetable meals than other cookware for three specific reasons — not because it’s traditional or photogenic.
Even Heat Distribution
Thin stainless pans have hot spots. Cast iron doesn’t — or at least the hot spots are far less pronounced once the pan comes up to temperature, which is why preheating matters so much. That even surface temperature means chicken browns from edge to center at the same rate, and vegetables caramelize instead of burning in one spot while sitting raw in another. For one-pan recipes where protein and vegetables share the same skillet, consistent heat matters on every inch of the cooking surface.
Natural Non-Stick Surface
A seasoned cast iron skillet releases food without a chemical coating that eventually scratches and degrades. The surface improves with every use instead of worsening. Chicken skin releases cleanly when it’s ready — not when you force it — and vegetables pick up proper caramelized edges instead of sticking and tearing and leaving half their flavor behind on the pan.
Versatility in Cooking Methods
Start on the stovetop, finish in the oven. Or do everything on one burner. Or take it camping — cast iron doesn’t care. For recipes like the Cajun chicken thighs or the honey mustard Brussels sprouts version, the stovetop-to-oven move in a single pan is what makes the whole thing practical. No transferring, no losing drippings, no extra dishes.
These pans also last longer than any other cookware in the kitchen. Not by a small margin. Properly maintained cast iron outlasts everything else by decades, and it gets better the whole time.
Essential Tools and Ingredients for Cast Iron Skillet Recipes
A 12-inch cast iron skillet and five other things. That’s genuinely the whole setup for every recipe here.
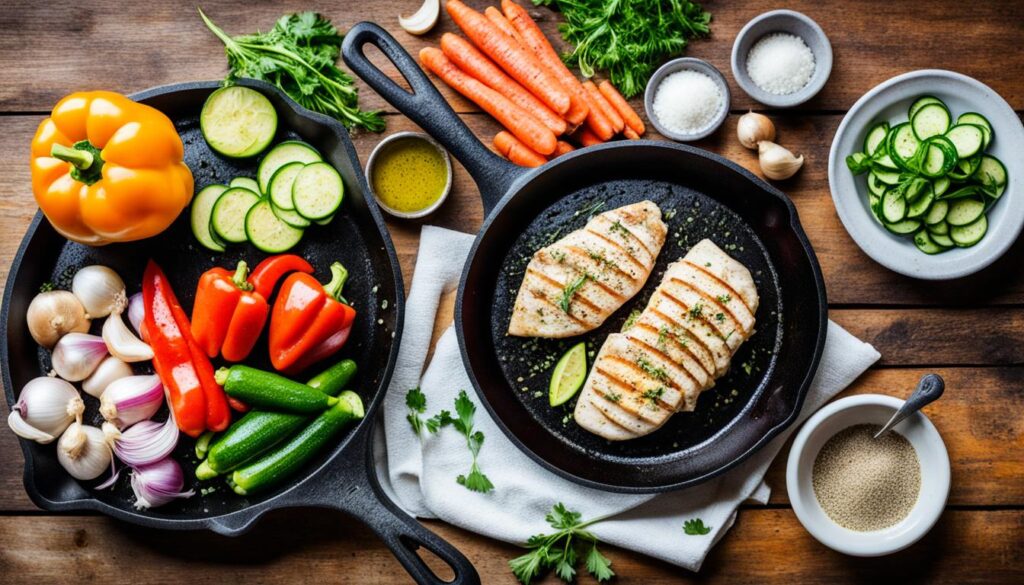
The skillet comes first. Beyond that:
- Heatproof tongs — for turning chicken without puncturing it and losing the juices you spent time building
- A silicone spatula — metal scratches the seasoning, silicone doesn’t, costs $8 and it’s not worth debating
- Heavy oven mitts — the handle of a cast iron skillet coming out of a 425°F oven will burn you if you forget about it even once
- A meat thermometer — the only reliable way to know chicken is done
Pantry staples that appear in at least six of these ten recipes: olive oil, fresh garlic, dried thyme, smoked paprika, kosher salt, black pepper. Stock these and most recipes only require a quick grocery run for fresh chicken and vegetables.
| Tool / Ingredient | What it does | Notes |
|---|---|---|
| 12-inch cast iron skillet | Everything | Non-negotiable size for 4 servings |
| Olive oil | Searing and cooking vegetables | 2-3 tbsp per recipe |
| Fresh garlic | Aromatic base | 2-4 cloves in most recipes |
| Thermometer | Doneness check | Pull at 160-162°F, rest to 165°F |
| Silicone spatula | Stirring without damage | Protects the seasoning surface |
Proper cleaning after each use matters as much as any ingredient. Hot water, stiff brush, dry on a low burner, thin oil coat while still warm. Five minutes. Every time.
Preparing Your Cast Iron Skillet for Cooking
A properly prepared skillet — seasoned, preheated, and maintained — is what separates cast iron cooking from just cooking in a heavy pan.
Seasoning Your Skillet
Apply oil to every surface — inside, outside, handle — and bake upside down at 450°F for 30 minutes. Let it cool in the oven. That’s the process. Seasoning correctly from the start compounds over time, and oil type genuinely matters:
| Oil | Smoke Point | Approximate Cost | Worth it? |
|---|---|---|---|
| Avocado oil | 500-520°F | ~$15 / 32 oz | Best results overall |
| Grapeseed oil | 400-420°F | ~$13 / 32 oz | Good mid-range choice |
| Canola oil | 400-450°F | ~$3 / 32 oz | Budget option, works fine |
| Flaxseed oil | 225°F | ~$35 / 32 oz | Skip it — too low, goes rancid fast |
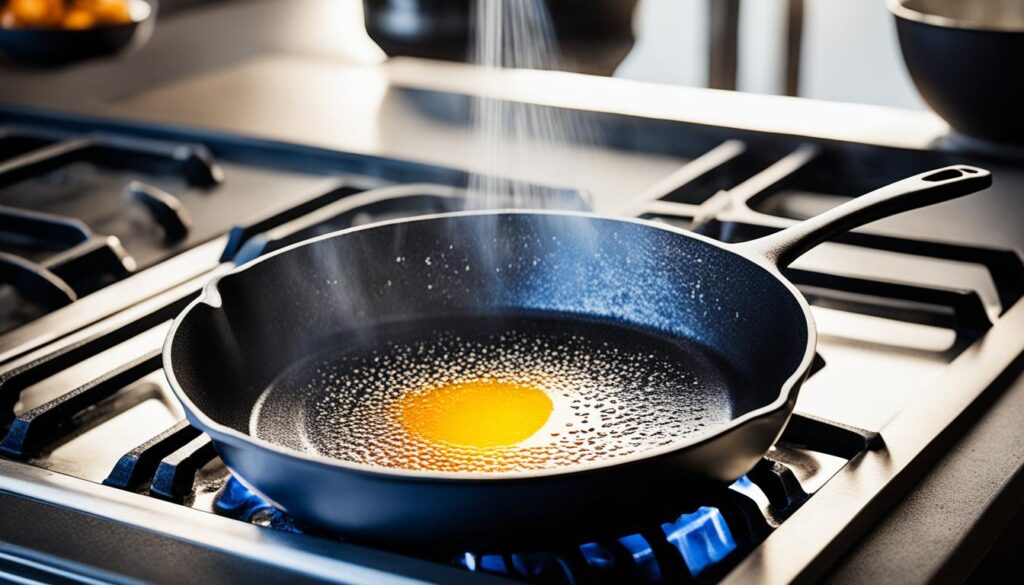
Preheating Techniques
Five minutes over medium heat before anything goes in. Not two minutes, not “until it looks warm.” Five minutes. The water drop test: if a drop skitters across the surface and evaporates in under a second, the pan is ready. Sitting and bubbling means wait longer.
Proper Care and Maintenance
After cooking: hot water, stiff brush, no soap, dry completely on a low burner, thin film of oil while still warm. Soap strips seasoning — skip it every time. That’s the whole routine, and five minutes of it after each use builds a pan that gets noticeably better year after year.
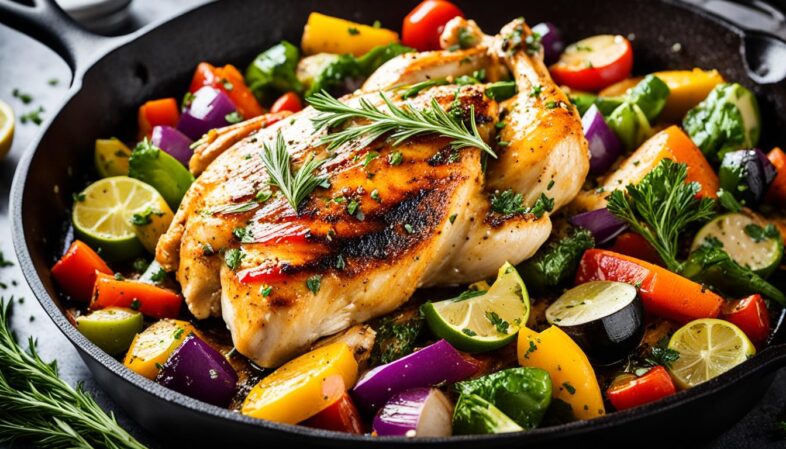
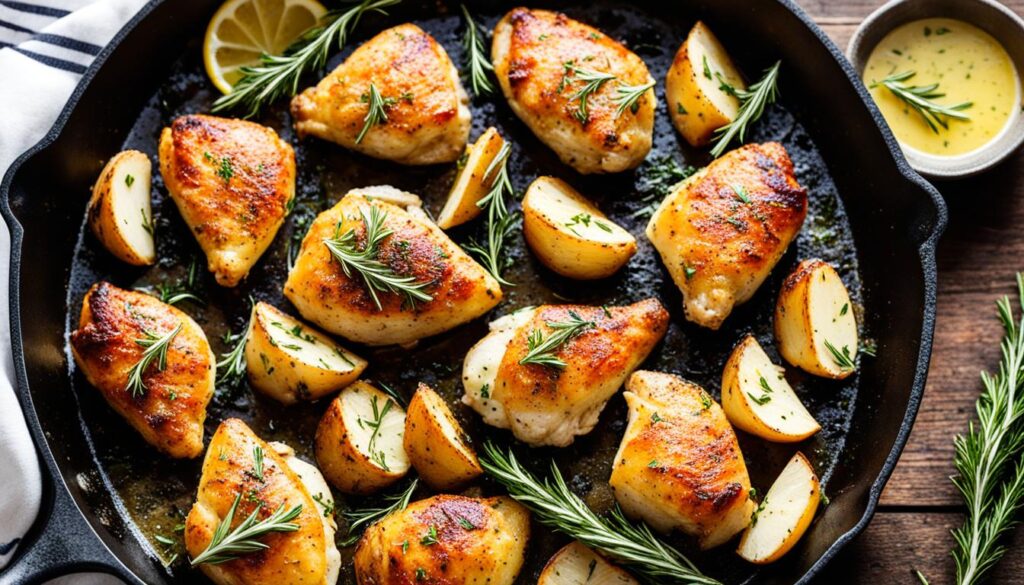
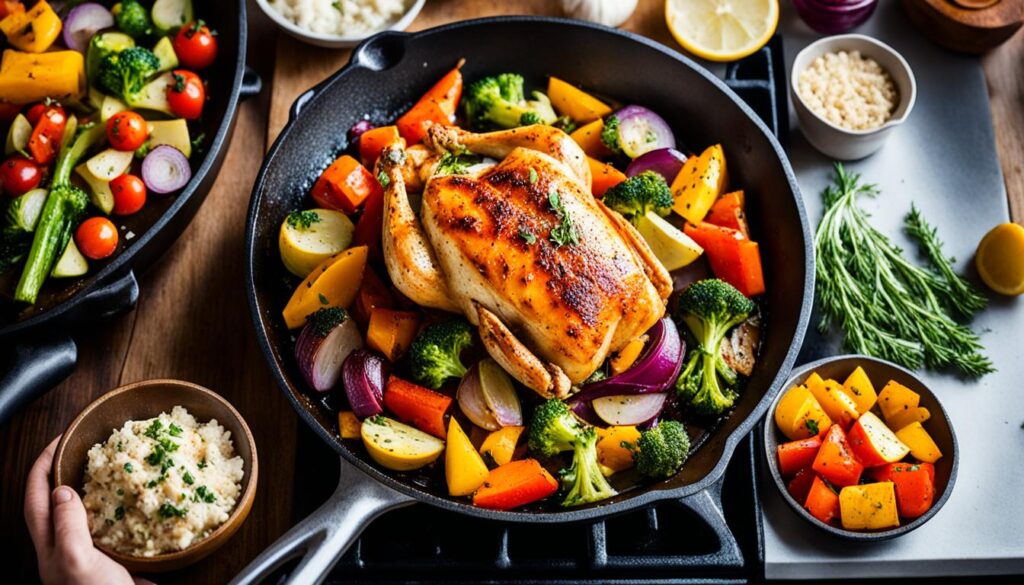
Rosemary Garlic Butter Chicken with Root Vegetables
Rosemary garlic butter roast chicken in a cast iron skillet with baby potatoes and carrots is a Sunday dinner that fills the house with the kind of smell that brings people to the kitchen before you call them.
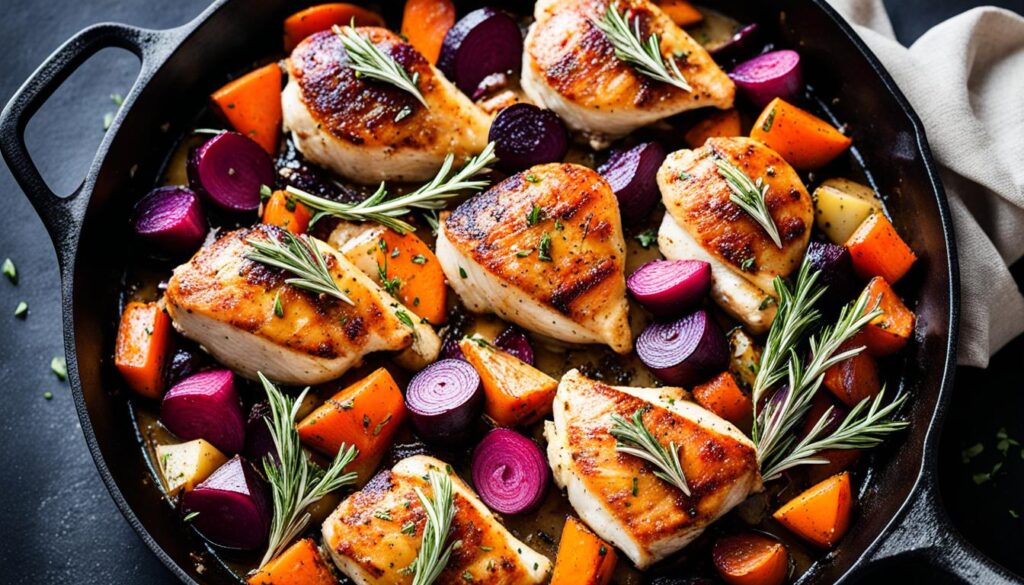
The butter goes under the skin. Not brushed on top — under it. On the surface, it just browns and slides off into the pan. Under the skin, it bastes the meat from the inside throughout the entire roast, which is the only reason the breast stays juicy through an hour and 40 minutes at 400°F.
Ingredients
- 1 whole chicken, 3-1/2 to 4 lbs
- 4 tbsp unsalted butter, softened to room temperature
- 3 cloves garlic, minced fine
- 1-1/2 tbsp fresh rosemary, minced — dried rosemary here is a real downgrade, use fresh
- 1 lb baby potatoes, halved
- 3 medium carrots, cut into 1-inch pieces
- 2 tbsp canola or avocado oil
- Salt and black pepper
Method
Preheat oven to 400°F. Combine the softened butter with garlic and rosemary. Season with salt and pepper.
Loosen the skin over the breast and thighs by sliding your fingers underneath — work slowly and try not to tear it. Push the herbed butter under the skin and spread as evenly as possible. Season the outside of the chicken generously. Toss potatoes and carrots in oil, season them, and spread them in a 12-inch cast iron skillet. Nestle the chicken on top.
Roast at 400°F for 25 minutes. Drop to 375°F and roast another 75 minutes until the thigh registers 165°F internally. Rest 10 full minutes before carving. Cut into it early and the juices run out onto the board instead of staying in the meat — that rest matters.
Nutritional Information (Per Serving)
| Nutrient | Amount per Serving |
|---|---|
| Calories | 520 |
| Carbohydrates | 22g |
| Protein | 42g |
| Fat | 28g |
| Fiber | 3g |
| Sodium | 380mg |
One-Pan Italian Herb Chicken and Potatoes
Italian herb chicken thighs roasted over Yukon Golds, carrots, zucchini, mushrooms, and onion — everything seasons together in the oven, the drippings coat the vegetables underneath, and it comes out as a complete dinner with almost nothing to clean up.
Ingredient List
- 1-1/2 lbs bone-in, skin-on chicken thighs — about 4 pieces
- 1 lb Yukon Gold potatoes, cut into 1-inch pieces
- 2 medium carrots, sliced into coins
- 1 small zucchini, halved lengthwise and sliced
- 6 oz cremini mushrooms, quartered
- 1 medium yellow onion, cut into wedges
- 1/4 cup olive oil
- 2 tbsp Italian herb blend (dried oregano, basil, and thyme in roughly equal parts)
- 4 cloves garlic, minced
- Salt and pepper
Cut everything into roughly equal sizes. Uneven pieces mean the small ones burn while the large ones finish — it’s where most one-pan roasts go wrong, and it’s easy to avoid.
Step-by-Step Cooking Instructions
- Preheat oven to 400°F.
- Toss potatoes and carrots with half the olive oil and half the herbs. Season with salt and pepper.
- Rub chicken thighs all over with remaining oil, herbs, garlic, salt, and pepper — get some under the skin.
- Heat the 12-inch skillet over medium-high with a splash of oil. Sear the chicken skin-side down 4-5 minutes. Don’t move it — the skin releases when it’s ready, forcing it causes tearing.
- Pull the chicken and set aside. Add the seasoned vegetables to the skillet.
- Nestle the chicken on top, skin-side up.
- Roast 30-35 minutes until the chicken hits 165°F and the potatoes are tender when pierced.
Serving Suggestions
Serve straight from the skillet. A green salad with balsamic vinaigrette and crusty bread to soak up the drippings makes it a complete Italian-style dinner. Those drippings are genuinely the best part — don’t leave them in the pan.
Nutritional Information (Per Serving)
| Nutrient | Amount per Serving |
|---|---|
| Calories | 480 |
| Carbohydrates | 26g |
| Protein | 34g |
| Fat | 26g |
| Fiber | 4g |
| Sodium | 340mg |
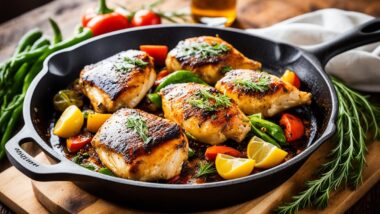
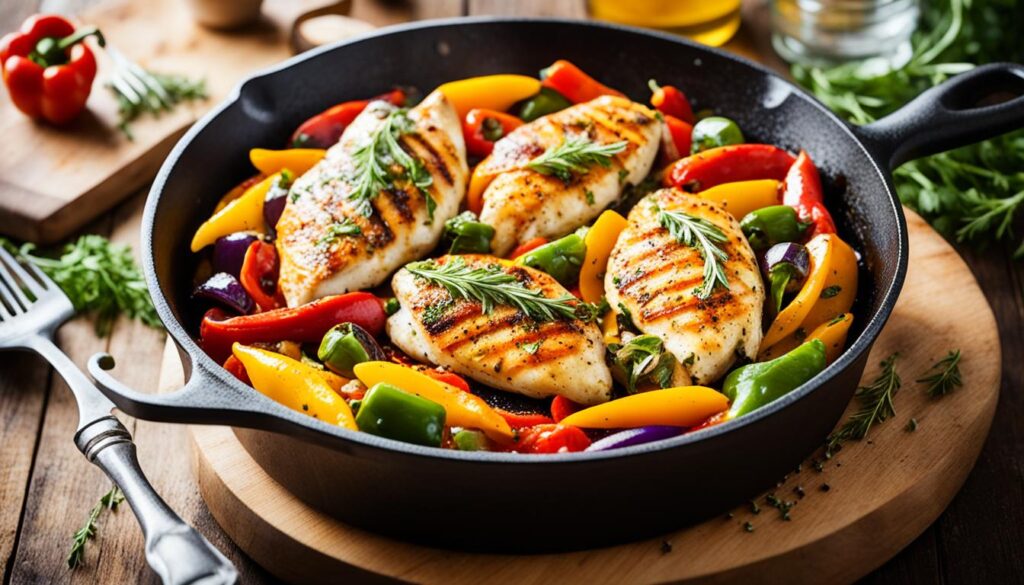
Skillet Lemon Thyme Chicken with Zucchini and Peppers
Lemon thyme chicken with zucchini and bell peppers in a cast iron skillet is a 30-minute dinner where the lemon goes in at the end — which is exactly why it tastes bright and fresh instead of bitter.
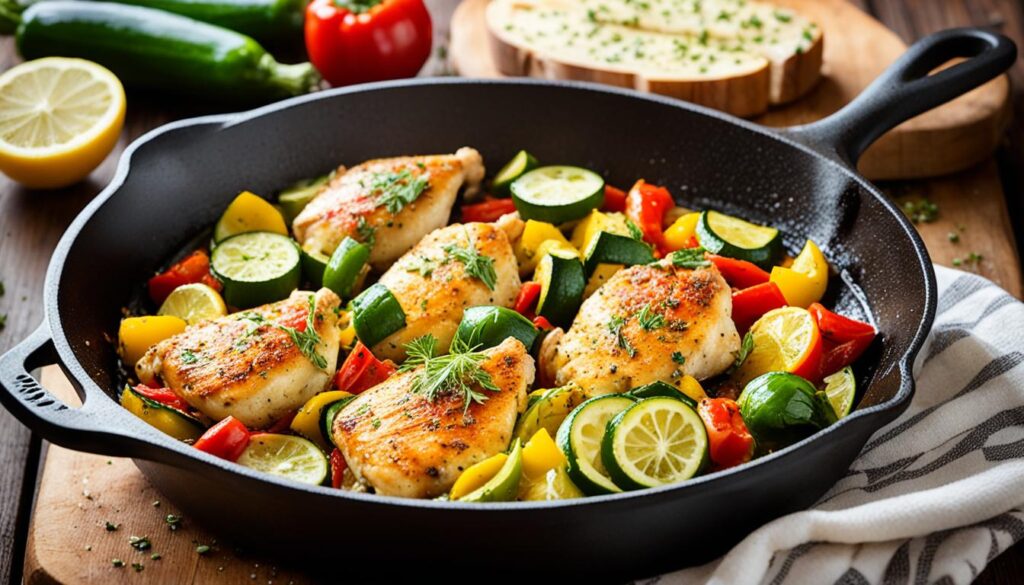
Lemon juice cooked for more than a few minutes turns bitter and flat. Add it in the last 2 minutes of cooking and you get the brightness you’re actually after. This applies to every lemon-forward chicken recipe, not just this one.
- 1-1/2 lbs boneless, skinless chicken breasts — 4 medium, pounded to even 3/4-inch thickness
- 2 medium zucchini, sliced into half-moons
- 1 red bell pepper, sliced
- 1 yellow bell pepper, sliced
- 3 tbsp olive oil
- 1/4 cup fresh lemon juice (about 2 lemons)
- 1 tbsp fresh thyme leaves
- 3 cloves garlic, minced
- Salt and pepper
Pound the chicken to an even thickness before cooking. This is the step most people skip — and then wonder why the thin end is dry by the time the thick end is safe to eat. Two minutes with a meat mallet. Do it.
Heat 2 tbsp olive oil in a 12-inch cast iron skillet over medium-high. Season chicken with salt, pepper, and half the thyme. Cook 5-6 minutes per side until golden and at 165°F internally. Set aside uncovered — tenting with foil makes the crust soggy.
Add remaining oil to the same pan. Cook zucchini and peppers 4-5 minutes over medium-high until the edges start to color. Add garlic, 30 seconds. Return the chicken. Pour lemon juice over everything. Scatter remaining thyme. Simmer 2 minutes together. Done.
Nutritional Information (Per Serving)
| Nutrient | Amount per Serving |
|---|---|
| Calories | 310 |
| Carbohydrates | 9g |
| Protein | 38g |
| Fat | 13g |
| Fiber | 2.5g |
| Sodium | 290mg |
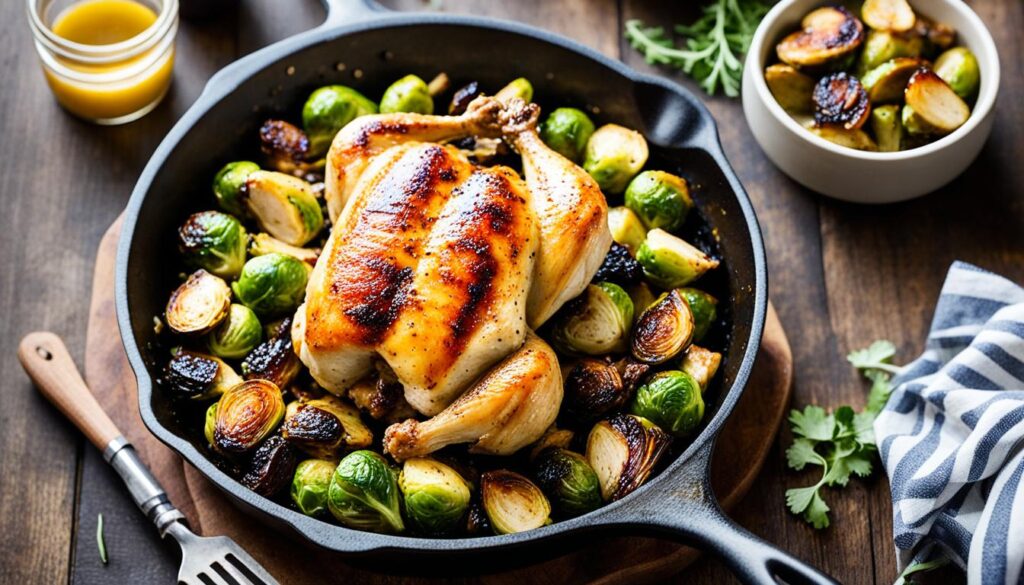
Honey Mustard Glazed Chicken with Roasted Brussels Sprouts
Honey mustard glazed chicken thighs with charred Brussels sprouts in a cast iron skillet — 35 minutes, the kind of caramelized glaze that makes people ask what you did differently.
Preparing the Honey Mustard Glaze
Whisk together:
- 1/4 cup honey
- 1/4 cup Dijon mustard
- 2 tbsp fresh lemon juice
- 1/2 tsp smoked paprika
- 1/2 tsp garlic powder
- Salt and pepper
The ratio matters. More honey and it burns before the chicken cooks through. More mustard and it overpowers the Brussels sprouts. This balance is correct — adjust it after you’ve made it once if needed, not before.
Cooking the Chicken and Vegetables
- 4 bone-in, skin-on chicken thighs — about 1-1/2 lbs total
- 1 lb Brussels sprouts, halved through the stem end
- 2 tbsp olive oil
- Salt and pepper
Preheat oven to 425°F. Toss halved Brussels sprouts with olive oil, salt, and pepper directly in a 12-inch cast iron skillet. Push them to the edges. Set chicken thighs skin-side up in the center. Brush generously with the honey mustard glaze, getting it under the skin edges too.
Roast 30-35 minutes until the skin is lacquered and deep golden and the chicken hits 165°F. Brussels sprouts directly under the chicken get steamed rather than roasted — they’re still good, just softer and richer from the drippings, which is actually a fine trade-off.
Plating and Presentation Tips
Straight from the skillet. Fresh thyme sprigs and a lemon half alongside take 10 seconds and make it look considerably more intentional than it was. The contrast between dark glazed skin and charred-green sprouts is visually appealing without any effort.
Nutritional Information (Per Serving)
| Nutrient | Amount per Serving |
|---|---|
| Calories | 485 |
| Carbohydrates | 24g |
| Protein | 36g |
| Fat | 26g |
| Fiber | 4g |
| Sodium | 420mg |
Mediterranean-Inspired Chicken with Olives and Cherry Tomatoes
Mediterranean cast iron chicken with Kalamata olives, cherry tomatoes, capers, and artichoke hearts builds its own pan sauce during the oven roast — the tomatoes blister and burst and do all the work.
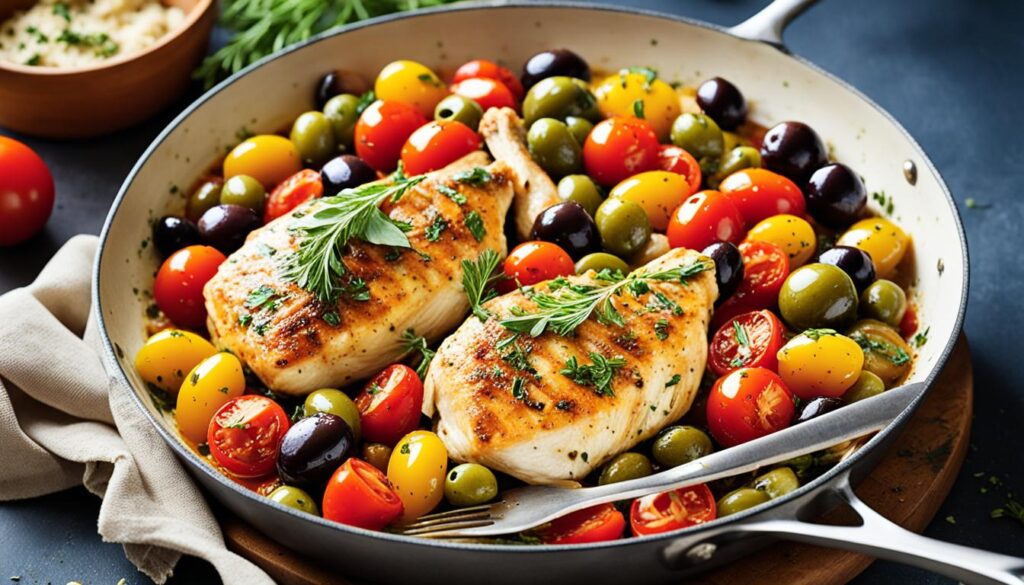
The feta goes on after the oven. Not before — baked feta melts into the sauce and disappears entirely. Cold crumbled feta scattered over the finished dish gives you the textural contrast and the concentrated salty hit that makes the dish feel complete. Small detail, meaningful difference.
- 1-1/2 lbs boneless, skinless chicken breasts (4 medium, pounded to even thickness)
- 3 tbsp extra virgin olive oil
- 2 cups cherry tomatoes
- 1/4 cup Kalamata olives, pitted — standard canned black olives are not a substitute here
- 1/4 cup pimento-stuffed green olives
- 1/4 cup artichoke hearts, roughly chopped
- 2 tbsp capers, drained
- 1 lemon, sliced into thin rounds
- 1 tsp smoked paprika
- 1 tsp dried oregano
- Salt and pepper
- Fresh parsley and crumbled feta to finish
Preheat oven to 375°F. Season chicken with paprika, oregano, salt, and pepper. Heat olive oil in a 12-inch cast iron skillet over medium-high. Sear the chicken 3-4 minutes per side until golden — not cooked through, just colored. Scatter the tomatoes, both olives, artichoke hearts, capers, and lemon slices around the chicken. Roast 15 minutes until the chicken reaches 165°F and the tomatoes have burst. Scatter fresh parsley and feta over everything before serving.
For another cast iron recipe worth having in the rotation, this Chicago deep dish pizza uses the same skillet for something completely different.
Nutritional Information (Per Serving)
| Nutrient | Amount per Serving |
|---|---|
| Calories | 340 |
| Carbohydrates | 8g |
| Protein | 38g |
| Fat | 17g |
| Fiber | 2.5g |
| Sodium | 680mg |
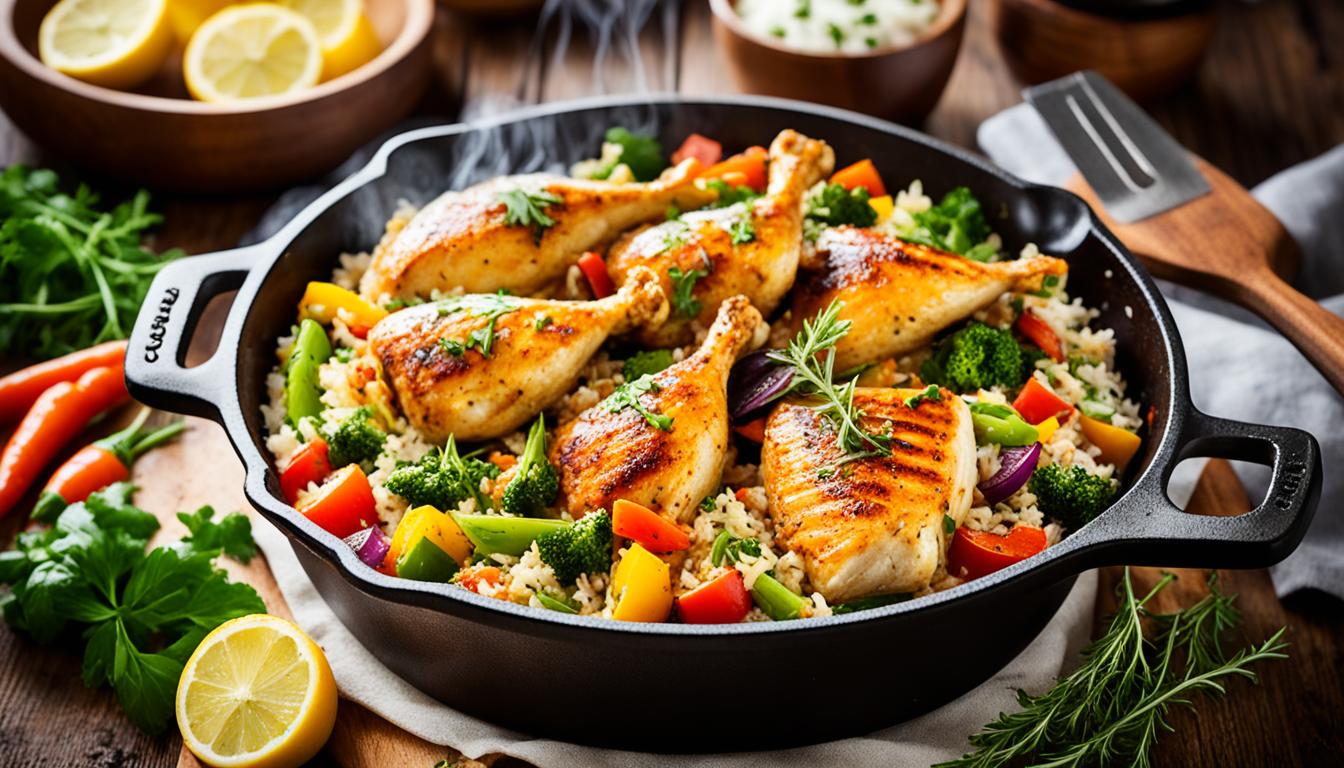
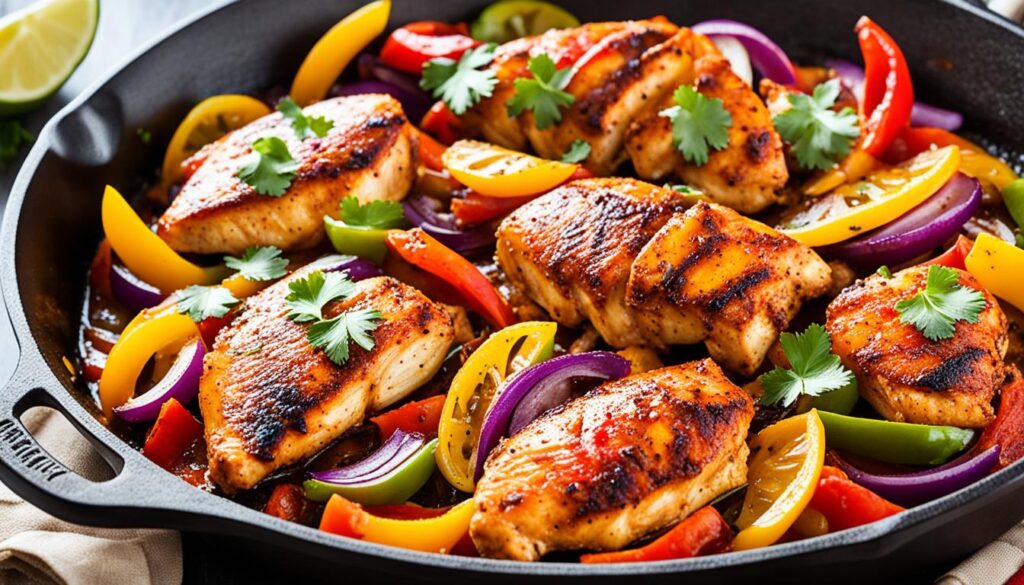
Spicy Cajun Chicken with Bell Peppers and Onions
Cajun chicken thighs with bell peppers and onions in a cast iron skillet — a bold homemade spice blend, properly charred skin, sweet peppers and onions underneath absorbing every drop of the spiced drippings.
Make the spice blend yourself. Store-bought Cajun seasoning is usually over-salted and under-spiced everywhere it matters. Two minutes of measuring beats every bottle on the shelf — and you control the cayenne level, which store-bought never gets right for everyone at the table.
Cajun Spice Blend
- 2-1/2 tsp smoked paprika
- 2 tsp garlic powder
- 1-1/4 tsp dried oregano
- 1-1/4 tsp dried thyme
- 1 tsp onion powder
- 1 tsp black pepper
- 1/2 to 1 tsp cayenne — start at 1/2 if you’re unsure about heat tolerance at your table
- 1-1/2 tsp kosher salt
Full Recipe
- 1-1/2 lbs bone-in, skin-on chicken thighs (4 pieces)
- 2 bell peppers — 1 red, 1 green, sliced
- 1 large yellow onion, sliced into half-moons
- 2 cloves garlic, minced
- 2 tbsp olive oil
Rub the spice blend all over the chicken including under the skin. Let the thighs sit at room temperature for 15 minutes — this isn’t marinating, it just lets the surface dry slightly so the spice crust adheres and doesn’t slide off during searing.
Preheat oven to 425°F. Heat olive oil in a 12-inch cast iron skillet over medium-high. Add chicken skin-side down and cook 5 minutes without moving until deeply golden. Flip. Add bell peppers, onion, and garlic to the spaces around the chicken. Transfer to the oven. Roast 20-25 minutes until the chicken reads 165°F.
Serve over rice to catch the spiced drippings, or with crusty bread.
Nutritional Information (Per Serving)
| Nutrient | Amount per Serving |
|---|---|
| Calories | 420 |
| Carbohydrates | 10g |
| Protein | 34g |
| Fat | 26g |
| Fiber | 2.5g |
| Sodium | 580mg |
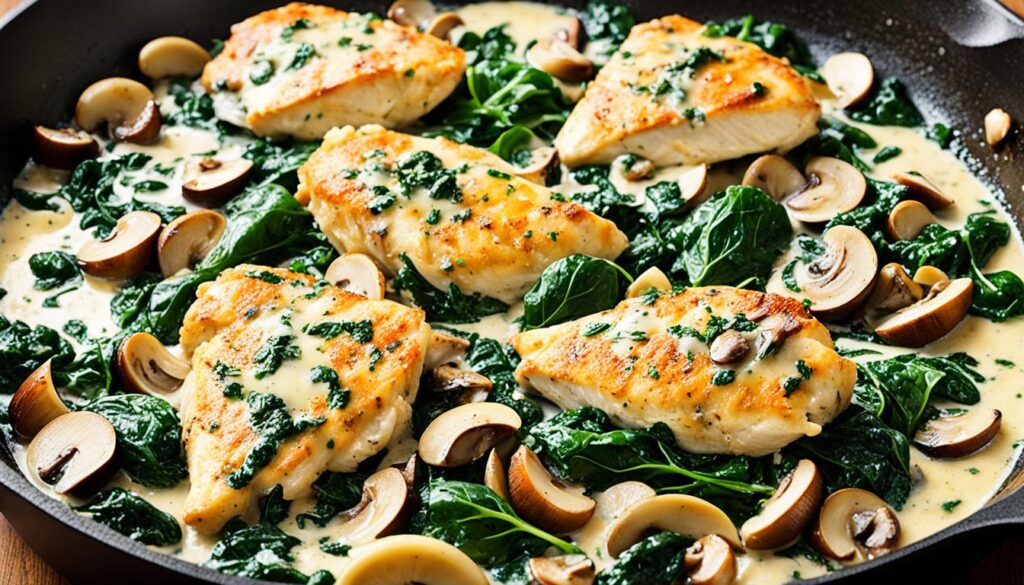
Creamy Garlic Parmesan Chicken with Spinach and Mushrooms
Creamy garlic Parmesan chicken with spinach and mushrooms in a cast iron skillet — from-scratch pan sauce, same pan the chicken was seared in, 30 minutes total.
Creating the Perfect Cream Sauce
The sauce builds in the same pan the chicken was seared in. That fond — the browned bits stuck to the bottom — is where the flavor comes from. Using a different pan for the sauce produces a noticeably blander result.
After searing and setting aside 4 boneless, skinless chicken breasts (1-1/2 lbs total):
- 2 tbsp unsalted butter
- 4 cloves garlic, minced
- 2 tbsp all-purpose flour
- 1 cup low-sodium chicken broth
- 3/4 cup heavy cream
- 1/2 cup freshly grated Parmesan — not pre-shredded from a bag, anti-caking agents interfere with melting
- Salt, pepper, and a small pinch of nutmeg
Melt butter over medium. Add garlic, 30 seconds. Stir in flour and cook 1 minute. Whisk in broth, then cream. Simmer until the sauce coats a spoon, 3-4 minutes. Off the heat, stir in Parmesan.
Incorporating Vegetables into the Dish
- 8 oz cremini mushrooms, sliced
- 3 cups fresh baby spinach
Cook mushrooms before the sauce — 4-5 minutes over medium-high until their liquid releases and evaporates. Set aside. Spinach goes into the finished sauce last, stirred in for 1 minute until just wilted. Then return the seared chicken and spoon the sauce over everything.
Pairing Suggestions for a Complete Meal
Over pasta or rice to absorb the sauce. Zucchini noodles or mashed cauliflower if carbs matter. Crusty bread for the plate — this sauce is genuinely worth the effort of wiping the plate clean.
Nutritional Information (Per Serving)
| Nutrient | Amount per Serving |
|---|---|
| Calories | 460 |
| Carbohydrates | 8g |
| Protein | 42g |
| Fat | 28g |
| Fiber | 1.5g |
| Sodium | 520mg |
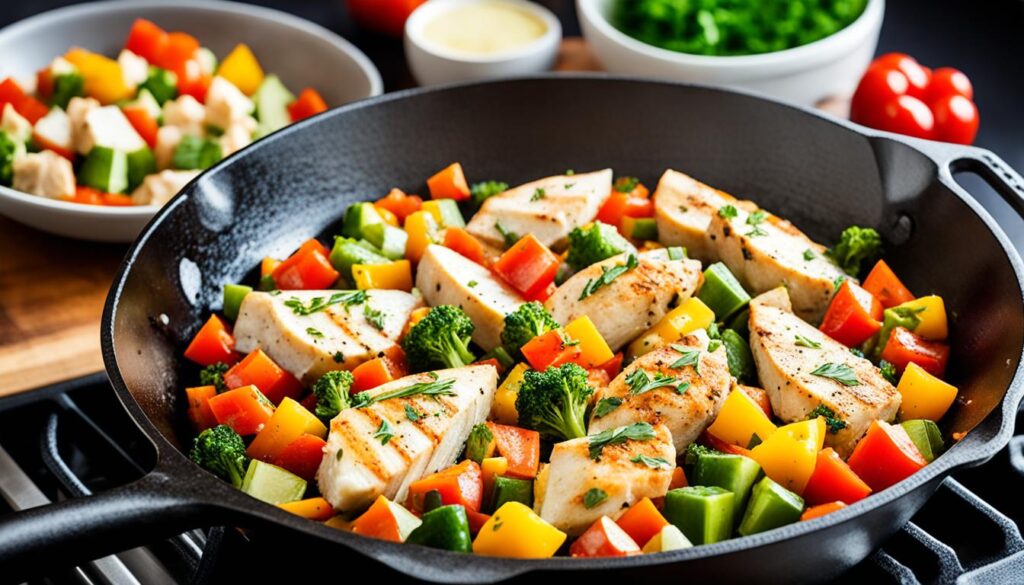
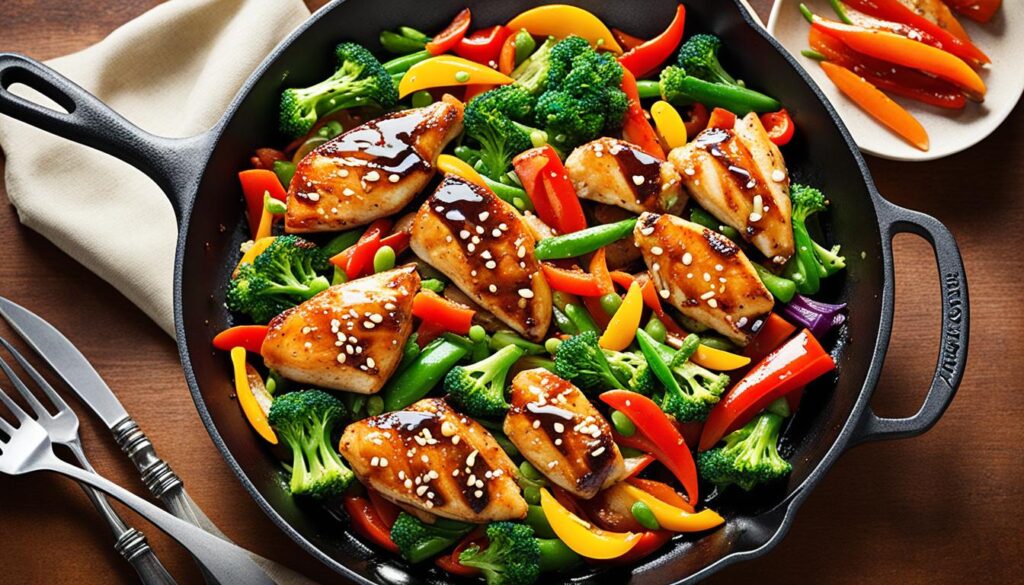
Teriyaki Chicken Stir-Fry with Mixed Vegetables
Cast iron teriyaki chicken stir-fry with a from-scratch sauce that genuinely beats anything from a bottle — the high heat cast iron reaches produces the slight char on the chicken and broccoli that makes this taste like actual stir-fry.
Make the sauce before anything hits the heat. Stir-fry moves fast — stopping to measure cornstarch while the pan is at maximum temperature doesn’t go well.
Homemade Teriyaki Sauce
Whisk together until the cornstarch fully dissolves:
- 1/2 cup low-sodium chicken broth
- 3 tbsp mirin
- 2 tbsp low-sodium soy sauce
- 1 tsp rice vinegar
- 3 tbsp brown sugar
- 1 tbsp cornstarch
- 1 tsp fresh ginger, grated
- 2 cloves garlic, minced
The cornstarch amount is calibrated specifically for a skillet stir-fry — bottled teriyaki is either too thin to coat or so thick it overwhelms everything, and this lands in the right place between them.
Full Recipe
- 1-1/2 lbs boneless, skinless chicken breasts, cut into 1-inch pieces
- 2 cups broccoli florets
- 1/2 large onion, sliced
- 1 red bell pepper, sliced
- 2 tbsp vegetable oil
- Sesame seeds and sliced green onions to finish
Heat the cast iron skillet over high heat until genuinely hot. Add oil. Spread chicken in a single layer and cook 3-4 minutes without stirring — let it color on one side before moving it. Stir and cook another 2 minutes. Pull out and set aside.
Same pan, same high heat: stir-fry the vegetables 3-4 minutes until they pick up some char. They should sizzle aggressively, not steam quietly. Return the chicken. Pour the sauce over everything. Cook 1-2 minutes until it thickens and coats. Sesame seeds and green onions on top. Serve over steamed rice.
For another cast iron Asian-inspired recipe using the same high-heat technique, this shrimp and broccoli stir-fry is worth having on rotation alongside these chicken recipes.
Nutritional Information (Per Serving)
| Nutrient | Amount per Serving |
|---|---|
| Calories | 340 |
| Carbohydrates | 24g |
| Protein | 38g |
| Fat | 9g |
| Fiber | 3g |
| Sodium | 620mg |
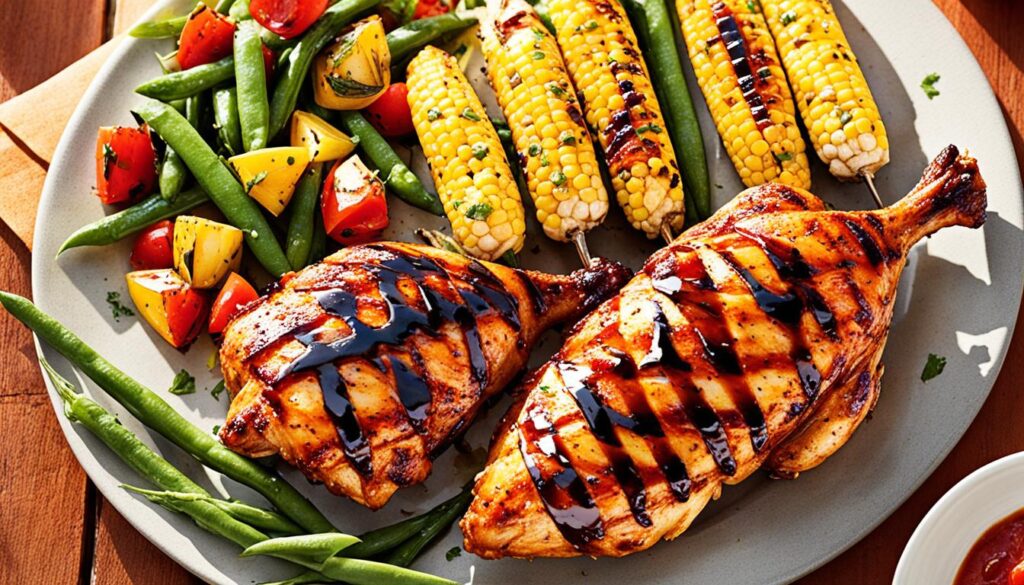
Barbecue Ranch Chicken with Corn and Green Beans
Barbecue ranch chicken thighs with fresh corn and green beans in a cast iron skillet — the ranch seasoning builds a spiced crust during the sear, the barbecue sauce goes on after and caramelizes instead of burning. Order of operations matters here.
Get this backwards — barbecue sauce first, high heat — and you get a burnt, bitter exterior before the chicken is even close to cooked through. Ranch seasoning first, barbecue sauce after the initial sear. That’s the sequence.
Ingredients
- 4 boneless, skin-on chicken thighs — about 1-1/2 lbs
- 2 tbsp ranch seasoning mix
- 1/4 cup barbecue sauce — use one you’d eat straight, it matters
- 2 cups fresh corn kernels (about 3 ears, or frozen works)
- 2 cups green beans, trimmed and halved
- 2 tbsp olive oil
- Salt and pepper
Method
Heat olive oil in a 12-inch cast iron skillet over medium-high. Season chicken all over with ranch seasoning, salt, and pepper. Cook skin-side down 5-6 minutes until golden and the ranch crust has set. Flip, cook another 3 minutes.
Brush the top of each thigh generously with barbecue sauce — get under the skin edges. Cook 2-3 more minutes until the sauce caramelizes and turns sticky. Pull the chicken and set aside.
Add corn and green beans to the same skillet over medium-high. Cook 5-6 minutes, stirring occasionally, until the corn picks up some color and the beans are just tender — not soft, just tender. Return the chicken on top. Final coat of barbecue sauce. Cook together 2-3 minutes over medium heat.
Serve from the skillet.
Nutritional Information (Per Serving)
| Nutrient | Amount per Serving |
|---|---|
| Calories | 440 |
| Carbohydrates | 28g |
| Protein | 32g |
| Fat | 22g |
| Fiber | 4g |
| Sodium | 680mg |
Tips for Achieving Perfectly Cooked Chicken in a Cast Iron Skillet
Three things that apply across every recipe above — temperature control, moisture retention, and resting. Get all three right and the recipes take care of themselves.
Temperature Control
Preheat the skillet 5 minutes before anything goes in. Cook boneless breasts 5-7 minutes per side over medium heat. Bone-in thighs need 20-25 minutes in a 400-425°F oven after the initial stovetop sear. Both assume a properly preheated pan — cold pan, different results.
| What you’re tracking | Target |
|---|---|
| Stovetop searing heat | Medium to medium-high |
| Internal done temp | 165°F |
| Pull from heat at | 160-162°F |
| Rest time | 5-10 minutes |
Moisture Retention Techniques
Pull chicken at 160-162°F, not 165°F. Carryover cooking during the rest brings it to safe temperature while the meat stays juicy. Pulled exactly at 165°F and then rested, it’s overcooked before it hits the table.
Don’t tent with foil while the chicken rests. Steam makes the skin wet and soft. Rest uncovered on a cutting board — the temperature loss over 5-10 minutes is minimal and the crust stays intact.
Bone-in, skin-on pieces retain moisture better than boneless skinless. The bone insulates during cooking, the fat under the skin bastes from above. If juiciness matters more than convenience on a particular night, use bone-in thighs. Worth it.
Resting and Serving Best Practices
Five to ten minutes after cooking. Every time. No exceptions for “it’s getting cold.” Rested chicken is measurably juicier — the juices redistribute through the meat instead of pooling at the surface and running out the moment you cut in.
Leftovers keep 4 days refrigerated in an airtight container. Reheat at 300°F covered with foil and a splash of broth — low and slow, not high heat, which makes already-cooked chicken tough and dry. The cast iron skillet works for reheating too, covered over low heat with a splash of liquid.
Adapting Cast Iron Skillet Recipes for Different Dietary Needs
Every recipe here adapts without much effort — the cast iron skillet doesn’t care what’s in it, and neither do most of these recipes at their core.
Gluten-free: Swap all-purpose flour for rice flour or cornstarch in any sauce or roux — 1:1 ratio. Cornstarch produces a slightly glossier sauce; rice flour is more matte. Both work. Check chicken broth labels and seasoning packets carefully — gluten hides in unexpected places and is easy to miss.
Low-carb: The rosemary butter chicken, Mediterranean, Cajun, lemon thyme, and creamy garlic Parmesan recipes are all naturally low in carbs as written. For the teriyaki, swap the brown sugar for a sugar-free substitute and reduce the mirin by half. Serve everything over cauliflower rice instead of regular rice — it absorbs pan sauces well and adds almost nothing in carbs.
Meatless: Firm tofu or tempeh replaces chicken at a 1:1 weight ratio in most recipes. Press the tofu for at least 30 minutes before cooking — unpressed tofu steams in the pan instead of searing, and the result is nothing like what these recipes are designed to produce. Tempeh browns more aggressively than tofu and handles high heat better. Use vegetable broth wherever chicken broth appears.
The technique stays the same regardless of what’s in the pan. Hot skillet, proper browning, right temperature, proper rest. That’s the whole system.