Table of Contents
- 1 Understanding Why Your Cast Iron Skillet Feels Rough
- 2 The Difference Between Seasoning and Smoothing Cast Iron
- 3 How to Mechanically Smooth a Rough Cast Iron Skillet
- 4 How to Season Your Newly Smoothed Cast Iron Skillet
- 5 Building Smoothness Through Seasoning Layers Alone
- 6 Advanced Seasoning Techniques for Maximum Smoothness
- 7 Maintaining Your Smooth Cast Iron Surface
- 8 Common Mistakes When Trying to Smooth Cast Iron
- 9 Comparing Smooth Cast Iron to Rough: Performance Differences
- 10 Vintage Cast Iron vs. Modern Rough Cast Iron
- 11 Brand-Specific Information for Rough Cast Iron
- 12 Troubleshooting Smoothing and Seasoning Problems
- 13 Alternative Approaches to Getting Smooth Cast Iron
Understanding Why Your Cast Iron Skillet Feels Rough
Your cast iron skillet feels rough because modern manufacturers leave the textured surface from the casting process instead of machining it smooth like vintage pans—seasoning alone won’t eliminate this texture, but you can reduce it significantly through sanding or gradual wear over time.
Here’s the deal: if you’ve touched an old Griswold or Wagner skillet, you know what smooth feels like. Glass-like. Almost slippery. Your new Lodge? Feels like 60-grit sandpaper by comparison.
Not a defect. Just different manufacturing.
The Truth About Modern Cast Iron Texture vs. Vintage Smoothness
Pre-1960s cast iron was machined after casting. They’d grind and polish the cooking surface until it was smooth. Time-consuming. Expensive. But the results were incredible—surfaces that took seasoning beautifully and became naturally non-stick fast.
Modern cast iron (especially Lodge, the biggest player) skips this step entirely. They cast the pan, knock off the rough bits, and call it done. That pebbly, sandy texture you’re feeling? That’s the raw casting surface.
Why the change?
- Machining adds significant cost
- Most people don’t know the difference
- Rough surfaces actually hold seasoning better initially (though smooth surfaces win long-term)
Vintage smooth iron was ground with stones or belts. Modern “artisan” brands (Field Company, Stargazer, Butter Pat) are bringing back smoother finishes, but they charge premium prices for it.
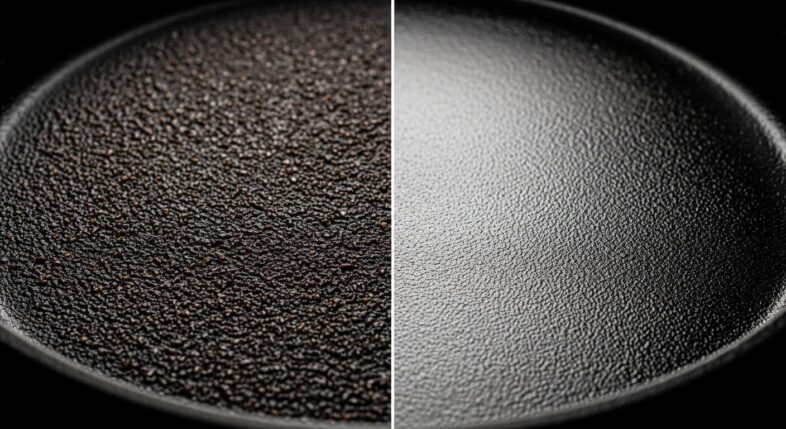
The texture difference is real and measurable. Run your finger across both—vintage feels like a smartphone screen, modern feels like pavement.
Can Seasoning Alone Make a Rough Cast Iron Skillet Smooth?
Sort of. But don’t hold your breath.
Multiple layers of seasoning will fill in the valleys of that rough texture and slightly reduce the pebbly feel. After 20-30 coats (built up over months or years of cooking), the pan will feel smoother than when new.

But truly smooth? Like vintage iron? Won’t happen through seasoning alone.
Think of it like this: if the texture is mountains and valleys, seasoning fills the valleys partway. The mountains are still there. You’ve just reduced the height difference.
What seasoning CAN do:
- Create a slick, non-stick surface on top of rough texture
- Make the roughness less noticeable when cooking
- Build up enough to reduce friction
What seasoning CAN’T do:
- Eliminate the underlying texture completely
- Create that glass-smooth vintage feel
- Level out deep pebbling or casting imperfections
You want actual smoothness? You’ll need to remove metal. No way around it.
What Actually Creates That Silk-Smooth Cast Iron Surface
Two things create genuinely smooth cast iron: mechanical removal of the texture, followed by proper seasoning.
The smoothness comes from the iron itself being polished flat. Seasoning just enhances what’s already there.
Vintage manufacturers used:
- Belt sanders with progressively finer grits
- Grinding wheels
- Buffing compounds
You can replicate this at home with sandpaper and patience (or an orbital sander and less patience). The goal is removing the peaks of that rough texture until the surface is uniformly flat.
After sanding, you season it properly—thin layers, high heat, multiple coats. The seasoning bonds to the smooth iron and creates that legendary slick surface.

Smooth iron + good seasoning = silk. Rough iron + good seasoning = slick but still textured. That’s the reality.
The Difference Between Seasoning and Smoothing Cast Iron
Seasoning and smoothing are completely separate processes that work together to create the ideal cooking surface.
Smoothing is mechanical. You’re physically removing metal to create a flat, polished surface. This is permanent (unless you sand it rough again, which would be weird).
Seasoning is chemical. You’re polymerizing oil onto the iron to create a protective, non-stick coating. This builds up over time but can also be stripped away.
Most people confuse these. They buy a rough Lodge, season it a bunch, wonder why it doesn’t feel like their grandma’s Wagner. Wrong approach.
Why Multiple Seasoning Layers Won’t Fix a Rough Surface
Because seasoning is thin. Really thin.
Each properly applied coat of seasoning is maybe 0.0001 inches thick. Maybe. The rough texture on modern cast iron has peaks and valleys that are 0.002-0.005 inches deep.
Do the math. You’d need 20-50 coats of perfectly even seasoning just to fill the valleys level with the peaks. And that’s assuming the seasoning distributes evenly (it doesn’t—it pools in the valleys).
Even if you somehow built up 50 coats, you wouldn’t have smooth iron. You’d have rough iron buried under thick, potentially gummy layers of polymerized oil. Not the same thing.
Good seasoning follows the contours of whatever surface it’s applied to. Rough iron gets smooth-ish seasoning on rough contours. Smooth iron gets smooth seasoning on smooth contours.
When Mechanical Smoothing Is Necessary Before Seasoning

You NEED to sand if:
- You want vintage-level smoothness
- The texture bothers you when cooking (eggs stick, spatulas catch)
- You’re restoring a pan that has rust pitting or damage
- You’ve got the time and don’t mind the work
You can skip sanding if:
- The texture doesn’t bother you
- You’re fine with “pretty smooth” rather than “glass smooth”
- You’d rather let cooking gradually polish it over years
- You don’t want to strip and re-season the pan
Honestly? Most people don’t need to sand their pans. The rough texture works fine for 90% of cooking once properly seasoned. But if you want that ultra-smooth feel, sanding’s the only way.
Realistic Expectations for Making Rough Cast Iron Smooth
Let’s be real about what you’re getting into.
Time investment: 2-4 hours of sanding (depending on pan size and roughness), plus another 6-8 hours of oven seasoning (most of which is passive waiting).
Effort level: Moderate. Your arm will get tired from sanding. It’s not rocket science, but it’s work.
Results: You can get a Lodge or modern rough pan to 80-90% of vintage smoothness. It’ll never be identical to a Griswold (different iron composition, different casting methods), but it’ll be way smoother than it started.
Durability: Once smoothed, it stays smooth forever unless you damage it. The seasoning on smooth iron actually holds better long-term than on rough surfaces.
Worth it? Depends on how much the texture bugs you and whether you’ve got a free Saturday.
How to Mechanically Smooth a Rough Cast Iron Skillet
To mechanically smooth a rough cast iron skillet, strip all seasoning first, then sand the cooking surface with progressively finer grits starting at 80-120 grit and finishing at 400+ grit until the surface feels uniformly smooth.

This is the real work. The part where you actually fix the texture.
Assessing Your Cast Iron’s Roughness Level
Not all rough cast iron is equally rough. Figure out what you’re dealing with before you start.
Light Texture vs. Heavy Pebbling
Light texture: Feels slightly sandy but relatively uniform. Most Lodge skillets fall here. You can see and feel the texture, but it’s not extreme.
Heavy pebbling: Deep valleys, pronounced peaks, seriously rough feel. Some vintage cast iron has this (especially cheap old brands). Modern preseasoned pans sometimes have extra texture from thick factory seasoning hiding roughness underneath.
Run your fingernail across the cooking surface. If it catches noticeably, you’ve got work to do. If it’s just slightly textured, less work.
Which Rough Surfaces Can Be Improved at Home
You can smooth:
- Standard Lodge or modern cast iron texture (very doable)
- Light to moderate vintage roughness
- Minor pitting from rust (if it’s not too deep)
- Uneven surfaces from poor casting
You probably can’t fix:
- Severe rust pitting that goes deep into the metal
- Cracks or structural damage
- Warped pans (sanding won’t fix warping)
- Extremely thick, cheap cast iron with major casting flaws
If the pan’s basically sound but just rough, you’re good to go.
Tools and Materials for Smoothing Cast Iron
Here’s what you actually need.
Sandpaper Grits and Which to Use
You’ll progress through multiple grits. Each one removes scratches from the previous grit while making finer scratches of its own.
| Grit Range | Purpose | When to Use |
|---|---|---|
| 80-120 grit | Aggressive material removal | Heavy texture, deep scratches |
| 150-220 grit | Moderate smoothing | After coarse work, medium texture |
| 320-400 grit | Fine smoothing | Getting close to smooth |
| 600+ grit | Polishing | Final finish for glass-like surface |
Buy variety packs of wet/dry sandpaper. Cheaper and you’ll have what you need.
Don’t skip grits. Going from 80 straight to 400 doesn’t work—you’ll be sanding forever trying to remove coarse scratches with fine paper.
Orbital Sanders vs. Hand Sanding
Orbital sander (random orbital, not belt):
- Way faster—maybe 45 minutes instead of 3 hours
- More even results if you’re careful
- Risk of removing too much metal if you’re not paying attention
- Costs $40-60 if you don’t own one
Hand sanding:
- Cheaper (just sandpaper)
- More control over pressure and coverage
- Tiring for your arm and hand
- Takes forever
I’d use a sander for the rough work (80-220 grit), then finish by hand (320-600 grit) for control. Best of both worlds.
But hand sanding the whole thing works fine if you’ve got patience and a podcast queue.
Safety Equipment You’ll Need
Don’t be stupid about this part.
Required:
- Dust mask or respirator (iron dust is nasty stuff)
- Safety glasses (metal particles flying around)
- Gloves (optional but prevents blisters)
Recommended:
- Do this outside or in a garage
- Drop cloth or tarp to catch metal dust
- Fan for ventilation if you’re inside
Cast iron dust gets everywhere and it’s not great for your lungs. Seriously, wear the mask.
Step-by-Step Process to Smooth Rough Cast Iron
Alright. Let’s actually do this.
Step 1: Strip All Existing Seasoning First
You can’t sand through seasoning effectively. It gums up the sandpaper and gives inconsistent results.
Stripping methods:
- Oven cleaner (Easy-Off): Spray it on, seal in a garbage bag, wait 24 hours, scrub off. Repeat if needed.
- Lye bath: Mix lye and water, submerge pan for a few days. Nuclear option but effective.
- Self-cleaning oven: If your pan fits, run it through a clean cycle. Burns off all seasoning.
After stripping, you’ll have bare gray iron. It’ll rust fast, so work quickly or oil it lightly until you’re ready to sand.
The bare metal shows you the true texture you’re working with.
Step 2: Start with Coarse Grit Sandpaper (80-120 Grit)
Begin with 80 or 100 grit. This removes the peaks of the rough texture fastest.
If using a sander:
- Keep it moving constantly—don’t sit in one spot
- Use light to medium pressure
- Work in overlapping passes across the entire surface
- Check progress every 2-3 minutes
If hand sanding:
- Use a sanding block or wrap paper around a flat piece of wood (gives even pressure)
- Sand in circular motions or figure-8 patterns
- Apply firm pressure
- Rotate the paper as it loads up with metal dust
You’ll see the surface start to flatten. The peaks get removed, the valleys become shallower. Keep going until the surface looks relatively uniform—less shiny high spots, less dark low spots.
Takes 20-45 minutes depending on roughness and your method.
Step 3: Progress Through Medium Grits (150-220 Grit)
Once the coarse work is done, switch to 150 or 180 grit. This removes the scratches from your 80-grit work while continuing to smooth.
Same process—keep the sander moving, or hand sand in varied patterns. You’re not removing much metal now, just refining the surface.
After 150, move to 220. The surface should start feeling pretty smooth to your fingers, though you’ll still see scratch patterns.
Spend maybe 15-20 minutes per grit.
Check your progress: Run your hand across it. Getting smoother? Good. Still catching on rough spots? Keep going.
Step 4: Finish with Fine Grit for Smoothness (400+ Grit)
Switch to 320, then 400, then (if you’re feeling fancy) 600 grit.
At this point, you’re polishing more than sanding. Light pressure, lots of passes. The surface should feel smooth—not quite glass, but close.
Some people go up to 1000 or 1500 grit for a mirror finish. Overkill for cooking, but looks amazing.
I usually stop at 400 or 600. Smooth enough for excellent cooking performance without spending another hour chasing perfection.
Step 5: Clean Away All Sanding Dust
This matters more than you’d think.
Wash the pan thoroughly with hot water and dish soap (yes, soap—you’ve stripped the seasoning anyway). Use a brush or rough sponge to get into any remaining texture.
Rinse until the water runs completely clear.
Dry immediately and completely—bare iron rusts in minutes. Towel dry, then heat on the stovetop until bone dry.
Any metal dust left on the surface will interfere with seasoning adhesion. Get it clean.
How Long the Smoothing Process Takes
Hand sanding: 2-4 hours for a 10-12 inch skillet, depending on initial roughness and how smooth you want it.
Orbital sander: 45 minutes to 1.5 hours for the same pan.
Breaks included? Add more time. Your arm will need rest, especially hand sanding.
Figure on a Saturday afternoon project. Not quick, but not an all-day ordeal either.
Alternative Methods: Sandblasting and Professional Smoothing
Don’t want to sand by hand? Options exist.
Sandblasting: Takes the texture off fast—maybe 15 minutes of actual work. But you need a sandblaster (or access to one) and the skill to use it evenly. Too aggressive and you’ll pit the surface. Professional sandblasters can do it for $20-40 typically.
Machine shop polishing: Some machine shops will polish your pan on a buffing wheel. Results are incredible—better than you’ll get by hand. Costs $50-100 depending on the shop.
Wire wheel on a bench grinder: Technically works but creates deep circular scratches that are hard to remove. Not recommended unless you know what you’re doing.
Most people just sand by hand or with an orbital sander. Cheaper, more control, perfectly good results.
How to Season Your Newly Smoothed Cast Iron Skillet
To season newly smoothed cast iron, clean the bare metal thoroughly, apply an ultra-thin layer of high smoke point oil, wipe until nearly dry, then bake at 450-500°F for one hour—repeat this process 4-6 times for a durable, glass-like finish.
You’ve done the hard work of smoothing. Don’t screw up the seasoning.
Why Smooth Cast Iron Requires Proper Seasoning
Bare iron rusts. Fast. Like, within hours if there’s humidity.
Smooth iron rusts even faster than rough iron because there’s no texture to slow down moisture contact. It’s also more visible on smooth surfaces.
The seasoning does three things:
- Creates a non-stick cooking surface
- Protects against rust
- Brings out that silky feel you worked so hard to create
Smooth iron takes seasoning beautifully—bonds better, looks more uniform, feels slicker. But you need to do it right.
Preparing Bare Iron After Sanding
Removing All Metal Dust and Debris
Wash with hot water and soap. Scrub with a brush. Rinse thoroughly.
Check: run a white cloth across the surface. Still shows gray/black? Wash again.
Once the cloth comes away clean, you’re good.
Preventing Flash Rust on Exposed Iron
After washing bare iron, rust starts forming immediately. Literally within 5-10 minutes in humid environments.
Prevention: As soon as you’ve washed and dried the pan, rub a light coat of oil over the entire surface. This gives you time to set up for proper seasoning without rust starting.
If you do see surface rust (reddish tint), scrub it off with steel wool or coarse salt, wash again, dry completely, and oil immediately this time.
Work fast. Bare iron waits for no one.
Choosing the Best Oil for Seasoning Smooth Cast Iron
Not all oils are equal for seasoning. Some create harder, more durable finishes.
Oils That Create the Hardest, Smoothest Finish
| Oil | Smoke Point | Finish Quality | Cost |
|---|---|---|---|
| Grapeseed | 420°F | Excellent—hard, durable, smooth | $$$ |
| Canola | 400°F | Very good—reliable, available | $ |
| Crisco/Shortening | 490°F | Great—old-school favorite | $ |
| Avocado | 520°F | Good but expensive, not necessary | $$$$ |
Best choice: Grapeseed creates the hardest finish. But canola’s like 90% as good for 25% of the price.
Avoid: Flaxseed (flakes over time), olive oil (too low smoke point), butter (milk solids cause problems).
I use grapeseed for the initial seasoning on smooth iron, then maintain with whatever’s in the kitchen.
Why Oil Choice Matters More on Smooth Surfaces
On rough iron, the texture provides mechanical grip that helps seasoning adhere even if the oil’s not ideal.
On smooth iron, the bond between oil and metal is everything. Poor-quality seasoning on smooth surfaces is more likely to peel or not develop properly.
So yeah, use good oil. Especially for those first few coats.
Complete Seasoning Process for Smooth Cast Iron
Here’s the exact process. Don’t skip steps.
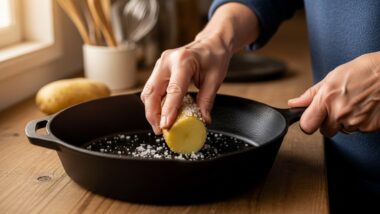
Step 1: Apply Ultra-Thin Oil Layer
Preheat oven to 450-500°F. (I use 475°F as a good middle ground.)
Pour maybe ½ teaspoon of oil on the cooking surface. Less than you think.
Use a lint-free cloth or paper towel to spread it over the ENTIRE pan—inside, outside, bottom, handle, every surface. The whole thing should have a light sheen.
Step 2: Buff Until Almost Dry
This is where people mess up.
Take a fresh, clean cloth and wipe the pan like you’re trying to remove all the oil. Buff it hard. The pan should look almost dry when you’re done—barely any sheen visible.
Too much oil creates sticky, gummy seasoning that never fully hardens. On smooth iron, this is really obvious and really annoying.
Can’t wipe too much. If it looks almost dry, you’re right. If you can see oil, wipe more.
Step 3: Bake at High Temperature (450-500°F)
Place the pan upside down on the middle oven rack. (Upside down prevents any oil from pooling.)
Put foil or a baking sheet on the rack below to catch drips (there shouldn’t be any if you wiped properly).
Bake for one hour at your chosen temp.
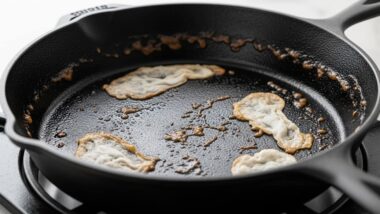
The pan will smoke during the first 10-15 minutes. That’s normal—it’s the oil polymerizing. Open windows, turn on fans.
Don’t open the oven to check on it. Just let it bake.
Step 4: Cool Completely in the Oven
After an hour, turn off the oven. Leave the pan inside.
Let it cool completely—usually 1-2 hours. Don’t rush this by taking it out early. The slow cooling helps the seasoning cure properly.
Once it’s room temperature, you’ve got one layer of seasoning. The pan will be noticeably darker and have a slight sheen.
Step 5: Repeat for Multiple Layers
Do the whole process again: thin oil layer, wipe nearly dry, bake for an hour, cool completely.
And again. And again.
How Many Seasoning Coats Smooth Cast Iron Needs
Minimum: 3-4 coats before first use. Gives basic protection and non-stick properties.
Recommended: 5-6 coats for a really solid base. This is what I do on newly smoothed pans.
Maximum useful: 8-10 coats initially. Beyond that, you get diminishing returns. Additional layers will build naturally through cooking.
After 5-6 coats, the pan should be quite dark (dark brown to nearly black) with a smooth, semi-gloss finish. Run your hand over it—feels slick now.
Each layer takes about 1.5 hours (baking plus cooling), so this is a multi-day project unless you’re really committed to marathon oven seasoning.
Building That Glass-Like Finish Over Time
Even after 6 coats, you won’t have that legendary glass-smooth finish yet. That comes with use.
Cook fatty foods (bacon, sausage, fried chicken, grilled cheese) regularly. Each time, you’re adding micro-layers of natural seasoning.
Use metal spatulas and utensils. On smooth iron, these actually help polish the surface over time without damaging it (unlike rough iron where they can catch on texture).
After 6-12 months of regular use, smooth, well-seasoned cast iron develops this incredible feel—slick, dark, almost wet-looking even when dry. That’s the goal.
Building Smoothness Through Seasoning Layers Alone
To build smoothness through seasoning alone without sanding, cook frequently with fats, use metal spatulas to gradually polish high spots, and build up 20-30 layers over months—this won’t create true smoothness but will significantly reduce the rough feel.
So you don’t want to sand. Fine. Here’s the slow method.
Can You Skip Mechanical Smoothing?
Yes. Absolutely.
Your pan will never be as smooth as a sanded one, but it’ll improve noticeably over time through cooking and seasoning alone.
This is how people did it for decades before the internet told everyone to sand their Lodge skillets. It works. Just slower.
Pros of skipping smoothing:
- No sanding work required
- Pan stays in service the whole time
- Natural process through normal use
Cons:
- Takes 6-12 months to see major improvement
- Never reaches vintage-level smoothness
- Still feels textured (just less so)
If the texture doesn’t actively bother you, skip sanding. Use the pan. It’ll get better.
The Metal Spatula Method for Gradual Smoothing
Here’s a sneaky technique: regular use of metal spatulas gradually wears down the peaks of rough texture while leaving the seasoned valleys intact.
Not sanding. Just normal cooking friction over hundreds of uses.
How Cooking Utensils Polish Cast Iron Over Time
Every time you scrape a metal spatula across the cooking surface, you’re creating micro-abrasion on the high points. Over months, this wears them down slightly.
The seasoned areas in the valleys aren’t touched as much, so they stay protected. Net result: the surface becomes more uniform.
It’s incredibly slow. But it’s also completely passive—just cook normally.
Which Utensils Work Best for This Method
Metal spatulas: Thin, flexible ones work best. Use them for everything—flipping, scraping, stirring.
Metal spoons and forks: Also helpful but less surface contact.
What to avoid: Plastic, silicone, wood. These won’t polish the surface (though they also won’t hurt seasoning).
Use metal utensils confidently. On properly seasoned cast iron, they don’t damage anything—they actually improve the surface over time.
Strategic Cooking to Enhance Smoothness
Foods That Build Seasoning and Smooth Surfaces
Cook these regularly:
- Bacon — Fat content builds seasoning beautifully
- Cornbread — The oil in the batter seasons the pan
- Fried chicken — Deep-frying builds thick seasoning layers fast
- Grilled cheese — Butter plus frequent spatula use = good polish
- Sautéed vegetables in oil — Regular maintenance seasoning
Basically: cook fatty foods where you’re stirring or flipping with a spatula. That’s the winning combination.
Avoiding Acidic Foods During the Breaking-In Period
Tomatoes, vinegar-based sauces, wine, citrus—these strip seasoning, especially on newly seasoned pans.
During the first 3-6 months, minimize acidic cooking. Let the seasoning build up first.
After that? Cook whatever. The seasoning will be thick enough to handle occasional acidic foods without problems.
Timeframe: How Long Until Rough Cast Iron Feels Smooth
3 months: Noticeably improved but still textured
6 months: Significantly smoother, food releases better
12 months: As good as it’s going to get without sanding (maybe 60-70% of sanded smoothness)
This assumes regular use—several times per week minimum. Cook once a month? Double or triple these timeframes.
Bottom line: it’s a long game. But it works.
Advanced Seasoning Techniques for Maximum Smoothness
For the best possible seasoning finish on smooth cast iron, use specific oils, precise temperatures, and multiple thin coats applied with careful technique.
Want to get nerdy about this? Let’s go.
The Flaxseed Oil Controversy for Smooth Finishes
Flaxseed creates the most beautiful initial seasoning. Dark, glassy, perfectly smooth. It’s like jewelry.
It also flakes off after a few months of use. Especially on smooth surfaces where there’s no texture to help it grab.
Why people love it: High polyunsaturated fat content, polymerizes into a very hard finish, looks incredible.
Why it fails: Too hard—brittle rather than flexible. Chips and peels with thermal cycling and normal use.
I don’t recommend it anymore, despite using it myself years ago. Too many people end up re-seasoning after their flaxseed coating fails.
Stick with grapeseed or canola.
Stovetop Seasoning vs. Oven Seasoning for Smoothness
Oven seasoning (what I described earlier) is best for building uniform, durable layers. Even heat, consistent results, works great on smooth iron.
Stovetop seasoning involves heating the oiled pan on a burner until it smokes, then wiping and repeating. Faster per layer (maybe 10-15 minutes vs. an hour), but less even—hot spots create uneven polymerization.
For smooth cast iron where you want that uniform glass finish, oven seasoning wins. Stovetop is fine for maintenance or touching up spots, but initial seasoning should be in the oven.
Multiple Thin Coats vs. Fewer Thick Coats
Always thin coats. Always.
Three ultra-thin coats beat one thick coat every single time. Thick coats don’t polymerize completely—they stay gummy and sticky underneath the hardened surface layer.
On smooth iron, this is super obvious. Sticky spots show up clearly on flat surfaces.
Remember: wipe until it looks too dry, then wipe more. That’s thin enough.
Temperature and Timing Adjustments for Glass-Like Finishes
Most guides say 400-500°F. That’s correct, but here’s the nuance:
Higher temps (475-500°F): Create harder finishes, polymerize more completely, work well with high-smoke-point oils.
Lower temps (400-425°F): Slightly softer finishes, better for oils with lower smoke points, less smoking in your kitchen.
For smooth iron, I prefer higher temps with grapeseed—creates the hardest possible finish.
Timing: One hour is standard. Some people do 90 minutes for the first coat on bare iron, then 60 minutes for subsequent coats. Probably overkill, but won’t hurt.
Maintaining Your Smooth Cast Iron Surface
To maintain smooth cast iron, clean gently after each use, avoid abrasive scrubbers, re-season occasionally when the finish looks dull, and cook with adequate fat to continuously build the seasoning.
You worked hard for that smooth surface. Don’t wreck it.
Cleaning Methods That Preserve Smoothness
What to Avoid: Abrasive Scrubbers and Metal Brushes
Don’t use:
- Steel wool (strips seasoning)
- Stiff metal brushes (too aggressive)
- Scouring pads (abrade the finish)
- Chain mail scrubbers used aggressively (these are fine if gentle, but easy to overdo)
The smooth surface doesn’t need aggressive scrubbing. Food releases easier anyway.
Best Cleaning Practices for Smooth Seasoning
Daily cleaning:
Wipe out the warm pan with paper towels. Done. Seriously, that’s usually enough.
For stuck food:
Coarse salt and a bit of oil, gentle scrub with a cloth, rinse with hot water, dry on stove.
For real messes:
Hot water and a soft brush or cloth. Scrub gently. The smooth surface lets food come off without serious effort.
Always dry thoroughly on the stovetop. Always apply a thin maintenance oil layer before storing.
Smooth cast iron is actually easier to clean than rough cast iron. Food doesn’t stick in texture, so it wipes away cleaner.
Re-Seasoning Schedule for Smooth Cast Iron
Full oven re-seasoning: Every 6-12 months, or when the finish looks dull/patchy.
Stovetop touch-up seasoning: Every few weeks—just heat the oiled pan until it smokes lightly, wipe, cool.
After every use: Wipe with thin oil layer (this is maintenance, not full seasoning).
Smooth iron holds seasoning better than rough iron long-term, so you’ll probably re-season less often once it’s established.
Cooking Techniques That Protect Your Smooth Finish
Preheat properly: 3-5 minutes before adding food. Prevents sticking that might tempt you to scrub hard later.
Use enough fat: Even well-seasoned smooth iron isn’t truly non-stick without some cooking fat. Don’t go dry.
Medium heat: Cast iron doesn’t need high heat. Medium works for almost everything and is gentler on seasoning.
Let food release: If something’s sticking, wait 30 seconds. It’ll release when ready. Don’t force it.
Treat your smooth iron like the precision tool it is. Not delicate, but not something to abuse either.
Common Mistakes When Trying to Smooth Cast Iron
People screw this up in predictable ways. Don’t be one of them.
Sanding Unevenly and Creating Low Spots
If you sit in one spot too long with a sander, you’ll create a depression. The pan won’t sit flat on the stove.
Keep moving. Overlap your passes. Check progress frequently.
Hand sanding makes this less likely but still possible if you focus on one area too much.
Removing Too Much Metal from the Pan
Cast iron is thick, but not infinitely so. Overly aggressive sanding can thin the bottom, creating hot spots or weak points.
You should only be removing maybe 0.003-0.005 inches of metal total. That’s basically nothing—just enough to level the texture.
If you can see a visible change in thickness, you’ve gone too far.
Not Removing All Seasoning Before Sanding
Sanding through seasoning is miserable. The polymerized oil gums up sandpaper instantly, requiring constant paper changes.
It also gives uneven results—some areas expose bare iron, others still have seasoning.
Strip completely first. Way easier.
Using the Wrong Grit Progression
Jumping from 80 grit to 400 grit doesn’t save time. You’ll spend forever trying to remove coarse scratches with fine paper.
Follow the progression: coarse → medium → fine. Each step should take roughly the same amount of time.
Skipping grits is false economy.
Inadequate Seasoning After Smoothing
Smooth bare iron is thirsty for seasoning. One or two coats isn’t enough.
Minimum 4 coats, ideally 5-6. Don’t skimp here after all that sanding work.
Inadequately seasoned smooth iron rusts fast and cooks poorly. All that effort wasted.
Expecting Instant Results
You won’t get glass-smooth perfection after your first sanding and seasoning session.
The best smooth cast iron develops over months of use. The initial smoothing and seasoning creates the foundation—cooking adds the final polish.
Be patient. It gets better with time.
Comparing Smooth Cast Iron to Rough: Performance Differences
Smooth cast iron cooks slightly better than rough cast iron due to improved food release, more even seasoning, and better contact between food and pan—though the difference is noticeable rather than dramatic for most cooking.
Is the difference worth the work? Depends on what you cook.
Does Smooth Cast Iron Actually Cook Better?
In measurable ways, yes.
Heat distribution: Identical. The metal thickness matters, not the surface texture.
Heat retention: Identical. Same reason.
Food release: Better on smooth iron. Noticeably so for eggs, fish, delicate foods.
Ease of cleaning: Easier with smooth iron. Food doesn’t catch in texture.
Appearance of cooked food: Smooth iron gives better sear marks and more even browning on flat foods (steaks, pancakes).
For most cooking (sautéing vegetables, frying chicken, baking cornbread), you won’t notice much difference. For eggs, crepes, fish, and delicate items, smooth iron is clearly superior.
Non-Stick Performance: Smooth vs. Rough Surfaces
Well-seasoned smooth iron approaches the non-stick performance of actual non-stick pans. Eggs slide around, spatulas glide, nothing sticks.
Well-seasoned rough iron is non-stick-ish. Foods release fine with enough preheat and fat, but there’s more friction.
The texture on rough iron provides micro-grip points where food can catch. Usually not a problem, but it’s there.
Smooth iron has no such points. Once properly seasoned, it’s slick as glass.
Heat Distribution and Retention Differences
None. This is determined by metal thickness and mass, not surface finish.
A thick, heavy Lodge cooks the same whether rough or smooth. A thin vintage skillet heats faster whether rough or smooth.
Smoothness affects how food contacts the pan, not how the pan handles heat.
Seasoning Adhesion on Smooth vs. Textured Iron
Rough iron: Seasoning grabs onto texture mechanically. Builds up faster initially, but can be uneven (pools in valleys).
Smooth iron: Seasoning relies entirely on chemical bonding to the iron. Slower to establish but more uniform, and ultimately more durable.
Long-term (1+ years of use), smooth iron develops better, more resilient seasoning. Short-term (first few months), rough iron might season slightly faster.
Either way, proper technique matters more than texture.
Vintage Cast Iron vs. Modern Rough Cast Iron
Vintage cast iron was machined smooth at the factory, making it naturally silky without additional work—modern cast iron is left rough to save manufacturing costs, though some new artisan brands offer smooth finishes at premium prices.
Want smooth iron without sanding? Buy old stuff or pay up for new artisan brands.
Why Old Cast Iron Was Machined Smooth
Manufacturing standards were different pre-1960. Smoothness was considered a mark of quality.
Companies like Griswold, Wagner, and Birmingham Stove & Range ground their cooking surfaces after casting, then polished them. Labor-intensive but created superior products.
After WWII, competition increased and costs mattered more. Companies started skipping the grinding step. By the 1970s, pretty much everyone left cast iron rough.
Lodge (the main survivor) never went back to smooth finishing. Too expensive for their price point.
Which Vintage Brands Have the Smoothest Surfaces
Griswold’s Polished Finish
Griswold (made in Erie, PA from 1865-1957) is the gold standard. Their skillets were polished to a near-mirror finish.
Run your hand over a Griswold. It’s like touching glass. Almost frictionless.
They’re also quite thin compared to modern iron, so they heat faster.
Downside: Expensive now. A #8 Griswold in good shape runs $60-150 depending on condition.
Wagner’s Smooth Casting
Wagner Ware (1881-1952, then bought by various companies) also made beautifully smooth iron, though slightly less refined than Griswold.
Still way smoother than any modern Lodge. Excellent cooking performance.
Prices similar to Griswold, maybe slightly less.
Birmingham Stove & Range Quality
Less famous than Griswold or Wagner, but BSR (Birmingham Stove & Range, made in Alabama) produced very smooth iron at lower prices.
Often labeled just “BSR” or with regional markings. You can find these for $20-40 if you hunt.
Quality’s excellent. Underrated brand.
Finding and Restoring Vintage Smooth Cast Iron
Check:
- Estate sales (best prices, best finds)
- Antique shops (higher prices, already cleaned usually)
- eBay (wide selection, can’t inspect in person)
- Flea markets (hit or miss)
- Facebook Marketplace (growing source)
Look for rust (it’s fine—cleans off), cracks (deal-breaker), and warping (also a deal-breaker). Surface rust doesn’t hurt smooth iron at all.
Restore using the same stripping methods described earlier (lye bath, oven cleaner, self-cleaning oven), then season properly.
Is Vintage Worth It vs. Smoothing Modern Cast Iron?
Vintage pros:
- Already smooth (no sanding work)
- Thinner, lighter, heats faster
- Better iron quality (arguably)
- Cool historical artifact
Vintage cons:
- Costs more upfront ($30-150 vs. $20-40 for Lodge)
- Might need restoration
- Can have damage you don’t notice initially
- Harder to find specific sizes
Smoothing modern iron pros:
- Cheaper to start
- You know exactly what you’re getting
- New production (no unknowns)
- Satisfying DIY project
Smoothing modern iron cons:
- Hours of work
- Thicker/heavier than vintage
- Will never be quite as refined as old Griswold
If you can find good vintage for $40-50, I’d buy that over sanding a new Lodge. Above $75, I’d probably just sand the Lodge and save money.
Brand-Specific Information for Rough Cast Iron
Different modern brands have different surface textures—knowing which ones are rougher helps you decide whether to smooth, buy different, or just accept the texture.
Lodge Cast Iron’s Textured Surface
Why Lodge Keeps Their Rough Finish
Cost. That’s it.
Grinding and polishing takes time and machinery. Lodge produces thousands of skillets daily. Skipping that step saves significant money, letting them sell a 10-inch skillet for $25-30 instead of $75-100.
They market it as “traditional” or say the texture “helps seasoning adhere.” Which is… partially true but mostly spin.
The texture doesn’t hurt performance much, so most people don’t care. Those who do? Either smooth it themselves or buy different brands.
Making Lodge Smoother Through Use
Cook with it regularly. Use metal spatulas. Give it 6-12 months.
Won’t become glass-smooth, but will improve noticeably. Many Lodge users report good non-stick performance after a year of use, even without sanding.
If the texture doesn’t actively bother you, just use it. It’ll be fine.
Smoother Modern Brands: Stargazer, Field Company, Butter Pat
New artisan brands are bringing back smooth finishes:
Field Company: CNC-machined smooth surface, lighter weight, modern aesthetics. About $125 for a 10-inch.
Stargazer: Hand-polished, smooth finish, thinner than Lodge. Around $88-98 for 10-inch.
Butter Pat Industries: Machined smooth, vintage-style design. Similar pricing to Field.
All of these feel closer to vintage iron than modern Lodge. The smoothness comes from the factory.
Worth the premium? If you cook a lot and don’t want to sand, yeah. If you’re casual about cast iron, probably not.
Budget Options for Starting with Smoother Iron
Honestly? Vintage is your best budget option for smooth iron.
Find a rusty old Wagner or BSR at an estate sale for $15-25, clean it up, season it. You’ve got smooth iron for the price of a new Lodge.
Otherwise, smooth modern iron costs money. No way around it.
Troubleshooting Smoothing and Seasoning Problems
Things go wrong when smoothing and seasoning cast iron—here’s how to fix common issues.
My Seasoning Won’t Stick to Sanded Cast Iron
Usually means the surface still has metal dust, oil residue from sanding, or wasn’t cleaned properly.
Fix: Wash with hot soapy water and a stiff brush. Rinse thoroughly. Dry completely. Try seasoning again.
If it still won’t stick, scrub with coarse salt to remove any invisible residue, wash again, and season.
Smooth iron can be slightly harder to season initially (no mechanical texture for grip), but proper cleaning solves this.
The Surface Looks Smooth But Still Feels Rough
You might not have sanded enough, or you stopped at too coarse a grit.
Check: can you see/feel scratch patterns? If yes, sand with finer grit until scratches disappear.
Or you’ve got thick, uneven seasoning making it feel rough. Strip and re-season with thinner coats.
Uneven Coloring After Seasoning Smooth Cast Iron
This is normal, especially for the first few coats. Smooth iron shows color variations more than rough iron.
As you build up layers, it evens out. By coat 5-6, it should look pretty uniform.
If it’s really splotchy (light gray spots, dark spots, bronze spots), you probably had uneven oil application. Add more coats.
Seasoning Flaking Off Smoothed Areas
Either the sanded surface wasn’t clean enough before seasoning, or you used too much oil and it didn’t polymerize completely.
Fix: Scrub off the flaking areas with salt and a scrubber. Clean thoroughly. Re-season those spots with ultra-thin oil coats.
Make sure you’re wiping nearly dry before baking.
Created Scratches or Gouges While Sanding
Minor scratches from sandpaper are fine—they’ll fill with seasoning.
Deep gouges from a sander sitting too long in one spot? Problematic but not fatal. They’ll show through seasoning and might collect food.
You can try to sand them out (more work, removes more metal), or just accept them and season over them. Won’t affect cooking performance much, just appearance.
Alternative Approaches to Getting Smooth Cast Iron
If sanding isn’t appealing, you’ve got other options for acquiring smooth cast iron.
Buying Pre-Smoothed Modern Cast Iron
Field Company, Stargazer, Butter Pat, and similar brands sell cast iron that’s already smooth.
Costs 3-4x what Lodge costs, but saves you hours of work and gives you new iron with warranties.
If your time’s valuable and you want smooth iron now, this is the move.
Having a Machine Shop Polish Your Pan
Some machine shops or welding shops will polish cast iron on buffing wheels for $30-75 depending on the shop.
Results are often better than home sanding—professional equipment creates a more uniform finish.
Call around. Not every shop does this, but some will.
Electrolysis and Chemical Stripping Before Smoothing
If you’re restoring rusty vintage iron or heavily gunked-up modern iron, electrolysis or lye baths strip everything down to bare metal before you sand.
This gives you a clean slate. Better results than trying to sand through rust and old seasoning.
Process: strip completely → sand smooth → season properly.
Starting with Carbon Steel Instead
Here’s a thought: carbon steel pans (like de Buyer, Matfer, or Lodge’s carbon steel) are smooth from the factory, lighter than cast iron, and season similarly.
They heat and cool faster (thinner metal), but develop comparable non-stick properties.
If you want smooth cookware without sanding cast iron, carbon steel’s worth considering. Not the same thing, but fills a similar niche.