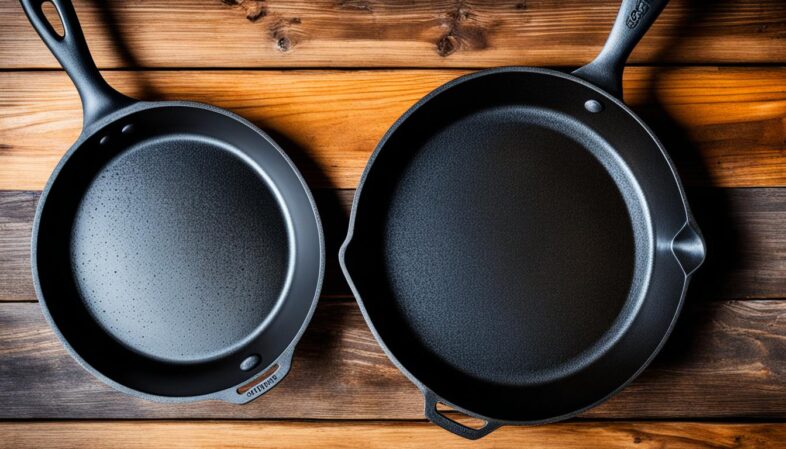
Table of Contents
- 1 Introduction
- 2 Quick Answer: Carbon Steel vs Cast Iron Skillet Comparison
- 3 What Is a Cast Iron Skillet?
- 4 What Is a Carbon Steel Skillet?
- 5 Carbon Steel Skillet vs Cast Iron Skillet: Head-to-Head Comparison
- 6 Cooking Performance Comparison
- 7 Seasoning: Carbon Steel vs Cast Iron Skillet
- 8 Durability and Longevity
- 9 Maintenance and Care Requirements
- 10 Reactivity With Acidic Foods
- 11 Versatility and Cooking Applications
- 12 Price Comparison: Carbon Steel vs Cast Iron Skillet
- 13 Carbon Steel Skillet vs Cast Iron Skillet: Which Should You Choose?
Introduction
The main differences between carbon steel skillets and cast iron skillets come down to weight, heat responsiveness, and cooking technique—carbon steel pans weigh 25-30% less and adjust temperature faster, while cast iron retains heat longer and costs significantly less.
You’ve probably stood in the cookware aisle or scrolled through online reviews, trying to decide which pan deserves space in your kitchen. Both options promise a naturally non-stick surface when properly seasoned. Both can last decades with the right care. Both develop that coveted dark patina professional chefs prize.
The choice isn’t obvious.
What makes this decision challenging:
- Similar appearance – Dark, matte surfaces that look nearly identical
- Overlapping capabilities – Both excel at high-heat searing and oven cooking
- Comparable care requirements – Neither works with dishwashers; both need seasoning
- Conflicting advice – Some cooks swear by cast iron’s tradition, others insist carbon steel performs better
This article will help you I will talk about my which pan sears a steak faster, which one your wrist will thank you for using, and which material responds better when you need to drop the temperature quickly for delicate foods.
We’ll compare eight critical factors that affect your cooking:
| Comparison Factor | Why It Matters |
|---|---|
| Weight & handling | Impacts ease of use during sautéing and cleaning |
| Heat distribution | Determines hot spots and cooking consistency |
| Temperature response | Affects control during time-sensitive techniques |
| Seasoning process | Influences maintenance effort and non-stick performance |
| Cooking versatility | Shows which dishes each pan handles best |
| Durability | Reveals long-term value and replacement timeline |
| Reactivity | Limits or expands recipe options |
| Price range | Helps match budget to performance needs |
Cast iron might suit your cooking style if you prioritize heat retention for dishes that go from stovetop to oven. Carbon steel could be the better investment if you frequently toss vegetables or flip delicate fish fillets. Some cooks find both pans earn their place once they understand each material’s strengths.
Quick Answer: Carbon Steel vs Cast Iron Skillet Comparison
Carbon steel skillets weigh 3-4 pounds for a 12-inch pan compared to cast iron’s 5-8 pounds, heat up in 3-5 minutes versus 8-10 minutes, and respond to temperature changes within seconds while cast iron takes 2-3 minutes to adjust.
This table shows how the two materials stack up across factors that affect daily cooking:
| Feature | Cast Iron Skillet | Carbon Steel Skillet |
|---|---|---|
| Weight (12-inch) | 5-8 lbs | 3-4 lbs |
| Preheat time | 8-10 minutes | 3-5 minutes |
| Heat response | Slow (2-3 minutes) | Fast (15-30 seconds) |
| Heat retention | Excellent | Very good |
| Maneuverability | Limited | High |
| Seasoning difficulty | Easy | Moderate |
| Initial cost | $15-$200 | $30-$300 |
| Warp resistance | Excellent | Good |
| Best cooking style | Steady-heat dishes | Quick technique changes |
Weight and Handling Differences
Cast iron construction creates pans that strain the wrist during extended cooking sessions. A 10-inch Lodge cast iron skillet weighs 5 pounds empty. Add food and you’re maneuvering 7-8 pounds one-handed. The same size carbon steel pan from Matfer Bourgeat weighs 3.3 pounds.
Practical implications:
- Sautéing vegetables – Carbon steel allows proper pan-tossing technique
- Flipping omelets – Lighter weight prevents wrist fatigue
- Pouring sauces – Cast iron requires two hands for control
- Stovetop-to-sink – Carbon steel reduces strain during cleanup
Heat Performance at a Glance
The thinner carbon steel construction (1.5-2.5mm) heats faster than cast iron’s 3-5mm thickness. You’ll wait 3-5 minutes for carbon steel to reach searing temperature. Cast iron demands 8-10 minutes for even heat distribution.
Temperature responsiveness separates these materials most dramatically. Drop the heat under carbon steel and the pan cools within 30 seconds. Cast iron holds its temperature for 2-3 minutes after you reduce the flame.
What this means for cooking:
- Searing then reducing – Carbon steel prevents overcooking delicate proteins
- Maintaining steady heat – Cast iron keeps cornbread baking at consistent temperature
- Quick stir-fries – Carbon steel matches wok-style cooking demands
- Thick steaks – Cast iron’s retained heat creates better crust
Maintenance Requirements
Both materials require seasoning, but the process differs slightly. Cast iron often arrives pre-seasoned from manufacturers like Lodge. Most carbon steel pans ship with a protective coating you must remove before the first seasoning.
Cleaning comparison:
| Task | Cast Iron | Carbon Steel |
|---|---|---|
| Daily wash | Hot water + brush | Hot water + brush |
| Soap usage | Small amounts OK | Small amounts OK |
| Drying method | Stovetop heat | Stovetop heat |
| Oil application | Thin layer | Thin layer |
| Rust susceptibility | Moderate | Moderate |
| Re-seasoning frequency | Every 3-6 months | Every 2-4 months |
Acidic foods strip seasoning from both materials. Tomato sauce cooked for 20 minutes will damage the patina on either pan. The seasoning on carbon steel repairs itself faster due to the thinner coating requirement.
Price and Value Assessment
Budget cast iron from Lodge costs $20-30 for quality performance. Premium brands like Finex or Field Company charge $100-200 for smoother machining and lighter designs. Carbon steel starts at $30 for basic models from Cuisinart. Professional-grade options like De Buyer or Matfer Bourgeat run $50-120.
Cost per use over 10 years:
- Cast iron (Lodge): $0.05-0.08 per use
- Carbon steel (De Buyer): $0.10-0.15 per use
Neither pan wears out with proper maintenance. The initial price difference becomes negligible across decades of cooking. Performance preferences matter more than the $20-50 price gap between comparable models.
Usage Recommendations
Cast iron suits cooks who prepare dishes requiring steady heat. Baked frittatas, braised chicken thighs, and seared steaks benefit from the heat retention. The weight becomes less relevant when the pan stays relatively stationary.
Carbon steel serves cooks who manipulate food constantly during preparation. Tossed vegetables, flipped crepes, and stir-fried noodles demand the lighter construction. Professional kitchens stock carbon steel for stations requiring speed and precision.
Optimal applications:
Cast Iron excels at:
- Cornbread and skillet cookies
- Roasted chicken with vegetables
- Pan pizza with crispy crust
- Deep-dish frittatas
- Reverse-seared thick steaks
Carbon Steel excels at:
- Stir-fried vegetables and proteins
- Pan-tossed Brussels sprouts
- Thin crepes and delicate omelets
- Hash browns requiring flipping
- Restaurant-style sautéed fish
The verdict shifts based on your dominant cooking techniques. Both pans perform competently across most applications. The differences become pronounced at the extremes of technique and temperature manipulation.
What Is a Cast Iron Skillet?
A cast iron skillet is a heavy-duty cooking pan made from molten iron poured into sand molds, resulting in a thick 3-5mm cooking surface that weighs 5-8 pounds for standard 12-inch sizes and retains heat longer than any other common cookware material.
Material Composition and Construction
Cast iron contains 97-98% iron mixed with 2-3% carbon and trace amounts of silicon. Foundries heat iron to 2,500°F until it liquefies. The molten metal gets poured into sand molds shaped like skillets. This casting process creates the thick walls and slightly porous surface texture.
Manufacturing creates two distinct types:
| Type | Production Method | Surface Texture | Price Range |
|---|---|---|---|
| Traditional cast iron | Sand casting only | Rough, pebbly | $15-$50 |
| Machined cast iron | Sand cast + surface grinding | Smooth, polished | $80-$200 |
Modern brands like Lodge skip the grinding step to reduce costs. Vintage Wagner and Griswold skillets were machined smooth, which explains their premium pricing on secondhand markets. Field Company and Smithey replicate this smoother finish today through additional manufacturing steps.
The thick construction serves a purpose beyond durability. That 4-5mm of iron stores tremendous thermal energy once heated. A fully preheated 12-inch Lodge skillet holds enough heat to sear four burger patties without a significant temperature drop.
Key Characteristics of Cast Iron Cookware
Cast iron’s defining trait is its thermal mass. The material stores heat in proportion to its weight. More mass equals more stored energy. This explains why cast iron maintains consistent temperatures during cooking even when cold food hits the surface.
Performance characteristics:
- Heat retention: Stays hot for 5-10 minutes after removing from burner
- Heat distribution: Requires 8-10 minute preheat for even temperature across surface
- Temperature ceiling: Safe to 500°F+ in ovens; no upper limit concerns
- Cooking surface: Develops naturally non-stick patina through oil polymerization
- Handle design: Integral to pan body; becomes extremely hot during cooking
The porous surface structure traps polymerized oil during seasoning. Each layer of seasoned fat fills microscopic gaps in the iron. Ten to fifteen cooking sessions create a dark, slick surface that releases eggs and fish without sticking.
Lodge pre-seasons their skillets at the factory using soy-based oil baked at 450°F. This initial coating protects against rust during shipping and storage. The seasoning isn’t complete—you’ll build additional layers through normal cooking with fats and oils.
Common brands and quality indicators:
| Brand | Price Point | Notable Features |
|---|---|---|
| Lodge | $20-$60 | Rough texture, pre-seasoned, lifetime warranty |
| Victoria | $25-$70 | Slightly smoother than Lodge, Mexican-made |
| Field Company | $100-$150 | Machined smooth, lighter weight (20% less) |
| Finex | $150-$250 | Octagonal design, polished surface, steel spring handle |
| Smithey | $150-$200 | Hand-finished, heirloom quality, smooth cooking surface |
Weight indicates thickness and quality to some degree. A 10-inch skillet weighing less than 4.5 pounds likely has thin walls that won’t retain heat effectively. Handles matter too—shorter handles reduce leverage for lifting but prevent oven rack interference.
The cooking surface requires inspection before purchase. Deep pitting or severe roughness will never smooth out completely, no matter how many seasoning layers you apply. Minor texture disappears after six months of regular use as seasoning accumulates in the valleys.
Cast iron’s molecular structure makes it virtually indestructible through normal use. You can drop it, scratch it with metal utensils, or leave it in a campfire overnight. Cracks form only from thermal shock—plunging a screaming-hot pan into cold water. Warping doesn’t occur because the thick construction resists deformation even at extreme temperatures.
This durability creates the heirloom reputation. A properly maintained cast iron skillet functions identically after 50 years of use. The seasoning improves over time as layers compound. Vintage skillets from the 1950s often outperform new ones due to decades of accumulated polymerized oil and slight surface smoothing from metal spatula use.
What Is a Carbon Steel Skillet?
A carbon steel skillet is a lightweight cooking pan forged or stamped from 99% iron and 1% carbon, creating a 1.5-2.5mm thick surface that weighs 3-4 pounds for 12-inch sizes and heats up 60% faster than cast iron while maintaining similar seasoning and non-stick properties.
Material Composition and Construction
Carbon steel contains 99% iron alloyed with approximately 1% carbon. This ratio creates a material harder than pure iron but more malleable than cast iron’s 2-3% carbon content. The reduced carbon percentage allows manufacturers to roll and shape the metal at lower temperatures without cracking.
Two manufacturing methods dominate production:
| Method | Process | Thickness Range | Price Impact | Common Brands |
|---|---|---|---|---|
| Stamped | Sheet metal cut and pressed into shape | 1.5-2mm | Lower cost | Vollrath, Cuisinart |
| Hand-forged | Heated steel hammered over molds | 2-3mm | Premium pricing | De Buyer Mineral B, Matfer Bourgeat |
Stamped pans start as flat steel sheets. Hydraulic presses punch out circular blanks. Additional presses shape the blank into a pan with sloped sides. The handle gets welded or riveted separately. This process takes minutes per pan and keeps costs down.
Hand-forged carbon steel follows traditional blacksmithing techniques. Craftsmen heat steel discs to 1,800°F until malleable. Hammers or mechanical presses shape the glowing metal over forms. The forging process creates a denser molecular structure with slightly better heat distribution. Handles form as integral parts of the pan body.
The thinner gauge differentiates carbon steel from cast iron structurally. That 1.5-2.5mm thickness responds faster to temperature changes because less thermal mass requires heating. A Matfer Bourgeat 11.875-inch skillet weighs 3.9 pounds compared to 6.5 pounds for the equivalent Lodge cast iron.
Thickness variations by manufacturer:
- De Buyer Mineral B: 2.5-3mm (thicker, more cast iron-like)
- Matfer Bourgeat: 2.5mm (professional standard)
- Lodge Carbon Steel: 2mm (mid-weight option)
- BK Cookware: 2mm (European design)
- Vollrath: 1.5mm (lightweight, restaurant supply)
Thicker gauges bridge the gap between carbon steel and cast iron performance. De Buyer’s 3mm construction retains heat nearly as well as thin cast iron. The trade-off comes in weight—their 12.5-inch skillet weighs 5.3 pounds, approaching cast iron territory.
Key Characteristics of Carbon Steel Cookware
Carbon steel’s reduced thermal mass creates the defining performance difference from cast iron. The pan reaches 400°F in 3-4 minutes over medium-high heat. You’ll wait 8-10 minutes for cast iron to hit the same temperature. This responsiveness makes carbon steel the standard in professional kitchens where speed matters.
Performance specifications:
- Heat-up time: 3-5 minutes to reach searing temperature (450°F+)
- Temperature adjustment: Responds to burner changes within 30-45 seconds
- Heat retention: Maintains temperature for 2-3 minutes after heat removal
- Oven safety: 600°F+ capability; handles may have lower limits
- Surface development: Builds non-stick patina faster than cast iron
The material conducts heat 20% more efficiently than cast iron. This improved conductivity eliminates hot spots common in budget cast iron pans. A carbon steel surface shows temperature variations of only 15-20°F between center and edges after proper preheating. Cast iron can vary by 40-50°F.
Professional kitchens favor carbon steel for sauté stations where cooks constantly adjust temperatures. The pan cools within seconds when you reduce heat, preventing delicate fish or vegetables from overcooking. Cast iron holds its temperature stubbornly, which works perfectly for applications requiring steady heat but fails when precision matters.
Why restaurants stock carbon steel:
| Cooking Station | Carbon Steel Advantage |
|---|---|
| Sauté station | Quick temperature changes for protein cookery |
| Vegetable prep | Rapid heating for blanching and quick sears |
| Breakfast line | Fast recovery between orders of eggs and pancakes |
| Wok cooking | Similar responsiveness to traditional carbon steel woks |
The sloped sides differ from cast iron’s straighter walls. Most carbon steel pans feature 30-45 degree angles from base to rim. This design facilitates tossing and flipping techniques. Cast iron typically uses 15-25 degree slopes optimized for cornbread and stationary cooking.
Carbon steel develops seasoning through the same polymerization process as cast iron. Fats heated above their smoke point bond to the iron surface. The thinner metal allows seasoning to build faster—you’ll achieve decent non-stick properties after 5-6 uses compared to 10-15 for cast iron. The thinner seasoning layer remains more delicate and strips more easily from acidic foods.
Popular carbon steel skillet brands:
- Matfer Bourgeat: French manufacturer supplying Michelin-starred restaurants since 1814
- De Buyer: Multiple lines including Mineral B (beeswax finish) and Prima Matera (uncoated)
- Lodge: American brand’s carbon steel line launched 2020, pre-seasoned with oil
- Made In: Direct-to-consumer brand offering 5-ply clad and carbon steel options
- BK Cookware: Dutch manufacturer with ergonomic handle designs
- Vollrath: Restaurant supply standard, stamped construction, budget-friendly
Handle design varies significantly across brands. Matfer uses a traditional round steel handle that gets hot quickly. De Buyer employs an epoxy-coated cast iron handle that stays cooler but limits oven temperature to 400°F. Lodge adds silicone sleeves for grip and heat protection during stovetop cooking.
The blue-gray appearance of new carbon steel pans comes from the manufacturing process. Heat oxidation during forging creates a thin protective layer. Some manufacturers apply beeswax or mineral oil coatings for rust prevention during shipping. These coatings must be scrubbed off before initial seasoning, unlike pre-seasoned cast iron that’s ready to cook.
Carbon steel warps when exposed to extreme temperature differentials. Heating one section while another stays cool creates uneven expansion. The thin metal flexes under this stress. A warped pan rocks on flat stovetops and concentrates heat in raised areas. Proper preheating over low heat for 2-3 minutes before increasing temperature prevents this damage.
Carbon Steel Skillet vs Cast Iron Skillet: Head-to-Head Comparison
The most significant difference between carbon steel and cast iron skillets lies in weight and heat responsiveness—carbon steel’s 3-4 pound construction heats in 3-5 minutes and adjusts temperature within 30 seconds, while cast iron’s 5-8 pound mass requires 8-10 minutes to preheat and holds steady heat for 2-3 minutes after adjustment.
Weight and Maneuverability
Cast Iron Skillet Weight
Cast iron construction creates pans that challenge wrist strength during extended cooking. A 10-inch Lodge skillet weighs 5 pounds empty. Add two chicken breasts and you’re lifting 6.5 pounds one-handed. The 12-inch version tips the scale at 8 pounds before ingredients.
Weight by size:
| Pan Size | Typical Cast Iron Weight | With Food (Estimate) |
|---|---|---|
| 8-inch | 3.5-4 lbs | 5-5.5 lbs |
| 10-inch | 5-5.5 lbs | 6.5-7 lbs |
| 12-inch | 7-8 lbs | 9-10 lbs |
| 15-inch | 11-13 lbs | 14-16 lbs |
Storage presents challenges in compact kitchens. The weight stresses cabinet shelves not designed for concentrated loads. Wall-mounted pot racks sag under multiple cast iron pans. Many cooks store one skillet permanently on the stovetop to avoid repeated lifting.
Pouring pan sauces or transferring cooked food requires two-handed control. The off-balance weight distribution when tilting makes one-handed pours risky. Hot oil or sauce spills cause serious burns when heavy pans slip from tired grips.
Carbon Steel Skillet Weight
Carbon steel reduces lifting strain by 30-40% compared to cast iron equivalents. A 12-inch Matfer Bourgeat weighs 3.9 pounds empty. The same size Lodge carbon steel comes in at 4.2 pounds. Both remain manageable for single-handed maneuvers throughout meal preparation.
Carbon steel weight comparison:
| Pan Size | Carbon Steel Weight | Weight Difference vs Cast Iron |
|---|---|---|
| 8-inch | 2-2.5 lbs | 1.5-2 lbs lighter |
| 10-inch | 3-3.5 lbs | 2 lbs lighter |
| 12-inch | 3.9-4.5 lbs | 3-3.5 lbs lighter |
| 14-inch | 5.5-6 lbs | 4-5 lbs lighter |
The reduced weight enables proper sauté technique. Professional cooks toss vegetables by jerking the pan forward and upward in a fluid motion. This technique evenly distributes ingredients and prevents sticking. Cast iron’s weight makes this movement exhausting after the first few tosses. Carbon steel allows 20-30 tosses without arm fatigue.
Wrist strain becomes noticeable during longer cooking sessions. Stir-frying for 8-10 minutes with constant pan movement taxes the forearm muscles. Carbon steel maintains comfort throughout. Cast iron forces most cooks to use spatulas instead of pan manipulation.
Practical handling differences:
- Flipping omelets: Carbon steel allows the classic wrist-flip technique
- Tossing hash browns: Light weight prevents burnt sections from stationary cooking
- Transferring to serving plates: Single-handed pouring without spills
- Cleaning at the sink: Less awkward positioning during scrubbing
- Oven removal: Easier control when using thick oven mitts
Age and physical capability factor into material selection. Cooks over 60 or those with arthritis find carbon steel significantly easier to handle. The weight difference seems minor on paper but compounds during actual cooking when the pan gets manipulated dozens of times.
Heat Distribution and Retention
How Cast Iron Handles Heat
Cast iron heats unevenly during the preheat phase. The section directly over the burner reaches 400°F while edges lag at 300°F. This temperature gradient creates hot spots that burn food in the center while leaving edges undercooked. Proper preheating for 8-10 minutes allows heat to conduct throughout the mass, evening out the temperature.
Preheating timeline for even heat:
| Time | Center Temp | Edge Temp | Temperature Variance |
|---|---|---|---|
| 2 minutes | 350°F | 220°F | 130°F difference |
| 5 minutes | 425°F | 340°F | 85°F difference |
| 8 minutes | 450°F | 420°F | 30°F difference |
| 10 minutes | 450°F | 440°F | 10°F difference |
The thermal mass stores enormous heat energy once fully preheated. Adding cold ingredients barely affects surface temperature. Four frozen burger patties dropped into a preheated 12-inch Lodge cause only a 40-50°F temperature drop. The pan recovers to searing temperature within 60 seconds.
This heat retention creates the superior crust on thick steaks. The surface stays hot enough (400°F+) to trigger the Maillard reaction continuously. Thinner pans lose heat when cold meat makes contact, resulting in gray, steamed protein instead of brown crust.
Cast iron maintains steady oven temperatures for baked dishes. A skillet of cornbread batter sits in a 425°F oven surrounded by fluctuating air temperature. The iron mass buffers these fluctuations, keeping the batter at a consistent temperature. The bottom crust browns evenly without burnt spots.
Optimal cast iron applications:
- Reverse-seared ribeyes: Oven finish to temperature, then sear in screaming-hot pan
- Pan pizza: Even bottom heat creates crispy crust without burnt spots
- Cornbread: Consistent temperature from edges to center
- Roasted chicken thighs: Maintains browning temperature when fat renders
- Shakshuka: Eggs cook evenly in steady-temperature tomato sauce
Temperature adjustment happens slowly in cast iron. Reduce the burner from high to medium and the pan surface stays at 425°F for 2-3 minutes. The stored thermal energy dissipates gradually through the thick metal. This delay causes problems when cooking delicate items that need precise temperature control.
How Carbon Steel Handles Heat
Carbon steel reaches cooking temperature in 3-5 minutes over medium-high heat. The thinner gauge requires less total energy to heat through. Temperature variance between center and edges stays within 15-20°F during preheat, compared to cast iron’s 40-50°F variance at the same stage.
Heat-up efficiency comparison:
| Material | Time to 400°F | Time to 450°F | Energy Required |
|---|---|---|---|
| Carbon steel (2mm) | 3 minutes | 4 minutes | Lower gas/electric use |
| Cast iron (4mm) | 7 minutes | 9 minutes | Higher energy consumption |
The improved conductivity stems from carbon steel’s crystalline structure. Heat moves through the material 20% faster than through cast iron’s more porous composition. This faster conduction eliminates the hot spot directly over the burner flame.
Temperature responsiveness defines carbon steel’s main advantage. Turn the heat down and the pan surface cools within 30-45 seconds. Increase the flame and temperature rises proportionally within the same timeframe. This immediate feedback allows cooks to control the cooking environment precisely.
Thin fish fillets demonstrate this control dramatically. Salmon skin crisps at 375-400°F. The flesh overcooks above 140°F internal temperature. Carbon steel allows you to sear the skin side at high heat, then reduce temperature immediately when you flip to finish cooking gently. Cast iron holds high heat too long, overcooking the flesh before you can compensate.
Temperature response test:
A Matfer Bourgeat 12-inch pan at 450°F was tested by reducing burner heat to low. Surface temperature dropped to 350°F within 45 seconds. The same test with Lodge cast iron showed only a 30°F drop in the first minute. After 3 minutes, cast iron still registered 390°F while carbon steel had cooled to 325°F.
Heat retention trades off against responsiveness. Carbon steel maintains searing temperature for 2-3 minutes after heat removal. This works fine for most applications—the pan stays hot enough to finish cooking after you kill the flame. The shorter retention period becomes limiting only when cooking large quantities that require multiple batches.
Stir-frying reveals carbon steel’s design intent. Traditional wok cooking demands rapid temperature changes. Vegetables sear at high heat for 30 seconds, then the cook reduces heat to prevent burning while adding sauce. Carbon steel mimics wok performance in a flat-bottomed format. The quick heat response prevents the burnt-outside, raw-inside problem common when stir-frying in cast iron.
Carbon steel excels when you need:
- Precise temperature control for delicate proteins
- Quick temperature drops to prevent overcooking
- Rapid heating between cooking batches
- Restaurant-style sauté technique with constant adjustment
- Wok-like responsiveness for Asian cooking techniques
Oven performance matches cast iron’s capabilities with one exception. Both materials withstand 500°F+ oven temperatures. The thinner carbon steel heats faster in the oven environment but also cools faster when removed. This matters little for most recipes—a minute of difference won’t affect a frittata or skillet cookie.
The reduced thermal mass affects consecutive batch cooking. Searing six steaks requires three batches in a 12-inch pan. After the first two steaks, cast iron maintains searing temperature. Carbon steel drops 50-60°F and requires 60-90 seconds of reheating between batches. For single servings or small households, this distinction remains academic.
Cooking Performance Comparison
Carbon steel skillets outperform cast iron for quick-cooking techniques like stir-frying and sautéing due to faster temperature response, while cast iron delivers superior results for steady-heat applications like searing thick steaks, baking cornbread, and dishes requiring oven finishing.
Searing and High-Heat Cooking
Cast Iron Advantages for Thick Steaks
Cast iron creates the darkest crust on steaks 1.5 inches or thicker. The massive heat storage maintains surface temperature above 400°F even when cold protein makes contact. A 16-ounce ribeye at 38°F refrigerator temperature causes a 40-50°F drop in cast iron surface temperature. The pan recovers within 45-60 seconds.
Searing temperature retention test:
| Pan Type | Initial Temp | Temp After Steak Contact | Recovery Time |
|---|---|---|---|
| Cast iron (12-inch Lodge) | 450°F | 400°F | 45 seconds |
| Carbon steel (12-inch Matfer) | 450°F | 370°F | 90 seconds |
The extended contact time at high temperature drives the Maillard reaction deeper into the meat surface. This creates a crust measuring 1-2mm thick compared to the 0.5-1mm crust from carbon steel. The difference appears minor but affects texture significantly—cast iron produces crunchier, more substantial crusts.
Thick pork chops and bone-in chicken breasts benefit similarly. The steady heat penetrates far enough to render fat deposits near the bone while maintaining exterior browning. Temperature fluctuations in thinner pans cause the surface to brown, then stop browning as the pan cools, resulting in uneven color.
Carbon Steel Benefits for Quick Sears
Carbon steel excels when searing thin proteins that cook through quickly. A 3/4-inch New York strip needs only 2-3 minutes per side. The reduced thermal mass prevents excessive heat transfer that would overcook the interior while building crust.
Scallops demonstrate this advantage clearly. The ideal scallop shows a golden-brown crust on each flat side with a translucent center. Cast iron’s retained heat continues cooking after you remove the scallop, often resulting in an opaque, rubbery texture. Carbon steel cools quickly enough to stop cooking the moment you lift the scallop.
Optimal protein thickness by pan type:
- Cast iron: Steaks 1.25″+ thick, whole chicken breasts, thick pork chops
- Carbon steel: Fish fillets, thin steaks under 1″, shrimp, scallops, pounded cutlets
- Either works: Standard 1″ ribeyes, burger patties, bone-in thighs
Restaurant kitchens sear dozens of portions consecutively. Carbon steel’s faster recovery between items maintains consistent output. A sauté cook can sear a salmon fillet, wipe the pan, and start the next order within 90 seconds. Cast iron requires 2-3 minutes to stabilize temperature after wiping.
Achieving Restaurant-Quality Crust With Both
Both materials produce excellent crusts when preheated properly and used within their optimal applications. The technique matters more than the material for most home cooking scenarios.
Crust-building technique comparison:
| Step | Cast Iron Method | Carbon Steel Method |
|---|---|---|
| Preheat | 8-10 minutes medium heat | 4-5 minutes medium-high heat |
| Oil application | Thin layer on pan surface | Oil brushed on protein |
| Protein placement | Room temp preferred | Cold protein acceptable |
| Flip timing | When releases easily (4-5 min) | Visual crust check (3-4 min) |
| Second side | Reduce heat slightly | Maintain temperature |
Pat protein completely dry before searing in either pan. Surface moisture creates steam that prevents browning. Paper towels remove excess moisture better than cloth towels. Salt draws moisture out, so salt immediately before cooking rather than 30 minutes ahead.
Sautéing and Stir-Frying
Why Carbon Steel Excels at Quick Cooking Techniques
Carbon steel’s light weight enables the tossing motion essential to proper sautéing. The cook jerks the pan forward and up, causing ingredients to flip and redistribute. This movement ensures even cooking and prevents sticking. A 12-inch carbon steel pan weighing 4 pounds allows 30-40 tosses without arm fatigue.
Sauté technique requirements:
- Pan weight: Under 5 pounds loaded with ingredients
- Temperature adjustment: Response within 30-60 seconds
- Handle control: Comfortable single-handed grip
- Heat recovery: Quick reheating between ingredient additions
Vegetable sautés benefit from temperature modulation during cooking. Brussels sprouts start at high heat to brown the cut faces (425-450°F). Once browned, temperature drops to 325-350°F to finish cooking the interiors without burning the exteriors. Carbon steel adjusts in 30 seconds. Cast iron takes 2-3 minutes to cool, often burning the vegetables before reaching the target temperature.
Stir-frying demands constant food movement and rapid temperature changes. Traditional carbon steel woks work specifically because of these properties. Flat-bottomed carbon steel skillets replicate wok performance on Western stovetops. The vegetables sear against the hot metal for seconds, then move to cooler areas of the pan while the next batch sears.
Cast Iron Limitations for Fast-Paced Cooking
Cast iron’s 7-8 pound weight makes pan-tossing impractical for most cooks. The alternative requires constant stirring with a spatula. This approach works but increases cooking time—ingredients spend less time in direct contact with the hot surface, reducing browning efficiency.
Temperature sluggishness creates a narrow window between undercooked and burnt. Green beans need 5-6 minutes at 375°F to develop char marks while staying crisp-tender. Cast iron preheated to 400°F won’t cool to 375°F for 2-3 minutes even on reduced heat. The beans burn before the pan temperature drops.
Professional kitchens avoid cast iron for sauté stations. The combination of weight and thermal inertia slows service during busy periods. A cook preparing 40 dinner orders cannot wait 2-3 minutes between temperature adjustments. Carbon steel’s responsiveness maintains the pace required in commercial settings.
Cooking time comparison for common sautés:
| Dish | Carbon Steel Time | Cast Iron Time | Quality Difference |
|---|---|---|---|
| Garlic green beans | 6 minutes | 8-9 minutes | Carbon steel: better color retention |
| Mushroom sauté | 8 minutes | 11 minutes | Carbon steel: less moisture release |
| Diced chicken breast | 7 minutes | 7 minutes | Similar results |
| Bell pepper strips | 5 minutes | 7-8 minutes | Carbon steel: crispier texture |
Tossing Ability Comparison
The physics of pan-tossing require specific weight thresholds. Most cooks handle 5 pounds comfortably for brief tosses. Beyond 6 pounds, the motion becomes difficult to execute smoothly. Add ingredients and cast iron exceeds comfortable tossing weight.
Carbon steel stays within the manageable range even when loaded. A 12-inch pan with 1 pound of vegetables totals 5 pounds. The tossing motion remains fluid throughout cooking. This capability translates directly to better browning—ingredients spend more time touching the hot surface rather than being stirred away from it.
Home cooks with smaller builds or reduced grip strength find cast iron prohibitive for tossed preparations. A 10-inch Lodge at 5.5 pounds approaches the upper limit before adding food. Carbon steel at 3.5 pounds provides substantial headroom for ingredients while maintaining control.
Baking and Oven Use
Both Skillets Excel in Oven Applications
Cast iron and carbon steel perform identically for most baked skillet recipes. Both materials withstand 500°F+ oven temperatures. Both conduct heat efficiently to create browned bottom crusts. Both transition seamlessly from stovetop to oven.
Oven-safe temperature limits:
| Pan Type | Safe Temperature | Limiting Factor |
|---|---|---|
| Cast iron (bare handle) | 600°F+ | No practical limit |
| Carbon steel (bare handle) | 600°F+ | Potential warping above 550°F |
| Cast iron (silicone handle) | 400°F | Silicone degradation |
| Carbon steel (epoxy handle) | 400°F | Epoxy melting point |
Skillet cornbread demonstrates equal performance. The batter pours into a preheated pan, creating immediate bottom crust formation. Both materials maintain consistent temperature throughout the 20-25 minute bake time. The finished cornbread shows identical browning patterns and texture.
Frittatas, Dutch babies, and skillet cookies produce comparable results in either pan. The recipes depend on steady oven heat rather than thermal mass or responsiveness. A cast iron frittata finishes in 12-14 minutes. Carbon steel requires 12-14 minutes. The weight difference matters only when removing the hot pan from the oven.
Temperature Limitations for Each
Handle construction determines practical oven temperature limits more than the pan material itself. Traditional bare metal handles withstand any home oven temperature. Lodge’s silicone handle covers melt above 400°F. De Buyer’s epoxy-coated handles degrade at similar temperatures.
Carbon steel warps when heated above 550°F repeatedly. The thin gauge expands unevenly under extreme heat. One section may be slightly hotter due to oven hot spots, causing that area to expand more than surrounding metal. The pan develops a wobble on flat surfaces. This rarely occurs in home ovens but affects restaurant broiler use.
Handle material guide:
- Bare cast iron handle: No temperature limits, becomes extremely hot
- Bare steel handle: No temperature limits, heats faster than cast iron
- Silicone sleeve/cover: Remove before oven use above 400°F
- Epoxy coating: Permanent coating limits oven use to 400°F
- Wood handle: Unsuitable for oven use (rare on these pan types)
Cast iron’s superior heat retention provides minor advantages for recipes requiring resting time. A skillet of baked mac and cheese holds serving temperature for 15-20 minutes after oven removal. Carbon steel cools to lukewarm within 10-12 minutes. For family-style serving, cast iron maintains proper eating temperature longer.
Delicate Foods and Eggs
Non-Stick Performance When Properly Seasoned
Both materials develop functional non-stick surfaces through seasoning, but neither matches Teflon’s release properties. A well-seasoned carbon steel or cast iron pan releases fried eggs with minimal oil when the seasoning has built up through 15-20 cooking sessions.
Seasoning development timeline:
| Cooking Sessions | Cast Iron Performance | Carbon Steel Performance |
|---|---|---|
| 1-3 uses | Eggs stick significantly | Eggs stick moderately |
| 5-8 uses | Eggs release with spatula help | Eggs slide with gentle nudge |
| 10-15 uses | Eggs release fairly easily | Eggs slide freely |
| 20+ uses | Eggs slide well | Eggs slide like Teflon |
The thinner carbon steel seasoning layer polymerizes faster due to quicker heat penetration during seasoning sessions. Each cooking cycle with fat contributes to the patina. Carbon steel reaches dependable egg-cooking status after 8-10 uses. Cast iron requires 12-15 sessions to achieve similar performance.
Surface texture affects release characteristics. Machined smooth cast iron from Field Company or Smithey releases eggs similarly to carbon steel. Rough-textured Lodge cast iron traps more egg protein in the surface valleys, requiring additional seasoning layers to fill the gaps completely.
Carbon Steel Slight Edge for Delicate Items
Fish fillets with skin demonstrate carbon steel’s advantage for fragile proteins. The skin crisps at 375-400°F and releases cleanly when fully cooked. Temperature control prevents overcooking—carbon steel allows immediate heat reduction when the skin achieves proper crispness. Cast iron’s retained heat continues cooking aggressively even after flame reduction.
Crepes require precise temperature maintenance at 350-375°F. Higher temperatures create brown spots. Lower temperatures prevent proper setting. Carbon steel holds this narrow range through responsive heat adjustment. Cast iron oscillates above and below the target as you compensate for its thermal lag.
Delicate food success rates (properly seasoned pans):
- Fried eggs over-easy: Carbon steel 90% clean release, cast iron 85%
- Fish skin-on: Carbon steel 85% intact skin, cast iron 75%
- Crepes: Carbon steel consistent results, cast iron requires more practice
- Thin omelets: Carbon steel slides easily, cast iron needs careful spatula work
Learning Curve for Both Pans
New users struggle with temperature management in both materials. The pans need adequate preheating—insufficient heat causes sticking regardless of seasoning quality. Too much heat burns food and damages seasoning. The learning curve spans 8-12 cooking sessions.
Cast iron’s thermal lag complicates the learning process. The pan feels hot to a hovering hand but may not have reached proper cooking temperature. Beginners add eggs too early, causing sticking. The solution requires a longer preheat than intuition suggests.
Carbon steel provides clearer feedback. The pan reaches cooking temperature faster, reducing the temptation to add food prematurely. The water droplet test works reliably—a drop should skitter across the surface when temperature reaches the proper level. Both materials benefit from this test, but carbon steel reaches the target state more quickly.
Seasoning: Carbon Steel vs Cast Iron Skillet
Both carbon steel and cast iron skillets require identical seasoning through oil polymerization at 400-500°F, but carbon steel develops a functional non-stick surface after 5-8 cooking sessions compared to cast iron’s 12-15 sessions due to its thinner metal requiring less buildup to achieve smooth release.
How Seasoning Works
Polymerization Process Explained
Seasoning transforms liquid cooking oil into a hard, plastic-like coating bonded to iron surfaces. Heat breaks down oil’s fatty acid molecules at temperatures above 400°F. These fragmented molecules recombine into polymers that crosslink with iron atoms on the pan surface. The process mirrors industrial coating applications but uses edible fats.
Chemical requirements for proper seasoning:
| Component | Purpose | Specification |
|---|---|---|
| Fat/oil | Provides molecules for polymerization | Smoke point 400°F+ |
| Heat | Initiates molecular breakdown | 450-500°F sustained |
| Time | Allows complete polymerization | 60-90 minutes per layer |
| Oxygen | Participates in crosslinking reaction | Oven environment sufficient |
Flaxseed oil polymerizes into the hardest coating due to its high concentration of alpha-linolenic acid. This omega-3 fatty acid creates dense polymer networks. The coating becomes brittle over time and flakes off with thermal cycling. Most cooks prefer oils with balanced fatty acid profiles that create more flexible coatings.
Building a Natural Non-Stick Surface
Multiple thin layers outperform single thick applications. A heavy oil coating pools in low spots and creates sticky, uneven surfaces. Six thin layers build a smoother finish than two thick ones. Each layer should appear barely visible after wiping—the pan looks dry but feels slightly tacky.
The seasoning fills microscopic surface irregularities in both materials. Cast iron’s rougher texture contains valleys measuring 20-40 microns deep. Carbon steel’s smoother surface shows 5-15 micron variations. More layers are required to level cast iron’s deeper texture.
Layer accumulation timeline:
- Layers 1-3: Protection against rust, minimal non-stick properties
- Layers 4-6: Eggs release with spatula assistance, fish sticks moderately
- Layers 7-10: Reliable egg cooking, delicate foods manageable
- Layers 10+: Teflon-like performance for most foods
Regular cooking with fats builds seasoning faster than dedicated seasoning sessions. A tablespoon of butter used to sauté vegetables contributes a micro-layer of polymerized fat. Fifty normal cooking sessions create better seasoning than ten oven-based applications because the repeated heating cycles strengthen the molecular bonds.
Layers of Protection Against Rust
Iron oxidizes within hours when exposed to moisture and air. A single seasoning layer reduces rust formation by 80-90%. Three layers provide near-complete protection under normal storage conditions. The polymerized coating acts as a moisture barrier, preventing water molecules from reaching bare iron.
Humidity accelerates rust on inadequately seasoned pans. Coastal environments or basements with 70%+ humidity require thicker seasoning protection. Pans stored in these conditions benefit from monthly maintenance seasoning even without active rust formation.
Seasoning Cast Iron Skillets
Factory Pre-Seasoning on Modern Pans
Lodge pioneered industrial pre-seasoning in 2002, applying soy-based oil in spray booths before a 450°F oven cure. The factory coating measures 2-3 layers thick—enough to prevent shipping rust but insufficient for optimal cooking performance. The black surface appears ready to use but improves dramatically after home seasoning.
Pre-seasoning quality by brand:
| Brand | Pre-Seasoning | Initial Performance | Recommendation |
|---|---|---|---|
| Lodge | Soy oil, 2-3 layers | Cook immediately | Add 2-3 home layers for best results |
| Victoria | Flaxseed oil blend | Good initial release | Ready for eggs after breaking in |
| Camp Chef | Single layer | Minimal protection | Season 3-4 times before cooking |
| Field Company | Grapeseed oil, 4+ layers | Excellent non-stick | Use immediately |
Budget brands sometimes skip pre-seasoning entirely, shipping with only rust-preventive oil that requires complete removal. The raw gray iron surface demands 4-5 seasoning layers before the first cooking session.
Initial Seasoning Process
New cast iron without pre-seasoning starts with a degreasing wash using dish soap and hot water. Steel wool removes any factory wax or protective coatings. The pan dries completely in a 200°F oven for 10 minutes, eliminating residual moisture from surface pores.
Step-by-step initial seasoning:
- Application: Rub 1 teaspoon oil over entire surface including handle
- Buffing: Wipe vigorously with paper towels until pan looks dry
- Heating: Place upside-down in 450°F oven for 60 minutes
- Cooling: Turn off oven, leave pan inside for 2 hours
- Repeat: Complete 3-4 cycles for functional baseline
The upside-down position prevents oil pooling on the cooking surface. A sheet pan or foil on the lower rack catches any drips. Smoke during the first 15 minutes indicates proper polymerization—inadequate ventilation makes this unsuitable for apartment dwellers without range hoods.
Maintenance Seasoning Frequency
Well-used cast iron requires dedicated oven seasoning every 3-6 months depending on cooking frequency and foods prepared. Daily bacon cooking builds seasoning naturally. Weekly use with acidic tomato sauces strips seasoning faster than it accumulates.
Visual inspection reveals when maintenance becomes necessary. Dull gray patches indicate exposed iron where seasoning has worn away. Food sticking in specific spots shows localized seasoning failure. Either condition warrants a full oven seasoning session.
Maintenance indicators:
- Excellent condition: Uniform black/brown color, beads water when droplets hit surface
- Adequate condition: Mostly dark with small lighter patches, minimal sticking
- Needs maintenance: Gray areas visible, eggs stick consistently, slight rust spots
- Requires stripping: Heavy rust, flaking seasoning, severe sticking across entire surface
Stovetop maintenance after each use supplements oven seasoning. Heat the cleaned pan until water droplets evaporate instantly. Add 1/4 teaspoon of oil and spread with a paper towel. Heat for 60 seconds until the oil smokes lightly. This micro-layer accumulates over dozens of cooking sessions.
Common Seasoning Oils and Fats
Neutral oils with smoke points above 400°F create the most durable seasoning. Grapeseed, avocado, and refined canola oils polymerize reliably at standard oven temperatures. Unrefined oils with lower smoke points produce sticky, incomplete coatings.
Oil performance comparison:
| Oil Type | Smoke Point | Seasoning Result | Cost per Application |
|---|---|---|---|
| Grapeseed | 420°F | Hard, durable finish | $0.15 |
| Avocado | 520°F | Excellent bonding | $0.40 |
| Canola (refined) | 400°F | Reliable standard | $0.05 |
| Flaxseed | 225°F | Very hard but brittle | $0.60 |
| Crisco | 490°F | Traditional favorite | $0.10 |
| Bacon fat | 325°F | Poor polymerization | $0.08 |
Flaxseed oil’s low smoke point requires heating well beyond its smoke point for polymerization. The resulting coating provides impressive initial non-stick properties but chips away after 20-30 thermal cycles. The brittleness stems from excessive crosslinking that creates internal stress.
Bacon fat and butter contain proteins and milk solids that burn before polymerizing. These impurities create brown, sticky residues rather than smooth black coatings. Save animal fats for cooking rather than dedicated seasoning sessions.
Seasoning Carbon Steel Skillets
Often Requires Initial Seasoning by User
Most carbon steel pans ship with factory coatings that prevent rust during storage but aren’t proper seasoning. De Buyer applies beeswax that melts at 145°F. Matfer uses cosmoline, a waxy petroleum product. Both require complete removal before seasoning can begin.
Factory coating removal methods:
| Method | Effectiveness | Time Required | Best For |
|---|---|---|---|
| Boiling water + scrubbing | Moderate | 15-20 minutes | Beeswax coatings |
| Oven burn-off (500°F) | Excellent | 60 minutes | All coating types |
| Degreaser spray | Good | 10 minutes | Light cosmoline |
| Steel wool + dish soap | Good | 20 minutes | Stubborn residue |
The oven burn-off method removes coatings most completely. Place the pan in a 500°F oven for 60 minutes. The coating smokes off as vapor. Scrub residual ash with steel wool under hot water. The bare steel appears gray with slight discoloration from oxidation.
Lodge’s carbon steel line arrives pre-seasoned similar to their cast iron. These pans skip the stripping process and need only 2-3 additional seasoning layers before cooking.
Faster Patina Development
Carbon steel’s 2mm thickness requires less oil accumulation to achieve functional non-stick performance. The thinner metal means shorter distances for heat to penetrate during seasoning. Polymerization occurs more uniformly through the metal’s depth.
Patina development comparison:
| Milestone | Carbon Steel | Cast Iron | Reason for Difference |
|---|---|---|---|
| First non-stick eggs | 5-8 uses | 12-15 uses | Thinner base requires less buildup |
| Teflon-like performance | 15-20 uses | 25-30 uses | Smoother factory surface |
| Full black patina | 30-40 uses | 40-60 uses | Faster heat cycling |
Restaurant carbon steel pans develop complete patinas within 2-3 weeks of daily use. The constant exposure to fats at high temperatures accelerates polymerization. Home cooks cooking 4-5 times weekly achieve similar results in 8-10 weeks.
The developing patina shows color variations that alarm new users. Brown, blue, and bronze patches appear during the first 10-15 cooking sessions. These colors represent different stages of oxidation and polymerization. The pan performs well despite the mottled appearance. Eventually, the entire surface darkens to uniform black.
Maintenance Approach
Carbon steel requires the same post-cooking oil application as cast iron. The thinner seasoning layer shows wear faster, making this step more critical. Skip the maintenance oil and rust appears within 24-48 hours in humid environments.
Frequent high-heat cooking strips carbon steel seasoning more aggressively than cast iron. Searing steaks at 500°F+ degrades the polymer coating at accelerated rates. Plan on oven re-seasoning every 2-3 months with regular high-heat use compared to cast iron’s 4-6 month interval.
Maintenance schedule by cooking frequency:
- Daily use: Stovetop oil wipe after each use, oven season every 2 months
- 3-4x weekly: Stovetop oil wipe after each use, oven season every 3 months
- 1-2x weekly: Stovetop oil wipe after each use, oven season every 4-6 months
- Occasional use: Stovetop oil wipe after each use, oven season as needed for sticking
Best Oils for Carbon Steel Seasoning
Carbon steel responds identically to the same oils that work for cast iron. Grapeseed and avocado oils produce reliable results. The choice between materials doesn’t alter oil chemistry or polymerization requirements.
Some manufacturers recommend specific oils. De Buyer suggests flaxseed oil for initial seasoning. Experience shows this creates the same brittleness problems as with cast iron. Neutral oils with 400-450°F smoke points provide better long-term durability.
Comparing Seasoning Maintenance
Re-Seasoning Frequency
Both materials require similar maintenance attention when used for comparable cooking tasks. The determining factors are cooking frequency, food types, and cleaning methods rather than the base metal composition.
Factors affecting re-seasoning intervals:
| Factor | Impact on Seasoning | Mitigation Strategy |
|---|---|---|
| Acidic foods | Strips coating rapidly | Limit tomato sauce to 15-minute maximum |
| Metal utensils | Scratches expose iron | Use wood or silicone tools |
| Harsh scrubbing | Removes layers mechanically | Gentle brush cleaning only |
| Soap usage | Minimal impact if mild | Brief soap application acceptable |
| Dishwasher | Destroys seasoning completely | Never use dishwasher |
Carbon steel’s thinner seasoning shows damage earlier but rebuilds faster. Cast iron’s thicker layers resist damage better but take longer to repair. Over a year of cooking, both pans demand approximately equal maintenance time.
Durability of Seasoning Layer
Cast iron’s thicker construction allows deeper seasoning penetration. The 4-5mm of metal can hold more polymerized layers before the coating becomes thick enough to flake. Well-maintained cast iron develops seasoning measuring 40-60 microns thick—multiple times thicker than carbon steel’s typical 15-25 micron coating.
The thinner carbon steel coating remains more flexible under thermal cycling. Cast iron seasoning becomes brittle when it exceeds 50 microns thickness. The rigid coating cracks when the metal expands and contracts during heating. These cracks propagate and cause flaking.
Coating durability test results:
A thermal shock test compared both materials. Pans heated to 500°F were plunged into 60°F water. Cast iron seasoning showed micro-cracking after 3 cycles. Carbon steel maintained coating integrity through 5 cycles. Neither material should experience this abuse in normal cooking, but the test demonstrates carbon steel’s superior flexibility.
Recovery from Seasoning Damage
Light seasoning damage repairs itself through normal cooking in both materials. A small scratched area re-seasons within 3-4 cooking sessions when fats are present. Larger damaged areas measuring 2+ inches diameter require dedicated oven seasoning for efficient repair.
Carbon steel recovers faster from major seasoning failure. Stripping the pan completely and re-seasoning from scratch takes 4-5 oven cycles (6-8 hours total work). Cast iron requires 6-8 cycles (10-12 hours) to achieve equivalent protection and performance.
Rust damage affects both materials identically. Surface rust removes with steel wool and requires immediate re-seasoning. Deep pitting rust that creates holes cannot be repaired—the pan becomes scrap metal. Prevention through proper drying and storage remains more effective than any restoration technique.
Durability and Longevity
Cast iron skillets last 100+ years with minimal care and resist cracking, warping, or structural failure under normal use, while carbon steel skillets provide 50-75 years of service but show greater susceptibility to warping from extreme heat and require more careful temperature management to maintain structural integrity.
Cast Iron Skillet Lifespan
Virtually Indestructible With Proper Care
Cast iron’s thick construction creates a pan that withstands abuse impossible for thinner cookware. Drop a 12-inch Lodge from counter height onto tile flooring and it survives without damage. The same fall shatters non-stick pans and dents stainless steel. The dense molecular structure absorbs impact energy that would destroy lighter materials.
Failure modes ranked by likelihood:
| Damage Type | Probability | Cause | Prevention |
|---|---|---|---|
| Rust | Common | Improper drying/storage | Dry thoroughly, apply oil |
| Seasoning loss | Common | Acidic foods, dishwasher | Proper cleaning, maintenance |
| Cracking | Rare | Thermal shock (hot to cold water) | Cool gradually before washing |
| Breaking | Extremely rare | Dropping from height onto hard surface | Handle carefully when hot |
| Warping | Nearly impossible | Requires industrial heat levels | No practical concern |
Thermal shock represents the only realistic threat to cast iron’s structural integrity. Plunging a pan heated to 500°F directly into cold water creates extreme thermal stress. The rapid temperature change causes uneven contraction—the exterior cools and shrinks while the interior remains expanded. This stress cracks the iron at its weakest points, typically where the handle meets the pan body.
Normal cooking never approaches the temperature differentials that cause cracking. Moving a hot pan from stovetop to sink and running warm water poses no risk. The gradual cooling from 450°F to 120°F water temperature stays within the material’s stress tolerance.
Heirloom Quality and Multi-Generational Use
Vintage cast iron from the 1950s trades on secondhand markets for 2-3 times the cost of new equivalent pans. A Griswold #8 from 1950 sells for $80-120 compared to $30 for a new Lodge. The 75-year-old pan performs identically to its modern counterpart after a cleaning and re-seasoning.
Multi-generational performance factors:
- No wear parts: Cast iron contains no components that degrade over time
- Seasoning renewal: Complete restoration possible regardless of age
- Performance stability: 50-year-old pan cooks exactly like new one
- Value retention: Well-maintained vintage pieces appreciate in value
Estate sales and antique shops stock cast iron skillets that cooked daily for 40-50 years. These pans show cosmetic wear—scratches, uneven patina, slight rust—but remain structurally sound. Three hours of restoration work with steel wool and oven seasoning returns them to full functionality.
The investment proposition differs from planned obsolescence cookware. A $30 Lodge skillet provides 60+ years of cooking at $0.50 per year. Non-stick pans costing $40 last 3-5 years before coating failure, calculating to $8-13 annually. The durability gap makes cast iron the most economical cookware option despite requiring more maintenance.
Resistance to Warping and Damage
Cast iron’s 4-5mm thickness and high mass prevent the warping common in thinner cookware. Stainless steel pans warp when one section heats significantly faster than surrounding areas. The hot section expands while cooler areas remain unchanged. This uneven expansion bends the thinner metal permanently.
Cast iron’s thermal properties prevent this failure mode. The material heats slowly and evenly through its thick cross-section. Temperature gradients between different pan areas stay within 40-50°F during normal preheating. This narrow differential creates proportional expansion that doesn’t stress the structure.
Warp resistance comparison:
| Material | Thickness | Warp Risk | Typical Failure Point |
|---|---|---|---|
| Cast iron | 4-5mm | None under normal use | Never occurs in home cooking |
| Carbon steel | 2mm | Moderate at 550°F+ | After repeated extreme heating |
| Stainless clad | 2.5-3mm | Low to moderate | High heat on gas burners |
| Aluminum non-stick | 3-4mm | High | After 6-12 months regular use |
Metal utensils scratch cast iron’s seasoning but not the underlying iron. Stainless steel spatulas, forks, and whisks cause no structural damage. The scratched areas re-season within 2-3 cooking sessions. This durability allows aggressive scraping to remove stuck food without concern for pan damage.
Restoration Possibilities
Cast iron covered in rust, damaged seasoning, or decades of built-up carbon returns to like-new condition through restoration. The process requires 2-4 hours of work but no specialized equipment beyond steel wool, oven cleaner, or an electrolysis setup.
Restoration method comparison:
| Method | Time Required | Effectiveness | Equipment Needed |
|---|---|---|---|
| Steel wool + elbow grease | 2-3 hours | Excellent | Steel wool (#0-#00), dish soap |
| Oven cleaner (lye-based) | 24-48 hours | Excellent | Easy-Off, garbage bag, gloves |
| Electrolysis tank | 4-8 hours | Perfect | Car battery charger, washing soda, plastic tub |
| Self-cleaning oven | 3-4 hours | Good | Self-cleaning oven (risks some pans) |
Lye-based oven cleaner dissolves seasoning and light rust without damaging iron. Spray the pan thoroughly, seal in a garbage bag for 24 hours, then scrub under water. Stubborn spots require a second application. The bare iron emerges ready for seasoning.
Electrolysis removes rust through electrochemical reaction. The setup uses a 12V battery charger, washing soda solution, and sacrificial steel anode. Current flow converts rust (iron oxide) back to metallic iron. The process handles severely rusted pans that appear beyond repair.
Garage sale cast iron costing $5-10 often rivals premium new skillets after restoration. A Wagner or Griswold from the 1940s features smoother machining than modern Lodge. The $3-4 in restoration supplies plus 2 hours of work creates a $100+ equivalent pan.
Carbon Steel Skillet Lifespan
Decades of Use With Proper Maintenance
Carbon steel provides 50-75 years of reliable service when users avoid warping and maintain seasoning properly. Professional kitchen carbon steel pans last 10-15 years under daily restaurant abuse before replacement. Home use extends longevity 5-6 times due to gentler treatment and lower usage frequency.
Lifespan factors:
- Usage frequency: Daily cooking reduces lifespan to 30-40 years
- Heat levels: Regular 550°F+ heating accelerates degradation
- Cleaning method: Aggressive scrubbing thins metal over decades
- Storage conditions: Proper drying prevents rust damage
- Initial quality: Hand-forged pans outlast stamped versions
The thinner gauge experiences more stress during thermal cycling than cast iron. Each heating and cooling cycle causes microscopic expansion and contraction. After thousands of cycles, metal fatigue can create small stress cracks near the handle attachment point. This failure mode remains rare in home cooking—it typically requires restaurant-level use intensity.
Susceptibility to Warping at Extreme Temperatures
Carbon steel warps when heated rapidly to temperatures above 550°F or when significant temperature gradients exist across the pan surface. The 2mm thickness lacks the rigidity to resist thermal stress. Uneven heating causes one section to expand more than surrounding areas, bending the metal.
Warping causes and prevention:
| Cause | Temperature Threshold | Prevention Strategy |
|---|---|---|
| Rapid high heating | 550°F+ reached in under 3 minutes | Preheat gradually over 4-5 minutes |
| Uneven burner contact | Any temperature with poor pan contact | Use properly sized burners |
| Thermal shock | 400°F+ to cold water | Cool to 200°F before washing |
| Broiler use | 550°F+ top-down heating | Avoid prolonged broiler exposure |
Restaurant broilers pose the highest warping risk. These units generate 600-700°F top-down heat. The pan’s upper surface reaches extreme temperatures while the underside stays comparatively cool. This 150-200°F gradient across 2mm of metal creates warping stress. Commercial carbon steel pans used under broilers typically last 18-24 months before replacement.
Home oven broilers rarely cause warping because most don’t exceed 550°F and exposure time remains brief. Melting cheese on a burger for 2-3 minutes doesn’t create sufficient stress. Extended broiling for 10+ minutes increases risk, particularly with thin-gauge stamped pans under 2mm.
A warped pan rocks on flat cooktops and creates hot spots where metal contacts the burner. Minor warping (1-2mm deflection) affects induction cooktops more than gas. The uneven surface prevents proper magnetic coupling. Gas burners heat the pan despite warping through flame contact and convection.
Warp correction possibilities:
Minor warps sometimes correct through careful counter-flexing. Place a towel on a flat surface, position the pan concave-side down, and press firmly on the raised edges. The metal may flex back to flat, though this risks cracking. Professional metalworkers can hammer warps flat using dollies and specialized tools. For most home cooks, prevention remains more practical than correction.
Overall Durability Assessment
Carbon steel strikes a middle ground between cast iron’s extreme durability and non-stick cookware’s planned obsolescence. The material withstands decades of use but demands more careful handling than cast iron. Users who master proper preheating and temperature control find carbon steel matches cast iron’s longevity.
Durability comparison scoring (1-10 scale):
| Factor | Cast Iron | Carbon Steel |
|---|---|---|
| Impact resistance | 10 | 7 |
| Thermal shock resistance | 6 | 5 |
| Warp resistance | 10 | 6 |
| Scratch resistance | 10 | 9 |
| Rust resistance (when seasoned) | 7 | 7 |
| Overall structural longevity | 10 | 8 |
The 2-point overall durability gap reflects carbon steel’s warping vulnerability and slightly higher crack risk near handle welds. These failure modes affect perhaps 5-10% of carbon steel pans over 50 years of use. The vast majority provide trouble-free service matching cast iron’s practical lifespan.
Replacement becomes necessary when warping exceeds 3-4mm deflection or when handle attachment fails. Both issues affect cooking performance—warped pans heat unevenly, and loose handles create safety hazards. Rust damage severe enough to pit the metal through to the other side also warrants replacement, though proper maintenance prevents this outcome.
Long-Term Value
Carbon steel’s higher initial cost ($30-120 vs cast iron’s $15-60) amortizes over decades of use. A $80 Matfer Bourgeat serving for 50 years costs $1.60 annually. The calculation favors either material over non-stick, stainless steel, or ceramic cookware requiring replacement every 5-10 years.
50-year cost of ownership:
| Pan Type | Initial Cost | Replacement Frequency | Total Cost | Annual Cost |
|---|---|---|---|---|
| Cast iron (Lodge) | $30 | Never | $30 | $0.60 |
| Carbon steel (Matfer) | $80 | Never | $80 | $1.60 |
| Non-stick (quality) | $60 | Every 5 years (10 pans) | $600 | $12.00 |
| Stainless clad | $150 | Every 20 years (2.5 pans) | $375 | $7.50 |
The value calculation changes for cooks who don’t maintain seasoning properly. Rust-damaged pans replaced every 10 years triple the ownership cost. Both carbon steel and cast iron reward proper maintenance with exceptional longevity. Users unwilling to invest 5 minutes of post-cooking care should consider non-stick alternatives despite the higher long-term expense.
Resale value provides another consideration. Well-maintained carbon steel pans from De Buyer or Matfer retain 40-60% of original value on secondary markets. Cast iron appreciates—vintage skillets sell for more than new equivalents. This residual value offsets the initial investment for cooks who upgrade or change their cookware collection.
Maintenance and Care Requirements
Carbon steel and cast iron skillets require identical daily maintenance—cleaning with hot water and a stiff brush, immediate drying over stovetop heat, and a thin oil application after each use—but carbon steel demands more frequent oven re-seasoning every 2-3 months compared to cast iron’s 4-6 month intervals due to its thinner seasoning layer.
Daily Cleaning: Cast Iron
Hot Water and Stiff Brush Method
Cast iron cleaning starts while the pan remains warm but touchable. Hot water (120-140°F) removes food particles more effectively than cold water. A bamboo or nylon brush with stiff bristles scrubs stuck-on bits without damaging seasoning. The mechanical action lifts residue while preserving the polymerized oil coating.
Cleaning tool effectiveness:
| Tool | Cleaning Power | Seasoning Impact | Best Use Case |
|---|---|---|---|
| Chainmail scrubber | Excellent | Minor removal | Burnt-on food |
| Stiff nylon brush | Very good | None | Daily cleaning |
| Plastic pan scraper | Good | None | Deglazing stuck bits |
| Steel wool (#0000) | Excellent | Moderate damage | Stubborn carbon buildup |
| Sponge (soft side) | Poor | None | Light residue only |
Stuck food releases easier with deglazing technique. Add 1/4 cup water to the warm pan and heat for 30-60 seconds. The steam lifts stuck particles. A wooden spatula scrapes loosened bits during this process. This method handles 90% of stuck food without aggressive scrubbing.
Salt serves as an abrasive cleaner for stubborn spots. Coarse kosher salt combined with minimal water creates a paste. Scrub the affected area using a folded paper towel. The salt crystals mechanically remove residue without chemical cleaners. Rinse thoroughly afterward as salt residue promotes rust.
Avoiding Soap (Modern Perspective)
The traditional no-soap rule originated when soaps contained lye that stripped seasoning chemically. Modern dish soaps use synthetic surfactants that don’t affect polymerized oil. A small amount of Dawn or Palmolive (2-3 drops) helps remove grease without seasoning damage.
Soap usage guidelines:
- Acceptable: Brief application (30 seconds contact), mild dish soap, thorough rinsing
- Avoid: Extended soaking, harsh degreasers, abrasive soap-embedded pads
- Never: Dishwasher detergent, oven cleaner during routine cleaning
Soap becomes necessary after cooking strongly flavored foods. Fish cooked in cast iron leaves oils that water alone won’t remove completely. A quick soap wash prevents flavor transfer to tomorrow’s pancakes. The minimal seasoning loss rebuilds during the next cooking session.
Many experienced cast iron users clean with soap regularly without issues. The determining factor is seasoning thickness—pans with 15+ layers withstand occasional soap use. Newly seasoned pans with 3-4 layers show more vulnerability to soap’s degreasing action.
Drying Thoroughly to Prevent Rust
Water evaporates from cast iron more slowly than from thinner cookware. The thermal mass holds enough heat to evaporate surface water but doesn’t dry the microscopic pores completely. Air-drying leaves moisture that causes rust within 12-24 hours.
Effective drying methods:
| Method | Drying Time | Rust Prevention | Energy Use |
|---|---|---|---|
| Stovetop heat (medium) | 2-3 minutes | Excellent | Minimal |
| Oven (200-250°F) | 5-10 minutes | Excellent | Moderate |
| Towel + air dry | 30-60 minutes | Poor to fair | None |
| Towel only | N/A | Inadequate | None |
Stovetop drying provides the fastest, most reliable results. Place the washed pan over medium heat for 2-3 minutes. Water droplets sizzle and evaporate within the first minute. Continue heating until no moisture remains visible. The pan surface should feel completely dry to touch.
Visual confirmation ensures complete drying. Properly dried cast iron shows no water beads or dark wet spots. The surface appears uniformly matte black or dark brown. Any shiny areas indicate residual moisture requiring additional heating time.
Light Oil Application After Cleaning
The post-cleaning oil layer protects against moisture during storage. Apply 1/4 teaspoon of neutral cooking oil to the warm, dry pan. Use a paper towel to spread the oil across all surfaces including the exterior and handle. Buff vigorously until the pan looks dry—excess oil creates sticky buildup.
Oil application technique:
- Amount: 1/4 teaspoon for 10-12 inch pans
- Distribution: Even coating on cooking surface, handle, and exterior
- Buffing: Wipe until pan appears dry but feels slightly slick
- Heat setting: Optional 1-minute stovetop heating to polymerize
- Cooling: Allow to cool before storage
The buffing step prevents the tacky surface that develops when excess oil doesn’t polymerize. A proper application leaves no visible oil but provides a protective barrier. Running your hand across the surface should feel smooth and slightly slippery, not wet or sticky.
Some cooks skip the oil application after cooking with significant fats. Bacon or sausages leave enough residual fat to protect the pan until the next use. This approach works for daily or every-other-day cooking schedules. Pans stored for a week or more benefit from intentional oil application.
Daily Cleaning: Carbon Steel
Similar Cleaning Approach to Cast Iron
Carbon steel follows the identical cleaning protocol as cast iron. Hot water and brush scrubbing remove food residue. The pan requires immediate drying and oil application. The similarities reflect their shared iron composition and seasoning-based non-stick properties.
The thinner carbon steel cools faster after cooking, requiring attention to timing. Start cleaning while the pan retains heat from cooking. Waiting 10 minutes allows the pan to cool enough that stuck food hardens. Cleaning within 2-3 minutes of cooking completion provides optimal conditions.
Cleaning timeline comparison:
| Pan Type | Optimal Cleaning Window | Reason |
|---|---|---|
| Cast iron | 5-15 minutes after cooking | Retains heat longer, food stays soft |
| Carbon steel | 2-5 minutes after cooking | Cools faster, stuck food sets quickly |
Carbon steel’s smooth surface releases food more easily than rough-textured cast iron during cleaning. Fewer microscopic valleys means less trapped food particles. A quick brush scrub handles most residue. The efficiency reduces cleaning time by 30-40% compared to budget cast iron.
Soap Usage Debate
The soap question generates identical controversy for carbon steel as for cast iron. The thinner seasoning layer shows slightly more vulnerability to soap’s degreasing properties. Conservative users avoid soap entirely. Practical cooks use minimal amounts without problems.
Carbon steel’s faster seasoning development offsets any soap-related damage. Seasoning stripped by soap rebuilds within 2-3 cooking sessions. This rapid recovery makes soap-averse practices less critical than with cast iron. The pan forgives occasional soap use that might set back cast iron seasoning noticeably.
Practical soap usage approach:
- Most cooking: Water and brush only
- After fish: Small amount of dish soap
- After strong flavors (curry, garlic): Brief soap wash
- General grease: Water adequate if deglazing used
- Sticky residue: Soap acceptable, re-oil immediately
Quick Maintenance Routine
Carbon steel cleaning takes 3-5 minutes from start to storage. The lighter weight makes handling at the sink less cumbersome than cast iron. Single-handed washing and drying remains comfortable throughout the process.
5-minute maintenance routine:
- Deglaze: Add water to warm pan, scrape with spatula (60 seconds)
- Scrub: Hot water and brush (60 seconds)
- Rinse: Clear water rinse (20 seconds)
- Dry: Stovetop medium heat (2 minutes)
- Oil: Apply and buff 1/4 teaspoon oil (30 seconds)
The routine becomes automatic after 10-15 repetitions. Experienced users complete the process without conscious thought. The minimal time investment prevents the neglect that damages pans—few cooks skip a 3-minute cleaning task after spending 20 minutes preparing dinner.
Post-Cleaning Seasoning Touch-Ups
Carbon steel benefits from the stovetop micro-seasoning after each cleaning. Heat the oiled pan over medium heat for 60-90 seconds until light smoke appears. This brief polymerization session adds a thin seasoning layer. Forty cleaning sessions build substantial seasoning through this accumulated maintenance.
The smoking point indicates proper polymerization temperature. Oil starts smoking at 400-450°F depending on type. This temperature range creates the molecular changes that bond oil to iron. Insufficient heat leaves unpolymerized oil that turns sticky. Excessive heat burns the oil to carbon without proper polymerization.
Stovetop seasoning indicators:
- Too cool: No smoke, oil remains liquid appearance (under 350°F)
- Correct: Thin wisps of smoke, oil shimmers then dulls (400-450°F)
- Too hot: Thick smoke, oil burns black immediately (over 500°F)
Some carbon steel users apply oil but skip the heating step during daily maintenance. This approach works adequately when cooking frequency stays high. The next cooking session heats the protective oil layer sufficiently. For pans used weekly or less, the heating step provides better rust protection.
Long-Term Maintenance Comparison
Rust Prevention Strategies for Both
Both materials require identical rust prevention—complete drying and protective oil coating. The iron composition makes them equally susceptible to oxidation. Neglected pans develop surface rust within 24-48 hours in humid environments. Coastal areas or basement storage accelerate rust formation.
Environmental rust risk:
| Environment | Time to Rust (No Protection) | Prevention Approach |
|---|---|---|
| Arid climate (under 40% humidity) | 5-7 days | Standard oil coating |
| Moderate climate (40-60% humidity) | 2-3 days | Oil after every use |
| Humid climate (60-80% humidity) | 24-36 hours | Oil + monthly oven seasoning |
| Coastal/tropical (80%+ humidity) | 12-24 hours | Oil + silica packets in storage |
Surface rust appears as orange-brown spots or a uniform reddish haze. This light oxidation removes easily with steel wool and doesn’t affect pan function after cleaning. Deep rust pitting that creates holes through the metal indicates terminal damage requiring replacement.
Preventive storage techniques eliminate rust concerns. Store pans in climate-controlled spaces rather than damp basements or garages. Place paper towels between stacked pans to prevent moisture trapping. Silica gel packets inside storage cabinets absorb atmospheric moisture.
Storage Recommendations
Proper storage prevents damage from stacking and moisture accumulation. Cast iron’s weight makes stacking risky—the bottom pan supports 15-20 pounds when three skillets stack together. This pressure can chip seasoning where pans contact.
Storage best practices:
- Hanging: Wall-mounted pot racks ideal for frequently used pans
- Stacked with protection: Paper towels or cloth between each pan
- Single-layer: Shelf storage without stacking prevents chipping
- Avoid: Sealed containers that trap moisture
- Lids: Store separately or with paper towel moisture barrier
Carbon steel’s lighter weight tolerates stacking better than cast iron. Three carbon steel pans total 12-15 pounds compared to cast iron’s 20-24 pounds. The reduced pressure causes less seasoning damage at contact points.
Pans stored for extended periods (months without use) benefit from heavier oil coating. Apply 1/2 teaspoon oil instead of the usual 1/4 teaspoon. This thicker layer withstands longer storage without drying out. Wipe thoroughly before first use to remove any oil that hasn’t polymerized.
Dealing With Stuck-On Food
Stuck food requires more aggressive intervention than daily cleaning. The chainmail scrubber removes carbonized residue without stripping seasoning. Scrub in circular motions with hot water. Most stuck food releases within 2-3 minutes of scrubbing.
Stuck food removal techniques:
| Method | Effectiveness | Seasoning Impact | Time Required |
|---|---|---|---|
| Boiling water deglaze | Good | None | 5 minutes |
| Salt scrub | Very good | Minimal | 3 minutes |
| Chainmail scrubber | Excellent | Light surface removal | 5 minutes |
| Plastic pan scraper | Good | None | 5-10 minutes |
| Steel wool (#0000) | Excellent | Moderate damage | 3 minutes |
Boiling water in the pan softens stuck residue better than room-temperature soaking. Fill the pan 1 inch deep and simmer for 5 minutes. The heat and water combination loosens most carbonized food. Drain and scrub with a brush while still warm.
Avoid using metal spatulas or sharp scrapers aggressively. These tools remove stuck food but gouge the seasoning layer. Minor gouges repair through normal cooking, but deep scratches expose bare iron that requires spot re-seasoning.
When to Re-Season Completely
Complete oven re-seasoning becomes necessary when food sticks consistently across the entire cooking surface. Isolated sticky spots indicate localized seasoning failure manageable through continued cooking with fats. Widespread sticking signals degraded seasoning requiring full restoration.
Re-seasoning triggers:
- Visual: Gray patches covering 25%+ of cooking surface
- Performance: Eggs stick even with adequate oil and proper temperature
- Texture: Surface feels rough or has flaky coating
- After damage: Rust removal, harsh cleaning, or acidic food damage
The re-seasoning process follows the initial seasoning protocol. Strip damaged seasoning if flaking occurs, otherwise season directly over existing coating. Apply 3-4 oven seasoning layers at 450°F for 60 minutes each. The pan returns to full non-stick performance after completion.
Carbon steel requires this maintenance every 2-3 months with regular use. Cast iron extends the interval to 4-6 months. Daily high-heat cooking accelerates the timeline for both materials. Gentle cooking at moderate temperatures extends time between re-seasoning sessions.
Reactivity With Acidic Foods
Both carbon steel and cast iron skillets react with acidic ingredients identically—tomato sauce, vinegar, wine, and citrus strip seasoning and leach metallic flavors into food when cooking time exceeds 15-20 minutes, requiring cooks to limit acidic dishes or accept seasoning degradation that rebuilds within 2-3 cooking sessions.
Cast Iron and Acidic Ingredients
Impact on Seasoning
Acidic foods dissolve polymerized oil layers through chemical reaction. Tomato sauce at pH 4.2-4.5 attacks the seasoning bonds to iron. A 30-minute tomato-based pasta sauce removes the top 2-3 seasoning layers from well-seasoned cast iron. Newly seasoned pans lose their entire coating.
pH levels and seasoning damage:
| Food | pH Level | Safe Cooking Time | Damage Level |
|---|---|---|---|
| Tomato sauce | 4.2-4.5 | Under 15 minutes | Moderate to high |
| Wine reduction | 2.8-3.5 | Under 10 minutes | High |
| Lemon juice | 2.0-2.5 | Under 5 minutes | Very high |
| Vinegar | 2.4-3.4 | Under 10 minutes | High |
| Apple cider | 3.3-3.7 | Under 20 minutes | Moderate |
The stripped areas appear lighter in color—gray or brown instead of black. These spots feel rougher to the touch compared to surrounding seasoned surfaces. Food sticks in damaged areas during subsequent cooking until re-seasoning occurs.
Metallic Taste Concerns
Iron dissolves into acidic foods, creating a metallic or tinny flavor. The taste becomes noticeable in tomato sauces simmered for 20+ minutes. Sensitive palates detect it after 10-15 minutes. The iron content isn’t harmful—it actually provides dietary iron—but the flavor proves unpleasant.
Metallic taste intensity factors:
- Cooking duration: Longer exposure increases iron transfer exponentially
- Acidity level: Lower pH extracts more iron per minute
- Seasoning quality: Well-seasoned pans leach less iron than poorly seasoned
- Temperature: Higher heat accelerates chemical reaction
- Food volume: Small amounts in large pans concentrate the metallic taste
A study measuring iron content in tomato sauce found 0.8mg per serving after 5 minutes in cast iron versus 3.5mg after 30 minutes. The difference explains why quick tomato dishes work acceptably while slow-simmered sauces taste metallic.
Time Limitations for Acidic Foods
Cast iron handles brief acidic exposure without significant problems. Deglazing with wine for 2-3 minutes causes minimal seasoning damage. Adding lemon juice to finish a dish in the final minute creates no issues. The 15-minute threshold separates acceptable use from problematic cooking.
Acidic cooking time guidelines:
| Dish Type | Recommended Time | Pan Impact |
|---|---|---|
| Wine pan sauce | 3-5 minutes | Negligible damage |
| Tomato-based sauce | Under 15 minutes | Light seasoning wear |
| Braised dishes with wine | Under 20 minutes | Moderate damage |
| Long-simmered marinara | Avoid completely | Severe seasoning loss |
| Lemon finishing sauce | 1-2 minutes | None |
Tomato paste poses less reactivity than crushed tomatoes or sauce. The concentrated form contains less liquid volume, reducing contact time between acid and iron. Dishes using tomato paste for flavor base rather than liquid component work better in cast iron.
Which Dishes to Avoid in Cast Iron
Long-simmered Italian sauces belong in stainless steel or enameled cast iron. Sunday gravy cooked for 3-4 hours destroys seasoning completely and tastes distinctly metallic. The sauce also develops an unappetizing grayish color from dissolved iron.
Recipes unsuitable for cast iron:
- Marinara simmered 45+ minutes: Use stainless steel or enameled cast iron
- Chicken cacciatore: 60+ minute cooking time damages seasoning severely
- Beef stew with red wine: 90-120 minute braising strips all seasoning
- Tomato-based curries: Extended simmering creates metallic flavor
- Shakshuka: 20-30 minute cook time acceptable but causes moderate wear
Quick-cooked tomato dishes work acceptably. Eggs poached in tomato sauce for 8-10 minutes cause minimal damage. Shrimp in spicy tomato sauce cooked for 6-8 minutes preserve seasoning adequately. The food tastes normal without metallic notes.
Carbon Steel and Acidic Ingredients
Similar Reactivity to Cast Iron
Carbon steel’s 99% iron composition creates identical chemical reactions with acids. The material dissolves into acidic foods at the same rate as cast iron. No performance difference exists between the two materials regarding acid resistance.
The thinner carbon steel seasoning shows damage faster than cast iron’s thicker layers. A 20-minute tomato sauce removes 3-4 layers from carbon steel compared to 2-3 from cast iron. The absolute difference remains small—both pans require re-seasoning after extended acidic cooking.
Reactivity comparison:
| Factor | Cast Iron | Carbon Steel | Practical Difference |
|---|---|---|---|
| Iron leaching rate | 3.5mg per serving (30 min) | 3.7mg per serving (30 min) | Negligible |
| Seasoning damage | Moderate | Slightly higher | Minimal practical impact |
| Metallic taste | Noticeable after 15-20 min | Noticeable after 15-20 min | None |
| Safe cooking time | Under 15 minutes | Under 15 minutes | Identical |
Shorter Cooking Times Recommended
Carbon steel’s faster seasoning recovery makes brief acidic cooking more forgiving. The seasoning stripped by a 12-minute tomato dish rebuilds within 2-3 cooking sessions. Cast iron requires 4-5 sessions for equivalent recovery. This faster healing encourages slightly more flexible acidic food preparation.
Professional chefs cooking tomato-based dishes in carbon steel limit contact time to 10 minutes maximum. The pan develops a wine reduction sauce in 5-6 minutes. Tomato concasse finishes in 8 minutes. These shortened times preserve seasoning while achieving proper flavors.
Quick acidic dish examples:
- Pan sauce with white wine: 4-5 minutes, minimal impact
- Cherry tomato sauté: 6-8 minutes, light seasoning wear
- Balsamic reduction: 3-4 minutes, negligible damage
- Lemon butter sauce: 2-3 minutes, no measurable impact
Effect on Patina Development
Acidic cooking during the patina-building phase (first 20 uses) sets back progress significantly. A 25-minute tomato sauce cooked in a carbon steel pan with 8 layers of seasoning removes those 8 layers completely. The pan returns to bare metal performance requiring complete re-seasoning.
Established pans with 20+ layers tolerate acidic insults better. The thick seasoning base absorbs damage to the top 3-4 layers while maintaining non-stick performance on underlying layers. The pan continues cooking eggs successfully despite visible seasoning wear.
Patina stage acid tolerance:
| Seasoning Layers | Acid Tolerance | Recovery Time |
|---|---|---|
| 1-5 layers | Poor | 5-8 cooking sessions |
| 6-10 layers | Fair | 3-5 cooking sessions |
| 11-20 layers | Good | 2-3 cooking sessions |
| 20+ layers | Very good | 1-2 cooking sessions |
Alternative Cookware for Tomato-Based Dishes
Stainless steel provides the ideal surface for acidic cooking. The chromium oxide layer resists acid attack. No flavor leaching occurs regardless of cooking time. Multi-hour tomato sauce development works perfectly in stainless.
Enameled cast iron combines cast iron’s heat properties with acid-resistant porcelain coating. Le Creuset and Staub Dutch ovens handle tomato sauces, wine braises, and citrus dishes without limitations. The enamel prevents iron-acid reactions completely.
Acidic cooking alternatives:
| Cookware Type | Acid Resistance | Heat Properties | Cost |
|---|---|---|---|
| Stainless steel | Excellent | Good heat distribution | $50-$200 |
| Enameled cast iron | Excellent | Superior heat retention | $150-$400 |
| Ceramic | Excellent | Poor heat distribution | $30-$100 |
| Aluminum (anodized) | Very good | Excellent heat conductivity | $40-$150 |
Most serious home cooks own both bare iron (cast iron or carbon steel) and stainless steel cookware. The combination covers all cooking scenarios. Iron handles high-heat searing and non-acidic dishes. Stainless manages acids, deglazing, and sauce-heavy preparations. The two materials complement rather than compete.
Carbon steel and cast iron users who insist on cooking acidic foods accept the maintenance cost. Re-seasoning every 4-6 weeks instead of every 3-4 months becomes routine. The pans continue functioning but demand more attention. For cooks unwilling to increase maintenance, avoiding acidic preparations entirely proves simpler than managing recurring seasoning damage.
Versatility and Cooking Applications
Carbon steel skillets excel at quick-cooking techniques requiring constant pan manipulation like stir-frying, sautéing, and crepe-making due to their 3-4 pound weight and rapid temperature response, while cast iron skillets perform better for steady-heat applications including baked dishes, deep frying, and slow-cooked braises where 5-8 pounds of thermal mass maintains consistent cooking temperatures.
Best Uses for Cast Iron Skillets
Cornbread and Skillet Cookies
Cast iron creates superior baked goods through even bottom heat and heat retention. Cornbread batter poured into a preheated 450°F skillet forms an immediate crust. The iron maintains temperature throughout the 20-25 minute bake despite oven temperature fluctuations. The result shows crispy, golden edges and a tender interior.
Baking performance advantages:
| Baked Dish | Cast Iron Benefit | Alternative Pan Result |
|---|---|---|
| Cornbread | Crispy bottom crust, even browning | Softer bottom in glass/ceramic |
| Skillet cookie | Crispy edges, gooey center | Uneven texture in thin pans |
| Dutch baby | High rise from steady heat | Lower rise in aluminum |
| Focaccia | Crispy underside | Pale bottom in baking sheet |
Skillet cookies demonstrate cast iron’s temperature stability. The dough starts at room temperature, cooling the pan initially. Cast iron’s thermal mass recovers quickly and maintains 375°F throughout the 18-22 minute bake. Thin aluminum pans lose heat and produce pale, undercooked centers.
Roasted Chicken with Vegetables
Whole chicken pieces benefit from cast iron’s stovetop-to-oven transition capability. Sear skin-side down for 4-5 minutes to render fat and brown the skin. Flip and transfer directly to a 425°F oven. The pan maintains searing temperature even in the oven environment, continuing to crisp the skin while the meat cooks through.
Root vegetables roasted alongside chicken develop excellent caramelization. The iron’s consistent heat browns potatoes, carrots, and onions evenly. No stirring required—the steady temperature prevents burning while encouraging browning.
One-pan protein and vegetable dishes:
- Bone-in chicken thighs with Brussels sprouts: 35-40 minutes at 425°F
- Pork chops with apples and onions: 25-30 minutes at 400°F
- Sausages with peppers: 30-35 minutes at 375°F
- Lamb chops with fingerling potatoes: 20-25 minutes at 450°F
Pan Pizza With Crispy Crust
Cast iron makes restaurant-quality pizza at home. Preheat the empty skillet in a 500°F oven for 30 minutes. Stretch dough to fit the pan, add toppings, and bake for 12-15 minutes. The preheated iron creates immediate bottom crust browning. The high thermal mass maintains baking temperature despite the cold dough.
Detroit-style pizza relies specifically on cast iron’s properties. The thick, focaccia-like dough requires 14-16 minutes at 500°F. Cast iron’s heat retention crisps the bottom while the top browns under the broiler. The characteristic caramelized cheese crust forms where cheese meets the hot pan edges.
Deep-Dish Frittatas
Frittatas showcase cast iron’s oven capabilities. Sauté vegetables on the stovetop, add beaten eggs, cook for 2-3 minutes until edges set, then transfer to a 375°F oven. The pan’s weight and heat retention cook the frittata evenly from bottom to top. The result shows no pale, undercooked center common in thinner pans.
Frittata success factors:
| Factor | Cast Iron Advantage | Thin Pan Problem |
|---|---|---|
| Even cooking | Uniform heat eliminates raw centers | Hot spots create uneven doneness |
| Bottom browning | Develops golden crust | Often pale or burnt |
| Presentation | Serves directly from skillet | Requires transfer to serving dish |
| Temperature stability | Maintains heat after oven removal | Cools rapidly |
Reverse-Seared Thick Steaks
The reverse sear method starts steaks in a 275°F oven until internal temperature reaches 115°F (20-30 minutes for 1.5-inch ribeyes). Remove from oven and rest while heating cast iron to maximum temperature. Sear 60-90 seconds per side. Cast iron’s massive heat storage browns the exterior without raising internal temperature above 130°F for perfect medium-rare.
Thinner pans lose temperature when cold steak makes contact. The searing stalls mid-crust formation. Cast iron drops only 40-50°F and recovers within 45 seconds. Multiple steaks sear consecutively without reheating between pieces.
Best Uses for Carbon Steel Skillets
Professional-Style Sautéing
Carbon steel enables the wrist-flip technique essential to proper sautéing. Vegetables toss and redistribute with quick forward-and-up jerks of the pan. This movement ensures even cooking and prevents sticking. The 4-pound weight allows 30-40 tosses without fatigue.
Sauté vegetables requiring tossing:
- Green beans with garlic: Toss every 45-60 seconds for 6 minutes total
- Mushrooms: Constant tossing prevents moisture buildup and ensures browning
- Diced bell peppers: Quick tosses maintain crisp-tender texture
- Asparagus: Rolling technique via pan tosses cooks evenly
Temperature modulation during sautéing separates carbon steel from cast iron. Start Brussels sprouts at 450°F to char cut faces. Reduce to 325°F after 2 minutes to finish cooking interiors. Carbon steel adjusts in 30 seconds. Cast iron remains at 425°F for 2-3 minutes, often burning the vegetables.
Stir-Frying and Wok-Like Cooking
Carbon steel flat-bottomed skillets replicate wok performance on Western stovetops. The quick heat response and light weight enable authentic stir-fry technique. Ingredients sear against the hot surface briefly, then move to cooler areas while the next batch sears.
Stir-fry technique requirements:
| Requirement | Carbon Steel Performance | Cast Iron Limitation |
|---|---|---|
| Rapid temperature changes | Adjusts within 30-45 seconds | Takes 2-3 minutes |
| Pan tossing | Easy at 4 pounds loaded | Exhausting at 8+ pounds |
| Heat recovery | Quick between batches | Slower reheating |
| Sloped sides | 30-45 degree angles facilitate tossing | Straighter walls prevent proper tossing |
Beef and broccoli demonstrates carbon steel’s advantages. Sear beef strips at 475°F for 90 seconds, remove, reduce heat to 400°F, add broccoli within 30 seconds. The temperature drops quickly enough to prevent sauce burning when added. Cast iron holds high heat too long, scorching garlic and sauce.
Quick Weeknight Meals
Carbon steel’s efficiency suits time-constrained cooking. The pan reaches temperature in 3-4 minutes versus cast iron’s 8-10 minutes. Cleanup takes 3 minutes versus 5 minutes for heavier cast iron. Total time saved per meal: 7-10 minutes.
20-minute weeknight dinners:
- Pan-seared salmon with lemon: 12 minutes cooking, 3 minutes cleanup
- Chicken cutlets with pan sauce: 10 minutes cooking, 3 minutes cleanup
- Shrimp stir-fry: 8 minutes cooking, 3 minutes cleanup
- Pork tenderloin medallions: 12 minutes cooking, 3 minutes cleanup
Crêpes and Delicate Omelets
Carbon steel’s temperature control enables French-style egg cookery. Crêpes require 350-375°F—higher temperatures create brown spots, lower temperatures prevent proper setting. Carbon steel holds this narrow range. Cast iron oscillates above and below target as you compensate for thermal lag.
Thin omelets cook at 300-325°F for 2-3 minutes. The light weight allows the classic rolling technique. Lift the pan with one hand while rolling the omelet with a spatula. Cast iron’s weight makes this maneuver awkward.
Delicate food success rates:
| Dish | Carbon Steel | Cast Iron | Reason for Difference |
|---|---|---|---|
| French crêpes | 95% success | 70% success | Better temperature precision |
| Thin omelets | 90% success | 75% success | Easier pan manipulation |
| Fish with skin | 85% intact skin | 75% intact skin | Controlled temperature prevents sticking |
| Over-easy eggs | 90% intact yolks | 85% intact yolks | Lighter pan aids flipping |
Hash Browns Requiring Flipping
Restaurant-style hash browns demand carbon steel’s maneuverability. Shredded potatoes pack into the pan and cook 4-5 minutes until the bottom browns. Flip the entire hash brown cake with a plate-flip method or aggressive spatula work. Carbon steel’s light weight makes the plate method feasible—place a plate over the pan, flip together, slide the hash brown back into the pan.
Cast iron at 7-8 pounds makes this technique dangerous. The weight creates higher risk of hot oil spills during the flip. Most cooks resort to flipping hash browns in sections rather than as one piece, sacrificing the crispy unified crust.
Can You Have Both?
Complementary Roles in a Well-Equipped Kitchen
Carbon steel and cast iron serve different functions without overlap. Cast iron handles baking, braising, and steady-heat cooking. Carbon steel manages quick sautés, stir-fries, and delicate foods. Owning both provides complete cooking capability.
Complementary use cases:
| Cooking Scenario | Optimal Pan | Why |
|---|---|---|
| Sunday pot roast | Cast iron | 3-hour braising requires heat retention |
| Tuesday stir-fry | Carbon steel | Quick cooking needs fast temperature response |
| Weekend cornbread | Cast iron | Baking demands even, steady heat |
| Wednesday fish dinner | Carbon steel | Delicate protein needs precise temperature control |
| Friday steak night | Cast iron | Thick steaks benefit from massive heat storage |
The two pans rarely compete for the same dish. Clear performance differences guide pan selection. Cooks who prepare diverse cuisines find both materials earn their storage space.
Suggested Starter Setup
Begin with one 12-inch pan of either material based on dominant cooking style. Add the opposite material’s 10-inch pan six months later. This two-pan setup handles 95% of home cooking scenarios.
Starting combinations:
- Frequent baker/slower cook: 12-inch cast iron + 10-inch carbon steel
- Quick-cooking enthusiast: 12-inch carbon steel + 10-inch cast iron
- Balanced cooking style: 12-inch cast iron + 12-inch carbon steel
Building Your Cookware Collection Strategically
Avoid buying multiple sizes of one material before trying the alternative. A 10-inch and 12-inch cast iron provide redundant capabilities. A 12-inch cast iron and 12-inch carbon steel expand functional range.
Strategic collection timeline:
- First purchase: 12-inch pan in material matching your primary cooking style
- Second purchase (6-12 months): 10-inch pan in opposite material
- Third purchase (12-18 months): Specialty size based on identified needs
- Fourth purchase: Stainless steel for acidic dishes
The collection grows based on actual cooking patterns rather than theoretical needs. Two years of cooking reveal which sizes and materials you reach for consistently. Future purchases fill genuine gaps instead of creating redundant inventory.
Price Comparison: Carbon Steel vs Cast Iron Skillet
Cast iron skillets cost $15-$200 with quality options available at $20-$40, while carbon steel skillets range from $30-$300 with professional-grade pans priced at $50-$120, making cast iron 40-50% less expensive initially but both materials provide similar cost-per-use over decades of service.
Cast Iron Skillet Pricing
Budget Options ($15-$30)
Lodge dominates the budget cast iron market with pre-seasoned skillets offering legitimate quality. A 10-inch Lodge costs $20-25 at major retailers. The rough surface texture requires more seasoning buildup than premium brands, but performance equals expensive alternatives after proper break-in.
Budget cast iron comparison:
| Brand | 12-inch Price | Pre-Seasoned | Surface Quality | Origin |
|---|---|---|---|---|
| Lodge | $23-$30 | Yes | Rough texture | USA |
| Utopia Kitchen | $18-$25 | Yes | Very rough | China |
| Victoria | $28-$35 | Yes | Medium texture | Colombia |
| Camp Chef | $20-$28 | Minimal | Rough | China |
Budget cast iron requires no performance compromises. The pans conduct heat identically to $150 alternatives. The surface roughness affects initial non-stick properties but disappears after 20-30 cooking sessions as seasoning accumulates.
Mid-Range Skillets ($30-$70)
Mid-priced cast iron offers slight refinements over budget options. Lancaster Cast Iron ($45-$60) features smoother machining than Lodge. Stargazer ($60-$75) provides glass-smooth surfaces approaching vintage quality. Both brands use American foundries and traditional manufacturing.
The smoother surfaces reduce initial seasoning requirements. Eggs release cleanly after 8-10 uses versus 15-20 for rough Lodge pans. This convenience matters for cooks wanting immediate performance.
Mid-range value assessment:
- Lancaster ($50 for 12-inch): Worth premium for smoother surface
- Stargazer ($65 for 12-inch): Excellent if budget allows, minimal advantage over Lancaster
- Smithey ($150): Diminishing returns—beautiful but doesn’t cook better
Premium and Artisan Brands ($70-$200+)
Field Company, Smithey, and Finex occupy the premium segment. Prices reach $100-$150 for 10-inch skillets and $150-$200 for 12-inch versions. These pans feature machined-smooth cooking surfaces, refined handle designs, and lighter weight than budget options.
Premium cast iron features:
| Feature | Budget Cast Iron | Premium Cast Iron | Cooking Impact |
|---|---|---|---|
| Surface smoothness | Rough, pebbly | Glass-smooth | Faster seasoning development |
| Weight | 8 lbs (12-inch) | 6-7 lbs (12-inch) | Easier handling |
| Handle comfort | Basic design | Ergonomic | Better grip |
| Heat distribution | Good | Good | No difference |
The cooking performance gap remains minimal. A $150 Field Company skillet browns steak identically to a $25 Lodge. The premium justifies itself through aesthetics, lighter weight, and faster seasoning buildup rather than fundamental cooking superiority.
Value Assessment
Lodge provides unbeatable value at $20-30 for 10-12 inch skillets. The rough texture presents the only disadvantage, overcome through normal use within 2-3 months. Premium brands charge 5-7 times more for marginal functional improvements.
Cost-benefit by use case:
- Daily cooking: Lodge sufficient—surface smooths naturally
- Gift/heirloom piece: Premium brands justify cost through appearance
- Professional use: Lodge preferred—lower replacement cost matters more
- Collectors: Vintage Griswold/Wagner better investment than new premium
Carbon Steel Skillet Pricing
Entry-Level Options ($30-$50)
Vollrath and basic Cuisinart carbon steel pans serve restaurant supply markets. These stamped pans sacrifice refined finishing for low prices. A 12-inch Vollrath costs $32-40. The thin 1.5mm gauge heats quickly but warps more easily than thicker alternatives.
Budget carbon steel offerings:
| Brand | 12-inch Price | Thickness | Construction | Best For |
|---|---|---|---|---|
| Vollrath | $35-$42 | 1.5mm | Stamped | High-turnover restaurants |
| Cuisinart | $38-$48 | 1.8mm | Stamped | Casual home use |
| Winco | $32-$40 | 1.5mm | Stamped | Budget-conscious buyers |
Budget carbon steel works adequately for home cooking at moderate temperatures. Warping risks increase above 500°F. Cooks who preheat gently and avoid broiler use find these pans deliver years of service.
Professional-Grade Pans ($50-$120)
Matfer Bourgeat and De Buyer represent professional standards. A 12-inch Matfer costs $70-85. De Buyer’s Mineral B line runs $65-95 for the same size. These 2.5mm thick pans resist warping and distribute heat evenly. Hand-forged construction creates denser metal structure than stamped alternatives.
Professional carbon steel comparison:
- Matfer Bourgeat ($75 for 11.875-inch): Industry standard, used in Michelin kitchens
- De Buyer Mineral B ($70 for 12.5-inch): Beeswax coating, comfortable handle
- Lodge Carbon Steel ($65 for 12-inch): Pre-seasoned, American-made
- Made In ($79 for 12-inch): Direct-to-consumer, good quality control
The $50-120 range delivers optimal value for serious home cooks. These pans balance performance, durability, and cost effectively. The thicker gauge prevents warping through decades of high-heat use.
High-End and Specialty Skillets ($120-$300)
Boutique brands like Blanc Creatives ($180-220) and specialty De Buyer lines exceed $120. These pans offer aesthetic refinements—hand-hammered surfaces, custom handles, limited editions—without performance advantages over $75 alternatives.
Japanese carbon steel from brands like Turk commands premium prices ($150-$300) based on craftsmanship reputation. The hand-forging process creates beautiful pans that cook identically to French equivalents at half the cost.
Premium pricing justification:
| Price Point | What You Get | Worth It For |
|---|---|---|
| $50-$80 | Professional performance | 95% of cooks |
| $80-$120 | Refined details, better handles | Enthusiasts willing to pay |
| $120-$200 | Artisan craftsmanship | Collectors, gift recipients |
| $200+ | Limited editions, hand-forging | No one unless collecting |
Cost-Per-Use Analysis
A $75 Matfer Bourgeat used 4 times weekly for 50 years equals 10,400 uses. Cost per use: $0.007. Compare to a $50 non-stick pan replaced every 3 years (17 pans over 50 years): $850 total, $0.08 per use.
50-year cost comparison:
| Pan Type | Initial Cost | Replacement Frequency | Total Cost | Cost Per Use |
|---|---|---|---|---|
| Carbon steel | $75 | Never | $75 | $0.007 |
| Cast iron | $25 | Never | $25 | $0.002 |
| Non-stick (budget) | $30 | Every 2 years (25 pans) | $750 | $0.07 |
| Non-stick (quality) | $60 | Every 5 years (10 pans) | $600 | $0.06 |
Which Offers Better Value?
Initial Investment Comparison
Cast iron costs 30-60% less than equivalent carbon steel. A 12-inch Lodge at $25 versus a 12-inch Matfer at $75 shows a $50 gap. Both pans function for 50+ years, making the difference negligible when amortized.
Budget constraints favor cast iron initially. The $50 saved on cast iron purchases a quality stainless steel pan for acidic cooking. This two-pan combination costs $75 total versus $75 for carbon steel alone.
Longevity Considerations
Both materials last multiple human lifetimes with proper care. Cast iron shows slight durability advantage through superior warp resistance. Carbon steel requires more careful heat management to prevent structural damage.
The practical lifespan difference matters only for restaurant use. Home cooks achieve 50+ years from either material. The $25-50 initial price gap becomes irrelevant across this timeframe.
Performance-to-Price Ratio
Cast iron delivers maximum performance per dollar spent. A $25 Lodge performs 95% as well as a $150 Smithey. Carbon steel shows tighter performance-to-price correlation—$35 Vollrath pans warp more readily than $75 Matfer pans.
Performance value by price segment:
| Price | Cast Iron Performance | Carbon Steel Performance |
|---|---|---|
| Under $30 | Excellent value (Lodge) | Fair value (warping risk) |
| $30-$80 | Moderate value (minimal improvement) | Excellent value (professional quality) |
| Over $80 | Poor value (aesthetics only) | Poor value (diminishing returns) |
The optimal purchase strategy combines $25-30 cast iron with $65-85 carbon steel. This $90-115 investment provides complete cooking versatility without redundant spending. Cooks prioritizing single-pan simplicity should choose based on dominant cooking style rather than price—both materials justify their cost through longevity.
Carbon Steel Skillet vs Cast Iron Skillet: Which Should You Choose?
Choose carbon steel if you frequently sauté, stir-fry, or cook delicate foods requiring quick temperature changes and lighter weight (3-4 pounds), or select cast iron if you prioritize steady-heat cooking like baking, braising, and searing thick steaks while accepting 5-8 pound weight and slower temperature response.
Choose Cast Iron If You:
Prioritize Maximum Heat Retention
Cast iron’s 5-8 pound mass stores more thermal energy than any common cookware material. This heat storage maintains consistent cooking temperatures when cold ingredients contact the surface. Four refrigerator-temperature burger patties cause only a 40-50°F drop in a preheated cast iron pan. The surface recovers to searing temperature within 60 seconds.
Heat retention benefits:
- Thick steak searing: Surface stays above 400°F throughout cooking
- Batch cooking: Minimal reheating between successive portions
- Outdoor cooking: Holds heat in cold weather or wind
- Table service: Food stays warm for 15-20 minutes after cooking
Cook Dishes That Go From Stovetop to Oven
Cast iron’s integral construction eliminates temperature-limited components. No plastic handles, no riveted joints, no coatings that degrade above 400°F. The pan moves seamlessly from stovetop searing to 500°F oven finishing.
Stovetop-to-oven recipes:
| Dish | Stovetop Phase | Oven Phase | Total Time |
|---|---|---|---|
| Chicken thighs | 5 min sear | 25 min at 425°F | 30 minutes |
| Pork chops | 3 min sear | 12 min at 400°F | 15 minutes |
| Frittata | 3 min edge setting | 10 min at 375°F | 13 minutes |
| Skillet cookie | N/A | 22 min at 350°F | 22 minutes |
Want the Most Affordable Option
Lodge 10-inch skillets cost $20-25 and function identically to $150 premium alternatives after break-in. The rough surface texture smooths through normal use within 3-4 months. No other cookware material provides comparable performance at this price point.
Budget comparison across 10 years of ownership shows cast iron’s financial advantage. A $25 Lodge used 4 times weekly equals $0.01 per cooking session. Carbon steel at $75 calculates to $0.04 per session. The difference remains trivial but favors cast iron for price-conscious buyers.
Don’t Mind the Extra Weight
Cooks who keep pans stationary during cooking find weight irrelevant. Baking cornbread or braising chicken requires minimal pan movement. The skillet sits on the burner or in the oven throughout cooking. Lifting occurs only during initial placement and final removal.
Upper body strength and wrist stability determine weight tolerance. Users comfortable handling 8 pounds one-handed experience no limitations. Those with arthritis, reduced grip strength, or wrist issues should consider carbon steel’s lighter construction.
Value Traditional, Heirloom Cookware
Cast iron carries nostalgic and cultural significance unmatched by other materials. Vintage skillets from grandparents’ kitchens remain functional after 70-80 years. The pans improve with age as seasoning accumulates and surface texture smooths from decades of metal spatula use.
Heirloom appeal factors:
- Passes through multiple generations without degradation
- Seasoning layers contain decades of cooking history
- Aesthetic improves with age (patina development)
- Emotional connection to family cooking traditions
Cook for Larger Groups Regularly
Cast iron’s heat retention suits high-volume cooking. A 15-inch Lodge holds six burger patties simultaneously. The thermal mass maintains searing temperature despite the protein load. Smaller carbon steel pans drop temperature significantly when cooking for 6-8 people.
Large cast iron also serves directly at the table. The rustic presentation works for family-style meals. The pan holds serving temperature for 20 minutes without additional heating.
Choose Carbon Steel If You:
Need a Lighter, More Maneuverable Pan
Carbon steel at 3-4 pounds enables single-handed operation throughout cooking. Toss sautéed vegetables with wrist-flip technique. Pour pan sauces without two-handed grip. Clean at the sink without awkward positioning. The weight difference becomes decisive for cooks who manipulate pans constantly.
Weight comparison by size:
| Size | Carbon Steel Weight | Cast Iron Weight | Difference |
|---|---|---|---|
| 10-inch | 3-3.5 lbs | 5-5.5 lbs | 2 lbs (40% lighter) |
| 12-inch | 3.9-4.5 lbs | 7-8 lbs | 3-3.5 lbs (45% lighter) |
| 14-inch | 5.5-6 lbs | 10-11 lbs | 4.5-5 lbs (45% lighter) |
Frequently Sauté and Stir-Fry
Quick-cooking techniques demand carbon steel’s responsiveness and maneuverability. Vegetables sear at 450°F, then temperature drops to 325°F within 30 seconds for gentle finishing. Cast iron holds high heat for 2-3 minutes, often burning delicate ingredients before temperature adjusts.
The light weight allows proper pan-tossing technique. Brussels sprouts flip and redistribute every 30-45 seconds throughout 6-minute cooking time. Cast iron’s weight makes this movement exhausting after the third toss.
Sauté and stir-fry advantages:
- Temperature drops 100°F in 30 seconds when heat reduced
- Pan tosses 30-40 times without arm fatigue
- Single-handed operation during ingredient addition
- Quick recovery between cooking batches
Want Faster Heat Response
Carbon steel reaches searing temperature (450°F) in 3-5 minutes versus cast iron’s 8-10 minutes. This time saving accumulates across daily cooking—30 minutes weekly, 26 hours annually. The efficiency suits weeknight cooking when time constraints matter.
Temperature adjustments happen immediately. Increase the flame and carbon steel responds within 30 seconds. Decrease heat and temperature drops proportionally. This real-time feedback allows precise cooking control impossible with cast iron’s thermal lag.
Prefer Professional-Style Cooking
Restaurant kitchens stock carbon steel for sauté and fish stations. The pans replicate commercial cooking capabilities in home environments. Chefs rely on quick heat response to manage multiple orders simultaneously. The same properties benefit home cooks preparing complex meals with synchronized timing.
Professional technique becomes accessible through carbon steel. The pan weight allows flipping, tossing, and one-handed operation matching culinary school training. Cast iron forces modified techniques that work but don’t match professional standards.
Have Limited Upper Body Strength or Wrist Issues
Arthritis, carpal tunnel, or age-related strength reduction make cast iron’s weight prohibitive. Carbon steel at 4 pounds remains manageable for users who struggle with 7-8 pound cast iron. The difference determines whether cooking remains enjoyable or becomes painful.
Physical consideration factors:
- Arthritis sufferers find 3-pound difference significant
- Repetitive wrist strain reduced by 40% with lighter pans
- Recovery from wrist surgery limits heavy pan use for months
- Age-related grip strength decline makes weight critical
Cook Delicate Foods Often
Fish fillets, eggs over-easy, and thin omelets benefit from carbon steel’s temperature precision. Fish skin crisps at 375-400°F and releases cleanly. Reduce heat immediately upon flipping to prevent overcooking the flesh. Carbon steel adjusts within seconds. Cast iron’s retained heat continues cooking aggressively.
Crepes require 350-375°F maintained within a 15-degree range. Carbon steel holds this tight tolerance through responsive heat control. Cast iron oscillates above and below target, creating inconsistent results until cooks develop compensatory timing.
Can You Have Both?
Complementary Roles in a Well-Equipped Kitchen
The materials excel at different tasks without functional overlap. Cast iron handles baked goods, braises, and thick protein searing. Carbon steel manages quick sautés, stir-fries, and delicate foods. Neither pan replicates the other’s strengths effectively.
Task allocation by pan:
| Task Category | Primary Pan | Backup Pan | Performance Gap |
|---|---|---|---|
| Baking (cornbread, cookies) | Cast iron | Neither | Carbon steel acceptable but inferior |
| Quick sautés | Carbon steel | Cast iron with limitations | Significant difference |
| Stir-frying | Carbon steel | Not cast iron | Cast iron unsuitable |
| Thick steak searing | Cast iron | Carbon steel adequate | Moderate difference |
| Delicate fish | Carbon steel | Cast iron requires skill | Notable difference |
The two-pan system costs $90-110 total (budget cast iron + quality carbon steel). This investment eliminates cooking technique compromises. Each meal uses the optimal tool.
Suggested Starter Setup
Start with one 12-inch pan matching your dominant cooking style. Track which dishes you cook most frequently over 3 months. Add the complementary material in 10-inch size after identifying gaps in your current pan’s capabilities.
Starter combinations by cooking style:
- Baking enthusiast: 12-inch cast iron, later add 10-inch carbon steel
- Quick-cooking preference: 12-inch carbon steel, later add 10-inch cast iron
- Balanced repertoire: 12-inch cast iron (lower cost), 10-inch carbon steel for delicate work
- Meat-focused cooking: 12-inch cast iron for steaks, 10-inch carbon steel for chicken cutlets
Building Your Cookware Collection Strategically
Avoid duplicate sizes in one material before trying both. Two cast iron pans (10-inch and 12-inch) provide redundant capabilities. The money spent on a second cast iron could purchase carbon steel, expanding functional range instead of duplicating existing performance.
Collection building timeline:
| Purchase Order | Item | Price | Cumulative Cost | Cooking Coverage |
|---|---|---|---|---|
| First | 12-inch cast iron | $25 | $25 | 60% of recipes |
| Second | 10-inch carbon steel | $70 | $95 | 90% of recipes |
| Third | 12-inch stainless steel | $80 | $175 | 98% of recipes |
| Fourth | Specialty items as needed | Varies | N/A | 100% coverage |
The three-pan core (cast iron, carbon steel, stainless steel) handles all cooking scenarios. Cast iron and carbon steel manage non-acidic dishes. Stainless steel covers tomato sauces, wine reductions, and citrus preparations. This foundation eliminates technique compromises while minimizing redundant purchases.
Storage space limits collection size for many cooks. Two pans (cast iron + carbon steel) occupy the same cabinet space as four non-stick pans requiring replacement every 3-5 years. The permanent nature of iron cookware makes collection planning more important than with disposable alternatives.


