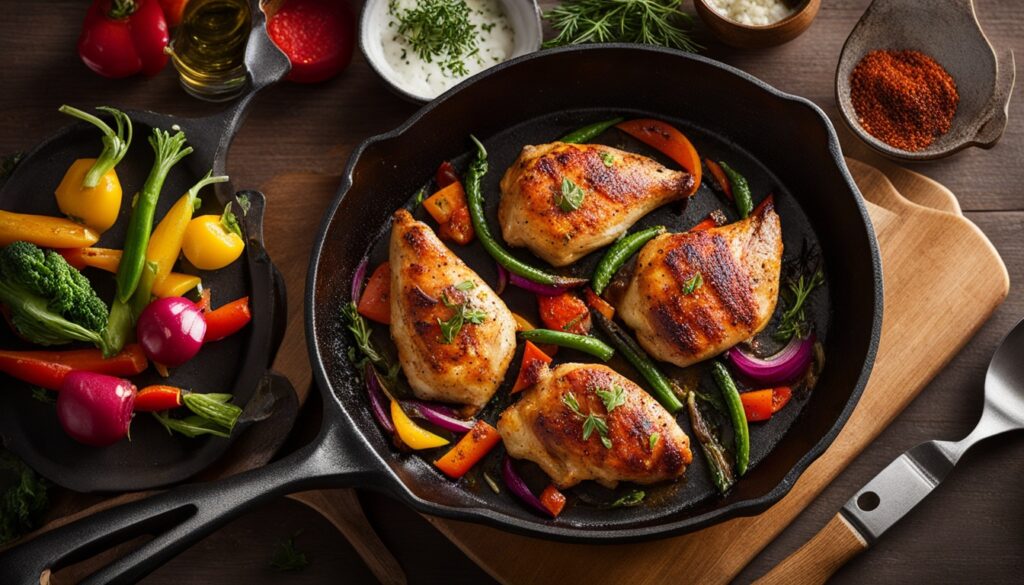
Cast iron skillet chicken breast recipes solve the one problem that ruins more weeknight dinners than anything else: dry, overcooked chicken that nobody wants to eat.
I’ve been overcooking chicken breast my entire adult life. Not every time — but enough times that I started avoiding it and defaulting to thighs just because thighs are more forgiving. Then about five years ago I committed to figuring out cast iron chicken breast properly. Hot pan, dry meat, thermometer, rest time. That’s it. Four variables. Once I stopped guessing and started controlling those four things, the chicken got better immediately and has stayed better since.
My wife does not overcook chicken. She has a gift for it that I’ve never fully understood. My sons don’t cook chicken yet, but they have very detailed opinions about how it should taste. These 12 recipes reflect all of that, including the occasional disagreement about what “spicy enough” means.
Table of Contents
- 1 Getting Started with Cast Iron Skillet Cooking
- 2 Benefits of Using a Cast Iron Skillet for Chicken Breasts
- 3 Essential Tips for Perfect Cast Iron Skillet Chicken Breasts
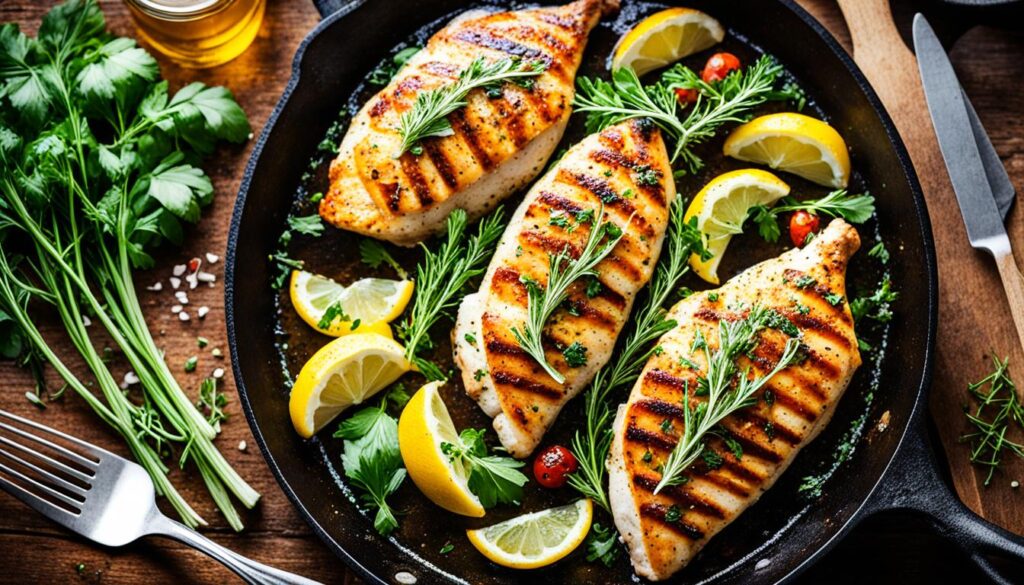
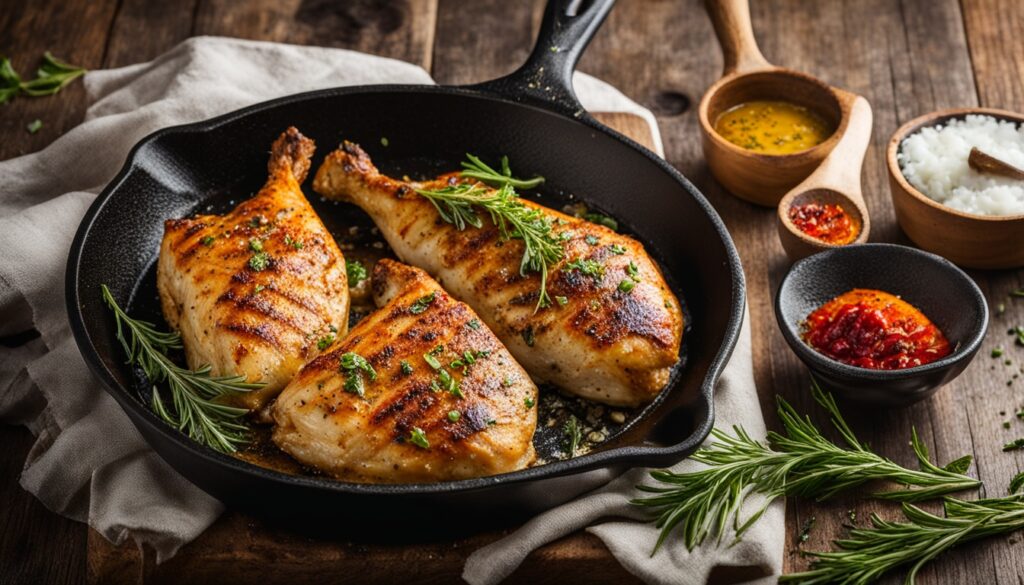
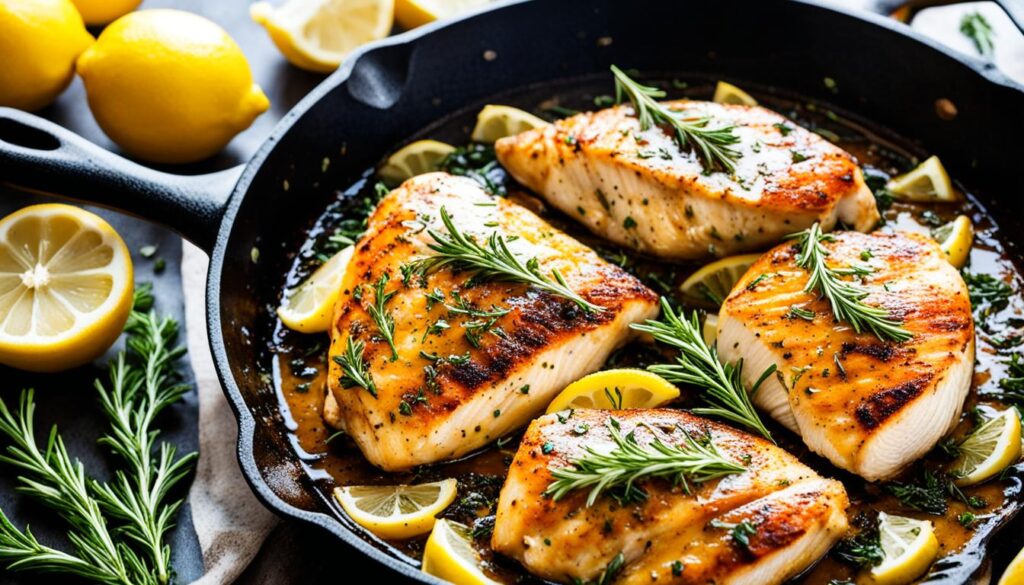
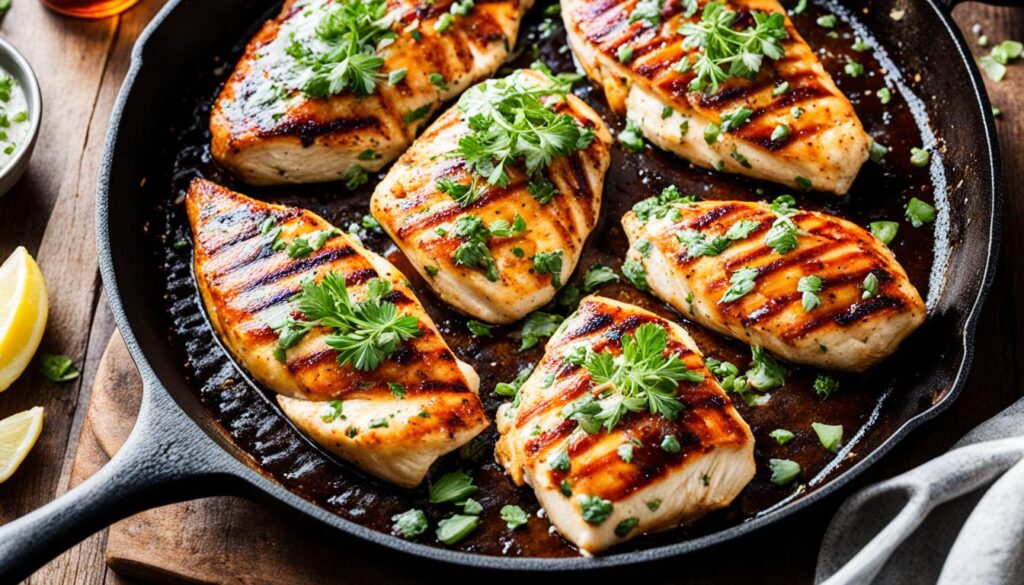
- 4 1. Lemon Garlic Herb Cast Iron Chicken Breast
- 5 2. Smoky Paprika and Cumin Chicken Breast
- 6 3. Honey Mustard Glazed Chicken Breast
- 7 4. Mediterranean-Inspired Olive and Tomato Chicken Breast
- 8 5. Creamy Mushroom and Thyme Chicken Breast
- 9 6. Spicy Cajun Cast Iron Chicken Breast
- 10 7. Asian-Fusion Soy and Ginger Chicken Breast
- 11 8. Parmesan and Sun-Dried Tomato Crusted Chicken Breast
- 12 9. Balsamic Glazed Cast Iron Chicken Breast
- 13 10. BBQ Ranch Chicken Breast
- 14 11. Coconut Curry Cast Iron Chicken Breast
- 15 12. Herb-Crusted Goat Cheese Stuffed Chicken Breast
Getting Started with Cast Iron Skillet Cooking
Cast iron skillet cooking for chicken breast produces a better sear, more consistent heat, and juicier results than nonstick or stainless — because the pan holds temperature when cold protein hits it instead of dropping.
Before the recipes, a few things about cast iron that actually matter.
Preheat the pan. Fully. Not 30 seconds. Three to four minutes over medium-high heat before any oil goes in. Most people preheat briefly and then wonder why nothing browns. The thermal mass — the actual reason you’re using cast iron — only works when the pan is genuinely hot. Cold cast iron is just a heavy nonstick pan that’s harder to clean.
Pat the chicken dry. Paper towels, both sides, every time. Moisture on the surface creates steam when it hits hot oil. Steam prevents browning. The sear you’re after requires a dry surface. This takes ten seconds and it matters every single time.
Use a thermometer. Pull the chicken at 160°F internal. Carryover cooking from the rest period brings it to 165°F, which is the FDA’s food safety target. If you pull at 165°F you’ll hit 168 to 170°F after resting. That’s dry. The thermometer is the single best tool in cast iron chicken cooking — not optional, not just for beginners.
Rest it five minutes. The juices redistribute. Cut into it immediately after cooking and they run onto the cutting board. Wait five minutes and they stay in the meat. This is not a suggestion.
These cast iron skillet chicken breast recipes all follow the same architecture: hot pan, dry seasoned chicken, proper sear, oven or sauce finish. The details change. The structure doesn’t.
Choosing the right cookware matters especially for chicken breast because it’s so lean. There’s almost no fat to buffer against a poorly controlled pan. The cast iron is doing real protective work here.
Benefits of Using a Cast Iron Skillet for Chicken Breasts
Cast iron skillets cook chicken breast better than other pans because they maintain consistent high heat, transfer from stovetop to oven without drama, and develop a proper sear crust that keeps moisture inside.
Here’s what’s actually happening when you use cast iron for chicken. The thermal mass — the weight of the pan — stores heat. When cold chicken hits the surface, the temperature doesn’t drop enough to kill the sear. With a thin nonstick pan, it drops significantly, moisture starts releasing from the meat, and you end up with chicken sitting in its own liquid instead of forming a crust. Cast iron doesn’t let that happen.
The stovetop-to-oven move is the other genuine advantage. Most of these recipes start with a 4 to 5 minute sear on each side, then finish in a 375-400°F oven for 10 to 15 minutes. Cast iron handles that transition without any drama. No transferring to a baking dish, no heat loss, no extra dishes.
The benefits of cast iron include a nutritional angle most people overlook too — a seasoned cast iron skillet transfers trace amounts of dietary iron into acidic foods cooked in it. Minor in the context of a full diet, but real. The pan I use for all these recipes is about 12 years old. It cooks better now than the day I bought it. Nothing else in my kitchen does that.
According to the USDA FoodData Central, a 4-ounce boneless skinless chicken breast provides roughly 26 grams of protein at around 124 calories — one of the best protein-to-calorie ratios of any meat. Cooking it in cast iron without needing excessive added fat preserves that ratio better than most other methods.
Essential Tips for Perfect Cast Iron Skillet Chicken Breasts
Perfect cast iron skillet chicken breast requires dry meat, a genuinely hot pan, a thermometer, and five minutes of patience after cooking. Everything else is secondary.
Pound the thick end. Chicken breasts are naturally uneven — fat at one end, tapered at the other. The thick end takes longer to cook. By the time the thick end hits temperature, the thin end is already dry and pulling away at the edges. Pound the thick end down to roughly 3/4-inch uniform thickness, or butterfly the whole breast. Either works. This single step makes more difference than any marinade.
Don’t move the chicken after it goes in. Put it in the pan and leave it alone for 4 to 5 minutes. It’ll stick initially — cast iron grabs protein — and release naturally when the sear is set. If it doesn’t release when you try to flip, it’s not ready. Another minute. It’ll let go.
Dry brine when you have time. Salt both sides 30 to 60 minutes before cooking and leave it uncovered in the refrigerator. The salt draws out surface moisture, then the moisture reabsorbs carrying salt into the meat. The result is chicken that’s seasoned from the inside and has a drier surface for a better sear. Worth doing on weekends when there’s time.
The same principles that make this Chicago deep dish pizza recipe work in cast iron — thermal mass, even heat distribution, stovetop-to-oven capability — apply directly to chicken breast cooking.
1. Lemon Garlic Herb Cast Iron Chicken Breast
This is the most-made recipe in my house. Not because it’s the fanciest or most interesting — it’s not — but because it works every single time and everyone at the table eats it without complaint, which in a house with two teenagers counts as a significant victory.
My wife requests this specifically when she doesn’t have a specific request. I’ve spent years trying to interpret what that means. I’ve decided it means it’s the comfortable default — the thing she wants when she’s tired and doesn’t want to think about it.
Goes well alongside healthy beef and broccoli stir fry if you’re planning a larger spread.
Ingredients
- 4 boneless skinless chicken breasts (6-8 oz each), pounded to even thickness
- 4 cloves garlic, minced
- 2 tablespoons olive oil
- 2 tablespoons unsalted butter
- 1 lemon, zested and juiced
- 1 teaspoon fresh thyme leaves
- 1 teaspoon fresh rosemary, finely minced
- 1 teaspoon salt
- 1/2 teaspoon black pepper
- 2 tablespoons fresh parsley, chopped
Instructions
Preheat the oven to 400°F. Pat the chicken completely dry on both sides — the surface should feel almost tacky, not damp — then season all over with salt and pepper. Let it sit while the pan heats.
Cast iron on medium-high for three full minutes. Oil in. Wait for shimmer. Chicken goes in presentation side down. Now leave it. Four to five minutes without touching it. When you try to lift an edge after four minutes, it should release cleanly — if it tugs and resists, give it another minute and try again. It will let go when it’s ready.
Flip. Butter into the pan immediately — it’ll foam up around the chicken. Garlic in. Tilt the pan and baste the chicken with the foamy garlic butter for about 30 seconds. The garlic should look pale golden and smell sharp and sweet. Brown garlic is bitter garlic. If it’s browning fast, move to the next step.
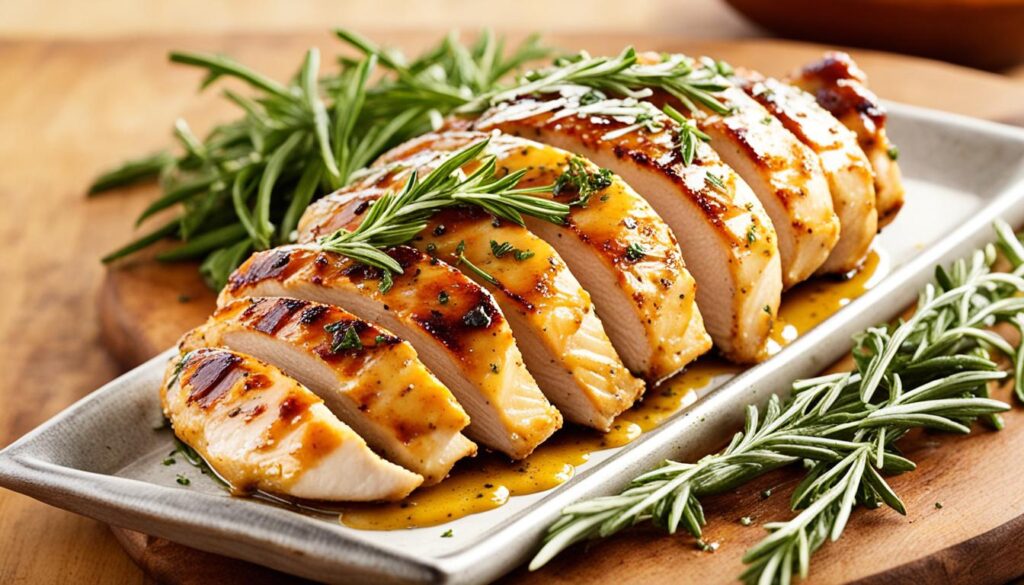
Lemon juice and zest over everything. Herbs in. Into the oven for 10 to 14 minutes. Pull at 160°F. The chicken should feel firm but not hard when pressed — springy, not bouncy. Rest five minutes before slicing. Spoon the pan sauce over the top.
Nutrition Info (per serving, serves 4)
| Nutrient | Amount per Serving |
|---|---|
| Calories | 295 |
| Carbohydrates | 3g |
| Protein | 38g |
| Fat | 14g |
| Fiber | 0.5g |
| Sodium | 680mg |
2. Smoky Paprika and Cumin Chicken Breast
This recipe came from a night I had chicken that needed to be cooked and a spice drawer I hadn’t organized in about four months. I started pulling things out, smelled the smoked paprika, smelled the cumin, and made a decision. My older son ate two portions and asked what I put on it.
Smoked paprika is not the same as regular paprika. I want to be direct about that because people substitute them and then wonder why the dish is flat. Smoked paprika has a depth that makes cast iron-seared chicken taste like it came off a wood-fired grill. It’s worth buying specifically.
Check out the Chinese Chicken Cabbage Stir Fry recipe for a completely different flavor direction using the same high-heat chicken technique.
Ingredients
- 4 boneless skinless chicken breasts, pounded to even thickness
- 2 teaspoons smoked paprika
- 1 teaspoon ground cumin
- 1 teaspoon garlic powder
- 1/2 teaspoon onion powder
- 1/2 teaspoon dried oregano
- 1/4 teaspoon cayenne pepper
- 1 teaspoon salt
- 1/2 teaspoon black pepper
- 2 tablespoons neutral oil
Instructions
Combine all the dry spices in a small bowl and stir. The rub should look uniformly orange-red and smell smoky, earthy, and slightly warm from the cayenne. Pat the chicken completely dry — this is especially important for a spice rub, wet chicken means the rub slides off — then press it firmly into both sides. Use your hand and actually press. Not a dusting. A real coating.
Let the rubbed chicken sit for at least 15 minutes. Thirty is better. The salt starts working and the rub adheres into the moisture the salt draws out.
Screaming hot cast iron. Oil in. Chicken in. Five full minutes without moving — the spice rub needs uninterrupted contact with the hot surface to form a crust. Flip once. The seared side should look deep brick-red with darkened, almost charred edges. That’s correct. That color is flavor.
Into the 400°F oven for 10 to 12 minutes. The crust should feel firm and slightly crackling when you press it. Pull at 160°F. Rest five minutes.
Nutrition Info (per serving, serves 4)
| Nutrient | Amount per Serving |
|---|---|
| Calories | 265 |
| Carbohydrates | 2g |
| Protein | 38g |
| Fat | 11g |
| Fiber | 0.5g |
| Sodium | 660mg |
3. Honey Mustard Glazed Chicken Breast

My younger son discovered honey mustard chicken at probably age 13 and has not moved on from it. He’s now 17. Four years of the same request, just with gradually increasing sauce quantity. The cast iron version produces a lacquered, slightly sticky glaze that a baking sheet never manages — the direct heat contact caramelizes the edges in a way that’s hard to describe until you see it.
Two coats of glaze. Not one. First coat before the oven, second coat halfway through. One coat is fine. Two coats is something else entirely.
If you’re looking for a totally different protein option, the shrimp and broccoli stir fry uses the same weeknight speed with a completely different flavor profile.
Ingredients
- 4 boneless skinless chicken breasts, pounded to even thickness
- 3 tablespoons Dijon mustard
- 2 tablespoons whole grain mustard
- 3 tablespoons honey
- 1 tablespoon apple cider vinegar
- 2 cloves garlic, minced
- 1/2 teaspoon salt
- 1/4 teaspoon black pepper
- 1 tablespoon olive oil
- Fresh thyme for garnish
Instructions
Whisk both mustards together with honey, apple cider vinegar, and garlic. Taste the raw mixture — it should be aggressively tangy and sweet in a way that makes you want to eat it off the spoon. It mellows and deepens as it cooks. Set aside about one-third of the glaze for the second application.
Pat the chicken dry, season lightly with salt and pepper. Hot cast iron with olive oil — 4 minutes per side until golden. Both sides need color before the glaze goes on.
Brush the top of each breast generously with the honey mustard mixture. Not a thin swipe — a real coat. Into the 400°F oven for 8 minutes. Pull out, apply the reserved glaze to the top of each breast. Back in for 5 to 7 more minutes until the internal temperature hits 160°F.
The finished glaze should look lacquered. Dark amber, slightly bubbling at the very edges where it touches the hot pan. Almost candy-like. Rest five minutes — the glaze firms up slightly as it cools and becomes even more glossy.
Nutrition Info (per serving, serves 4)
| Nutrient | Amount per Serving |
|---|---|
| Calories | 310 |
| Carbohydrates | 18g |
| Protein | 38g |
| Fat | 8g |
| Fiber | 0.5g |
| Sodium | 590mg |
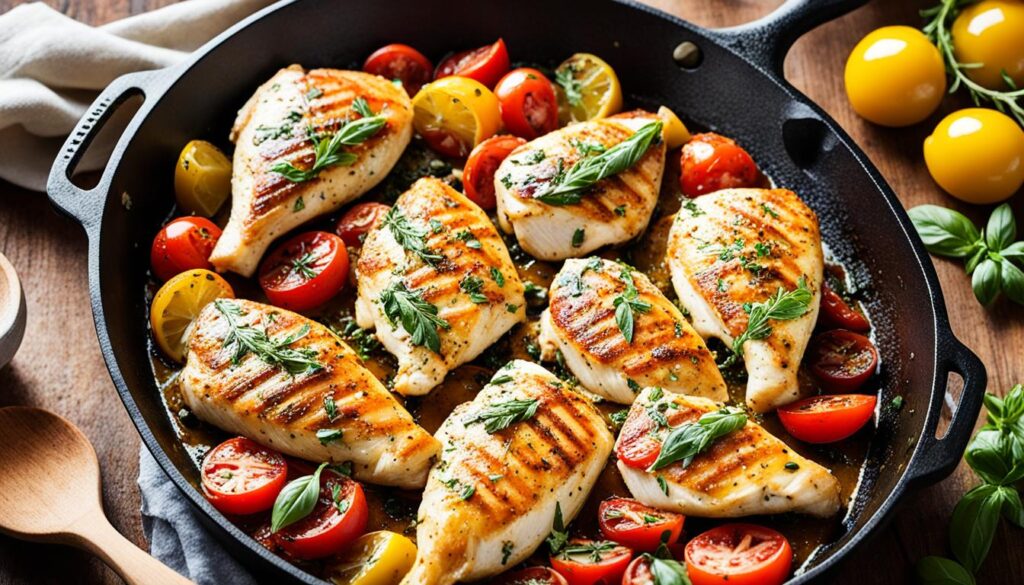
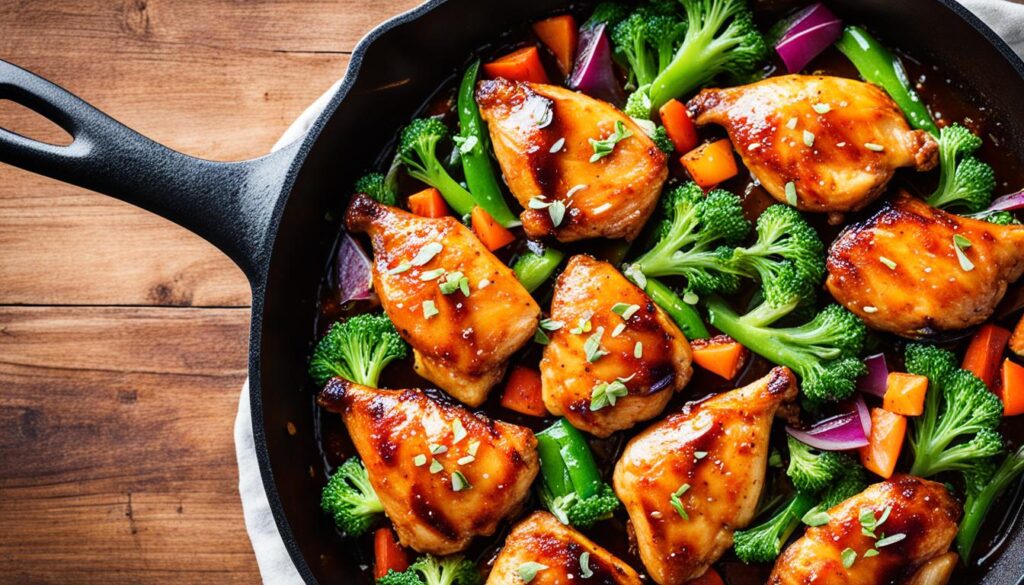
4. Mediterranean-Inspired Olive and Tomato Chicken Breast
This is the recipe I make when we have people coming for dinner and I want to look like I actually cook. The olives and tomatoes form their own sauce in the pan around the chicken. The cast iron goes from stovetop to oven and straight to the table. It looks like considerably more work than it is.
My wife calls this one “company food.” Which I think means it looks impressive. I choose to take it that way.
The Mediterranean-inspired chicken approach checks multiple boxes nutritionally too — a study from the American Heart Association supports the Mediterranean dietary pattern as one of the most consistently heart-protective approaches in the research literature, emphasizing olive oil, vegetables, and lean protein.
Ingredients
- 4 boneless skinless chicken breasts, pounded to even thickness
- 1/2 cup Kalamata olives, pitted and halved
- 1 cup cherry tomatoes, halved
- 1/2 cup jarred roasted red peppers, sliced
- 4 cloves garlic, minced
- 1/4 cup dry white wine (or chicken broth)
- 2 tablespoons olive oil
- 1 teaspoon dried oregano
- 1 teaspoon salt
- 1/2 teaspoon black pepper
- 2 tablespoons fresh basil, torn
Instructions
Salt and pepper the chicken, pat dry. Hot cast iron with olive oil — sear 4 to 5 minutes per side until deeply golden. The breasts should feel slightly firm when pressed but still have a little give at the center. Remove and set aside.
Medium heat in the same pan. Garlic in — 30 seconds, stirring. Pour in the wine or broth. It bubbles immediately and all the fond from the chicken lifts off the bottom. Scrape it up. That fond is what makes the sauce taste like it cooked for an hour.
Tomatoes, olives, and roasted peppers in. Stir to combine with the pan liquid. Nestle the seared chicken back into the vegetable mixture, pressing each breast down into it slightly. Oregano over everything. Into the 375°F oven for 15 to 18 minutes.
The tomatoes should be soft and slightly collapsed, their juice released into the olive-wine sauce, which should look glossy and fragrant when the pan comes out. Fresh basil goes on at the table, not before — heat kills the brightness.
Nutrition Info (per serving, serves 4)
| Nutrient | Amount per Serving |
|---|---|
| Calories | 320 |
| Carbohydrates | 8g |
| Protein | 39g |
| Fat | 14g |
| Fiber | 2g |
| Sodium | 780mg |
5. Creamy Mushroom and Thyme Chicken Breast
Sunday dinner. That’s when this gets made. Not a weeknight dish — it requires attention and patience that Thursday at 6:30 p.m. doesn’t allow. But on a Sunday when I have the kitchen to myself for an hour and nobody is asking how much longer, this is worth every minute of it.
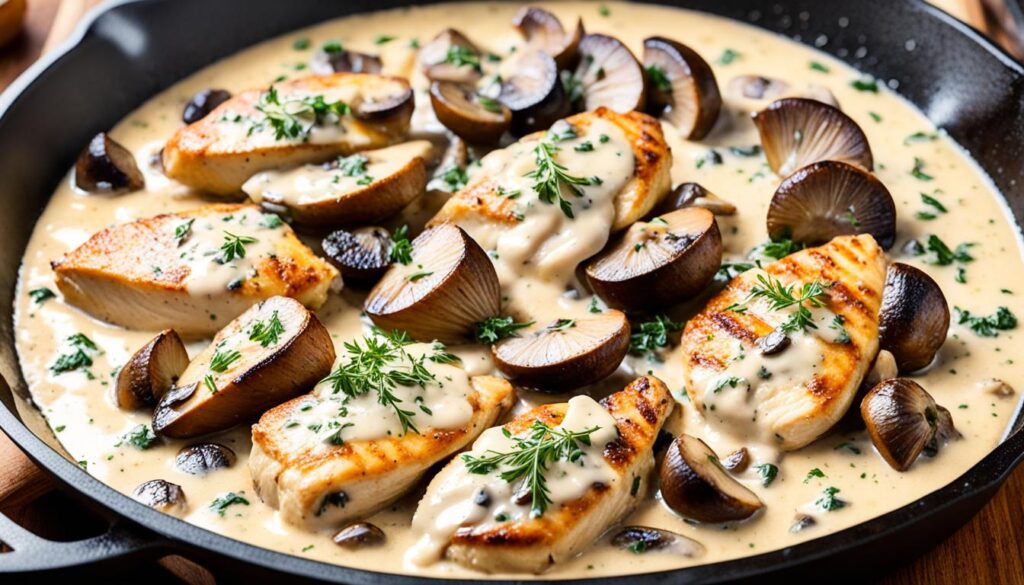
My wife walked into the kitchen while this was simmering once and said “it smells like a restaurant in here.” That comment has kept this recipe in regular rotation for two years.
The National Institutes of Health notes that mushrooms are among the very few non-animal dietary sources of vitamin D and also provide meaningful amounts of B vitamins and antioxidants — which gives this cream sauce a nutritional profile that’s more interesting than it might appear.
Ingredients
- 4 boneless skinless chicken breasts, pounded to even thickness
- 12 oz cremini mushrooms, sliced
- 3 cloves garlic, minced
- 1 shallot, finely diced
- 1 cup heavy cream
- 1/2 cup chicken broth
- 2 tablespoons unsalted butter
- 1 tablespoon olive oil
- 1 teaspoon fresh thyme leaves
- 1 teaspoon Dijon mustard
- Salt and black pepper
- Fresh parsley for serving
Instructions
Season the chicken generously with salt and pepper on both sides. Hot cast iron with olive oil — 5 minutes per side until deeply golden. The chicken doesn’t need to be fully cooked at this point, just properly seared with a real crust. Remove and set aside.
Same pan, medium heat, butter in. Mushrooms go in next — spread them out in a single layer and leave them alone for 2 full minutes before stirring. They should look golden and slightly shrunken, not pale and wet and releasing liquid. Pale wet mushrooms mean the pan was too crowded or not hot enough. Golden and slightly caramelized mushrooms mean the sauce will taste like something.
Shallot and garlic in. Two to three minutes until soft and fragrant. Chicken broth poured in — scrape the bottom of the pan. Heavy cream, Dijon mustard, and thyme in. Stir to combine. The sauce looks thin and pale at this point. That changes.
Nestle the chicken back in, partially submerged in the sauce. Low simmer — small bubbles at the edges, not a rolling boil. Twelve to fifteen minutes until the chicken hits 160°F and the sauce has thickened enough to coat the back of a spoon. Taste it. Adjust salt.
Nutrition Info (per serving, serves 4)
| Nutrient | Amount per Serving |
|---|---|
| Calories | 480 |
| Carbohydrates | 7g |
| Protein | 42g |
| Fat | 31g |
| Fiber | 1g |
| Sodium | 520mg |
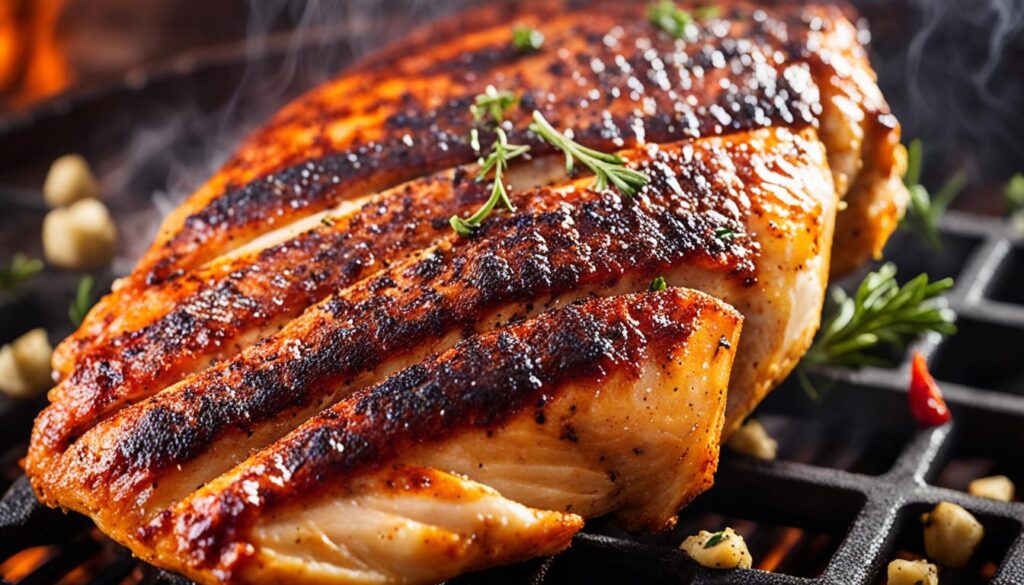
6. Spicy Cajun Cast Iron Chicken Breast
My older son started making this himself around age 16. He watched me do it a few times, asked a couple questions, and one night I came home to the kitchen smelling like a Cajun restaurant and both my sons eating at the table. He made it. He made it spicier than I do.
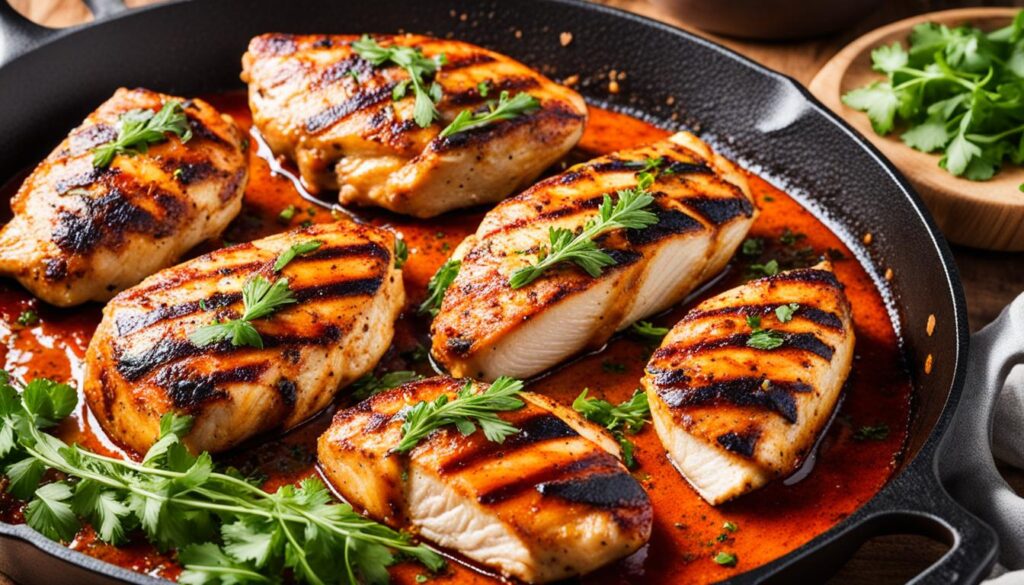
He’s probably right about the heat level. I’ve been gradually increasing the cayenne since he started making it and I haven’t looked back.
No sauce, no glaze — just a thick spice crust that chars at the edges in the hot cast iron and stays crackling through the oven finish. The crust is everything.
Ingredients
- 4 boneless skinless chicken breasts, pounded to even thickness
- 2 teaspoons smoked paprika
- 1 teaspoon garlic powder
- 1 teaspoon onion powder
- 1 teaspoon dried oregano
- 1 teaspoon dried thyme
- 1/2 teaspoon cayenne pepper (increase to 1 teaspoon for real heat)
- 1/2 teaspoon black pepper
- 1/2 teaspoon white pepper
- 1 teaspoon salt
- 2 tablespoons neutral oil
Instructions
Mix all the spices together. The rub should smell smoky, herby, and sharp from the cayenne — if you can’t smell the cayenne when you lean over the bowl, add more. Pat the chicken dry, press the rub firmly into both sides — both hands, real pressure, not a gentle dusting. Let the seasoned chicken sit out for 20 to 30 minutes. The salt draws out surface moisture and the rub adheres into it, forming a paste that sets during cooking.
Very hot cast iron. More oil than you’d think — 2 tablespoons. The rub absorbs some of it and the rest helps the crust form. Chicken in. Five full minutes without moving anything. Flip. The seared side should be deeply browned, almost charred at the thin edges. That level of color is correct. That’s not burning. That’s the point.
Into the 400°F oven for 10 to 12 minutes. The crust should feel firm and slightly crackling when you press it with a finger. Pull at 160°F. Rest five minutes. Cut against the grain — the contrast between the dark crust and the juicy pale interior is the visual you’re after.
Nutrition Info (per serving, serves 4)
| Nutrient | Amount per Serving |
|---|---|
| Calories | 270 |
| Carbohydrates | 2g |
| Protein | 38g |
| Fat | 11g |
| Fiber | 1g |
| Sodium | 680mg |
7. Asian-Fusion Soy and Ginger Chicken Breast
I didn’t expect much from this one when I first made it. It sounded like a stir fry protein that got separated from its dish. It’s not that at all — the soy-ginger glaze reduces in the same pan the chicken cooked in and becomes intensely savory and slightly sticky in a way that makes the whole breast taste glossy and complex. My entire family eats this without any negotiation, which doesn’t happen often.
The USDA’s dietary guidelines consistently identify lean poultry as a cornerstone of balanced protein intake — and this preparation adds significant flavor with minimal added fat.
Ingredients
- 4 boneless skinless chicken breasts, pounded to even thickness
- 3 tablespoons soy sauce
- 1 tablespoon dark soy sauce
- 2 tablespoons honey
- 1 tablespoon rice vinegar
- 1 tablespoon fresh ginger, grated
- 3 cloves garlic, minced
- 1 teaspoon sesame oil (for the sauce, not for cooking)
- 1 tablespoon neutral oil
- 2 green onions, sliced
- Sesame seeds for garnish
Instructions
Whisk together the soy sauces, honey, rice vinegar, ginger, and garlic. Taste the raw sauce — it should taste too salty and too sweet. That’s right. It concentrates as it reduces and everything balances out. Set it aside.
Salt the chicken lightly — the sauce carries significant sodium, so the chicken doesn’t need much. Pat dry. Hot cast iron with neutral oil. Sear 4 to 5 minutes per side until golden. Remove and set aside.
Sauce into the hot pan. It bubbles hard immediately. Two minutes over medium heat, stirring, until it’s reduced and coats the back of a spoon — dark, glossy, slightly thickened. Return the chicken to the pan, spoon the sauce over each breast, and into the 375°F oven for 10 to 12 minutes, basting once halfway through.
Sesame oil drizzled over at the end. Not in the pan, not in the sauce — over the finished dish. Sesame oil hits its smoke point fast and turns bitter. Green onions and sesame seeds on top. Serve over rice while everything is hot.
Nutrition Info (per serving, serves 4)
| Nutrient | Amount per Serving |
|---|---|
| Calories | 285 |
| Carbohydrates | 12g |
| Protein | 39g |
| Fat | 8g |
| Fiber | 0.5g |
| Sodium | 890mg |
8. Parmesan and Sun-Dried Tomato Crusted Chicken Breast
This is the recipe my wife requests when people are coming over and she wants it to look like I put in serious effort. The Parmesan crust forms and holds in cast iron in a way that doesn’t happen reliably with other pans — the direct heat contact sets the crust before the cheese has time to slide off.
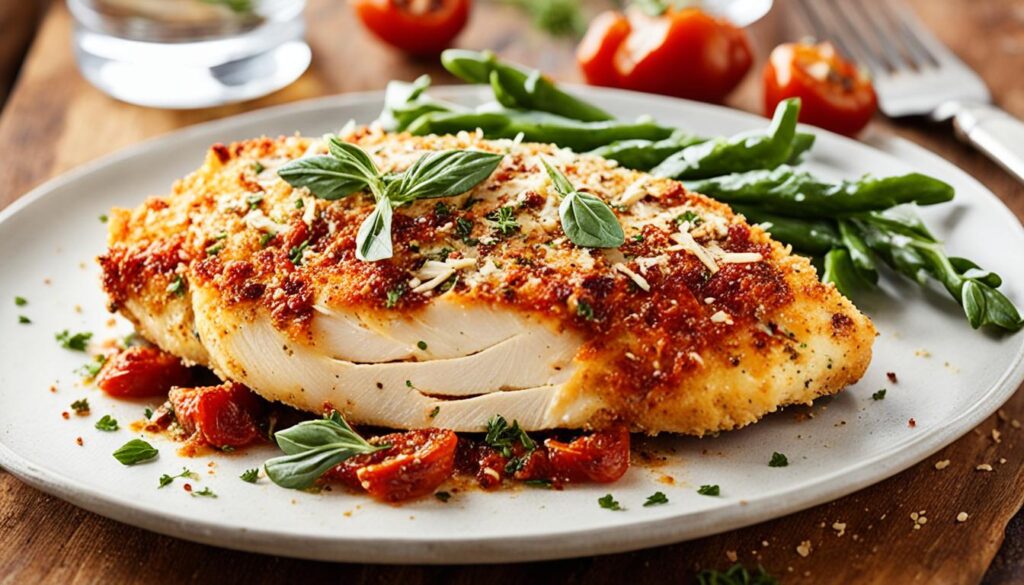
It looks complicated. It isn’t. About 35 minutes total and most of that is oven time.
Ingredients
- 4 boneless skinless chicken breasts, pounded to even thickness
- 1/2 cup freshly grated Parmesan cheese
- 1/3 cup sun-dried tomatoes in oil, drained and finely chopped
- 2 tablespoons panko breadcrumbs
- 2 cloves garlic, minced
- 1 tablespoon fresh basil, chopped
- 1 teaspoon dried oregano
- 1/2 teaspoon salt
- 1/4 teaspoon black pepper
- 2 tablespoons olive oil
Instructions
Combine the Parmesan, sun-dried tomatoes, panko, garlic, basil, and oregano in a bowl. The mixture should look like a rough, slightly oily paste — the oil from the sun-dried tomatoes helps everything bind. Taste it. The Parmesan is salty, so the chicken itself needs less salt than usual. Season the breasts lightly.
Cast iron over medium heat — slightly lower than the other recipes, because panko and Parmesan burn faster than plain chicken breast. Olive oil in. Sear the chicken 3 to 4 minutes on the first side until golden. Flip.
Now press the Parmesan mixture firmly onto the top of each breast. Both hands, press it in. It won’t look like much at first — a thin, rough layer that seems like it might fall off. Trust it. Into the 400°F oven for 12 to 15 minutes. The crust should be golden brown and smell intensely of toasted cheese and concentrated tomato. Don’t flip the chicken again. The crust forms on the top and stays there.
Nutrition Info (per serving, serves 4)
| Nutrient | Amount per Serving |
|---|---|
| Calories | 340 |
| Carbohydrates | 7g |
| Protein | 43g |
| Fat | 15g |
| Fiber | 1g |
| Sodium | 620mg |
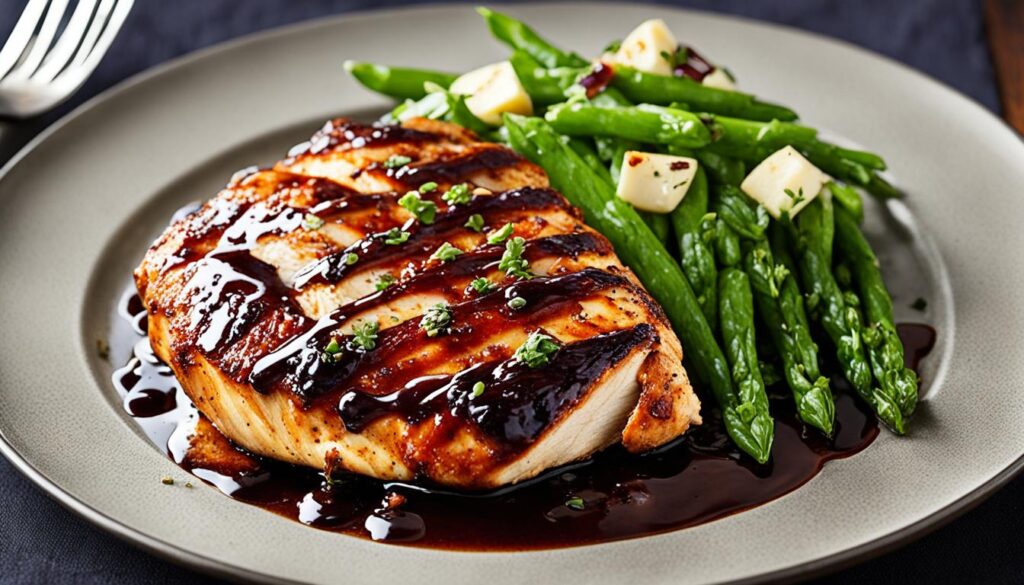
9. Balsamic Glazed Cast Iron Chicken Breast
Balsamic glaze sounds sophisticated. It’s literally just balsamic vinegar and honey reduced in a pan for five minutes. The fond from the chicken mixes in as it reduces and gives it depth that straight balsamic doesn’t have on its own. I make this when I want something that tastes like I planned it but I actually didn’t.
Ingredients
- 4 boneless skinless chicken breasts, pounded to even thickness
- 1/2 cup balsamic vinegar
- 2 tablespoons honey
- 2 cloves garlic, minced
- 1 teaspoon Dijon mustard
- 1/2 teaspoon dried rosemary
- 1 tablespoon olive oil
- Salt and black pepper
- Fresh rosemary for garnish
Instructions
Whisk together the balsamic vinegar, honey, garlic, Dijon, and dried rosemary in a small bowl. Smell it — sharp, sweet, complex, slightly acidic. That concentration is going to double when it reduces. Set it aside.
Pat the chicken dry, season with salt and pepper. Hot cast iron with olive oil — 5 minutes per side until deeply golden and nearly cooked through. Remove and set aside.
Balsamic mixture into the hot pan. It bubbles up immediately and hard. Reduce over medium heat for 3 to 4 minutes, stirring constantly, until the volume has roughly halved and the sauce is thick enough to coat a spoon. The color goes from deep red to almost black and glossy. That transition — dark, thick, glossy — means it’s ready.
Chicken back in, flip several times to coat every surface in the glaze. One minute back on the heat. Rest five minutes. The glaze sets slightly as it cools and becomes more intensely sticky.
Nutrition Info (per serving, serves 4)
| Nutrient | Amount per Serving |
|---|---|
| Calories | 285 |
| Carbohydrates | 16g |
| Protein | 38g |
| Fat | 7g |
| Fiber | 0.5g |
| Sodium | 380mg |
10. BBQ Ranch Chicken Breast
Both of my sons agree on this recipe. Completely, without argument, every time. I’ve stopped trying to understand the specific appeal of BBQ sauce combined with ranch dressing — it sounds like a fast-food invention — and just accepted that this is the one that produces unanimous household approval. That’s rare enough to be worth preserving.
Ingredients
- 4 boneless skinless chicken breasts, pounded to even thickness
- 1/3 cup BBQ sauce
- 3 tablespoons ranch dressing
- 1 teaspoon smoked paprika
- 1/2 teaspoon garlic powder
- 1/2 teaspoon onion powder
- Salt and black pepper
- 1 tablespoon neutral oil
- 1/2 cup shredded cheddar cheese
- 2 tablespoons chopped chives
Instructions
Stir the BBQ sauce and ranch dressing together in a small bowl. The mixture should look creamy and pink-tinged — somewhere between the two parent sauces. Make extra if you want dipping sauce on the side. My sons always want dipping sauce on the side.
Mix smoked paprika, garlic powder, onion powder, salt, and pepper. Season the chicken on both sides. Hot cast iron with neutral oil. Sear 4 to 5 minutes per side until golden.
Brush the BBQ ranch mixture generously over the top of each breast — not a thin coat, a real application. Scatter the shredded cheddar over each piece. Into the 400°F oven for 10 to 12 minutes until 160°F internal and the cheese is fully melted and softly bubbling.
Chives on top. Serve immediately. The cheese firms up slightly as it cools and loses the soft pull that makes it good. Hot is the time to eat this.
Nutrition Info (per serving, serves 4)
| Nutrient | Amount per Serving |
|---|---|
| Calories | 360 |
| Carbohydrates | 12g |
| Protein | 44g |
| Fat | 14g |
| Fiber | 0.5g |
| Sodium | 720mg |
11. Coconut Curry Cast Iron Chicken Breast
My family was skeptical of this one the first time. My sons were very skeptical. My younger son asked if the chicken was going to taste like sunscreen, which is the most teenage thing anyone has ever said to me in a kitchen. Three months later he was asking if there was more sauce to spoon over his rice. That trajectory — suspicion to enthusiasm — is one of my favorite cooking memories.
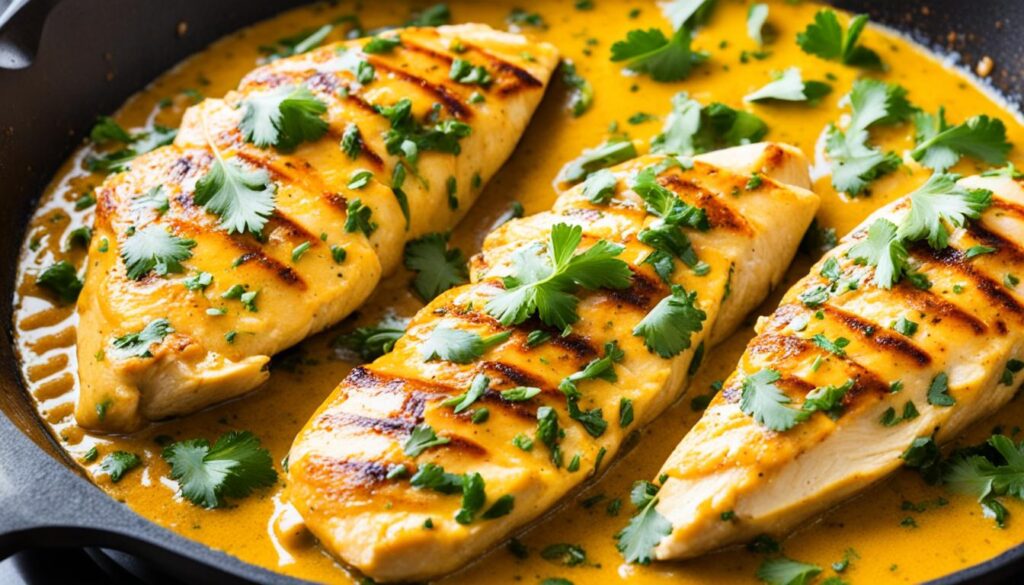
The coconut milk sauce comes together in the same pan after searing. Rich, slightly sweet, complex from the curry paste. A small amount goes a long way over jasmine rice.
Data from the American Institute for Cancer Research notes that turmeric contains curcumin, a compound with studied anti-inflammatory properties — though cooking amounts are modest relative to therapeutic doses. It still makes the sear color beautiful.
Ingredients
- 4 boneless skinless chicken breasts, pounded to even thickness
- 1 can (13-1/2 oz) full-fat coconut milk, shaken well before opening
- 2 tablespoons red curry paste
- 3 cloves garlic, minced
- 1 tablespoon fresh ginger, grated
- 1 tablespoon fish sauce
- 1 teaspoon turmeric
- 1 teaspoon brown sugar
- Juice of 1 lime
- 1 tablespoon neutral oil
- Salt and pepper
- Fresh cilantro and lime wedges for serving
Instructions
Season the chicken with salt, pepper, and a light dusting of turmeric on both sides — the turmeric gives the sear a beautiful golden color and adds to the curry depth. Pat dry first. Hot cast iron with oil — sear 4 to 5 minutes per side. The turmeric-dusted surface goes deep golden-orange. Remove and set aside.
Reduce to medium heat. Garlic and ginger in the same pan — 60 seconds of stirring. Red curry paste in. Let it cook in the residual fat for about a minute, stirring the whole time, until it darkens slightly and the pan smells complex and spiced in a way that’s hard to describe but very clear when you’re standing over it.
Coconut milk poured in — shake the can hard before opening, the fat separates. Fish sauce and brown sugar in. Stir to combine. The sauce looks creamy and orange-red. Bring to a simmer.
Chicken back in. Medium-low heat — small bubbles at the edges, not a rolling boil — for 12 to 15 minutes, turning once. Finish with lime juice. The sauce will have thickened and reduced slightly and should coat each piece of chicken like a glaze when you spoon it. Serve over jasmine rice with fresh cilantro.
Nutrition Info (per serving, serves 4)
| Nutrient | Amount per Serving |
|---|---|
| Calories | 420 |
| Carbohydrates | 8g |
| Protein | 40g |
| Fat | 26g |
| Fiber | 1g |
| Sodium | 610mg |
12. Herb-Crusted Goat Cheese Stuffed Chicken Breast
This is the one I make when I want the family to stop what they’re doing and come to the table without being called twice. It works. Every time someone cuts into the chicken and sees warm, creamy goat cheese and herbs inside, something happens to their face that makes the extra prep feel completely justified.
It looks impressive. The actual technique is not complicated — you’re just cutting a pocket and stuffing it. But the presentation when it comes out of the cast iron with a golden panko crust is the kind of thing that makes people think you spent the whole afternoon on it.
Ingredients
- 4 boneless skinless chicken breasts
- 4 oz goat cheese, softened to room temperature
- 2 tablespoons fresh basil, finely chopped
- 1 tablespoon fresh chives, finely chopped
- 1 teaspoon fresh thyme leaves
- 2 cloves garlic, minced
- 1/4 cup panko breadcrumbs
- 1 tablespoon fresh parsley, chopped
- 1 teaspoon lemon zest
- 2 tablespoons olive oil
- Salt and black pepper
Instructions
Combine the goat cheese, basil, chives, thyme, and garlic in a bowl. Mix until combined — the filling should look creamy and green-flecked and smell herbaceous and bright. Taste it. Season with a little salt and pepper. The filling should taste good enough to eat on its own, because essentially it’s going to be.
Cut a pocket into each chicken breast using a sharp knife: insert the blade at the thickest edge and cut horizontally almost through to the other side, leaving about 1/2-inch of meat on three sides. The pocket should open like a book. Don’t cut all the way through.
Stuff each pocket with one-quarter of the goat cheese mixture. Press the filling in firmly. The edges won’t seal perfectly and a little cheese visible at the opening is normal. Secure with a toothpick if the pocket is particularly wide.
Mix the panko, parsley, lemon zest, salt, and pepper on a flat plate. Press the outside of each stuffed breast lightly into the mixture to coat the surface.
Cast iron over medium heat — slightly lower, because panko burns fast. Olive oil in. Sear 4 minutes per side. Into the 375°F oven for 18 to 22 minutes. The panko should be golden brown. The goat cheese inside should be warm and slightly melted — when you cut the chicken, the filling spreads gently rather than running everywhere. Rest five minutes. Remove toothpicks before serving or someone will have a bad night.
Nutrition Info (per serving, serves 4)
| Nutrient | Amount per Serving |
|---|---|
| Calories | 380 |
| Carbohydrates | 8g |
| Protein | 44g |
| Fat | 18g |
| Fiber | 0.5g |
| Sodium | 490mg |