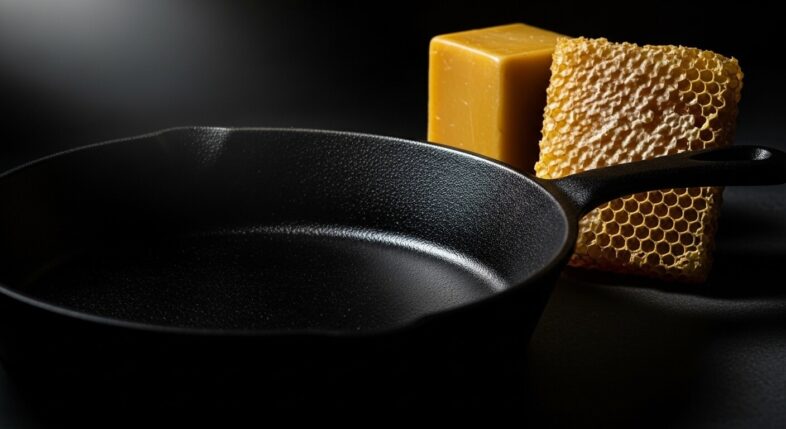
How to Season Your Skillet with Beeswax The Secret to a Glass-Like Finish

How to Season Your Skillet with Beeswax: The Secret to a Glass-Like Finish

Important Clarification: Beeswax for Cast Iron Seasoning (What You Need to Know First)

You cannot actually season a cast iron skillet with pure beeswax because beeswax doesn’t polymerize like oils do—what people call “beeswax seasoning” is really a protective coating applied over already-seasoned cast iron, typically using a beeswax-oil blend for storage protection or aesthetic enhancement.

Let’s clear this up right now.

If you searched for “how to season your skillet with beeswax,” you’re probably finding conflicting information online. Some sources claim beeswax creates amazing seasoning. Others say it’s nonsense. Who’s right?

Both. Sort of.

Why This Search Exists and What People Are Actually Looking For

People search for beeswax cast iron seasoning because they’ve seen social media posts showing incredibly shiny, glass-like cast iron finishes and want to replicate that look, or they’ve heard beeswax provides superior rust protection for storage and maintenance purposes.

The videos are everywhere. Someone rubbing a beeswax bar on a hot skillet, buffing it to a mirror shine, claiming it’s the “old-fashioned secret” to perfect cast iron. Looks amazing. Gets thousands of shares.

Here’s what they’re not telling you: that’s not seasoning in the traditional sense. It’s a surface treatment. A coating. A protectant. Different thing entirely.

The Truth About Beeswax and Cast Iron Seasoning

Beeswax is a natural wax that melts at around 145°F and provides excellent moisture protection, but it doesn’t undergo the chemical polymerization process that creates true cast iron seasoning—instead, it sits on top of existing seasoning as a protective barrier that melts away when you cook.

Real talk? Beeswax has been used on cast iron for over a century. Not for cooking seasoning. For storage and preservation.

Gunsmiths used it. Tool collectors use it. Museums use it on antique cookware displays. Because beeswax creates an airtight barrier against moisture and oxygen—the two things that cause rust.

But it’s not creating a bonded, polymerized coating like lard or vegetable oil seasoning does. Chemically impossible. Beeswax doesn’t have the molecular structure to polymerize.

What Beeswax Actually Does vs. What Traditional Seasoning Does

Traditional seasoning permanently bonds to iron through heat-induced polymerization and creates a non-stick cooking surface, while beeswax creates a temporary protective coating that prevents rust during storage but melts off during cooking and must be reapplied regularly.

Think of it this way: traditional seasoning is like paint bonded to metal. Beeswax is like car wax buffed onto paint. One becomes part of the surface. The other sits on top and washes off eventually.

Aspect Traditional Oil Seasoning Beeswax Treatment
How it bonds Chemical polymerization—permanent Physical coating—temporary
Cooking performance Creates non-stick surface Melts during cooking
Purpose Functional cooking protection Storage and aesthetic
Durability Lasts years with maintenance Lasts weeks to months (if not cooking)

Both have their place. Just different places.

Understanding Cast Iron Seasoning vs. Beeswax Coating

Cast iron seasoning happens when cooking oils polymerize into hard, bonded layers through exposure to high heat, while beeswax coating is a room-temperature or warm application of wax that creates a protective film without any permanent chemical bonding to the iron surface.

How Traditional Seasoning Works (Polymerization)

When you heat vegetable oil, lard, or other fats above 400°F, their triglyceride molecules break apart and recombine into cross-linked polymers that chemically bond with iron oxide on your skillet’s surface—this creates a coating that’s no longer grease but rather a hard, durable, plastic-like finish.

This is chemistry. Actual molecular transformation. Heat breaks chemical bonds, new bonds form with the iron, and you end up with something that wasn’t there before—a polymer coating that’s permanently attached.

The coating can be damaged or worn away through use, but it doesn’t just wipe off or melt off at normal cooking temperatures. It’s fused to the metal at the molecular level.

How Beeswax Works on Cast Iron (Protection Not Seasoning)

Beeswax melts into liquid form at 145°F and flows into the microscopic pores of cast iron, then hardens as it cools to create a water-resistant barrier—but this barrier doesn’t bond chemically to the iron and will melt again whenever the temperature exceeds 145°F.

No chemical reaction. No polymerization. No permanent bonding.

You’re just filling the surface texture with wax. It hardens at room temperature. Looks great. Feels smooth. Repels water beautifully. But heat the pan above 145°F and the wax liquefies again.

This is why beeswax doesn’t work as cooking seasoning—every time you cook, you’re melting and removing the protection you just applied.

Why Beeswax Alone Cannot Replace Proper Seasoning

Using only beeswax on bare or poorly-seasoned cast iron provides zero cooking performance benefits because the wax melts immediately when heated for cooking, leaving you with an unseasoned surface that sticks and rusts—you absolutely must have proper oil-based seasoning underneath any beeswax treatment.

Strip your cast iron to bare metal and apply only beeswax? You’ve done nothing useful. The second you try to cook, the wax melts, pools, smokes (it burns at higher temps), and leaves you with bare iron that sticks like crazy.

Not a replacement for seasoning. Never was. Never will be.

The Role of Beeswax in Cast Iron Maintenance

Beeswax serves as an excellent supplemental protectant for already-seasoned cast iron that’s being stored long-term, displayed as a collectible, or used infrequently—it provides an extra moisture barrier that prevents rust between uses without affecting the underlying seasoning.

This is where beeswax actually shines. You’ve got a well-seasoned skillet that you only use occasionally? Coat it with beeswax between uses. The wax creates an airtight seal that keeps humidity away from the iron.

Or you’ve got vintage cast iron you’re displaying, not cooking with? Beeswax treatment makes it look incredible and protects it from environmental moisture that would otherwise cause rust.

Right tool for the right job.

The Beeswax-Oil Blend Method for Cast Iron

The most effective way to use beeswax on cast iron is blending it with a cooking oil (typically 50/50 to 70/30 oil-to-wax ratio) to create a conditioning mixture that provides both some oil seasoning and wax protection in a single application.

Here’s where things get practical.

What the Beeswax Blend Actually Is

A beeswax-oil blend is a homemade or commercial mixture combining melted beeswax with mineral oil, coconut oil, or other stable oils to create a semi-solid conditioning paste that’s easier to apply than pure beeswax and provides both protective benefits from the wax and some seasoning from the oil.

You’ve probably seen these sold as “cast iron conditioners” or “board butter” adapted for metal. Same concept—wax for protection, oil for conditioning.

The blend stays semi-solid at room temperature, making it easy to scoop and apply. Then you heat it on the pan, it melts and spreads, you buff it out, and it cools into a protective coating.

Why People Combine Beeswax with Oil for Cast Iron

Mixing oil with beeswax creates a product that’s easier to apply than pure wax (which is too hard) or pure oil (which is too runny), plus the oil can add minor seasoning layers while the wax provides moisture protection—though the seasoning effect is minimal compared to traditional oven seasoning methods.

Practical benefits of the blend:

  • Easier application than dealing with a hard wax bar or messy liquid oil
  • Some seasoning benefit from the oil component (not much, but some)
  • Better spreadability compared to pure beeswax
  • Attractive finish that makes cast iron look cared-for
  • Good for maintenance between major seasonings

It’s not magic. Just convenient.

Common Beeswax-to-Oil Ratios Used

Most cast iron beeswax blends use anywhere from 50/50 to 30/70 beeswax-to-oil ratios depending on intended use—higher wax content (50/50) for storage protection, lower wax content (30/70) if you’ll still be cooking with the pan regularly.

Quick ratio guide:

Ratio (Wax:Oil) Best For Consistency
50/50 Long storage, display pieces Firm paste
40/60 Occasional use, maintenance Soft paste
30/70 Regular use with extra protection Spreadable cream

Play with ratios if you’re making your own. There’s no perfect formula—it depends on your climate, storage conditions, and how often you cook.

How This Differs from Pure Seasoning

Traditional oven seasoning creates permanent bonded layers through high-heat polymerization (450°F+), while beeswax-oil blends are applied at much lower temperatures (145-200°F) and create mostly surface protection rather than deep, durable non-stick properties.

You’re not building serious seasoning with a beeswax blend. You’re adding a protective topcoat and maybe—maybe—contributing a thin layer of oil seasoning if you heat it enough.

Think of traditional seasoning as the foundation and walls of a house. Beeswax blend is the fresh coat of paint on the outside. Makes it look better. Protects what’s underneath. But it’s not structural.

When Beeswax Makes Sense for Your Cast Iron Skillet

Beeswax treatment is worth doing when you’re storing cast iron long-term (more than a month without use), protecting vintage or collectible pieces, maintaining display cookware, or want that extra-shiny aesthetic finish on well-seasoned pans you use occasionally.

Not every skillet benefits from beeswax. Most don’t need it.

Using Beeswax as a Storage Protectant

If you’re storing cast iron for extended periods—seasonally-used camping cookware, inherited pieces you’re not ready to use, or excess skillets rotating out of regular service—a beeswax coating provides superior rust prevention compared to oil alone, especially in humid environments.

Oil can go rancid during long storage. Gets sticky. Attracts dust. Not ideal for a skillet sitting in your basement for six months.

Beeswax doesn’t go rancid. Ever. It’s chemically stable indefinitely. Apply it before storage and your cast iron stays protected for months or years without degradation.

This is actually where beeswax has always excelled—long-term preservation, not regular cooking maintenance.

Beeswax for Display or Decorative Cast Iron

Cast iron displayed on open shelving, hung on walls, or showcased as kitchen decor benefits from beeswax treatment because it creates that attractive, shiny finish while protecting the pieces from airborne moisture and handling oils that would otherwise cause dull spots or rust.

Got a beautiful antique Griswold you’re displaying? Beeswax treatment makes it look museum-quality. Deep, rich appearance with a subtle sheen that catches light beautifully.

It’s basically furniture polish for cast iron. Makes it look cared-for and loved.

Beeswax for Rarely-Used Vintage Pieces

Collectible or sentimental cast iron that you’re keeping but not actively cooking with—grandmother’s skillet that’s too special to use daily, rare pieces you’ve restored—can be maintained with beeswax to preserve the seasoning and appearance without the need for regular cooking or re-seasoning.

You don’t want to cook with grandma’s 100-year-old Griswold every day and risk damaging it. But you don’t want it to rust either. Beeswax bridges that gap—protection without use.

Clean it, apply beeswax treatment, and it’ll sit safely on your shelf for years looking perfect.

Situations Where Beeswax Is Not Appropriate

Skip beeswax if you’re using your cast iron daily or multiple times per week, if you’re trying to fix poor seasoning or rust issues (proper seasoning is required first), if you cook at high temperatures frequently, or if you’re looking for improved non-stick performance.

Don’t use beeswax when:

  • Your skillet is your daily driver (the wax just melts off constantly—pointless)
  • You’ve got seasoning problems that need actual repair
  • You’re trying to improve cooking performance (won’t work)
  • You do a lot of high-heat searing or stir-frying
  • Your pan has active rust (fix that properly first)

Beeswax doesn’t solve problems. It maintains already-good cast iron.

Materials Needed for Beeswax Cast Iron Treatment

To apply beeswax treatment to your cast iron skillet, you need pure beeswax (or a beeswax-oil blend), a heat source to melt it, clean cloths for application and buffing, and optionally a carrier oil if you’re making your own mixture.

Not complicated. Few basic supplies.

Types of Beeswax (Pure, Filtered, Cosmetic Grade)

Pure filtered beeswax from beekeeping suppliers or craft stores works best—avoid beeswax candles that contain dyes or fragrances, and cosmetic-grade beeswax is fine but often more expensive than bulk filtered beeswax sold for craft purposes.

What to buy:

  • Filtered beeswax pellets or blocks – easiest to work with, melts evenly
  • Straight from beekeepers (if you know any) – totally fine, just needs filtering
  • Cosmetic grade beeswax – works but costs more
  • Food-grade beeswax – perfect but not necessary

What to avoid:

  • Scented candle wax labeled “beeswax” but mixed with paraffin
  • Craft wax with dyes added
  • Old beeswax that smells off or has debris in it

A pound of beeswax treats dozens of skillets. You’re using tiny amounts per application.

Best Oils to Combine with Beeswax

Mineral oil is the most popular choice for beeswax blends because it never goes rancid, though food-grade coconut oil, jojoba oil, or even traditional seasoning oils like canola work—just avoid oils that oxidize quickly like flaxseed unless you’ll use the blend within weeks.

Good oil choices:

  • Mineral oil (food-grade) – stable forever, won’t go rancid, cheap
  • Coconut oil (fractionated) – solid at room temp, pleasant smell
  • Jojoba oil – very stable, expensive but nice
  • Canola or vegetable oil – works fine if you’ll use the blend quickly

Mineral oil is the default for a reason. Mix it with beeswax and the blend stays good indefinitely. No refrigeration needed.

Tools and Equipment Required

You’ll need a double boiler or makeshift version (glass bowl over simmering water) to melt beeswax safely, measuring cups or a kitchen scale for accurate ratios, clean lint-free cloths or paper towels for application, and a container to store any leftover blend.

The setup:

  • Double boiler or heat-safe bowl + pot of water
  • Measuring tools (by weight is easiest—1 oz wax, 1 oz oil for 50/50)
  • Several clean cloths (old t-shirts work great)
  • Mason jar or tin for storing finished blend
  • Heat source for warming the skillet (stovetop or oven)

If you’re just doing a one-time application and don’t want to make a blend, you can buy pre-made cast iron conditioners. They’re just beeswax-oil blends in a jar.

Safety Considerations When Melting Beeswax

Never melt beeswax directly over high heat or flame because it’s flammable above 400°F—always use a double boiler on low to medium heat, never leave melting wax unattended, and keep a lid nearby to smother flames if the wax somehow ignites.

Beeswax is safe. But it CAN catch fire if you overheat it. Don’t be stupid.

Use the double boiler method. The water bath keeps temperatures below boiling point (212°F), well under beeswax’s flash point. Safe and controlled.

And seriously—don’t walk away from melting wax. It takes 10 minutes to melt. You can stand there and watch it.

Preparing Your Cast Iron Before Beeswax Application

Before applying any beeswax treatment, your cast iron must already have good base seasoning (multiple coats of oil-polymerized finish), be completely clean of food residue and grease, and be thoroughly dried to prevent trapping moisture under the wax coating.

Beeswax goes on LAST. After everything else is right.

Ensuring Your Skillet Has Proper Base Seasoning First

Your cast iron needs at least 3-5 coats of traditional oil or lard seasoning before you even think about beeswax—the wax protects existing seasoning, it doesn’t create or replace it, so bare or poorly-seasoned iron must be properly seasoned first using conventional high-heat methods.

Can’t stress this enough. Beeswax isn’t seasoning. It’s a topcoat.

If your pan has gray patches, rust spots, or weak seasoning, fix that FIRST with proper oven seasoning using vegetable oil or lard. Get the pan to where it cooks well and looks properly black or dark brown.

Then—only then—consider adding beeswax for extra protection or aesthetics.

Cleaning the Skillet Thoroughly

Wash your seasoned skillet with hot water and a stiff brush to remove any surface oils, cooking residue, or dust that accumulated during storage—a tiny drop of dish soap is fine for this cleaning since you’re not stripping seasoning, just removing surface crud.

The skillet should feel clean when you run your hand across it. Not greasy. Not gritty. Just smooth and clean.

Any crud left on the surface gets sealed under the beeswax. Not what you want. You’re trying to protect clean, well-maintained cast iron, not preserve whatever mess is currently on there.

Drying Completely to Prevent Moisture Trapping

After washing, dry your skillet thoroughly with towels, then place it on a warm burner or in a 200°F oven for 5-10 minutes to evaporate any remaining moisture—trapped water under a beeswax coating is the perfect recipe for rust, defeating the entire purpose of the treatment.

Bone dry. That’s the goal.

Beeswax creates an airtight seal. Great for keeping new moisture out. Terrible if you’ve sealed existing moisture IN. That trapped water will sit against the iron under the wax coating and cause rust from the inside out.

Heat-dry every time. Don’t skip this.

When to Strip and Re-Season Before Beeswax Treatment

If your cast iron has flaking seasoning, sticky patches, heavy rust, or uneven coating that affects cooking performance, strip it completely and build fresh seasoning before applying beeswax—trying to cover bad seasoning with wax just preserves the problems.

Beeswax isn’t a band-aid for failed seasoning. It doesn’t fix anything.

Got a crusty, junky skillet you rescued from a yard sale? Strip it, season it properly with oil, THEN consider beeswax as a final protective coat. Or just use it regularly and skip the beeswax entirely.

Step-by-Step: Applying Beeswax Blend to Cast Iron

To apply a beeswax-oil blend to cast iron, warm your clean skillet to around 170-200°F, rub a small amount of the melted or soft blend across the entire surface, buff thoroughly to remove excess, then let it cool and harden into a protective coating.

The actual process is quick. Maybe 15 minutes total.

Step 1: Creating Your Beeswax-Oil Mixture

Melt beeswax using a double boiler over low heat until completely liquid (around 145-160°F), add your chosen oil in your preferred ratio, stir until fully combined, then let it cool slightly before pouring into a storage container—the mixture will solidify into a paste as it cools to room temperature.

Melting Beeswax Safely (Double Boiler Method)

Fill a pot with 2-3 inches of water and bring to a gentle simmer, place a heat-safe glass bowl on top (it shouldn’t touch the water), add your beeswax to the bowl, and let it melt slowly over the steam heat—this takes 5-10 minutes depending on the amount.

Don’t rush it. Wax melts at its own pace.

The double boiler keeps temps safe and prevents scorching. Direct heat can burn beeswax (smells terrible) or overheat it into the danger zone where it might ignite.

For general-purpose cast iron protection, mix 2 parts oil to 1 part beeswax by weight (roughly 67/33 oil-to-wax ratio) using mineral oil or coconut oil—this creates a soft paste that’s easy to apply and provides good protection without being too waxy.

My preferred recipe:

  • 2 oz mineral oil (food-grade)
  • 1 oz filtered beeswax pellets
  • Optional: few drops vitamin E oil (helps preserve it, totally unnecessary)

Melts together in about 10 minutes. Makes enough paste to treat 10-15 skillets.

Mixing to Proper Consistency

Once the beeswax is fully melted and liquid, add your oil and stir thoroughly for 30-60 seconds to ensure complete mixing—the mixture should look uniform without separation, and you can test consistency by letting a small amount cool on a spoon to see if it reaches your desired firmness.

Too firm after cooling? Remelt and add more oil. Too soft? Remelt and add more wax.

This is forgiving. You can always adjust.

Pour the final mixture into a small mason jar or metal tin. It’ll solidify as it cools over 30-60 minutes. You’ve now got homemade cast iron conditioner that’ll last for years.

Step 2: Heating Your Cast Iron Skillet

Warm your clean, dry skillet gently—either on a stovetop burner set to low for a few minutes or in a 200°F oven for 10 minutes—until the surface feels warm to the touch but not hot enough to burn you, roughly 170-200°F.

Don’t overheat. You want warm, not smoking hot.

The warmth helps the beeswax-oil blend melt and spread easily. Too cool and the blend stays thick and hard to work with. Too hot and it smokes or the wax flash-evaporates before you can spread it.

Test with your hand. Should feel like a warm ceramic mug, not a hot cooking surface.

Step 3: Applying the Beeswax-Oil Blend

Scoop out about a teaspoon of your beeswax blend (if it’s at room temperature it should be paste-like), rub it onto the warm skillet using a clean cloth or paper towel, and work it into the entire surface using circular motions—the warmth of the pan will melt the blend as you apply it, making spreading easier.

Application Technique for Even Coverage

Start with the cooking surface, spreading the blend in overlapping circles to ensure complete coverage, then work your way to the sides, bottom, and handle—the blend should liquefy slightly as it contacts the warm iron, allowing it to flow into microscopic surface texture.

Think of it like waxing a car. Same motion. Same goal—thin, even coverage everywhere.

Don’t glob it on. The temptation is to use too much because the paste seems thick. Resist. A little goes a very long way once it melts.

How Much to Apply

A teaspoon of blend is enough for a 12-inch skillet—you want just enough to create a thin film across the surface, not a thick coating, because excess wax creates sticky buildup that attracts dust and never properly hardens.

Less is more. Way more.

You’re aiming for the thinnest possible coating that still covers everything. If you can see thick wax sitting on the surface in globs, you’ve used too much.

Working the Blend into the Surface

Continue rubbing for 1-2 minutes even after the blend has spread across the surface—this friction helps work the mixture into the pores and creates heat that improves penetration, plus it starts the buffing process that creates that glass-like finish.

Rub with pressure. Really work it in.

The friction warms both the blend and the iron slightly, helping everything integrate better. Plus it distributes the coating more evenly than just smearing it on and walking away.

Step 4: Buffing and Finishing

After application, take a fresh clean cloth and buff the entire surface vigorously for 3-5 minutes, removing any visible excess and creating a smooth, even finish—the more you buff, the shinier the result, and proper buffing prevents sticky or tacky spots from forming as the wax cools.

This step makes or breaks the results. Buffing is where the magic happens.

Buff like you’re polishing silver. Hard, fast, circular motions. You should feel the cloth gliding smoothly as you work. Any drag or stickiness means there’s too much wax—keep buffing or wipe with a fresh cloth to remove more.

The surface should end up looking like it has a subtle sheen, not a wet-looking coating.

Step 5: Curing and Setting Time

Let your treated skillet sit at room temperature for at least 30-60 minutes to allow the beeswax blend to fully harden and set—don’t use the pan or expose it to heat during this time, and ideally let it cure overnight before storage to ensure the coating has completely solidified.

Patience. The wax needs time to cool and harden properly.

Touch it after an hour—should feel dry and smooth, not tacky or soft. If it still feels slightly soft, give it more time. Climate affects this—humid environments slow the hardening, dry environments speed it up.

Once fully hardened, your cast iron has that protective seal and glass-like appearance people rave about.

Alternative Methods: Beeswax Board or Solid Beeswax Application

Instead of making a beeswax-oil blend, some people apply solid beeswax directly to hot cast iron by rubbing a beeswax bar or conditioning board across the heated surface, though this method requires higher temperatures and creates a wax-heavy coating with minimal oil content.

Different approach. Same basic concept.

Using a Beeswax Conditioning Board on Warm Cast Iron

Conditioning boards—sold for wooden cutting boards and butcher blocks—can be rubbed across warm (not hot) cast iron to deposit a protective wax layer, though you’ll need to buff heavily afterward to prevent thick, uneven buildup since these boards deposit a lot of wax quickly.

Heat your skillet to about 200-225°F. Rub the conditioning board across it like a crayon. The wax melts off the board onto your pan.

Then buff like crazy. Because the board deposits way more wax than you need. Most of it has to come off through buffing to avoid stickiness.

It works. But it’s messier and harder to control than using a pre-mixed blend.

Rubbing Solid Beeswax Directly on Hot Skillets

Pure beeswax bars can be rubbed on cast iron heated to 200-250°F—the beeswax melts on contact and spreads across the surface—but this creates a wax-only coating without oil benefits and requires immediate, thorough buffing to prevent thick buildup and sticky patches.

This is the “old-fashioned” method you see in viral videos. Someone heats a skillet, rubs a beeswax bar on it, buffs it out. Looks amazing.

Couple problems: no oil means you’re getting pure protection without any seasoning contribution. And it’s really easy to apply way too much wax this way because you’re working with a solid chunk that deposits heavily.

If you try this, use a light touch and buff aggressively. Otherwise you’ll have wax problems.

Pros and Cons of Different Application Methods

Beeswax-oil blend (recommended):

  • Easier to control amount used
  • Combines protection and minor seasoning benefits
  • Can be stored and reused
  • More forgiving application

Solid beeswax direct application:

  • No prep needed (just heat and rub)
  • Traditional method some people prefer
  • Heavy wax protection
  • But: easy to over-apply, requires aggressive buffing, no oil benefits

Pick what works for you. The blend method is more reliable for consistent results.

What to Expect: The Appearance and Feel of Beeswax-Treated Cast Iron

Beeswax-treated cast iron develops a noticeably smoother, shinier surface than oil-seasoned iron alone—the finish has a subtle sheen (almost glass-like when done correctly), feels silky to the touch, and water beads up on the surface rather than spreading or absorbing.

This is where beeswax delivers on the hype. The appearance really is striking.

The “Glass-Like Finish” Explained

The glass-like finish from beeswax treatment comes from the wax filling microscopic surface texture and creating an ultra-smooth coating that reflects light evenly—it’s not actually as smooth as glass but appears that way because the wax eliminates the slight roughness present even in well-seasoned cast iron.

Your seasoned cast iron has texture. Microscopic peaks and valleys. Even good seasoning isn’t perfectly flat at the molecular level.

Wax fills those valleys. Smooth them out. Reflects light uniformly instead of scattering it. The result looks and feels smoother than it actually is.

It’s impressive visually. Really makes cast iron look premium and well-cared-for.

Texture and Visual Differences from Oil-Only Seasoning

Compared to standard oil seasoning which has a matte to semi-gloss finish and slightly textured feel, beeswax-treated cast iron has a more uniform sheen, feels noticeably silkier when you run your hand across it, and often appears darker because the wax enhances the depth of the seasoning color underneath.

The differences you’ll notice:

  • More uniform appearance (less blotchiness)
  • Subtle sheen that catches light
  • Smoother feel—almost slippery
  • Deeper, richer color
  • Water beads up dramatically

It’s cosmetic improvement more than functional. But if you care about how your cast iron looks, beeswax treatment delivers.

How Long the Beeswax Treatment Lasts

On cast iron that’s displayed or stored without cooking, beeswax treatment can last 6-12 months or longer before needing reapplication, but if you’re actually cooking with the skillet, the wax coating gradually melts away and typically needs renewal every 1-2 months depending on cooking frequency.

Storage piece? The wax lasts basically forever. I’ve got display cast iron with year-old beeswax treatment still looking perfect.

Cooking regularly? The wax disappears fast. Each time you heat the pan above 145°F, some wax melts. Gradually it all migrates away—either absorbing into food, burning off, or getting wiped away during cleaning.

You can reapply as needed. It’s not a one-time-forever thing.

Changes During Storage vs. Cooking Use

Beeswax-treated cast iron stored without use maintains its shiny, protected finish indefinitely, while skillets used for cooking will gradually lose the wax coating and revert to looking like standard seasoned cast iron—this is normal and expected since beeswax isn’t designed to withstand cooking temperatures.

If you treat a skillet with beeswax then cook with it daily, the beeswax vanishes within weeks. You’re basically maintaining it like any other cast iron at that point—clean, dry, occasional oil rub.

The beeswax treatment makes sense for occasional-use pans or storage situations. Not daily drivers.

Cooking with Beeswax-Treated Cast Iron

You can cook with beeswax-treated cast iron, but the wax will melt during heating and you’ll need to wipe out the liquefied wax before cooking, essentially removing the protective coating and leaving you with the underlying oil seasoning for actual cooking performance.

So… what’s the point of the beeswax if you’re cooking regularly?

Good question.

What Happens to Beeswax When You Cook

When you heat beeswax-treated cast iron above 145°F, the wax melts into liquid form and pools in the pan—this liquefied wax doesn’t contribute to non-stick performance and must be wiped out before cooking, or it’ll mix with your food and create an odd waxy texture nobody wants.

The wax just… melts. Simple physics.

Heat the pan, the solid wax becomes liquid wax, it runs around the cooking surface looking like oil but behaving differently. If you start cooking in it, your food gets waxy. Tastes fine (beeswax is edible) but feels weird texturally.

Most people wipe it out with a paper towel once the pan is hot, then proceed with normal cooking.

First Cook After Beeswax Application

The first time you cook after applying beeswax treatment, preheat the skillet as usual, wipe out all the melted wax with paper towels, add your cooking oil or fat, and cook normally—the underlying seasoning will perform as it did before the beeswax treatment since the wax is now removed.

Basically you’re removing the beeswax coating to access the real seasoning underneath.

Which raises the obvious question: why bother with beeswax if you’re cooking regularly? And the answer is: you probably shouldn’t bother. Beeswax is for storage and display, not active cooking maintenance.

Foods That Work Well vs. Foods to Avoid Initially

If you’re going to cook on beeswax-treated iron without removing the wax first (not recommended), stick to low-temperature, high-fat foods like slow-cooked eggs or gentle sautés—avoid high-heat searing, acidic foods, or anything delicate that might pick up waxy flavor or texture.

Honestly? Just wipe out the wax first. Don’t try to cook through it.

The wax doesn’t add anything positive to cooking. It’s neutral at best (adds weird texture) and problematic at worst (burns and smokes if you really overheat it).

How Cooking Gradually Changes the Beeswax Layer

Regular cooking progressively removes beeswax treatment through melting, wiping, and evaporation—after 5-10 cooking sessions, most of the wax will be gone and your cast iron will look and behave like it did before treatment, requiring reapplication if you want to maintain that protected, shiny appearance.

Each cook removes a percentage of the wax. After enough cooking sessions, it’s all gone.

You’ll notice the shine fading. The water-beading effect diminishing. The surface returning to that standard seasoned-iron appearance.

Totally normal. Reapply beeswax if you want. Or just keep cooking with your regular seasoned iron and forget about the wax.

Maintaining Beeswax-Treated Cast Iron Skillets

Clean beeswax-treated cast iron with warm water and gentle scrubbing (avoid harsh abrasives that remove the wax), dry thoroughly, and reapply beeswax treatment every few months if you’re storing the pan or whenever you notice the protective shine has faded.

Maintenance isn’t complicated. Just slightly different from regular cast iron care.

Cleaning After Cooking (Special Considerations)

After cooking on beeswax-treated iron (which melts the wax anyway), clean normally with hot water and a brush—the remaining wax won’t interfere with cleaning and may actually help water bead off during rinsing, though you’ll gradually remove wax residue through repeated washing.

Clean it like any cast iron. The beeswax that’s left doesn’t require special handling.

Hot water and scrubbing remove food residue without stripping the underlying seasoning. The wax just sits on top and slowly diminishes over time.

When to Reapply Beeswax Treatment

Reapply beeswax treatment when water no longer beads up on the surface (it spreads instead), when the shiny finish has dulled back to matte, or before long-term storage to ensure maximum rust protection—for actively-used skillets this might be monthly, for storage pieces it might be once per year.

Signs you need to reapply:

  • Water absorbs or spreads instead of beading
  • Surface looks dull instead of shiny
  • You’re about to store the skillet for extended time
  • It’s been 2-3 months since last treatment (for occasional-use pans)

There’s no strict schedule. Reapply when it seems necessary.

Combining Regular Seasoning with Periodic Beeswax Applications

The best approach for valuable or sentimental cast iron is maintaining proper oil-based oven seasoning as your foundation (re-seasoning whenever cooking performance degrades), then applying beeswax treatment between uses as supplemental protection—this gives you functional seasoning plus aesthetic and storage benefits from the wax.

Use both methods for their different strengths. Don’t try to make beeswax do what it can’t do (create cooking seasoning). Use oil seasoning for that. Then add beeswax for extra protection and appearance when appropriate.

Like I mentioned earlier—foundation seasoning plus protective topcoat. Both serving different purposes.

Long-Term Maintenance Strategy

For cast iron you use regularly, focus on traditional oil seasoning and forget about beeswax entirely—for occasional-use or display pieces, maintain good base seasoning, then apply beeswax treatment before storage and reapply every 6-12 months to maintain protection and appearance.

Regular-use skillet: Traditional maintenance only. Clean, dry, occasional oil rub. No beeswax needed.

Occasional-use skillet: Beeswax treatment after each use or every few months. Protects between cooking sessions.

Display piece: Beeswax treatment reapplied annually or as needed to maintain appearance.

Match your maintenance to your usage pattern.

Beeswax for Rust Prevention and Storage

Beeswax excels at preventing rust on cast iron during storage because it creates an airtight moisture barrier that’s more durable and stable than oil films, making it ideal for long-term storage, protecting vintage pieces, or maintaining cast iron in humid environments.

This is beeswax’s superpower. Where it actually outperforms everything else.

Why Beeswax Excels at Moisture Protection

Unlike oils that can oxidize, evaporate, or become sticky over time, beeswax creates a stable, impermeable coating that doesn’t degrade during storage—moisture can’t penetrate the wax layer to reach the iron underneath, and the wax itself remains chemically stable for years without going rancid or breaking down.

Oil-based storage protection has limitations. Oil can dry out. Can go rancid. Can oxidize and get sticky. After 6-12 months, that protective oil film might actually be causing problems instead of preventing them.

Beeswax doesn’t have these issues. Apply it once, and it’ll protect for years if undisturbed. No degradation. No stickiness. Just a stable barrier between iron and air.

Long-Term Storage Best Practices with Beeswax

For extended storage (six months or longer), clean and thoroughly dry your cast iron, apply a generous beeswax or beeswax-oil blend coating, buff well, then wrap in paper or cloth (never plastic, which traps moisture) and store in a climate-controlled, low-humidity location.

Storage protocol:

  1. Clean the skillet completely
  2. Dry thoroughly (heat-dry to be sure)
  3. Apply beeswax treatment while slightly warm
  4. Buff well to prevent tackiness
  5. Let cure 24 hours
  6. Wrap in paper, cloth, or leave unwrapped
  7. Store somewhere dry and stable

The beeswax creates primary protection. The wrapping creates secondary protection. Together they’ll keep rust away indefinitely.

Protecting Vintage or Collectible Cast Iron

Valuable antique cast iron deserves beeswax treatment because it provides museum-quality protection without affecting the original seasoning patina, creates an attractive display finish, and allows for handling and examination without risking fingerprint oils causing rust spots on valuable pieces.

You’ve got a $200 vintage Griswold or Wagner? Beeswax it.

The wax protects against handling oils (hands leave moisture and salts that cause rust). Protects against environmental humidity. And makes the piece look incredible for display or photography.

Plus you can remove the wax later without affecting the underlying seasoning if you ever want to actually cook with the piece.

Removing Beeswax When Ready to Use Again

To remove beeswax treatment before cooking, simply heat the skillet until the wax melts (around 175-200°F), wipe out all the liquefied wax with paper towels, then proceed with normal cooking—the underlying seasoning will be intact and ready to use.

Coming out of storage? Just melt and wipe.

The wax liquefies. Wipe it all out. Now you’ve got your regular seasoned cast iron back, ready to cook.

Some people wash with hot water and soap after removing the wax to ensure it’s completely gone. Not necessary but doesn’t hurt if you’re being thorough.

Common Mistakes When Using Beeswax on Cast Iron

The most common mistakes with beeswax cast iron treatment include trying to use pure beeswax without oil (creates thick, uneven coatings), applying it to poorly-seasoned or bare iron expecting it to create functional seasoning, and using way too much wax that results in sticky, dust-attracting buildup instead of a smooth protective finish.

People screw this up constantly. Here’s how to avoid the mistakes.

Using Pure Beeswax Without Oil (Why This Fails)

Applying solid beeswax without any oil creates an overly thick, hard coating that’s difficult to buff evenly, doesn’t provide any seasoning benefits, and often results in sticky or tacky patches where the wax didn’t spread properly—the oil in a blend helps the wax spread thinner and more evenly while adding minor conditioning.

Pure wax is too much of a good thing. It deposits heavy. Doesn’t spread well even when melted. Creates thick spots and thin spots.

The oil acts as a carrier and thinner, letting you achieve that ultra-thin, even coating that actually looks good and works well.

Can you use pure wax? Yeah. But expect mediocre, uneven results unless you’re really skilled at buffing.

Applying Beeswax to Unseasoned or Poorly Seasoned Iron

Putting beeswax on bare iron, lightly-seasoned iron, or iron with failing seasoning accomplishes nothing useful—the wax doesn’t bond to bare metal, won’t fix seasoning problems, and will just melt off the first time you cook, leaving you with the same unseasoned mess you started with.

Beeswax is not a shortcut. Not a fix. Not a replacement.

Your cast iron must be properly seasoned FIRST. The beeswax just protects and enhances what’s already there.

Trying to use it on bad seasoning is like waxing a car with peeling paint—the wax can’t fix the paint problems underneath.

Using Too Much Beeswax (Sticky Buildup Issues)

The biggest mistake is over-application—using too much beeswax creates thick coatings that never fully harden, feel sticky or tacky to touch, attract dust and lint, and look gummy instead of smooth and shiny because you haven’t buffed away enough excess.

Less is more. Way more.

I see photos online of cast iron absolutely globbed with wax, looking wet and sticky. That’s wrong. You want the thinnest possible coating—almost invisible.

If your treated cast iron feels tacky or attracts dust, you used too much. Warm it slightly and buff more aggressively to remove excess.

Wrong Heating Temperatures During Application

Overheating cast iron during beeswax application (above 250°F) can cause the wax to smoke, evaporate, or burn before you can spread it properly, while insufficient heat (below 140°F) means the wax won’t melt and spread, resulting in thick, uneven patches that don’t buff smooth.

Temperature guide:

  • Too cool (under 140°F): wax stays solid, won’t spread
  • Just right (170-200°F): wax melts on contact, spreads easily, buffs smooth
  • Too hot (over 250°F): wax smokes and evaporates, wastes material

Aim for “warm mug” temperature. If you can comfortably touch the pan for 2-3 seconds, it’s about right.

Expecting Beeswax to Create Cooking Seasoning

Perhaps the worst misconception is thinking beeswax treatment will give you non-stick cooking performance or build actual seasoning layers—it won’t, because beeswax doesn’t polymerize like oils do, and it melts during cooking anyway, so expecting improved cooking results from beeswax alone leads to disappointment.

If your cast iron sticks before beeswax treatment, it’ll stick after. The wax doesn’t fix that.

If your seasoning is weak, beeswax won’t strengthen it. Only proper oil seasoning builds cooking performance.

Manage expectations. Beeswax is for protection and aesthetics. That’s it.

Troubleshooting Beeswax Application Problems

When beeswax treatment goes wrong, you’ll typically see sticky surfaces that won’t dry, uneven shiny and dull patches, wax that flakes or peels off, or excessive buildup that makes the pan feel gummy—most problems stem from too much wax or improper buffing and can be fixed by reheating and buffing more aggressively.

Something went wrong. Here’s the fix.

Dealing with Sticky or Tacky Surfaces

If your beeswax-treated cast iron feels sticky hours after application, you applied too much—fix this by gently warming the skillet to around 150-170°F, then buffing vigorously with clean cloths to remove excess wax until the surface feels dry and smooth instead of tacky.

The stickiness is excess wax that didn’t get buffed away. Still there. Still soft. Not good.

Warm it slightly. Not hot—just warm enough that the wax becomes pliable. Then buff it off with fresh cloths. Keep buffing until tackiness disappears.

You might go through 3-4 cloths removing all the excess. That’s normal when you’ve over-applied.

Removing Excess Beeswax Buildup

For heavy wax buildup (thick, visible layers or crusty patches), heat the skillet to 200°F to fully melt all the wax, wipe out the melted wax with paper towels, then reapply a much thinner coat properly—trying to buff away thick cold wax is frustrating and ineffective.

Start over. That’s the easiest fix.

Melt it all off. Wipe it all out. Apply properly the second time with way less wax and way more buffing.

Think of the first attempt as practice. Now you know what too much looks like.

Fixing Uneven or Blotchy Beeswax Coating

Uneven treatment—some areas shiny, others dull—usually means the wax wasn’t spread uniformly during application or buffed inconsistently—fix it by warming the pan slightly and buffing the entire surface thoroughly to redistribute the wax and even out the finish.

Heat helps. Warming the pan lets you work the wax around, redistributing it from thick areas to thin areas through buffing action.

Buff everywhere, not just the dull spots. The goal is uniform coverage, which means moving wax from where there’s too much to where there’s too little.

Five minutes of thorough buffing usually evens everything out.

What to Do If Beeswax Flakes or Peels

If beeswax coating flakes or peels (rare but possible if applied to cold iron or not buffed properly), remove all the loose wax by warming and wiping, ensure the underlying surface is clean and dry, then reapply at proper temperature with thorough buffing.

Flaking means the wax didn’t adhere properly. Probably because the iron was too cold during application, or there was dust or oil preventing adhesion.

Strip it off. Start fresh. Make sure the surface is clean and warm this time.

Beeswax vs. Traditional Seasoning Oils

Beeswax and traditional seasoning oils serve completely different functions—oils polymerize into permanent bonded coatings that create non-stick surfaces, while beeswax provides temporary protective layers for storage and aesthetics—comparing them directly doesn’t make sense because they’re not interchangeable methods.

Apples and oranges. Different purposes entirely.

Comparing Beeswax-Oil Blend to Pure Vegetable Oil

A beeswax-oil blend applied at low temperatures provides some minor seasoning from the oil component plus wax protection, while pure vegetable oil seasoned at 450°F creates hard, polymerized, permanent seasoning—the oil method produces far superior cooking performance, while the beeswax blend offers better short-term storage protection.

Aspect Beeswax-Oil Blend Pure Vegetable Oil Seasoning
Application temp 145-200°F 450-475°F
Result Protective coating + minor seasoning Polymerized permanent seasoning
Cooking performance Minimal improvement Significant non-stick improvement
Storage protection Excellent Good but can degrade

Use vegetable oil for building actual seasoning. Use beeswax blend for protecting finished seasoning during storage.

Beeswax-Oil Blend vs. Pure Lard or Animal Fats

Beeswax blends provide better long-term storage stability than lard (which can go rancid) but contribute less to actual seasoning development—for cooking cast iron you use regularly, proper lard seasoning far outperforms any beeswax treatment, while beeswax wins for protecting rarely-used pieces.

Lard builds real seasoning through polymerization. Beeswax just sits on top.

For daily-use pans, lard is superior. For storage pans, beeswax is superior. They’re optimized for different scenarios.

When Traditional Seasoning Is Superior

Choose traditional oil or lard oven seasoning (not beeswax) when you want to improve cooking performance, fix weak or damaged seasoning, create a non-stick surface, prepare cast iron for regular use, or build durable layers that withstand high-heat cooking.

Use traditional seasoning for:

  • Building functional non-stick properties
  • Repairing damaged or stripped cast iron
  • Preparing new cast iron for use
  • Pans you cook with regularly
  • High-heat cooking applications

Traditional seasoning is the foundation. Always.

When Beeswax Treatment Adds Value

Choose beeswax treatment (not traditional seasoning) when you need superior rust protection during long-term storage, want an attractive shiny finish for display pieces, need to protect valuable vintage cast iron, or are maintaining occasional-use skillets between cooking sessions.

Use beeswax for:

  • Long-term storage protection
  • Display or collectible cast iron
  • Occasional-use pans between cooking sessions
  • Creating that glass-like aesthetic finish
  • Extra moisture protection in humid climates

It’s a specialty tool. Not an everyday solution.

The Science Behind Beeswax on Metal Surfaces

Beeswax protects metal through physical barrier formation rather than chemical bonding—its hydrophobic properties repel water while its stability prevents oxidation, but unlike polymerized oils, beeswax remains a separate substance sitting atop the metal rather than becoming integrated with it.

Quick chemistry lesson.

Beeswax Composition and Properties

Beeswax consists primarily of esters (long-chain fatty acid alcohols), hydrocarbons, and free fatty acids with a melting point around 145°F and excellent water-repelling properties—it’s chemically stable, doesn’t oxidize or go rancid, and maintains its protective properties indefinitely when stored properly.

What makes beeswax work for protection:

  • Hydrophobic (repels water aggressively)
  • Chemically stable (doesn’t degrade over time)
  • Malleable (fills microscopic surface texture)
  • Solid at room temp (stays in place after application)

These properties make it ideal for rust prevention. Water can’t reach the metal through the wax barrier.

How Beeswax Bonds (or Doesn’t Bond) to Iron

Beeswax adheres to cast iron through mechanical adhesion (physical grip in surface texture) rather than chemical bonding—it fills microscopic pores and irregularities but doesn’t form molecular bonds with iron oxide the way polymerized oils do, which is why it can be melted and wiped away easily.

It’s basically sitting on top. Not bonded AT the molecular level.

The wax grips the texture mechanically—like Velcro—but there’s no chemical reaction creating permanent attachment. Heat it and it releases. Wipe it and it comes off.

This is why beeswax protection is temporary and needs renewal, while oil seasoning is permanent (unless damaged).

Why Beeswax Doesn’t Polymerize Like Oils

Beeswax lacks the molecular structure necessary for polymerization—it doesn’t contain the unsaturated fatty acids with double bonds that break and reform during high-heat exposure, so no matter how hot you get it (before it burns), it won’t transform into a bonded polymer coating.

Can’t polymerize. Chemically impossible.

Oils have those reactive double bonds that heat breaks and reforms into cross-linked polymers. Beeswax’s molecular structure is stable—the bonds don’t want to break and reform even under heat.

So beeswax will always be beeswax. Just solid sometimes, liquid sometimes, depending on temperature.

The Protective Barrier Mechanism

Beeswax protects cast iron by creating an impermeable layer that prevents moisture and oxygen from contacting the iron surface—water beads up on the hydrophobic wax instead of spreading and penetrating, while the stable wax doesn’t oxidize or degrade to expose the metal underneath.

Simple physical barrier. Not complicated.

Water hits the wax, can’t penetrate, rolls off. Oxygen can’t get through to react with the iron. Rust requires both water and oxygen—beeswax blocks both.

As long as the wax coating stays intact, the iron underneath stays protected. Damage the wax layer and protection fails in that spot.

Historical and Traditional Uses of Beeswax on Iron

Beeswax has been used on iron tools and implements for centuries—primarily for rust prevention on stored tools, creating smooth surfaces on woodworking planes, and protecting valuable metalwork during shipping or storage—but its use on cooking cast iron specifically is more limited historically than modern internet claims suggest.

Let’s separate fact from fiction.

Did People Actually Season with Beeswax Historically?

Historical evidence shows beeswax was used to protect iron tools and prevent rust during storage, but it was not commonly used to “season” cooking cast iron in the modern sense—cooks seasoned with available cooking fats (lard, tallow, oil) and reserved beeswax for non-cooking applications where its protective properties mattered more than cooking performance.

Beeswax was expensive historically. Why waste it on cookware when you’ve got lard?

The primary historical uses were:

  • Protecting stored tools from rust
  • Smoothing metal plane soles for woodworking
  • Preserving valuable metalwork during shipping
  • Coating weapons and armor for storage

Cooking cast iron got lard because that’s what made sense. Use beeswax for cooking? That’s a modern idea that doesn’t have strong historical precedent.

Beeswax in Tool Maintenance and Preservation

Traditional craftsmen and tool collectors have long used beeswax to protect iron and steel tools—it prevents rust on chisels, planes, saws, and other implements during storage or seasonal downtime, and this application is well-documented and effective for non-cooking metalwork.

Tool maintenance is where beeswax has always excelled. This use is legit and time-tested.

A woodworker coating plane soles with beeswax for smooth gliding and rust protection? That’s traditional. Documented. Proven.

Applying that same principle to cast iron cookware? Makes sense. Works similarly. But it’s adapting a tool-maintenance technique to cookware, not following some ancient cooking tradition.

Modern Revival and Internet Claims vs. Historical Reality

The current popularity of beeswax cast iron treatment is largely a modern phenomenon driven by social media and blogs—while the technique works and has merit, claims that it’s “the old-fashioned way grandmothers seasoned cast iron” are mostly marketing rather than historical fact.

Be skeptical of claims that this is “the secret grandmothers used.”

Your grandmother probably used lard or Crisco. Maybe bacon grease. She wasn’t buying expensive beeswax to protect her everyday skillets.

The technique works—I’ve covered that extensively. But the historical narrative around it is largely invented for modern marketing purposes.

Beeswax for Other Cast Iron Cookware

Beeswax treatment works on all types of cast iron—skillets, Dutch ovens, griddles, and specialty pieces—though application techniques may need slight adjustment for different shapes, and the decision to use beeswax should still be based on usage patterns rather than cookware type.

Not just for skillets.

Applying Beeswax to Dutch Ovens

Dutch ovens can be treated with beeswax both inside and outside—the interior gets the same treatment as a skillet, while the exterior benefits from wax protection against rust even more since it’s not in constant contact with cooking oils during use.

Treat the pot and lid separately. Both interior and exterior surfaces on each.

The exterior is where beeswax really shines on Dutch ovens—that outside surface doesn’t get the benefit of cooking oil maintenance, so rust is more common there. Beeswax prevents it.

Beeswax on Cast Iron Griddles and Grill Pans

Flat griddles and grill pans can be wax-treated like skillets, though their large surface area means you’ll use more blend—for grill pans, make sure to work the wax into the valleys between ridges using a cloth corner or small brush to ensure complete coverage.

Same process. Bigger surface means more wax blend needed.

Those grill pan ridges need extra attention. Easy to miss the deep valleys during application and buffing. Work deliberately to get everything coated.

Exterior Surface Treatment vs. Cooking Surface Treatment

Some people apply beeswax only to cast iron exteriors (bottom and sides) while maintaining traditional oil seasoning on cooking surfaces—this gives you functional cooking performance from the interior seasoning plus enhanced rust protection and appearance from exterior wax treatment.

Smart approach for pans you actually cook with.

The cooking surface gets regular oil maintenance from actual use. The exterior doesn’t. So protect the exterior with beeswax while leaving the interior to function normally.

Best of both worlds—protection where you need it, performance where it matters.

Vintage vs. Modern Cast Iron Considerations

Vintage cast iron with valuable original seasoning benefits most from beeswax treatment because it protects the patina without requiring re-seasoning, while modern cast iron has less to lose and can be re-seasoned easily if the wax experiment doesn’t work out.

Low-risk on modern Lodge. Higher value on vintage Griswold.

If you’re experimenting with beeswax, start with modern cast iron. Learn the technique. Get comfortable with application and buffing. Then graduate to treating your valuable pieces once you know what you’re doing.

Recipes: Beeswax-Oil Blends for Cast Iron

Creating your own beeswax-oil blend for cast iron is simple—melt beeswax with your chosen oil in ratios ranging from 30/70 to 50/50 wax-to-oil by weight, pour into containers, and let solidify into a paste that’s ready to use whenever you need it.

Mix your own. Save money compared to commercial products.

Basic 50/50 Beeswax-Oil Recipe

Melt 2 oz filtered beeswax with 2 oz food-grade mineral oil using a double boiler, stir thoroughly, pour into a 4 oz tin or jar, and let cool—this creates a firm paste ideal for long-term storage protection and gives you enough blend to treat multiple skillets.

Simple formula:

  • 2 oz beeswax (by weight)
  • 2 oz mineral oil
  • Melt together over double boiler
  • Pour into container
  • Use once cooled and solidified

Makes a nice firm paste that’s easy to work with. Stores indefinitely at room temperature.

Heavy Protection Blend (Higher Beeswax Ratio)

For maximum rust protection on long-storage pieces, use a 60/40 or even 70/30 beeswax-to-oil ratio—this creates a harder, more wax-heavy coating that provides superior moisture barrier but requires more aggressive buffing to avoid tackiness.

More wax equals more protection but harder to apply smoothly.

Heavy-duty mix:

  • 3 oz beeswax
  • 1.5 oz mineral oil

Very firm when cooled. Needs warm iron to spread. But creates exceptional moisture barrier for multi-year storage.

Cooking-Friendly Blend (Lower Beeswax Ratio)

If you’re treating cast iron you’ll still cook with occasionally, use a 30/70 wax-to-oil blend that provides some wax protection but contributes more oil for minor seasoning maintenance—this lighter blend melts away more gracefully when you heat the pan for cooking.

Less waxy. More oil-focused.

Lighter blend:

  • 1 oz beeswax
  • 3 oz mineral or coconut oil

Softer paste. Easier to apply. Less buffing needed. Better choice if you’re treating pans that see occasional use rather than pure storage.

Adding Natural Ingredients (Misconceptions to Avoid)

Avoid adding essential oils, vitamin E, or other “natural” ingredients to your beeswax blend unless you know exactly what you’re doing—these additives can affect shelf stability, create weird smells when heated, or introduce unwanted flavors, and they provide no real benefit for cast iron protection.

Keep it simple. Beeswax plus oil. That’s it.

Some people want to add fancy ingredients because they work in skin care products. This isn’t skin care. It’s metal protection. The additives don’t help and might hurt.

The Verdict: Should You Use Beeswax on Your Cast Iron?

Use beeswax treatment on cast iron when you’re storing pieces long-term, protecting vintage or collectible items, maintaining occasional-use skillets, or want that glass-like aesthetic finish—skip it entirely for daily-use cookware where traditional oil seasoning provides better cooking performance and easier maintenance.

Final answer: depends entirely on your situation.

Best Use Cases for Beeswax Treatment

Beeswax makes sense for:

  • Cast iron you’re storing for 6+ months without use
  • Valuable vintage pieces you want to protect and display
  • Skillets used a few times per year that need rust protection between uses
  • Creating an attractive finish for open shelving display
  • Extra protection in very humid climates
  • Collectible cast iron you’re preserving but not cooking with

These scenarios benefit from beeswax’s unique strengths—superior storage protection and attractive appearance.

When to Skip Beeswax and Use Traditional Methods

Don’t bother with beeswax for:

  • Daily or weekly-use cast iron (traditional maintenance is simpler)
  • Pans with seasoning problems (fix the base seasoning first with oil)
  • Trying to improve cooking performance (won’t work)
  • High-heat cooking applications (the wax just melts off)
  • If you want simple, low-maintenance care (oil-only is easier)

Most cast iron doesn’t need beeswax. Traditional seasoning and maintenance work fine.

Realistic Expectations for Beeswax Results

Expect beeswax to make your cast iron look amazing—shinier, smoother, more attractive—and provide excellent rust protection during storage, but don’t expect it to improve cooking performance, create actual seasoning, or last through regular use without frequent reapplication.

It’s cosmetic and protective. Not functional for cooking.

Set realistic expectations and you won’t be disappointed. Expect it to transform your cooking results and you’ll waste time and money.

Final Recommendations for Different Skillet Situations

Your daily skillet: Traditional oil seasoning only. Clean, dry, occasional oil rub. No beeswax needed.

Occasional-use skillet: Beeswax treatment between uses provides good protection. Reapply every few months.

Display/collectible cast iron: Beeswax treatment is perfect. Apply once, maintains for 6-12 months.

Storage pieces: Definitely use beeswax before long-term storage. Best protection available.

Match the method to the usage. That’s the smart approach.

Previous Post
cast iron skillet vs ceramic
Skillet Basics

Cast Iron Skillet vs Ceramic: Which is Better?

Next Post
cast iron skillet vs teflon
Skillet Basics

Cast Iron Skillet vs Teflon: Which Is Better?

error: Content is protected !!