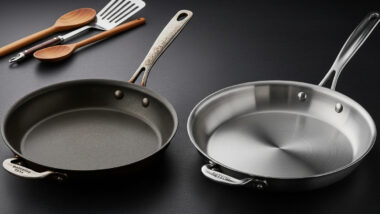
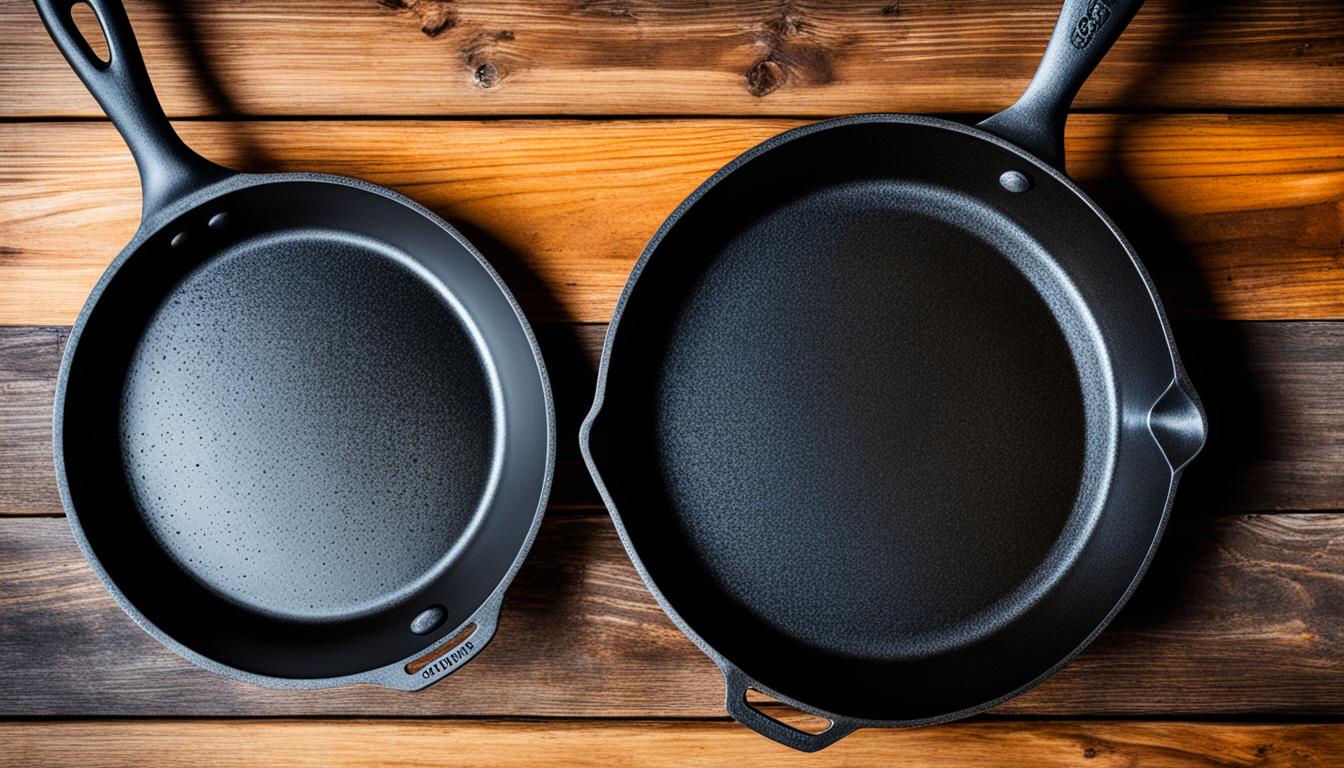
The main differences between skillets and sauté pans come down to their side walls and how those walls affect cooking performance. Skillets feature sloped sides that make flipping food effortless, while sauté pans have straight, vertical walls that excel at containing liquids and sauces.
Most home cooks own at least one of these pans, yet few understand when to reach for which one. The wrong choice can lead to spillage when reducing a wine sauce or difficulty achieving a proper sear on a steak.
This guide covers:
- Design differences – How side angle impacts cooking surface and liquid capacity
- Performance comparison – Which pan handles specific techniques better
- Material considerations – Cast iron, stainless steel, and non-stick options for both styles
- Practical recommendations – Whether you need one or both in your kitchen
The distinction matters more than cookware marketing suggests. A 12-inch skillet provides roughly 20% more usable cooking surface than a 12-inch sauté pan due to those sloped sides. That extra space can determine whether chicken breasts brown properly or steam in their own juices.
Understanding these tools helps you cook more effectively. Each design solves different problems, which explains why professional kitchens stock both types extensively.
Table of Contents
- 1 Quick Answer: Skillet vs Sauté Pan
- 2 What Is a Skillet?
- 3 What Is a Sauté Pan?
- 4 Skillet vs Sauté Pan: Side-by-Side Comparison
- 5 When to Use a Skillet Over a Sauté Pan
- 6 When to Use a Sauté Pan Over a Skillet
- 7 Material Options for Skillets and Sauté Pans
- 8 Size Guide: Choosing the Right Diameter
- 9 Care and Maintenance: Skillet vs Sauté Pan
Quick Answer: Skillet vs Sauté Pan
A skillet works best for high-heat searing and everyday frying, while a sauté pan excels at braising and cooking with liquids.
| Feature | Skillet | Sauté Pan |
|---|---|---|
| Side walls | Sloped at 45° angle | Straight, vertical (2-3″ tall) |
| Cooking surface | Larger usable area | Smaller surface, more depth |
| Handles | Single long handle | Long handle + helper handle |
| Lid included | Rarely | Almost always |
| Liquid capacity | 1-2 quarts | 3-5 quarts |
| Best for | Searing, frying, flipping | Braising, sauces, one-pot meals |
When to Choose a Skillet
Skillets handle these tasks better than sauté pans:
- Searing steaks and chops – The wider surface area prevents crowding, which causes steaming instead of browning
- Flipping omelets and pancakes – Sloped sides allow you to slide a spatula under food easily
- Stir-frying vegetables – Tossing food requires less effort with angled walls
- Quick weeknight cooking – Lighter weight makes one-handed maneuvering possible
The curved sides promote moisture evaporation. This design helps achieve crispy textures on fried chicken, hash browns, and bacon.
When to Choose a Sauté Pan
Sauté pans outperform skillets for these applications:
- Braising short ribs or chicken thighs – The included lid traps moisture during low, slow cooking
- Making risotto or paella – Straight sides contain 4+ cups of liquid without spillage
- Reducing pan sauces – Vertical walls minimize evaporation until you want it
- One-pot pasta dishes – Greater depth accommodates ingredients that start above the rim
The helper handle becomes essential when moving a full pan. A sauté pan loaded with liquid and protein can weigh 8-10 pounds.
Bottom Line
Most cooks use a skillet 70% of the time for everyday tasks. The sauté pan serves specific purposes that justify owning both if you braise meat weekly or prepare sauce-heavy dishes regularly.
What Is a Skillet?
A skillet is a flat-bottomed pan with sloped sides that curve outward at approximately 45 degrees from the cooking surface.
The angled walls distinguish skillets from every other pan type. This design feature creates a larger cooking surface relative to the pan’s diameter, which matters when you’re searing four chicken breasts or cooking bacon strips.
Design and Construction of Skillets
Physical characteristics:
- Side angle – Walls slope outward from 35° to 50°, with 45° most common
- Depth – Typically 1.5 to 2.5 inches from bottom to rim
- Handle configuration – Single long handle (8-10 inches) on one side
- Diameter range – 8, 10, 12, and 14 inches measured across the top rim
- Weight variation – 2 pounds (aluminum non-stick) to 8 pounds (cast iron)
The flat bottom ensures even contact with burners. Most skillets measure wider at the rim than at the base, which means a “12-inch skillet” has a 12-inch top diameter but roughly a 9-10 inch cooking surface.
Material options include:
| Material | Heat Conductivity | Maintenance | Price Range |
|---|---|---|---|
| Cast iron | Excellent retention | Requires seasoning | $20-$80 |
| Stainless steel | Even distribution | Dishwasher-safe | $50-$300 |
| Non-stick aluminum | Heats quickly | Hand-wash only | $25-$150 |
| Carbon steel | Responsive | Needs seasoning | $30-$120 |
Lids are sold separately for most skillets. The sloped sides make achieving a tight seal difficult, though universal lids work adequately for tasks requiring coverage.
Best Uses for a Skillet
Skillets perform these cooking techniques better than other pans:
High-heat applications:
- Searing steaks at 450°F+ creates the Maillard reaction for a brown crust
- Pan-frying breaded cutlets in 1/4 inch of oil
- Crisping skin-on fish fillets without sticking
Foods requiring manipulation:
- Scrambled eggs that you stir constantly
- Hash browns you flip in sections
- Stir-fried vegetables tossed every 30 seconds
Shallow cooking methods:
- Sautéing mushrooms or onions in butter
- Cooking quesadillas or grilled cheese sandwiches
- Frying eggs sunny-side up or over-easy
The open design accelerates moisture evaporation by 30-40% compared to covered cooking. This characteristic benefits recipes where you want to develop fond (browned bits) on the pan bottom for flavor.
Skillets transition from stovetop to oven easily. Roasted chicken thighs or baked frittatas start on a burner and finish under a broiler, provided the handle material tolerates oven temperatures.
What Is a Sauté Pan?
A sauté pan is a wide, flat-bottomed cooking vessel with straight vertical sides that rise 2 to 3 inches from the base.
The perpendicular walls create a distinct cooking environment. Unlike skillets, these vertical sides trap heat and contain liquids effectively, which changes how moisture behaves during cooking.
Design and Construction of Sauté Pans
Defining features:
- Side walls – Perfectly vertical at 90° angle to the bottom
- Wall height – 2 to 3.5 inches, providing significant depth
- Handle system – Long handle (8-10 inches) plus a helper handle opposite
- Capacity measurement – Rated in quarts (3-qt, 4-qt, 5-qt) rather than diameter
- Lid inclusion – Fitted lid comes standard with most models
- Base diameter – 10 to 12 inches across the cooking surface
The dual-handle design serves a practical purpose. When a 4-quart sauté pan holds chicken, vegetables, and 3 cups of liquid, the total weight reaches 9-12 pounds. Both handles distribute this load during transfers from stovetop to oven.
Construction materials:
| Material | Weight | Reactivity | Oven-Safe Temp |
|---|---|---|---|
| Stainless steel (tri-ply) | 3-5 lbs | Non-reactive | 500-600°F |
| Hard-anodized aluminum | 2-4 lbs | Non-reactive | 400-500°F |
| Enameled cast iron | 6-8 lbs | Non-reactive | 500°F |
| Copper core | 4-6 lbs | Non-reactive | 500-550°F |
The flat lid fits flush against the rim. This tight seal is rarely achieved with skillets, where sloped sides prevent proper contact. Steam and moisture remain trapped inside, which matters for braising and recipes requiring consistent liquid levels.
Best Uses for a Sauté Pan
Sauté pans excel at these cooking methods:
Liquid-based techniques:
- Braising pork chops in 2 cups of stock for 45 minutes
- Simmering marinara sauce that would splatter in a skillet
- Poaching chicken breasts submerged in wine and herbs
- Reducing 3 cups of liquid to 1 cup for concentrated sauces
One-pot preparations:
- Risotto that requires constant stirring of 4-5 cups of liquid
- Paella with saffron rice, seafood, and vegetables
- Chicken and rice where ingredients cook together sequentially
- Shakshuka with eggs poached in tomato sauce
Covered cooking applications:
- Smothered pork chops with onions and gravy
- Chicken cacciatore that braises under a lid
- Vegetables steamed in their own moisture
- Pan-roasted proteins finished in a 350°F oven
The straight sides contain oil splatter better than angled walls. When pan-frying cutlets in 1/2 inch of oil, vertical walls keep hot fat from escaping onto your stovetop.
Volume advantages:
A 12-inch sauté pan holds 4-5 quarts at capacity. The equivalent skillet manages only 1.5-2 quarts before liquid approaches the rim. This difference becomes critical when deglazing a pan with wine or making dishes like coq au vin that start with substantial liquid.
The helper handle provides leverage when shaking the pan. Tossing risotto or distributing ingredients requires less wrist strength with two points of control instead of one.
Skillet vs Sauté Pan: Side-by-Side Comparison
The functional differences between skillets and sauté pans determine which tool handles specific recipes more effectively.
Understanding how these pans perform across different cooking scenarios prevents technique failures and ingredient waste. The wall angle affects everything from browning capability to liquid management.
Cooking Surface Area Differences
Surface area calculations:
| Pan Size | Skillet Surface Area | Sauté Pan Surface Area | Difference |
|---|---|---|---|
| 10-inch | ~64 sq inches | ~50 sq inches | 22% more |
| 12-inch | ~92 sq inches | ~75 sq inches | 19% more |
| 14-inch | ~126 sq inches | ~103 sq inches | 18% more |
A 12-inch skillet provides room for four 6-ounce chicken breasts without overlap. The same diameter sauté pan fits three breasts comfortably. Crowding the fourth piece causes steaming instead of searing because moisture cannot escape quickly enough.
The sloped sides of a skillet extend the usable cooking area. Food can rest partially up the angled walls while still maintaining contact with the hot surface. Straight walls in a sauté pan create a hard boundary where the cooking surface ends.
Practical implications:
- Skillets accommodate larger quantities of ingredients spread in a single layer
- Sauté pans work better for smaller portions or stacked ingredients
- Pan-frying requires the extra surface area that skillets provide
- Deep cooking methods benefit from the vertical space in sauté pans
Heat Distribution: Skillet vs Sauté Pan
Both pan types distribute heat evenly when constructed with quality materials. The difference lies in how they manage moisture and temperature retention.
Moisture evaporation rates:
Skillets expose food to open air across the entire cooking surface. Water molecules escape freely over the low-profile sloped sides, which accelerates evaporation by 35-40%. This rapid moisture loss produces better browning and crispier textures.
Sauté pans trap moisture between their tall vertical walls. Even without a lid, the contained environment slows evaporation. When covered, moisture recirculates and condenses back onto food, which suits braising but hinders crisping.
Temperature stability:
- Skillets lose heat faster due to greater surface area exposure—beneficial for temperature-sensitive techniques like cooking eggs
- Sauté pans maintain consistent heat longer because vertical walls shield contents from ambient air—ideal for simmering sauces
- Recovery time after adding cold ingredients is similar in both when using equivalent materials
The mass of the pan matters more than shape for heat retention. A 5-pound cast iron skillet holds temperature better than a 3-pound stainless steel sauté pan regardless of wall design.
Liquid Capacity Comparison
Volume specifications:
| Pan Type | Typical Capacity | Maximum Safe Fill |
|---|---|---|
| 10″ skillet | 1.5 quarts | 1 quart |
| 12″ skillet | 2 quarts | 1.5 quarts |
| 3-qt sauté pan | 3 quarts | 2.5 quarts |
| 5-qt sauté pan | 5 quarts | 4 quarts |
Sauté pans hold 2-3 times more liquid than equivalent-diameter skillets. A recipe calling for 3 cups of chicken stock will fit comfortably in a sauté pan but approach the rim dangerously in a skillet.
Spillage prevention:
The straight walls of sauté pans contain liquid during stirring. When you mix risotto vigorously, vertical sides keep rice and stock inside the pan. Sloped skillet walls redirect motion upward and outward, which sends liquid toward the rim with each stir.
Deglazing techniques differ between the two pans. Adding 1 cup of wine to a hot skillet after searing creates dramatic steam and potential overflow. The same amount in a sauté pan sits safely 1-2 inches below the rim.
Ease of Use: Flipping and Tossing
Skillets require 40% less effort to flip food than sauté pans.
The physics favor sloped sides. When you jerk a skillet forward and pull back, food slides up the angled wall and flips naturally. Sauté pan walls block this motion, forcing you to lift food higher before it clears the rim.
Technique comparison:
- One-handed flipping – Possible with 10-12 inch skillets; difficult with sauté pans over 3 quarts
- Spatula access – Skillet curves allow spatulas to slide under food at multiple angles; sauté pans limit access to perpendicular entry
- Tossing vegetables – Skillet walls guide food back to center; sauté pan walls require precise wrist control
- Omelet folding – Sloped sides let you roll omelets smoothly; straight sides create hard creases
The helper handle on sauté pans aids in two-handed tossing. You grip both handles and shake the pan horizontally, which works for risotto or distributing ingredients but doesn’t replicate the flipping motion that skillets enable.
Storage Considerations
Space requirements:
Skillets nest inside each other efficiently. A 10-inch skillet fits completely inside a 12-inch model, and a 14-inch can accommodate both. The tapered design creates a stable stack that occupies minimal cabinet space.
Sauté pans with helper handles prevent nesting. The secondary handle protrudes at an angle that blocks stacking unless you offset pans significantly. A collection of three sauté pans requires 2-3 times more shelf space than three skillets.
Lid storage:
- Sauté pan lids add 1-2 inches of height per pan
- Most skillet owners purchase one universal lid for multiple pans
- Fitted lids for sauté pans must be stored with their corresponding pans or separately
The trade-off is functionality versus convenience. Sauté pans demand more storage but arrive ready for covered cooking without additional purchases.
When to Use a Skillet Over a Sauté Pan
Choose a skillet when your recipe prioritizes rapid browning, frequent food manipulation, or requires maximizing the cooking surface area.
The design advantages of sloped sides become critical in specific cooking scenarios. Recognizing these situations prevents mediocre results from using the wrong pan.
High-Heat Cooking Applications
Searing proteins at 400°F+:
Skillets outperform sauté pans for developing a dark crust on meat and fish. The wider cooking surface prevents crowding, which drops pan temperature. When you place four steaks in a 12-inch skillet, each piece has adequate space for moisture to evaporate before it pools.
Sauté pans with equivalent diameter fit fewer steaks due to reduced surface area. Overlapping pieces steam in their own juices rather than sear, creating gray meat instead of a mahogany crust.
Optimal spacing guidelines:
- Steaks and chops: 1 inch between pieces minimum
- Chicken breasts: 1.5 inches apart for even browning
- Fish fillets: 2 inches to prevent delicate flesh from tearing during flipping
The open design accelerates moisture removal. Water evaporates 35-40% faster in a skillet compared to a sauté pan, which matters when rendering fat from duck breast or crisping chicken thighs.
Pan-frying requirements:
Shallow frying in 1/4 to 1/2 inch of oil works better in skillets. The sloped sides provide easier access for flipping breaded items without disturbing the hot oil level. Tongs or spatulas slide under cutlets at multiple angles rather than the single perpendicular approach that straight walls demand.
| Technique | Skillet Advantage | Temperature Range |
|---|---|---|
| Steak searing | Larger surface prevents steam | 450-500°F |
| Stir-frying | Easy tossing motion | 400-450°F |
| Hash browns | Maximum crisping area | 375-400°F |
| Bacon rendering | Fat drains to edges | 325-350°F |
Everyday Cooking Tasks
Breakfast preparation:
Skillets handle eggs, pancakes, and bacon more efficiently than sauté pans. Three eggs cook side-by-side in a 10-inch skillet, each developing crispy edges. The same pan holds four strips of bacon laid flat.
Pancakes require the flip-friendly environment that sloped sides create. You slide a spatula under the pancake from any direction, lift slightly, and flip. Straight walls force you to approach from specific angles, which increases the chance of folded or torn pancakes.
Quick weeknight dinners:
Most 20-minute meals benefit from a skillet’s versatility:
- Chicken piccata – Sear cutlets, deglaze with minimal liquid, reduce sauce quickly
- Shrimp scampi – Toss shrimp frequently, evaporate white wine rapidly
- Ground beef tacos – Brown meat in thin layer, drain fat easily
- Vegetable stir-fries – Toss vegetables every 30 seconds without spillage
The single long handle makes one-handed cooking possible. You hold the handle while stirring with your dominant hand, which speeds up meal preparation. Sauté pans require two hands for most manipulation tasks due to their weight and helper handle configuration.
Single-serving efficiency:
An 8-inch skillet excels at cooking for one person. A single chicken breast, two eggs, or a grilled cheese sandwich fits perfectly without wasting heat on empty pan space. The smaller diameter heats faster and uses less energy than firing up a larger sauté pan.
Foods Requiring Frequent Turning
Delicate items:
Sloped walls provide the clearance needed for sliding a spatula under fragile foods:
- Fish fillets with skin that sticks initially
- Over-easy eggs where yolk integrity matters
- Thin cutlets that tear if lifted too aggressively
- Quesadillas that need support during the flip
The angle creates a natural ramp. Food slides up and over rather than lifting straight up and risking breakage. This geometry reduces the skill required for successful flipping compared to the vertical lift that sauté pans demand.
Constant stirring applications:
Scrambled eggs, fried rice, and sautéed mushrooms require near-continuous motion. Skillets accommodate rapid stirring without redirecting food over the rim. The curved transition from bottom to sides keeps ingredients in the pan even during aggressive manipulation.
Temperature control benefits:
The open design lets you monitor doneness visually across the entire cooking surface. Onions caramelizing in a skillet show color changes clearly. The same onions in a sauté pan hide behind tall walls, making even cooking difficult to assess without constant checking.
Skillets respond faster to burner adjustments. When you reduce heat, the exposed surface releases temperature quickly. This responsiveness prevents overcooking delicate ingredients like garlic or shallots that burn in the 15-20 seconds between perfect and ruined.
When to Use a Sauté Pan Over a Skillet
Use a sauté pan when your recipe involves significant liquid volume, requires a lid, or combines multiple cooking methods in one vessel.
The straight sides and fitted lid create conditions that skillets cannot replicate. Certain dishes fail completely without these design elements.
Braising and Simmering
Low and slow cooking:
Braising transforms tough cuts into tender meals through hours of gentle heat with moisture. Sauté pans provide the exact environment this technique requires—a tight-fitting lid, sufficient liquid capacity, and walls that trap steam.
Short ribs braised in 2 cups of wine and stock need room for liquid without risk of overflow. A 4-quart sauté pan holds the meat, vegetables, and liquid with 1-2 inches of clearance. The equivalent skillet barely accommodates half that volume.
Classic braises suited to sauté pans:
| Dish | Liquid Amount | Cooking Time | Why Sauté Pan Works |
|---|---|---|---|
| Coq au vin | 3 cups wine/stock | 90 minutes | Lid prevents evaporation |
| Braised pork chops | 2 cups broth | 45 minutes | Vertical walls contain splatter |
| Osso buco | 2.5 cups liquid | 2 hours | Depth accommodates shanks |
| Chicken cacciatore | 2 cups tomato sauce | 60 minutes | Sauce stays at proper level |
The lid maintains consistent moisture levels throughout cooking. Without it, you’d need to add liquid every 20-30 minutes as evaporation reduces the braising medium. This constant monitoring defeats the hands-off nature that makes braising attractive.
Simmering advantages:
Sauces that require 30-60 minutes of gentle bubbling perform better in sauté pans. The straight walls minimize evaporation until you remove the lid for the final reduction. Bolognese, curry sauces, and chili all develop deeper flavors when moisture stays controlled.
Temperature consistency matters for simmering. Sauté pans hold steady at 180-200°F more reliably than skillets, where the open design causes temperature fluctuations from ambient air movement.
Cooking with Sauces and Liquids
Pan sauce preparation:
After searing proteins, you deglaze the pan with wine or stock to create a sauce. Sauté pans accommodate the full sauce-making process without transferring ingredients between vessels.
The process works like this:
- Sear chicken breasts and remove them (vertical walls prevent oil splatter)
- Add 1 cup wine to deglaze fond (liquid stays safely below rim)
- Reduce by half while scraping (contained environment controls evaporation rate)
- Add cream or butter to finish (depth prevents boiling over)
- Return chicken to sauce (everything fits in one pan)
Skillets handle steps 1-2 adequately but struggle with volume in steps 3-5. The sauce approaches the rim dangerously, and returning proteins to a shallow pan creates overflow risk.
Rice dishes requiring liquid:
Risotto demands 4-5 cups of stock added gradually over 25 minutes. A sauté pan holds this volume while providing room to stir constantly. The rice, vegetables, and liquid occupy about 60% of the pan’s capacity, which leaves space for vigorous mixing without spillage.
Paella with saffron rice cooks better in wide, shallow sauté pans. The large surface area exposes maximum rice to heat for proper socarrat (the crispy bottom layer). A 12-inch sauté pan fits 2 cups of rice plus seafood, chicken, and vegetables.
Poaching applications:
Chicken breasts or fish fillets poached in wine, stock, or court bouillon require submersion. Sauté pans provide adequate depth—typically 2.5-3 inches—to cover proteins completely with 1-2 inches of liquid.
The wide base accommodates four chicken breasts lying flat. Poaching liquid circulates around each piece evenly, which produces uniform cooking. Narrow pots force stacking, creating uneven results.
One-Pot Meals
Sequential cooking in a single pan:
One-pot dinners build flavors through layered cooking steps. You brown meat, remove it, sauté aromatics, add liquid and grains, then return the meat to finish. Sauté pans handle this progression without requiring multiple vessels.
Example: Chicken and rice (one-pot method)
- Brown 4 chicken thighs in oil (sauté pan holds all pieces without crowding)
- Remove chicken, sauté onions and garlic (vertical walls contain spattering)
- Add 1.5 cups rice and toast 2 minutes (adequate surface area)
- Pour in 3 cups stock (depth prevents overflow)
- Nestle chicken on top, cover, simmer 25 minutes (fitted lid essential)
- Result: Complete meal cooked in one pan with minimal cleanup
This recipe fails in a standard skillet. The liquid volume exceeds safe capacity, and without a proper lid, the rice dries out or cooks unevenly.
Pasta cooked in sauce:
One-pot pasta dishes where dry noodles cook directly in sauce require substantial liquid capacity. You add 4 cups of liquid to 12 ounces of pasta, which fills a sauté pan halfway. The straight walls contain the bubbling mixture as pasta absorbs liquid and releases starch.
Skillets lack the depth for this technique. Pasta pieces stick above the liquid line, cooking unevenly. Vigorous boiling sends starchy water over the low-profile sides.
Stovetop-to-oven transitions:
Many one-pot recipes start on the burner and finish in a 350°F oven. Sauté pans excel at this transition because:
- Helper handles provide safe grip when moving hot, heavy pans
- Vertical walls prevent sauce from bubbling over during oven cooking
- Fitted lids can remain in place or be removed depending on desired result
- Oven-safe construction is standard in quality sauté pans
The dual-handle design becomes critical when a pan weighs 10+ pounds loaded with food and liquid. Attempting to move this weight with a single long handle risks spills or burns.
Material Options for Skillets and Sauté Pans
The material you choose affects heat conductivity, maintenance requirements, and cooking performance more than whether you select a skillet or sauté pan.
Both pan styles come in identical materials. The wall angle doesn’t limit your material options, though certain combinations prove more practical than others based on weight and handling considerations.
Cast Iron Skillets vs Sauté Pans
Performance characteristics:
Cast iron retains heat longer than any other cookware material. A preheated cast iron pan maintains 450°F even after you add cold ingredients, which matters for achieving proper sears. The material distributes heat evenly once fully heated, though it takes 8-10 minutes to reach temperature.
Why cast iron skillets dominate:
- Weight management – A 12-inch cast iron skillet weighs 5-8 pounds; a cast iron sauté pan of equivalent size weighs 8-12 pounds
- Single-handed use – Skillet design allows one-handed maneuvering; sauté pan weight requires two hands even when empty
- Seasoning ease – Sloped sides receive more even oil coating during seasoning process
- Market availability – 90% of cast iron cookware sold consists of skillets rather than sauté pans
Cast iron develops a natural non-stick surface through polymerized oil layers. This seasoning works better in skillets where frequent high-heat cooking and oil use build the patina faster. Sauté pans used for braising with acidic liquids can strip seasoning more quickly.
Maintenance requirements:
| Task | Frequency | Method |
|---|---|---|
| Cleaning | After each use | Hot water and stiff brush (no soap) |
| Drying | Immediately | Stovetop heat for 2 minutes |
| Re-seasoning | Every 3-6 months | Thin oil layer baked at 450°F for 1 hour |
| Rust removal | As needed | Steel wool, then full re-season |
Cast iron reacts with acidic ingredients like tomatoes or wine. Recipes requiring 2+ cups of acidic liquid (common in sauté pan applications) can impart metallic flavors and damage seasoning. Stainless steel handles these situations without issue.
Stainless Steel Options
Construction types:
Quality stainless steel cookware uses multi-ply construction—layers of different metals bonded together. Tri-ply (three-layer) pans sandwich aluminum or copper between stainless steel layers. Five-ply adds additional layers for enhanced heat distribution.
Stainless steel advantages:
- Non-reactive surface – Handles acidic ingredients (wine, tomatoes, citrus) without flavor changes
- Dishwasher compatibility – Can withstand harsh detergents and high heat
- Durability – Resists scratching, denting, and warping over decades of use
- Oven-safe range – Most withstand 500-600°F including handles
- Induction capability – Magnetic steel base works on all cooktop types
The material doesn’t conduct heat well on its own. The aluminum or copper core provides thermal conductivity while stainless steel offers durability and a stable cooking surface.
Why stainless works for both pan types:
Stainless steel sauté pans weigh 3-5 pounds for a 4-quart model—manageable for frequent use. The material’s strength allows for thinner walls without sacrificing durability, which keeps weight reasonable despite the sauté pan’s additional material requirements.
Both skillets and sauté pans develop fond (browned bits) excellently in stainless steel. These concentrated flavor deposits deglaze into pan sauces, making stainless ideal for recipes that build sauces after searing.
Preventing sticking:
Food adheres to stainless steel without proper technique. The preheat-and-oil method prevents most sticking issues:
- Heat empty pan over medium-high for 3-4 minutes
- Add oil and heat until it shimmers (350-375°F)
- Add protein and resist moving it for 2-3 minutes
- Food releases naturally once a crust forms
Temperature control matters more with stainless than with non-stick surfaces. Proteins seared at proper heat develop a crust that releases cleanly. Insufficient heat causes proteins to bond with the pan surface.
Non-Stick Coated Pans
Coating types and durability:
Traditional PTFE (Teflon) coatings last 2-5 years with proper care. Ceramic non-stick coatings degrade faster—typically 1-3 years. Reinforced non-stick surfaces with titanium or diamond particles extend lifespan to 3-7 years but cost significantly more.
Temperature limitations:
| Coating Type | Maximum Safe Temp | When Coating Fails |
|---|---|---|
| PTFE (Teflon) | 400-450°F | Releases toxic fumes above 500°F |
| Ceramic | 400-500°F | Loses non-stick properties permanently |
| Reinforced PTFE | 450-500°F | Begins degrading above 500°F |
These temperature limits exclude non-stick pans from high-heat searing. Steaks requiring 500°F+ temperatures will damage the coating and produce subpar results. Non-stick excels at medium-heat cooking where food naturally sticks—eggs, fish, pancakes.
Best applications for non-stick:
- Scrambled eggs cooked at medium-low heat slide out without residue
- Delicate fish fillets release cleanly without skin tearing
- Sticky sauces (teriyaki, barbecue) clean up easily after cooking
- Low-fat cooking requires minimal oil due to slick surface
Non-stick skillets outsell non-stick sauté pans by a 4:1 margin. The skillet’s everyday cooking applications align better with non-stick’s strengths. Sauté pans used for braising and deglazing don’t benefit as much from non-stick properties.
Maintenance rules:
Metal utensils scratch non-stick coatings irreparably. Use silicone, wood, or plastic tools exclusively. Hand-washing extends coating life—dishwashers accelerate degradation through harsh detergents and high heat. Store pans with protective layers between them to prevent scratching.
Carbon Steel Skillets and Sauté Pans
Material properties:
Carbon steel contains 99% iron and 1% carbon, making it similar to cast iron but much thinner (1.5-2mm vs 3-5mm). This reduced thickness cuts weight by 40-50% while maintaining excellent heat retention and distribution.
A 12-inch carbon steel skillet weighs 3-4 pounds compared to 7-8 pounds for cast iron. This weight advantage makes carbon steel viable for sauté pans where cast iron becomes unwieldy.
Performance comparison to cast iron:
- Heat responsiveness – Carbon steel adjusts to temperature changes in 30-45 seconds; cast iron takes 2-3 minutes
- Seasoning speed – Develops non-stick patina in 5-8 uses vs 15-20 for cast iron
- Warp resistance – Thinner material warps more easily on electric coils or induction
- Price point – Typically $30-120 vs $20-80 for cast iron
Both materials require seasoning and similar maintenance. Carbon steel reacts to acidic ingredients identically to cast iron—avoid prolonged contact with tomatoes, wine, or citrus until seasoning is well-established.
Why professional kitchens choose carbon steel:
The lighter weight allows cooks to flip and toss for hours without wrist fatigue. A carbon steel skillet heats faster than cast iron, which matters in commercial settings with tight timing requirements. The material handles stovetop-to-oven transitions easily, withstanding 600°F+ temperatures.
Carbon steel sauté pans exist but remain uncommon. The thin material doesn’t provide enough mass for the slow, even heat that braising requires. Most cooks who want carbon steel properties choose a skillet, then use stainless steel or enameled cast iron for sauté pan applications.
Size Guide: Choosing the Right Diameter
Select an 8-10 inch pan for single servings, a 12-inch for families of 3-4, or a 14-inch for batch cooking and large gatherings.
Pan size directly impacts cooking results. Too small crowds ingredients and causes steaming; too large wastes energy and creates uneven heating across the excessive surface area.
Small (8-10 inch) Skillets and Sauté Pans
Capacity and serving sizes:
| Pan Size | Skillet Capacity | Sauté Pan Capacity | Protein Portions |
|---|---|---|---|
| 8-inch | 1 quart | 1.5 quarts | 1-2 servings |
| 10-inch | 1.5 quarts | 2-2.5 quarts | 2-3 servings |
An 8-inch skillet accommodates two eggs, one chicken breast, or a single serving of vegetables. This size heats in 2-3 minutes on a standard burner, making it efficient for quick breakfast preparation or reheating small portions.
Practical advantages:
- Energy efficiency – Matches burner size perfectly on most cooktops, preventing wasted heat
- Storage ease – Fits in crowded cabinets or hangs on compact wall racks
- Weight – Most 8-inch skillets weigh under 2 pounds, enabling easy one-handed flipping
- Precision heating – Small surface area responds to temperature adjustments within 15-20 seconds
The 10-inch size works better as an all-purpose pan for singles or couples. Two chicken breasts fit without overlap, and scrambled eggs for two cook evenly. A 10-inch sauté pan holds enough liquid (2-2.5 quarts) for small-batch risotto or braised dishes.
Limitations:
These sizes cannot handle recipes requiring more than 2 cups of liquid. Sauce-heavy dishes overflow the rim, and braising even two pork chops becomes difficult. The confined space prevents proper browning when cooking for more than two people.
Small skillets lose heat rapidly when you add cold ingredients. Adding four chicken thighs to an 8-inch pan drops temperature by 150-200°F, which prevents proper searing. The 10-inch size handles this thermal shock better but still struggles with large quantities.
Medium (12 inch) Skillets and Sauté Pans
The standard size for most kitchens:
Twelve-inch pans dominate cookware sales because they balance capacity with manageability. A 12-inch skillet provides 90-95 square inches of cooking surface—enough for four servings without crowding.
What fits in a 12-inch pan:
- Skillets – 4 chicken breasts, 6 pork chops, 8 eggs, 1.5 pounds of ground meat
- Sauté pans – 4-quart capacity holds complete one-pot meals for 4-5 people
- Whole chicken – A 4-pound bird fits in a 12-inch skillet for roasting
- Large-format items – 10-12 inch pizzas, frittatas, or quesadillas
The cooking surface accommodates ingredients in a single layer, which ensures even browning. When making stir-fry for four, vegetables maintain contact with the hot surface rather than piling on top of each other.
Weight considerations:
A 12-inch stainless steel skillet weighs 3-4 pounds empty. Add food and the total reaches 5-7 pounds—manageable for most cooks. Cast iron versions weigh 7-8 pounds empty and feel significantly heavier when loaded.
Sauté pans at this size weigh 4-6 pounds depending on material. The helper handle becomes essential when the pan holds 3 quarts of liquid plus ingredients. Total weight can exceed 12 pounds, which requires two-handed lifting.
Heat distribution quality:
Most residential burners measure 6-8 inches in diameter. A 12-inch pan extends beyond this heat source, creating cooler zones at the edges. Quality tri-ply construction compensates for this by conducting heat laterally from the center to the perimeter.
Cheaper pans with thin bases or disk bottoms (heat disk only at center) develop hot spots in 12-inch sizes. Food directly over the burner cooks faster than food at the edges, requiring constant rotation.
Large (14 inch) Skillets and Sauté Pans
High-volume cooking capacity:
| Measurement | 14-inch Skillet | 14-inch Sauté Pan |
|---|---|---|
| Surface area | 125-130 sq inches | 105-110 sq inches |
| Liquid capacity | 2.5 quarts | 5-7 quarts |
| Protein servings | 6-8 portions | 8-10 portions |
| Weight (empty) | 5-9 pounds | 7-12 pounds |
A 14-inch skillet handles six steaks, eight chicken thighs, or a dozen eggs simultaneously. This size suits batch cooking, meal prep for the week, or families with 6+ members. The expanded surface area allows you to brown 3 pounds of ground beef without working in batches.
Practical challenges:
Most standard stovetops cannot accommodate 14-inch cookware properly. The pan overhangs burners significantly, which creates uneven heating. Professional ranges with 12,000+ BTU burners handle this size better, but residential 7,000-9,000 BTU burners struggle.
Storage becomes problematic. A 14-inch pan requires 15-16 inches of shelf space including handle length. Wall-mounted racks work better than cabinet storage. The size prohibits nesting inside other pans.
Weight and handling:
Cast iron skillets at 14 inches weigh 9-10 pounds empty. Loading this with food creates a 15-pound mass that most cooks find difficult to maneuver. Flipping or tossing becomes nearly impossible without two hands.
Sauté pans in this size exist primarily for commercial kitchens. A 14-inch, 6-quart sauté pan filled with braised meat and liquid weighs 18-20 pounds. The helper handle provides necessary support, but moving this weight from stovetop to oven requires strength and caution.
When this size makes sense:
- Large-format entertaining (fajitas for 10, paella for 12)
- Meal prepping 6-8 portions to freeze
- Commercial or catering operations
- Households with 6+ members eating together regularly
The 14-inch size eliminates batch cooking for high-volume scenarios. You brown all the meat at once, cook all the vegetables in one go, and maintain consistent timing across ingredients. This efficiency justifies the storage and handling challenges for cooks who regularly feed crowds.
Care and Maintenance: Skillet vs Sauté Pan
The material of your pan determines cleaning and maintenance requirements far more than whether it’s a skillet or sauté pan.
Both pan styles face identical care challenges when made from the same material. The wall angle creates minor differences in cleaning access and seasoning application, but these variations rarely affect long-term durability.
Cleaning Considerations
Material-specific cleaning methods:
| Material | Cleaning Method | Tools | What to Avoid |
|---|---|---|---|
| Cast iron | Hot water + brush | Stiff bristle brush, chainmail scrubber | Soap (debated), dishwasher, soaking |
| Stainless steel | Soap + sponge | Non-abrasive sponge, Bar Keeper’s Friend | Steel wool on polished exterior |
| Non-stick | Gentle soap + soft cloth | Soft sponge, nylon brush | Metal utensils, abrasive scrubbers |
| Carbon steel | Hot water + brush | Stiff brush, salt scrub | Prolonged soaking, harsh detergents |
Sauté pans accumulate more residue in the 90-degree corners where vertical walls meet the base. Food particles lodge in these crevices during cooking and require targeted scrubbing. A stiff brush or chainmail scrubber reaches these corners more effectively than a flat sponge.
Skillets with curved transitions from bottom to sides trap less debris. The gradual angle allows water and cleaning tools to sweep food particles out naturally. This geometry reduces scrubbing time by 20-30% compared to straight-walled pans.
Deglazing as cleaning:
Deglazing hot pans immediately after cooking loosens stuck-on food. Add 1/2 cup water to the hot empty pan and scrape with a wooden spoon. The steam releases browned bits that would otherwise require aggressive scrubbing. This technique works identically for skillets and sauté pans.
Preventing buildup:
Proper preheating prevents most food adhesion regardless of pan style. Heat the empty pan for 3-4 minutes before adding oil. The metal expands and closes microscopic pores that would otherwise trap food particles. Proteins release cleanly once they develop a proper crust, which requires adequate preheating and oil temperature.
Carbon steel and cast iron develop carbonized residue over time. This black coating is polymerized oil, not dirt. Scrubbing it away removes the non-stick patina you’ve built. Clean these materials with hot water only, reserving abrasive methods for actual stuck food.
Seasoning Requirements
Which materials require seasoning:
Cast iron and carbon steel develop their non-stick properties through seasoning—layers of polymerized oil bonded to the metal surface. Stainless steel and non-stick pans require no seasoning. Enameled cast iron has a glass coating that prevents seasoning adhesion.
Seasoning process differences:
The sloped sides of skillets receive oil coating more evenly during seasoning. When you wipe a thin oil layer across the surface, gravity naturally distributes it uniformly down the angled walls. Excess oil runs to the base rather than pooling.
Sauté pans with vertical walls challenge even oil distribution. Oil applied to straight sides tends to run down immediately, creating thick spots at the bottom and thin spots near the rim. The 90-degree corners where walls meet the base accumulate excess oil that can polymerize into sticky spots rather than smooth seasoning.
Proper seasoning technique:
- Clean the pan – Remove any existing residue with hot water and scrubbing
- Dry completely – Heat on stovetop for 2 minutes to evaporate all moisture
- Apply thin oil layer – Use flaxseed, grapeseed, or vegetable oil (1/2 teaspoon for 12-inch pan)
- Wipe thoroughly – Remove all visible oil; surface should look dry
- Bake upside down – Place in 450-500°F oven for 60 minutes
- Cool in oven – Turn off heat and let pan cool completely before removing
- Repeat 3-4 times – Build multiple layers for durable non-stick surface
Turning the pan upside down prevents oil from pooling. Gravity pulls excess oil away from the cooking surface, which ensures an even coating. This step matters more for sauté pans where corners can trap oil.
Maintaining seasoning:
Each cooking session with oil reinforces the seasoning layer. High-heat cooking accelerates this process. Avoid these seasoning-stripping activities:
- Simmering acidic ingredients (tomatoes, wine, vinegar) for more than 20 minutes
- Boiling water for extended periods
- Using metal utensils that scrape aggressively
- Storing food in the pan overnight
Sauté pans used primarily for braising with acidic liquids lose seasoning faster than skillets used for dry-heat cooking. Many cooks choose stainless steel for sauté pans to avoid this maintenance issue entirely.
Longevity and Durability
Expected lifespan by material:
| Material | Expected Lifespan | Failure Points |
|---|---|---|
| Cast iron | 50-100+ years | Cracking from thermal shock, rust if neglected |
| Stainless steel (quality) | 30-50 years | Rivets loosening, warping from overheating |
| Non-stick | 2-7 years | Coating degradation, peeling |
| Carbon steel | 30-80 years | Warping on electric coils, rust if neglected |
| Enameled cast iron | 20-40 years | Enamel chipping from impacts |
Both skillets and sauté pans achieve these lifespans when constructed well. The pan style doesn’t affect material durability—a quality stainless steel skillet lasts as long as an equivalent sauté pan.
Handle attachment vulnerabilities:
Sauté pans with helper handles introduce an additional failure point. The secondary handle attaches with rivets or welding that can loosen after years of use. Thermal expansion and contraction from repeated heating cycles gradually weakens these attachment points.
Inspect helper handles every 6-12 months. Grip firmly and attempt to wiggle the handle. Movement indicates loosening rivets that will eventually fail. Professional repair services can re-rivet handles, though replacement often costs less than repair for mid-range cookware.
Single-handle skillets have one attachment point, which simplifies construction and reduces failure risk. The long handle undergoes identical stress but requires repair less frequently due to its primary load-bearing design.
Warping and damage prevention:
Thin cookware (under 2mm base thickness) warps when exposed to temperature extremes. Never run cold water over a smoking-hot pan—the rapid temperature change causes metal to contract unevenly. Warped pans rock on flat cooktops and develop hot spots that ruin cooking performance.
Both skillets and sauté pans resist warping equally when properly constructed. Disk-bottom pans (aluminum disk bonded to stainless base) warp more readily than fully-clad construction. The bonded joint separates under thermal stress, creating a concave or convex bottom.
Quality indicators that extend lifespan:
- Riveted handles outlast welded attachments by 10-20 years
- Thick bases (3mm+) resist warping and provide even heating
- Full clad construction distributes heat and stress uniformly
- Stainless steel rivets prevent rust around attachment points
- Heavy-gauge materials tolerate aggressive cleaning and metal utensils
A $200 fully-clad stainless steel sauté pan used daily lasts 30+ years, averaging $6.67 per year. A $40 thin aluminum pan replaced every 3 years costs $13.33 annually. Quality construction delivers better value over time regardless of whether you choose a skillet or sauté pan.


