The main differences between the skillet and the saucepan are shape, cooking purpose, and liquid capacity — a skillet is wide, low, and open-topped, built for dry-heat cooking like searing and frying; a saucepan is tall, narrow, and lidded, built for liquid-based cooking like boiling, simmering, and sauce-making.
These aren’t competing pans. They don’t do the same job. Most kitchens need both.
| Feature | Skillet | Saucepan |
|---|---|---|
| Shape | Wide, low, flared walls | Tall, narrow, straight walls |
| Lid | Rarely included | Almost always included |
| Primary use | Searing, frying, browning | Boiling, simmering, sauces |
| Liquid capacity | Low — walls too short | High — deep walls hold volume |
| Price range | $15–$300+ | $20–$300+ |
If you’re trying to decide which one to buy first — and you only cook one type of food — the answer is probably the skillet. But if pasta, soup, and grains are your daily reality, start with the saucepan.
Table of Contents
What Is a Skillet — And What Does It Actually Do Well?
Wide. Flat. Low walls that angle outward. That’s the skillet — also called a frying pan or frypan, depending on where you grew up and who taught you to cook.
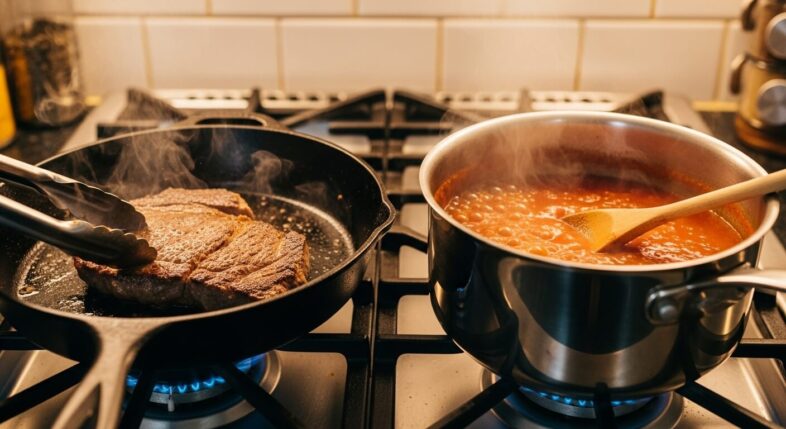
The flared sides aren’t an accident. They’re the whole point. When sides angle away from the food, steam escapes freely instead of circling back down and making everything wet. That’s how you get a proper sear. That’s the Maillard reaction — the browning that creates crust, color, and fond. It can’t happen if moisture is trapping itself in the pan. Flared sides fix that problem.
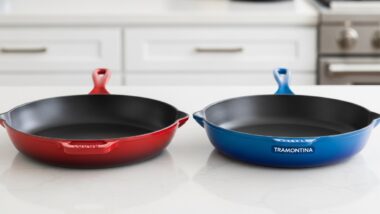
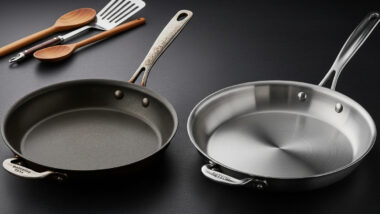
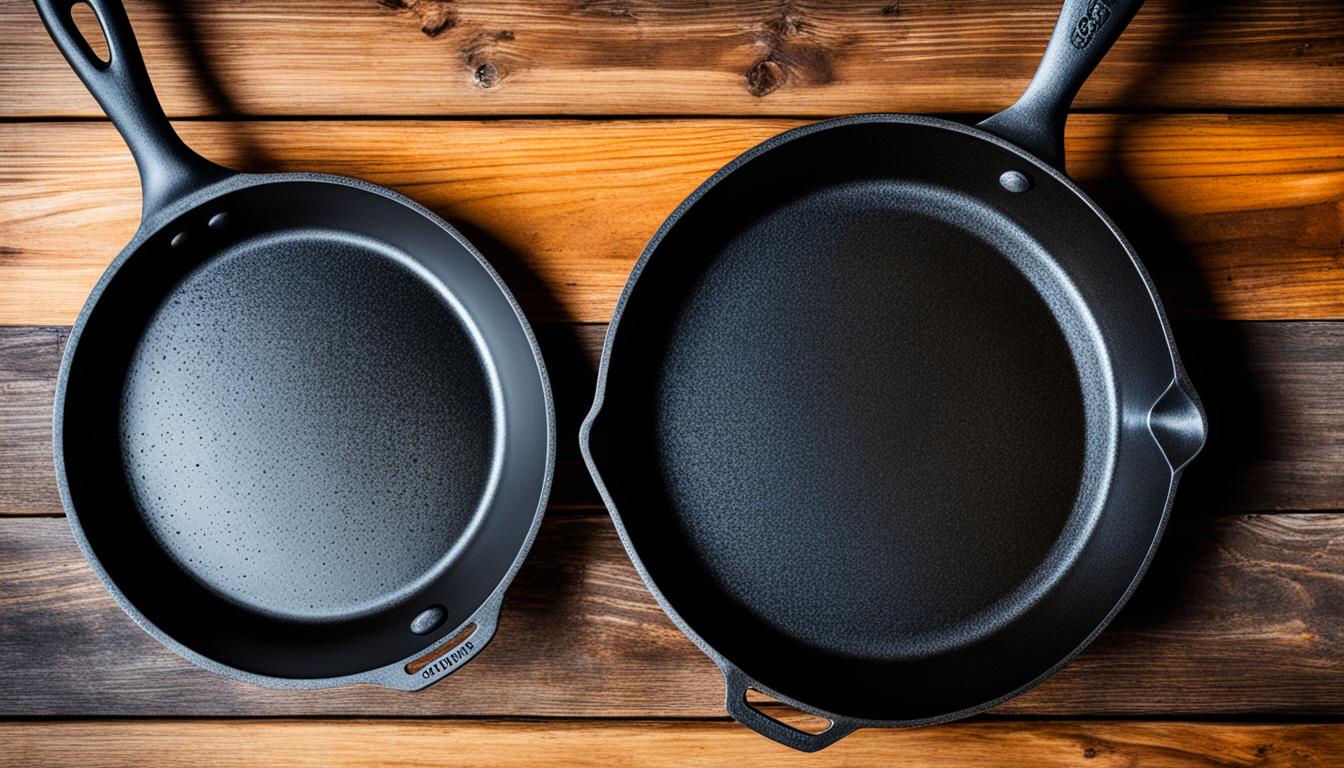
“Skillet” covers a lot of ground. Cast iron, stainless steel, nonstick, carbon steel — they’re all skillets. Same shape, different material, very different behavior. Sizes run from 8-inch to 14-inch. Most home cooks live in the 10-inch to 12-inch range.
Skillet Features
- Flared or angled sides — steam out, browning in; this is the defining feature
- Wide, flat cooking surface — maximum contact area with the burner
- No lid in most purchases — designed for open-top dry cooking where steam escape is the goal
- Material varies dramatically: cast iron holds heat longest; nonstick releases food easiest; stainless is the most durable; carbon steel is the professional’s choice for high-heat work
- Oven-safe ratings depend entirely on material — cast iron goes past 500°F; most nonstick caps at 350°F–400°F
- Induction compatible (cast iron and stainless); nonstick aluminum needs an induction-ready base
Skillet Price Range
- Budget nonstick: $15–$40 (T-fal, Amazon Basics)
- Mid-range cast iron or stainless: $25–$80 (Lodge, Tramontina, Cuisinart)
- Premium stainless: $100–$200+ (All-Clad, Made In)
- Premium enameled cast iron: $150–$300+ (Le Creuset)
Pros and Cons
Pros
- Nothing beats a skillet for searing — the flared sides are purpose-built for browning
- Available in every material, size, and price point — more options than any other pan category
- Lightweight nonstick versions are genuinely beginner-friendly
- Versatile across a huge range of stovetop tasks: eggs, steaks, stir-fry, fish, hash browns
Cons
- Low sides cause spills when liquid volume gets high — not designed for boiling or large-batch sauce work
- No lid in most purchases — limits steam-based techniques without a separate buy
- Nonstick coatings degrade in 2–5 years and need replacing
- Cast iron versions are heavy — a 12-inch Lodge weighs about 8 lbs
Who Should Buy a Skillet?
Honestly, everyone. But especially: cooks who sear, fry, scramble, and stir-fry daily. Anyone building a first cookware set. Beginners who want something forgiving.
Don’t reach for a skillet if you’re boiling pasta, making soup, cooking grains, or doing anything that involves significant liquid volume. That’s not what it’s for.
What Is a Saucepan — And Why Does Every Kitchen Need One?

Tall. Narrow. Straight walls. Long handle. Lid included almost always.
The saucepan is built for liquid. That’s it. The whole design — the depth, the straight walls, the tight-fitting lid — exists to contain, heat, and control liquid over time. The name is literal: it was designed to make sauces. But it also handles pasta water, grains, soups, custards, caramel, and pretty much anything that needs sustained heat applied to liquid over a burner.
Common sizes are measured in volume: 1-quart, 1.5-quart, 2-quart, 3-quart, 4-quart. A 2-quart saucepan is the kitchen workhorse — small enough to heat quickly, large enough to handle most everyday sauce and grain tasks. Most are made in stainless steel (clad is better), nonstick aluminum, or copper at the premium end.
One thing the saucepan doesn’t do well? Browning. The base is narrow relative to the pan’s height, and the tall walls trap steam even without the lid. Searing a chicken breast in a 3-quart saucepan is a bad idea — you’ll steam it, not brown it. That’s what the skillet is for.
Saucepan Features
- Tall, straight walls — contain liquid safely; minimize evaporation; prevent boil-overs and splatter
- Smaller base relative to overall height — not designed for browning; limited Maillard reaction potential
- Lid included — controls evaporation during simmering; enables steaming; essential for rice and grains
- Clad construction on quality models — aluminum or copper core between stainless layers distributes heat up the walls, not just across the base (important for sauces that can scorch)
- Long single handle — easy one-handed pouring and maneuvering
- Pouring lip on many models — a small spout for controlled pouring without a ladle
- Works on all cooktops; stainless versions are induction compatible
Saucepan Price Range
- Budget: $20–$50 (Cuisinart, Calphalon, Amazon Basics)
- Mid-range clad stainless: $50–$120 (Tramontina, All-Clad, Made In)
- Premium: $100–$300+ (All-Clad D3/D5, Demeyere, Mauviel copper)
Pros and Cons
Pros
- Purpose-built for liquid cooking — nothing handles boiling, simmering, and sauce-making as efficiently
- Lid included — rice, grains, and controlled reduction built right in
- Deep walls prevent boil-overs and spills even at a vigorous boil
- Excellent for temperature-sensitive tasks: custards, caramel, béchamel, hollandaise — the kind of sauces that punish you for using the wrong pan
- Lightweight compared to cast iron; easy to handle and pour from
Cons
- Can’t replace a skillet for browning — base is too small, walls trap steam
- Tall walls make scraping every last bit from the bottom slightly more awkward than a shallow pan
- Cheap single-layer stainless saucepans develop hot spots at the base — those hot spots will scorch your béchamel
- Nonstick versions still degrade over time
Who Should Buy a Saucepan?
Every home cook eventually. It’s one of the most foundational kitchen tools there is — alongside the skillet and a stockpot, it handles the majority of daily cooking.
Specifically: cooks who make sauces, soups, and grains regularly. Pastry cooks or anyone making custards, ganache, or caramel. Anyone who boils water more than once a week. That’s most people.
Skip it for searing, stir-frying, and anything that needs a wide browning surface and open steam escape.
Skillet vs Saucepan: The Real Differences, Laid Out
So both pans cook food. Both use heat. But they’re designed for fundamentally different jobs — and the geometry of each pan tells you exactly why.
Shape Is the Story
The skillet is built like a ramp. Low, wide, angled outward — steam exits quickly, food makes maximum contact with a hot flat surface, and browning happens fast. The Maillard reaction loves a skillet.

The saucepan is built like a cylinder. Tall, straight, enclosed — liquid stays put, heat is distributed up the walls (not just across the base), and evaporation is slow and controlled. Sauces and grains love a saucepan.
You can feel the design difference the moment you pick each one up. The skillet is wide and shallow. The saucepan is deep and focused. Neither is trying to do the other’s job.
Browning Performance: No Contest
A skillet wins here. Every time.
The Maillard reaction — the surface browning that creates flavor, color, and fond — requires direct, dry contact between food and a very hot surface. The skillet’s wide base and open, steam-escaping design maximizes that contact. The saucepan’s narrow base and tall walls work against it — steam accumulates even without the lid, and there’s not enough base area to properly sear anything larger than a small piece of fish.
Trying to sear a steak in a saucepan is genuinely a bad idea. Don’t do it.
Liquid Capacity: Also No Contest — Other Direction
A 12-inch skillet holds about 1.5–2 quarts of liquid comfortably before you’re nervous about spilling. Push past that and things get messy. A 2-quart saucepan handles 2 quarts easily. A 3-quart handles more. The tall straight walls are the entire reason — they give you depth without requiring more counter space or a larger burner.
Boiling pasta? The saucepan — you need depth for proper hydration and rolling boil. Cooking rice? Saucepan — controlled absorption with the lid on. Making a pan sauce with a few tablespoons of wine? Skillet — deglaze right where you seared.
Heat Distribution: Different Problems, Different Solutions
Skillets distribute heat across a wide flat surface — important for even browning without hot spots burning one part of a steak while the other barely sears.
Quality saucepans (clad construction specifically) distribute heat up the walls, not just the base. That matters enormously for sauces. A hot spot at the base of a saucepan will scorch your béchamel or crystallize your caramel before the rest of the pan catches up. Cheap disc-bottom saucepans have this problem constantly. Clad saucepans — where the aluminum or copper core runs up the sides — solve it.
Copper saucepans are the gold standard for temperature precision in sauce work. Extremely responsive to heat changes. Genuinely superior for pastry work. Also genuinely expensive — most home cooks don’t need to go there.
The Lid Situation
Saucepan: lid included. Always. The lid is fundamental to what a saucepan does — control evaporation, trap steam for rice and grains, allow a gentle simmer to maintain moisture.
Skillet: no lid in most purchases. Not a design flaw — a deliberate choice. The skillet’s job is to let steam out, not trap it. If you want to steam eggs in a shakshuka or finish a braise, you buy a universal lid separately or use foil as a workaround.
Neither is wrong. They’re just built for different cooking realities.
Can a Skillet Sub for a Saucepan?
For small tasks — yes. Reheating a cup of soup, making a quick pan sauce, warming leftover rice with a splash of water. A deep skillet manages those fine.
For real saucepan tasks? Not really. You can’t boil pasta properly in a skillet — not enough depth. Cooking rice in a skillet produces uneven results because the liquid evaporates from the wide open surface before the rice finishes cooking. And the moment you try to make a large-batch sauce, you’re nervously watching the liquid level and hoping nothing spills.
Can a Saucepan Sub for a Skillet?
In an emergency. You can fry an egg in a saucepan, technically. Heat a piece of fish. Cook a small portion of something.
But the base is too small for anything requiring wide browning coverage, the tall walls trap steam and work against crust development, and the whole exercise is frustrating. Don’t cook a steak in a saucepan. Just don’t.
Price at Each Tier
| Tier | Skillet | Saucepan |
|---|---|---|
| Budget | $15–$40 nonstick | $20–$50 stainless or nonstick |
| Mid-range | $40–$100 stainless or cast iron | $50–$120 clad stainless |
| Premium | $100–$200+ All-Clad, Made In | $100–$300+ All-Clad, Demeyere, copper |
Pricing is comparable at most tiers. The saucepan’s slight price advantage at the budget level (you can get a functional stainless saucepan for less than a quality nonstick skillet) makes it a strong first purchase if liquid-based cooking dominates your routine.
Best Skillets to Buy
Lodge Cast Iron Skillet
Pre-seasoned, made in the USA, virtually indestructible.
- Sizes: 8″, 10″, 12″, 14″
- Price: ~$20–$50
- Pre-seasoned with vegetable oil; oven-safe past 500°F; works on induction, gas, electric, and campfire
- Exceptional heat retention — once hot, it stays hot; ideal for searing steaks and frying chicken
- The trade-off: heavy (a 12-inch weighs ~8 lbs); slow to preheat; requires hand-washing and a light coat of oil after each use
Best for: Anyone who sears proteins, fries, or bakes in a skillet. The most durable pan at the lowest price — and it only gets better with age.
All-Clad D3 Stainless Fry Pan

The American benchmark. Tri-ply bonded all the way through.
- Sizes: 8″, 10″, 12″
- Price: ~$100–$170
- Fully clad tri-ply (stainless–aluminum–stainless), oven-safe to 600°F, dishwasher-safe, lifetime warranty
- Even heat distribution with no hot spots; holds up under decades of daily use
- Requires proper preheating technique to prevent sticking — that’s stainless steel in general, not just this pan
Best for: Cooks who want one premium skillet that lasts a lifetime. The investment is front-loaded, but you never buy another.
T-fal Professional Nonstick Skillet
The best-selling skillet in the US. Beginner-proof.
- Sizes: 8″, 10″, 12″
- Price: ~$25–$45
- PFOA-free PTFE coating, Thermo-Spot heat indicator, oven-safe to 400°F
- Eggs slide off. Cleanup takes 30 seconds. The Thermo-Spot tells you when the pan’s properly preheated — genuinely useful for new cooks
- Coating degrades in 2–5 years — budget for eventual replacement
Best for: Daily egg cooks, beginners, and anyone who wants maximum ease of use at a low price.
Made In Blue Carbon Steel Skillet
For cooks who want professional-level performance without lugging cast iron around.
- Sizes: 10″, 12″
- Price: ~$89–$119
- Pre-seasoned, oven-safe to 1,200°F, lighter than cast iron, excellent real-time heat response
- Builds a natural nonstick patina over time — same payoff as cast iron, but faster
- Requires hand-washing and oiling; reactive to acidic ingredients until fully seasoned
Best for: Intermediate to advanced cooks who want high-heat performance and are committed to maintaining the pan.
Best Saucepans to Buy
All-Clad D3 Stainless Saucepan
The benchmark. Fully clad tri-ply from base through the sidewalls.
- Sizes: 1 qt, 1.5 qt, 2 qt, 3 qt, 4 qt
- Price: ~$80–$160 depending on size
- Tri-ply clad throughout, oven-safe to 600°F, dishwasher-safe, lid included, lifetime warranty
- Heat distributes up the walls — not just across the base — which is exactly what you want for béchamel, hollandaise, and caramel
- Expensive. But the construction quality shows every single use.
Best for: Cooks who want one premium saucepan that handles everything — from pasta water to complex pastry sauces — for decades.
Tramontina Tri-Ply Clad Stainless Saucepan
The best value saucepan available. Beats pans twice its price in independent tests consistently.
- Sizes: 1 qt, 2 qt, 3 qt
- Price: ~$30–$60 depending on size
- Real tri-ply clad construction (not disc-bottom), oven-safe to 500°F, dishwasher-safe, lid included
- Widely available at Walmart, Target, and Amazon
- Handle can warm up over extended high heat — minor complaint at this price point
Best for: Budget-conscious cooks who want genuine clad performance. The single best price-to-performance saucepan on this list.
Calphalon Premier Nonstick Saucepan
The nonstick option for cooks who prioritize easy cleanup on daily sauce work.
- Sizes: 1.5 qt, 2.5 qt, 3.5 qt
- Price: ~$40–$80
- Hard-anodized aluminum, PFOA-free nonstick interior, oven-safe to 450°F, lid included
- Cleanup after a reduced sauce or sticky rice is genuinely effortless
- Coating has a limited lifespan — plan for replacement every few years with heavy use
Best for: Cooks who make sauces and grains daily and want the easiest possible cleanup without dealing with stainless technique.
Mauviel M’Cook Stainless Saucepan
French-made. 5-ply. For serious sauce cooks who want the best available.
- Sizes: 1.4 qt, 2.1 qt, 3.6 qt
- Price: ~$180–$300
- 5-ply fully clad construction, oven-safe to 680°F, induction compatible, cast stainless handle runs cooler than riveted handles
- The heat distribution is genuinely exceptional — noticeable if you make complex sauces regularly
- Heavy for a saucepan. Very expensive. Real overkill for casual cooks.
Best for: Serious home cooks, pastry enthusiasts, and anyone who makes complex sauces frequently enough to appreciate the difference in precision.
When to Use Each Pan — And When to Use Both
Use the Skillet For:
- Seared steaks and chops — the whole point of flared sides
- Fried eggs, omelets, and scrambled eggs (nonstick especially)
- Hash browns and home fries
- Smash burgers — full flat contact is essential
- Stir-fried vegetables at high heat
- Pan-fried fish, scallops, and shallow-fried dishes
Use the Saucepan For:
- Pasta water and blanching vegetables
- Rice, quinoa, and all cooked grains — lid-on absorption method
- Béchamel, hollandaise, caramel, ganache — temperature-sensitive work where a wide pan would burn things
- Soups, bisques, and small-batch stocks
- Reheating leftovers that involve liquid
- Steamed vegetables using the lid
When You Need Both in the Same Meal
This happens constantly. Steak dinner: skillet for the sear, saucepan for a beurre blanc or béarnaise on a side burner. Pasta night: saucepan for the boiling water, skillet for browning the meat or vegetables. Roast chicken: skillet for the initial stovetop sear, saucepan for the pan sauce after the chicken goes into the oven.
The two pans complement each other. They don’t compete.
Which One Should You Buy First?
For most home cooks — start with the skillet. It handles more varied stovetop tasks than a saucepan: eggs, proteins, vegetables, stir-fry. A saucepan is more specialized, even though you’ll use it constantly once you have it.
But if your daily cooking is pasta-heavy, soup-heavy, or grain-heavy — if you’re making béchamel three times a week or simmering stocks — start with the saucepan. It’ll get more use than a skillet in that kitchen.
Buy a skillet first if:
- You cook proteins, eggs, and vegetables daily
- You’re building a first cookware set on a limited budget
- You want maximum task variety from one pan
- Budget: $25–$100 for a solid starting skillet
Buy a saucepan first if:
- Pasta, soups, and grains dominate your routine
- Liquid-based cooking is genuinely most of what you do
- You already own a decent skillet
- Budget: $30–$100 for a solid starting saucepan
The ideal first setup: a 10-inch or 12-inch nonstick or stainless skillet paired with a 2-quart or 3-quart clad stainless saucepan. That combination covers the overwhelming majority of what most home cooks make on any given week. Best pairing at the budget level: Lodge Cast Iron or T-fal Nonstick (skillet) + Tramontina Tri-Ply Clad (saucepan). Add a stockpot and a sauté pan as your cooking expands from there.