What Is Flash Seasoning and Why It Works Between Cooking Sessions
Flash seasoning is a quick 2-3 minute stovetop process where you apply thin oil to a hot cast iron pan and heat it to smoking point—creating polymerized layers without using your oven.
Here’s the thing. You don’t always need an hour-long oven session to maintain your pan.
Most people think seasoning means a whole production. Preheat the oven. Multiple coats. Wait around. But between batches of bacon? There’s a faster way.
What makes flash seasoning different:
Takes 2-3 minutes instead of 60+
Done right on your stovetop
Pan’s already hot from cooking
Uses residual heat you’d waste anyway
Builds seasoning while you cook
The science is the same as oven seasoning. Oil heated beyond its smoke point bonds to iron. Polymerization happens. You get protection. Just faster.
When it works best:
Between cooking sessions
After foods that strip seasoning
During multi-batch cooking (bacon, burgers, pancakes)
Quick maintenance touch-ups
Building layers through regular use
Not a replacement for full seasoning. But for maintenance? Can’t beat it.
The Problem Flash Seasoning Solves for Cast Iron Users
Flash seasoning prevents seasoning degradation during heavy cooking by letting you rebuild protective layers in minutes rather than waiting for a full oven re-seasoning session.
You’re cooking. Things are going great. Then you notice—food’s sticking a bit more. The pan looks dull in spots.
Used to be, you’d ignore it. Let it get worse. Eventually strip and re-season the whole pan. Hours of work.
Or you could fix it between batches. Right now. While the pan’s hot anyway.
That’s what flash seasoning does. Preventive maintenance. Constant rebuilding. Your pan never gets bad enough to need a full reset.
Understanding Flash Seasoning vs. Traditional Cast Iron Seasoning
Traditional Full Seasoning Process
Traditional oven seasoning takes 4-6 hours to apply multiple thin oil coats at 450°F with complete cooling between each layer—necessary for building initial seasoning or complete restoration.
The full process looks like this:
Steps for oven seasoning:
Heat oven to 450°F (15 minutes)
Oil the pan, wipe excess
Bake 60 minutes
Cool 30+ minutes
Repeat 4-6 times
Total time? Five to seven hours. Sometimes spread over two days.
Your kitchen gets hot. The house smells like burnt oil. You’re committed.
It works. Gives you that solid base. But it’s not something you want to do monthly.
Flash Seasoning Quick Method
Flash seasoning applies a single thin oil coat to an already-hot pan for 2-3 minutes of stovetop heating—ideal for maintenance, touch-ups, and building layers during regular cooking.
Totally different approach.
The pan’s already hot from whatever you just cooked. You wipe it down. Add a tiny bit of oil. Let it smoke for 90 seconds. Done.
The process:
Clean hot pan (30 seconds)
Apply oil (15 seconds)
Heat to smoking (60-90 seconds)
Final wipe (15 seconds)
Three minutes. Maybe four if you’re being thorough.
You’re not building foundation here. You’re maintaining what’s already there. Adding micro-layers. Fixing small damage before it becomes big damage.
When to Use Each Method
Use flash seasoning for ongoing maintenance and minor repairs, but switch to full oven seasoning when you’ve got bare metal, widespread damage, or you’re starting with an unseasoned pan.
Think of it like car maintenance. Flash seasoning is checking your oil. Full seasoning is rebuilding the engine.
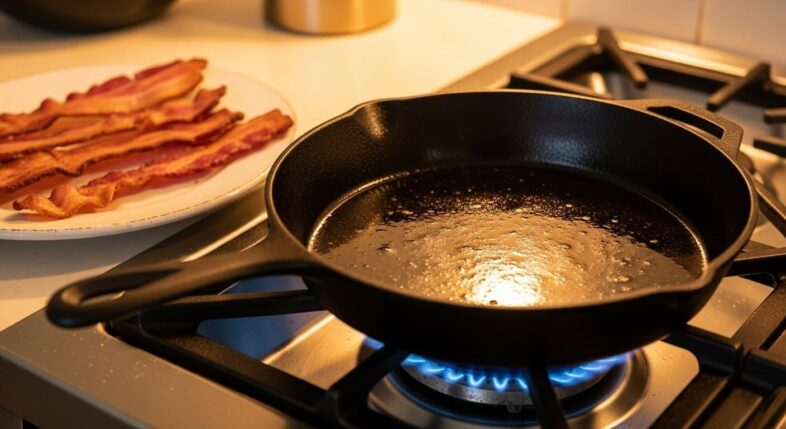
Why Bacon Makes Flash Seasoning Work Perfectly
The Fat Content Advantage
Bacon grease is ideal for flash seasoning because it’s already rendered at the right temperature, provides even coating across the pan, and has a smoke point (370-400°F) perfect for polymerization.
Get this—you’re already creating the perfect seasoning environment just by cooking bacon.
Bacon renders fat. Lots of it. That fat coats the pan. Heats to exactly the temperature where seasoning happens. You’re halfway there without trying.
Why bacon fat works:
High fat content (40-50% of bacon is fat)
Seasons the pan while you cook
Already at polymerization temperature
Even distribution from frying
Free material (you’re cooking anyway)
Other proteins? They don’t give you this. Chicken breast is too lean. Fish is delicate. Vegetables need added oil.
But bacon? Bacon leaves behind everything you need.
Quality matters though:
Thick-cut bacon renders more fat than thin
Higher-quality bacon = cleaner fat
Less sodium in the bacon = less crusty residue
Uncured bacon works fine too
Some people save bacon grease in a jar specifically for seasoning. Smart move.
Temperature Timing Between Batches
The pan stays at 350-400°F between bacon batches—the exact temperature range needed for flash seasoning—meaning you can season without any additional heating time.
Perfect timing. That’s what makes this work.
You finish a batch of bacon. Pull it out. The pan’s sitting there at 375°F or so. Still hot. Still ready.
If you were starting cold? You’d need 10-15 minutes just to get the pan hot enough. But you’re not starting cold. You’re already at temperature.
This is efficiency. Use the heat you’ve already generated. Don’t waste it.
Batch cooking timeline:
Cook bacon batch 1 (8-10 minutes)
Remove bacon, quick clean (1 minute)
Flash season (2-3 minutes)
Cook bacon batch 2 (8-10 minutes)
You’re adding three minutes to your cooking session. For seasoning that would otherwise take an hour in the oven.
Building Seasoning While You Cook
Every bacon batch contributes micro-layers of seasoning when combined with flash seasoning between batches, creating cumulative improvement that rivals oven seasoning after 10-15 cooking sessions.
Here’s where it gets interesting.
One flash season? Tiny improvement. But ten bacon sessions with flash seasoning between each? You’ve built serious protection.
The math:
Each flash season adds one micro-layer
Ten sessions = ten layers
That’s more than most people do in the oven
Happens naturally through cooking
Zero dedicated seasoning time
And bacon itself seasons while you cook. The fat polymerizes on the hot surface. You’re getting dual seasoning—the cooking plus the flash maintenance.
Why bacon beats other foods:
Food
Fat Content
Seasoning Benefit
Temperature
Bacon
40-50%
Excellent
350-400°F
Sausage
30-40%
Good
325-375°F
Ground beef
15-25%
Decent
350-400°F
Chicken
5-10%
Poor
350-400°F
More fat = better seasoning. Simple as that.
The salt in bacon? Doesn’t hurt seasoning like people think. As long as you clean the pan between batches, you’re fine.
Essential Materials for Flash Seasoning Cast Iron
Best Oils for Flash Seasoning
Use oils with smoke points above 400°F for flash seasoning—grapeseed (420°F), vegetable (400-450°F), or canola (400°F)—though rendered bacon grease works perfectly if you’re already cooking bacon.
You’ve got options here.
Top choices ranked:
Bacon grease from your current cooking – Already there, already hot, already working
Grapeseed oil – High smoke point, thin consistency, builds durable layers
Vegetable oil – Cheap, effective, smoke point is solid
Canola oil – Similar to vegetable, widely available
Avocado oil – Expensive but excellent (520°F smoke point)
Skip these:
Olive oil (smoke point too low, gets sticky)
Butter (burns before polymerizing)
Coconut oil (wrong smoke point range)
Between bacon batches? Just use the bacon grease. It’s sitting right there in the pan. Pour most of it off, leave a thin coating, you’re set.
For other cooking situations, keep a small container of grapeseed or vegetable oil near your stove.
Tools You’ll Need
Keep paper towels, heat-resistant tongs, a small container of seasoning oil, and good oven mitts within arm’s reach of your stove for quick flash seasoning between batches.
Not much required. But what you need should be accessible.
The actual list:
Paper towels (cheap kind works fine)
Tongs with silicone tips for handling towels
Small jar of oil (4-8 oz is plenty)
Oven mitts rated to 500°F
Timer or clock visible from stove
That’s it.
Some people use lint-free cloths instead of paper towels. Fine. But paper towels are easier—you use them and toss them. No laundry.
Optional but helpful:
Infrared thermometer (checking actual pan temp)
Small metal bowl for oil (easier than pouring from bottle)
Chain mail scrubber for quick cleaning between batches
Set up a little station near your stove. Oil, towels, tongs all in one spot. When you’re ready to flash season, everything’s right there.
Safety Equipment
Always use heat-resistant gloves rated to at least 500°F and ensure good ventilation when flash seasoning since the smoking oil produces fumes that can trigger smoke alarms.
This stuff gets hot. Respect that.
Safety essentials:
Silicone or Kevlar oven mitts (not fabric ones)
Long-handled tongs (keep your hands away from heat)
Range hood or fan running
Fire extinguisher in kitchen
Clear workspace (nothing flammable nearby)
The smoking oil? It’s gonna smoke. That’s polymerization happening. But smoke can set off alarms.
Open a window. Turn on the exhaust fan. If you’ve got a sensitive smoke detector right above your stove (poor placement, but common), maybe crack a door too.
Never leave flash seasoning unattended. Never. You’re dealing with hot oil and high heat. Stay put.
Step-by-Step: How to Flash Season Cast Iron Between Bacon Batches
Step 1: Remove Excess Bacon Grease
Pour off most of the rendered bacon fat into a container, leaving just a thin coating on the pan surface—about 1-2 tablespoons for a 10-12 inch skillet.
First batch of bacon is done. Time to work.
Pick up the pan (use mitts—it’s hot). Tilt it over your grease jar or can. Pour out most of the fat.
How much to leave:
Light coating visible on surface
Not pooling in the pan
Enough to protect while cleaning
About 1-2 tablespoons for a standard skillet
Don’t pour it all out. You want some there. It protects the pan and helps with the cleaning step.
Save that grease. Use it for cooking later. Or for seasoning. Or both.
Step 2: Clean the Cooking Surface Quickly
Wipe the hot pan with wadded paper towels to remove bacon bits and debris—scrape gently with tongs or a metal spatula if anything’s stuck, keeping the pan on medium heat throughout.
Pan’s still on the burner. Still hot. That’s good.
Grab paper towels with your tongs. Wipe out the surface. Get the bits out.
What you’re removing:
Crispy bacon pieces
Burnt spots
Any stuck-on debris
Excess salt
What you’re keeping:
Thin oil coating
The existing seasoning
The heat
Takes 30-60 seconds. Don’t overthink it. You’re not deep cleaning. Just getting the obvious stuff out.
If something’s really stuck, scrape it with a metal spatula. The pan’s hot—stuff comes off easier. Light pressure. Don’t gouge the surface.
Step 3: Apply Fresh Oil Layer
Add ½ to 1 teaspoon of oil to the hot pan, spread it evenly across the entire cooking surface with a paper towel held in tongs, then wipe away all visible excess until the pan looks nearly dry.
Now we season.
Pour a tiny amount of oil in the pan. Less than you think.
Application technique:
Oil goes in the center (½ teaspoon max)
Use fresh paper towel held in tongs
Spread everywhere—sides, handle, bottom if you can reach it
Wipe like you’re trying to remove it
Wipe again with clean towel
The pan should look barely oiled. Almost dry. If it’s shiny and wet-looking, you used too much.
This is the most common mistake. Too much oil creates sticky, gummy seasoning. You want a molecular-thin layer. Not visible pooling.
Between bacon batches, you can mix fresh oil with the bacon grease already there. Works great.
Step 4: Heat to Smoking Point
Increase burner heat to medium-high and heat the oiled pan for 60-90 seconds until the oil begins smoking steadily—watch for thin wisps of smoke and a slight color change on the pan surface.
Crank it up. You need smoke.
Turn your burner from medium (where you cooked bacon) to medium-high. The oil needs to get hotter than its smoke point.
What you’re watching for:
Smoke starting within 30-60 seconds
Thin, steady smoke (not thick clouds)
Slight shimmer on the oil surface
Pan darkening very slightly
Let it smoke. That’s good. That’s the oil breaking down and bonding to the iron.
Timing:
First smoke appears: 30-45 seconds
Keep smoking: another 45-60 seconds
Total heat time: 90 seconds minimum
Some oils smoke more than others. Bacon grease smokes less visibly than grapeseed. Both are working.
Don’t walk away. Stand there. Watch it. Control it.
Step 5: Wipe and Finish
Turn heat to low, quickly wipe the pan one final time with a clean paper towel to remove any pooled oil, then either cook your next bacon batch immediately or turn off heat and let the pan cool naturally.
Almost done.
Lower the heat to low or off. Grab a fresh paper towel with tongs. One more wipe across the surface.
This final wipe catches any oil that pooled during heating. Redistributes it. Ensures even coating.
What the pan should look like now:
Matte finish (not shiny)
Uniform color
Dry to the touch when cool
Maybe slightly darker than before
Ready for the next batch of bacon? Go for it. The pan’s protected, seasoned, and at perfect cooking temp.
Not cooking more? Turn off the heat. Let it cool on the stove. Don’t rinse it. Don’t wipe it again. Just leave it.
Total time for flash seasoning: 2-3 minutes.
Timing and Temperature Control for Flash Seasoning
Ideal Temperature Range
Flash seasoning works best when your cast iron reaches 400-450°F—hot enough for polymerization but not so hot that it burns off the oil before bonding occurs.
Temperature is everything here.
Too cool? Oil sits there. Doesn’t polymerize. Gets sticky.
Too hot? Burns off before bonding. Wasted effort.
The sweet spot: 400-450°F
Between bacon batches, your pan’s usually sitting at 350-375°F. You need to bump it up.
Visual temperature cues (no thermometer):
Water droplets dance and evaporate in 2-3 seconds: ~350°F
Water droplets ball up and roll: ~400°F
Oil smokes within 30 seconds: 400-425°F
Oil smokes immediately: 450°F+
If you’ve got an infrared thermometer? Point it at the cooking surface. Adjust heat until you hit 425°F. Hold it there.
Different stovetops heat differently. Gas is instant. Electric is slow. Induction is precise. You’ll learn your setup.
Time Requirements Between Batches
Plan for 3-4 minutes total between bacon batches to flash season—1 minute cleaning, 2-3 minutes for oil application and heating, no cooling needed before cooking again.
Here’s how the timing breaks down:
Flash seasoning timeline:
Remove bacon and excess grease: 15 seconds
Clean pan: 30-60 seconds
Apply oil: 15-30 seconds
Heat to smoking: 60-90 seconds
Final wipe: 15 seconds
Total: 2.5-3.5 minutes
Add this to your bacon batch interval and you’re looking at 3-4 minutes between batches instead of just 1 minute.
Worth it? Yeah. You’re building seasoning for free.
Speed vs. quality:
Approach
Time
Quality
When to Use
Quick wipe only
30 sec
Basic protection
Light cooking, good seasoning
Standard flash
3 min
Solid layer
Regular maintenance
Thorough flash
5 min
Better coverage
After acidic foods
Most of the time, the standard 3-minute flash is perfect.
Rushing it to 30 seconds? You’ll get some benefit. But not much polymerization.
Managing Heat on Different Cooktops
Gas Stove Flash Seasoning
Gas stoves offer instant heat control for flash seasoning—increase flame to medium-high for 90 seconds of smoking, then drop back to cooking temperature for your next bacon batch.
Gas is ideal for this. Instant response.
Turn the knob. Flame goes up. Temperature rises immediately.
Advantages:
See the flame (know exactly what heat you’re applying)
Instant adjustments
Even heating across pan bottom
Easy to maintain steady temp
Technique:
Start at medium for bacon
Bump to medium-high after cleaning
Count 90 seconds of smoking
Drop back to medium for next batch
The direct flame heats cast iron evenly. No hot spots to worry about.
Electric Coil Flash Seasoning
Electric coil stoves require planning ahead—increase heat 30 seconds before you’re ready to flash season since coils take time to reach higher temperatures and hold heat after you reduce power.
Coils are slower. More lag time.
You turn up the heat. Coil takes 30-60 seconds to actually get hotter. Then it stays hot even after you turn it down.
Working with coils:
Increase heat while finishing your pan cleaning
Give it 30 seconds to catch up
Expect residual heat to continue cooking after you lower temp
May need to briefly remove pan from burner between batches
Plan ahead. That’s the key.
Start cranking heat up while you’re still removing bacon. By the time you’ve cleaned the pan, the coil’s ready.
Glass-Top Electric Flash Seasoning
Glass-top electric stoves heat slowly and cool slowly—start temperature increases 60 seconds before flash seasoning and be prepared to lift the pan off the burner to prevent overheating between batches.
Glass tops are the most challenging.
Heat has to go through the glass. Slow to rise. Slow to fall. Everything lags.
Glass top strategy:
Increase heat early (while cleaning)
May take 60-90 seconds to reach flash temp
Lift pan off burner when done (or it’ll keep heating)
Use lower settings than you’d expect
The burner stays hot forever. Even after you turn it off. So if you’re doing multiple bacon batches with flash seasoning between each, you might need to work on two burners—one for cooking, one for flash seasoning.
Or just accept the slower pace.
Induction Flash Seasoning
Induction burners provide the best temperature control for flash seasoning—set exact temperatures (425-450°F), get instant heat response, and return to cooking temperature immediately for your next bacon batch.
Induction nails this.
Precise. Fast. Controllable.
Why induction wins:
Set exact temperature (not just “medium-high”)
Reaches flash temp in 15-30 seconds
Instant cool-down when you lower setting
No residual heat to manage
Just bump from 375°F (bacon cooking) to 450°F (flash seasoning). Wait for smoke. Drop back to 375°F. Done.
If you’re cooking bacon on induction, flash seasoning is almost too easy.
Flash Seasoning Technique Variations
The Quick-Wipe Method
For lightly-used pans with good existing seasoning, a 30-second quick-wipe with oil on the hot surface provides minimal protection between batches without full flash seasoning.
Sometimes you don’t need the full treatment.
Pan’s in good shape. You just cooked one gentle batch. Seasoning looks solid.
30-second maintenance:
Wipe out debris (15 seconds)
Rub in tiny bit of oil (10 seconds)
Let it sit on low heat (no smoking needed)
Done (5 seconds to turn off)
This isn’t building layers. This is just protection. Light maintenance.
When to use it:
After cooking that didn’t damage seasoning
Pan looks great already
You’re in a rush
Just want rust prevention
When it’s not enough:
Bare spots visible
Food started sticking
You cooked acidic stuff
Haven’t flash seasoned in weeks
Quick-wipe is fine for day-to-day. But don’t rely on it exclusively.
The Full Flash Method
The standard flash seasoning process—complete cleaning, thin oil application, 90 seconds of smoking heat, and final wipe—provides optimal protection and seasoning build-up between cooking sessions.
This is what we covered in the step-by-step section.
Full process. Nothing skipped. Maximum benefit.
When you need it:
Between bacon batches
After cooking eggs or fish
Touch-ups on worn areas
Regular weekly maintenance
Any time seasoning looks dull
Takes three minutes. Gives you real results.
Most people should default to this. It’s not that much more effort than the quick-wipe, but the results are way better.
The Double-Layer Flash
Apply two complete flash seasoning cycles back-to-back (6-7 minutes total) when you’ve got significant bare spots or want to accelerate seasoning build-up during multi-batch cooking.
Need extra protection? Double up.
The process:
Standard flash season (3 minutes)
Let pan cool for 60 seconds
Another thin oil coat
Heat to smoking again (90 seconds)
Final wipe
Total time: 6-7 minutes. You get two polymerized layers instead of one.
When it’s worth it:
Bare spots from scrubbing
Pan’s been neglected
After cooking tomato sauce or other acidic foods
Building seasoning aggressively
You’ve got the time anyway
Between first and second bacon batch? Perfect opportunity. You’re waiting anyway.
But don’t do double-flash every time. Overkill. Standard flash is usually plenty.
The Bacon Grease-Only Method
Use only the rendered fat left in the pan after cooking bacon—no additional oil needed—for flash seasoning that builds layers using the same fat that’s already coating the surface.
Simplest version.
Cook bacon. Pour off most grease. Flash season with what’s left.
Why it works:
Bacon fat is already there
Already at temperature
No extra products needed
Smoke point is adequate (370-400°F)
Builds seasoning naturally
The technique:
Pour off excess grease (leave thin coating)
Wipe out bacon bits
Crank heat to medium-high
Let the remaining grease smoke for 90 seconds
Wipe and continue
No oil application step. Just use what’s there.
Limitations:
Only works with bacon (obviously)
Less control over oil amount
Bacon grease quality varies
Might not smoke as visibly
For bacon batch cooking? This is perfect. Why complicate it?
Common Flash Seasoning Mistakes and How to Fix Them
Using Too Much Oil
Applying more than 1 teaspoon of oil during flash seasoning creates sticky, gummy residue that won’t fully polymerize—if your pan feels tacky after flash seasoning, you’ve used too much oil.
Most common mistake. By far.
People think more oil = better seasoning. Wrong.
Signs you overdid it:
Pan feels sticky or tacky when cool
Shiny, wet appearance
Oil pooling in spots
Gummy texture
Food sticks more than before
The fix:
Reheat pan to 450°F
Let it smoke for 2-3 minutes (no new oil)
Wipe thoroughly while hot
If still sticky, repeat
Sometimes you can cook it out with high heat. Sometimes you need to strip it and start over.
Prevention:
½ teaspoon or less for a 10-inch pan
Wipe like you’re removing it
Final wipe should leave almost no visible oil
When in doubt, use less
Less is always better with seasoning oil. Always.
Insufficient Heat for Polymerization
Flash seasoning below 400°F leaves oil sitting on the surface instead of bonding to the iron—resulting in greasy, non-protective coating that wipes off easily.
Oil needs heat. Real heat. To chemically change.
Below 400°F? Not hot enough. The oil doesn’t polymerize. Just sits there like regular oil.
How to tell:
No smoke after 60 seconds
Pan feels greasy after cooling
Oil wipes off with a towel
No color change
Temperature fixes:
Problem
Cause
Solution
No smoke
Too cool
Increase to medium-high
Weak smoke
Just under temp
Add 30 more seconds
No smoke at all
Way too cool
Restart at higher heat
You want visible smoke. Doesn’t need to be thick. But visible.
If your oil isn’t smoking within 60 seconds, crank the heat.
Skipping the Wipe-Down
Failing to wipe excess oil after smoking creates uneven, pooled seasoning with thick spots that stay tacky and thin spots that remain unprotected.
That final wipe matters. Really matters.
During heating, oil moves. Pools in the center. Runs to edges. Whatever.
If you don’t redistribute it, you get uneven results.
What happens when you skip it:
Thick pool in the middle (sticky)
Thin coverage on edges (vulnerable)
Drips on the outside
Uneven color
The final wipe:
Use clean paper towel
Quick pass over entire surface
Catches any pooled oil
Redistributes to bare spots
Takes 15 seconds
Do it. Every time.
Not Cleaning Between Applications
Leaving bacon bits, burnt spots, or debris under new seasoning layers creates rough texture, compromises bonding, and causes the new seasoning to flake off prematurely.
Seasoning over dirt doesn’t work.
You need clean iron for the oil to bond properly. Debris gets in the way.
What interferes with bonding:
Bacon bits
Burnt flour or batter
Salt crystals
Previous sticky oil
Carbon buildup
Quick cleaning takes one minute. Skipping it ruins your flash season.
Fast cleaning that works:
Hot water and stiff brush (if needed)
Paper towels while pan’s hot
Scraping with metal spatula
Chain mail for stubborn spots
Between bacon batches? Usually just wiping with paper towels is enough.
But if you see visible crud, get it out first.
Rushing the Smoking Phase
Reducing heat or wiping before the oil has smoked for at least 60 seconds prevents complete polymerization—resulting in weak seasoning that degrades quickly during cooking.
Impatience kills seasoning.
I get it. You want to cook the next batch. But those 90 seconds matter.
What 60-90 seconds of smoking does:
Breaks down oil molecules completely
Bonds them to iron surface
Creates hard, durable layer
Ensures even polymerization
Stop at 30 seconds? You’ve got partial polymerization. Weak protection. It’ll wear off fast.
Proper timing:
First smoke: note the time
Continue: 60 seconds minimum from first smoke
Better: 90 seconds
Don’t rush: the chemistry takes time
Set a timer if you need to. Stand there. Wait.
Three bacon batches with rushed flash seasoning = one batch with proper flash seasoning.
Maximizing Seasoning During Multi-Batch Bacon Cooking
Planning Your Bacon Session
Cook 2-3 bacon batches between each flash seasoning for efficient workflow—flash seasoning after every single batch is overkill, but waiting until you’re done cooking means missed opportunities for layer building.
How often should you flash season?
Not every batch. Not just at the end. Somewhere in between.
Efficient schedule for bacon cooking:
Batch 1: Cook
Batch 2: Cook
Flash season (3 minutes)
Batch 3: Cook
Batch 4: Cook
Flash season (3 minutes)
Done
Every 2-3 batches gives you multiple seasoning applications without slowing down too much.
Time math:
4 bacon batches = 40 minutes cooking
2 flash seasons = 6 minutes
Total = 46 minutes vs. 40 minutes without flash seasoning
You’re adding 15% to your cooking time. But getting 2-3 seasoning layers built.
Or go aggressive:
Flash season after every batch
Maximum layer building
Takes longer
Worth it if your pan needs help
Your call.
Reading Your Pan’s Needs
Check for dull spots, sticky areas, or places where bacon stuck more than usual—these visual and performance cues tell you when flash seasoning is needed during cooking.
Your pan talks to you. Listen.
Good signs (skip flash seasoning):
Bacon released easily
Pan still looks dark and shiny
Even color across surface
Nothing stuck
Warning signs (flash season now):
Bacon stuck in spots
Dull or grayish patches appearing
Surface feels rough
Food residue harder to clean
Between batches, take five seconds. Look at the pan. Run your finger across it (when cool enough).
Feels slick? Looks good? Keep cooking.
Feels rough? Looks dull? Flash season.
Some days you’ll cook five batches without needing to flash season. Other days you’ll do it after every batch.
Depends on what you’re cooking, how hot you went, how good your seasoning was to start.
Building Cumulative Layers
Ten bacon cooking sessions with flash seasoning between batches creates 10-15 polymerized layers—rivaling the protection of 5-6 oven seasoning cycles but built naturally through regular cooking.
After two months of regular bacon cooking with flash seasoning, your pan will have better protection than most people get from a single oven seasoning session.
And you didn’t spend any dedicated time. Just added three minutes here and there.
Tracking improvement:
Take a photo when you start
Photo every 10 sessions
Watch the color deepen
Feel the surface get smoother
Notice food releasing easier
The change is gradual. But real.
Strategic Oil Selection
Start bacon sessions with leftover bacon grease from previous cooking, then switch to neutral grapeseed or vegetable oil for final flash seasoning to build layers without impacting flavor.
Mix it up based on what you’re doing next.
Bacon grease approach:
First 1-2 batches: Use bacon fat for flash seasoning
Flavor builds on itself
Everything tastes like bacon (good or bad, depending)
Free material
Neutral oil approach:
Later batches or final flash: Switch to grapeseed/vegetable oil
Prevents bacon flavor in everything you cook
Higher smoke point
Cleaner polymerization
Cooking more bacon tomorrow? Bacon grease is fine.
Cooking fish or eggs next? Use neutral oil for the flash season.
Cost considerations:
Bacon grease: Free
Vegetable oil: Pennies per flash season
Grapeseed oil: Maybe 10-15 cents per flash season
Avocado oil: Expensive, probably unnecessary
For regular maintenance, cheap vegetable oil works great. Save the fancy stuff for full oven seasoning (if you use it at all).
Flash Seasoning for Different Cooking Scenarios
After Frying Eggs
Flash season at 375-400°F after frying eggs to repair any seasoning damage from the delicate protein and rebuild the non-stick surface for next time—use less oil since eggs usually leave some fat behind.
Eggs are tricky. They test your seasoning.
Cook eggs. Some stuck a little (or a lot). Now what?
Post-egg flash seasoning:
Clean out any stuck egg bits thoroughly
Heat pan to 400°F (medium-high)
Tiny bit of oil (¼ teaspoon)
Smoke for 60 seconds
Wipe and done
Eggs leave behind some protein and fat. You don’t need much additional oil.
Why it helps:
Repairs micro-damage from egg proteins
Smooths the surface
Next batch of eggs won’t stick as bad
Builds layers specifically where eggs contact
Do this after every few egg cooking sessions. Your egg game will improve dramatically.
Between Batches of Smash Burgers
Flash season between smash burger batches using the rendered beef fat at 425-450°F to maintain the pan’s sear quality and prevent buildup from degrading the crust.
Smash burgers. High heat. Crusty edges. Hard on seasoning.
But they also create great seasoning conditions. Lots of fat. High temps. Perfect.
Burger flash process:
Finish burger batch
Scrape up any stuck crust (it’s delicious—save it)
Wipe out excess grease and bits
Bump heat slightly
Let beef fat smoke (it’s already there)
Quick wipe
Beef fat smoke point is around 400°F. You’re already there or close.
Crust buildup management:
Carbon from searing builds up fast
Scrape between every 2-3 batches
Flash season removes some of it
Don’t let it get thick
The high heat you use for smash burgers (450-500°F) can burn off seasoning. Flash seasoning replaces it as you go.
After Cooking Acidic Foods
Immediately flash season after cooking tomato sauce, vinegar-based dishes, or citrus—acidic foods strip seasoning, and quick restoration prevents bare metal from rusting.
Acid is enemy number one.
Tomatoes. Vinegar. Lemon. Wine. They all strip seasoning by breaking down the polymerized oil.
Damage control:
Finish cooking
Clean pan while still warm
Dry completely
Flash season immediately (don’t wait)
Maybe do a double-flash
Why immediate matters:
Bare iron exposed to air = rust starts in minutes
Flash seasoning seals it
Prevents water absorption
Restores protection
After making tomato sauce in cast iron? Flash season right then. Not tomorrow. Not later tonight. Now.
The protection you add in those three minutes prevents hours of rust removal later.
Following Fish Cooking
Use gentle flash seasoning at 375-400°F after cooking fish—lower temperature prevents smoking up your kitchen with fish oils while still providing adequate polymerization.
Fish is delicate. The oils from fish are… distinctive.
You don’t want that smell polymerizing into your pan forever.
Fish flash approach:
Clean very thoroughly (fish residue must go)
Use neutral oil, not fish oil
Lower temp (375-400°F instead of 450°F)
Shorter smoking time (45-60 seconds)
Good ventilation
The goal is protection without baking in fish funk.
Alternative:
Just wipe with oil, don’t heat to smoking
Let it air dry
Full flash season before your next cook
Fish doesn’t damage seasoning much anyway. Light maintenance is usually enough.
During Cornbread Production
Flash season between cornbread rounds using bacon grease or butter at 400°F to maintain the non-stick surface and prevent batter from sticking to any degraded spots.
Cornbread in cast iron. Classic.
But the sugar and butter can affect seasoning. Especially if you’re making multiple rounds.
Between cornbreads:
Remove finished cornbread
Wipe out crumbs while pan’s hot
Light flash with butter or oil
Bring back to 400°F for next batter
The flash season fills in any spots where cornbread might’ve pulled away microscopic seasoning.
Sugar considerations:
Sugar can caramelize and bond to pan
Clean thoroughly between rounds
Flash season smooths it over
Prevents buildup
Some people skip this and just butter the pan between rounds. Works okay. But flash seasoning works better.
Troubleshooting Flash Seasoning Results
Seasoning Appears Blotchy or Uneven
Uneven flash seasoning usually comes from hot spots on your cooktop, insufficient oil distribution, or wiping more thoroughly in some areas—fix it by rotating the pan during heating or doing another quick flash season.
Blotchy pan after flash seasoning? Annoying but fixable.
Common causes:
Hot spots from burner:
Center heats faster than edges
Creates darker center, lighter perimeter
Rotate pan 180° halfway through smoking
Uneven oil application:
Wiped one area more than another
Oil pooled in spots
Spread more carefully next time
Existing seasoning variations:
Bare spots take oil differently than seasoned spots
Multiple flash seasons will even it out
Don’t expect perfection in one application
Quick fix:
Do another flash season
Focus oil on lighter areas
Even things out over time
Two or three flash seasons will blend it together.
Pan Seems Stickier After Flash Seasoning
If food sticks worse after flash seasoning, you’ve applied too much oil and created gummy residue—reheat the pan to 475°F for 3-4 minutes to complete polymerization or wipe with minimal fresh oil and try again.
This is the “too much oil” problem showing up during cooking.
Why it happens:
Excess oil didn’t fully polymerize
Created soft, sticky layer
Acts like glue instead of non-stick
The fix:
Reheat empty pan to 475°F
Let it sit there for 3-4 minutes
Wipe with dry paper towel while hot
Cool and test
High heat should finish polymerizing whatever’s sticky. If it doesn’t? You might need to scrub it off and start fresh.
Prevention next time:
Half the oil you just used
Wipe more aggressively
Make it look almost dry
Seasoning Wipes Off Too Easily
Flash seasoning that rubs off with a towel hasn’t properly bonded—likely due to insufficient temperature (below 400°F) or inadequate smoking time (less than 60 seconds).
Wipe the pan with a towel. Black comes off. That’s bad.
Why it’s not bonding:
Temperature too low (oil didn’t polymerize)
Didn’t smoke long enough
Pan was dirty (oil bonded to debris, not iron)
Wrong oil choice
Fixing weak seasoning:
Strip off the weak layer (hot water and scrubbing)
Dry completely
Flash season again with proper heat
Full 90 seconds of smoking
Verify smoke is happening
Properly polymerized seasoning doesn’t wipe off. It’s bonded at a molecular level.
If yours is wiping off? It never bonded. Try again with more heat.
Smoke Detector Going Off
Excessive smoke during flash seasoning means either too much oil, too high temperature (over 500°F), or poor ventilation—reduce oil amount, lower heat slightly, and improve airflow to prevent alarms.
Smoke alarm screaming. Neighbors concerned. Not ideal.
Reducing smoke production:
Use less oil (biggest factor)
Lower temp to 425°F instead of 475°F
Better ventilation (fan, window, hood)
Do it outside on a portable burner
Some smoke is normal. Thick clouds aren’t.
Ventilation fixes:
Range hood on high
Window open with fan blowing out
Cross-breeze through kitchen
Temporarily disable smoke alarm (but stay in the room—safety first)
Flash seasoning shouldn’t produce enough smoke to set off a properly-placed detector. If it does, you’re using too much oil.
Food Still Sticking After Flash Seasoning
One or two flash seasoning sessions won’t fix severely degraded seasoning—if food continues sticking after 3-4 flash seasons, your pan needs full oven re-seasoning with 5-6 complete layers.
Flash seasoning has limits.
It’s maintenance. Not magic.
When flash isn’t enough:
Bare metal showing
Rust patches
Years of neglect
Severe damage from dishwasher or harsh cleaning
If you’ve done three or four proper flash seasons and food still sticks badly? Your pan needs more help than flash seasoning can give.
Time for full seasoning when:
Multiple bare spots visible
Rust that won’t scrub off easily
Seasoning flaking off in chunks
Flash seasoning shows zero improvement
Do the oven seasoning. Build a foundation. Then maintain it with flash seasoning going forward.
Flash seasoning maintains good seasoning. It doesn’t create good seasoning from nothing.
Advanced Flash Seasoning Techniques
The Pre-Emptive Flash
Flash season your cast iron weekly even when it looks fine—proactive maintenance builds protective layers before degradation appears, preventing problems rather than fixing them.
Don’t wait for problems. Prevent them.
Preventive schedule:
Once a week: Flash season whether you “need to” or not
After any cooking session: Quick wipe with oil
Monthly: Inspect for weak spots, do targeted flash seasoning
Benefits:
Seasoning keeps building
Never degrades enough to cause sticking
Pan continuously improves
Problems never develop
Think of it like oil changes. You don’t wait until your engine seizes. You do it on schedule.
Same with cast iron.
One flash season per week = 52 layers per year. Your pan will be bulletproof.
Targeted Spot Flash Seasoning
Apply oil only to specific worn areas and heat the pan at an angle to concentrate heat on those spots—saves time and oil while building up thin areas without over-seasoning good areas.
Got one weak spot? Why season the whole pan?
Spot technique:
Identify the bare or thin area
Apply oil just there (couple drops)
Tilt pan so that spot sits directly over heat
Hold for 60 seconds
Rotate to another spot if needed
Works for:
Handle area that doesn’t get hot during cooking
Edge spots
Areas where you always use your spatula
Previous damage sites
Whole-pan flash seasoning is fine. But if you’re time-crunched, spot flash gets the job done faster.
Temperature Ladder Method
Start flash seasoning at 350°F for 30 seconds, increase to 400°F for 30 seconds, then finish at 450°F for final 60 seconds—gradual temperature increase creates stronger molecular bonding.
Advanced technique. Probably unnecessary for most people.
But some swear by it.
The ladder:
Apply oil to warm pan (350°F)
Let it heat gradually
Bump to 400°F after 30 seconds
Bump to 450°F after another 30 seconds
Finish with 60 seconds at 450°F
Theory:
Oil has time to penetrate surface at lower temp
Gradual heating reduces thermal stress
Multiple temperature zones = more complete polymerization
Stronger bonding
Does it work better than straight-to-450°F? Maybe. Hard to measure.
Takes longer. Maybe builds slightly better seasoning. Your call.
The Cool-Down Flash
Apply oil to your pan at the end of cooking as it cools naturally from cooking temperature—lower temperature polymerization over 10-15 minutes creates gentler seasoning layers.
Opposite approach. Low and slow.
How it works:
Finish cooking (pan at 300-350°F)
Clean and dry
Apply thin oil coat
Turn off heat
Let pan cool naturally on burner
Oil polymerizes slowly as temp drops
Advantages:
No smoke (happens below smoke point)
Gentler on seasoning
No active monitoring needed
Can do overnight
Disadvantages:
Slower process
Less complete polymerization
Weaker layers than hot flash
Takes 30-60 minutes
Good for people who hate smoke or want to season while sleeping.
Not as effective as regular flash seasoning. But better than nothing.
Comparing Flash Seasoning to Other Maintenance Methods
Stovetop Seasoning vs. Flash Seasoning
Full stovetop seasoning takes 30-40 minutes per layer with complete cooling—flash seasoning achieves similar results in 3 minutes by using residual cooking heat instead of starting from cold.
Both use the stovetop. Different time investment.
Full stovetop seasoning:
Start with cold pan
Heat to 450°F (10 minutes)
Apply oil, smoke for 30 minutes
Cool completely (20+ minutes)
Total: 60+ minutes per layer
Flash seasoning:
Start with hot pan from cooking
Bump temp slightly (30 seconds)
Apply oil, smoke for 90 seconds
No cooling needed
Total: 3 minutes
The chemistry is the same. The efficiency is completely different.
When to use full stovetop:
Dedicated seasoning session
Building foundation layers
No cooking planned
When to flash season:
During or after cooking
Quick maintenance
Building layers opportunistically
Post-Cook Oil Wipe vs. Flash Seasoning
Simply wiping oil on a cooling pan provides rust protection but no polymerization—flash seasoning creates actual bonded layers that improve non-stick performance, not just surface protection.
Lots of people just wipe oil on after cooking. Call it good.
It helps. A little.
Oil wipe (no heat):
Prevents rust ✓
Easy and fast ✓
Provides no real seasoning ✗
Oil just sits on surface ✗
Wipes off easily ✗
Flash seasoning:
Prevents rust ✓
Builds actual seasoning ✓
Creates polymerized layer ✓
Permanently bonds to iron ✓
Takes slightly longer (3 min vs. 30 sec) ✗
The oil wipe is better than nothing. Flash seasoning is better than oil wipe.
If you’ve got three minutes? Flash season. If you’ve got 30 seconds? Oil wipe.
Oven Touch-Ups vs. Flash Seasoning
Oven touch-up seasoning takes 45-60 minutes for one layer including preheat and cooling—flash seasoning builds equivalent protection in 1/15th the time using stovetop heat.
Sometimes people do mini oven sessions. Not full 6-layer seasoning. Just one quick coat.
Still takes forever compared to flash.
Oven touch-up:
Preheat: 15 minutes
Bake: 30 minutes
Cool: 20 minutes
Total: 65 minutes minimum
Flash seasoning:
Total: 3 minutes
Twenty times faster.
Oven advantages:
Even heat all around (sides, handle get seasoned)
Set and forget
Can do multiple pans at once
Flash advantages:
Crazy fast
No waiting for preheat
No heating up house
Can do between cooking tasks
For the cooking surface specifically? Flash is just more practical.
For handles and sides? Oven wins.
Do both. Flash season regularly. Oven touch-up quarterly.
Flash Seasoning Different Cast Iron Cookware
Flash Seasoning Skillets
Standard 10-12 inch cast iron skillets are ideal for flash seasoning between cooking batches—the flat cooking surface heats evenly, and the pan’s size matches most burner zones for consistent results.
Skillets are perfect for this technique.
Why skillets work great:
Flat bottom sits on burner evenly
Matches burner size
Easy to wipe down
Most common bacon cooking vessel
Even heating across surface
Technique specifics:
Standard 3-minute flash works perfectly
Oil coverage is straightforward
Can tilt slightly to hit sides
Handle usually needs separate attention (or doesn’t matter)
Nothing special required. Skillets and flash seasoning were made for each other.
Flash Seasoning Griddles
Large rectangular griddles need section-by-section flash seasoning—oil and heat one half at a time, rotating the griddle over your burner for even coverage across the entire surface.
Griddles are big. Bigger than your burner.
The challenge:
Griddle overhangs burner
Center gets hot, edges stay cool
Uneven heating = uneven seasoning
Section approach:
Position left side over burner
Flash season that half (3 minutes)
Shift griddle so right side is over burner
Flash season that half (3 minutes)
Or do it after cooking when the whole thing is evenly hot.
After pancakes:
Entire griddle is warm (300-350°F)
Bump heat under center
Oil spreads across whole surface
Residual heat helps polymerize edges
Not as efficient as skillets. But it works.
Flash Seasoning Dutch Ovens
Flash seasoning Dutch oven interiors works only for the bottom surface—curved sides don’t get enough direct heat from stovetop burners, making oven seasoning better for complete Dutch oven maintenance.
Dutch ovens are awkward for flash seasoning.
What works:
Flash seasoning the bottom (flat part that sits on burner)
After cooking stews or braises
Using residual heat
What doesn’t work:
Sides (vertical, not touching burner)
Lid (not getting heat at all)
Even coverage
Better approach:
Quick flash for bottom after cooking
Full oven seasoning every few months for sides and lid
Accept that flash is partial solution
Or just use enameled Dutch ovens and skip seasoning entirely.
Flash Seasoning Grill Pans
Grill pan ridges make flash seasoning tricky—oil pools in valleys while ridges get less coverage, requiring extra attention with folded paper towels to work oil into grooves.
Those ridges look cool. Pain to season.
The problem:
Oil runs into valleys
Ridges stay relatively dry
Uneven polymerization
Hard to wipe evenly
Technique adjustments:
Use slightly more oil
Fold paper towel into a thick pad
Press down into valleys
Drag across ridges
Repeat to distribute evenly
After grilling:
Clean between ridges thoroughly (gunk hides there)
Flash season while hot
Extra wipe in valleys to remove pools
Press towel into grooves
Takes an extra minute compared to flat skillets. But flash seasoning still beats oven seasoning for grill pans.
Building a Flash Seasoning Routine
Daily Cooking Integration
Make flash seasoning automatic by doing it after any cooking session where your pan is already hot—the three-minute habit builds cumulative layers without feeling like extra work.
Turn it into habit. Not a chore.
Simple routine:
Finish cooking
Eat your food
Come back to warm pan
Flash season (3 minutes)
Done
The pan’s still warm (maybe 200-250°F). Heats back to flash temp in 60 seconds. Easy.
Daily vs. occasional:
Daily flash = 365 layers per year
Weekly flash = 52 layers per year
Monthly flash = 12 layers per year
You don’t need daily. But the more often you do it, the better your pan gets.
Making it automatic:
Keep oil and paper towels next to stove
Do it before washing dishes
Set phone timer so you don’t forget
Track it for the first month until it’s habit
After 20-30 times, you won’t even think about it.
Weekly Maintenance Schedule
Set a specific day each week for flash seasoning your cast iron—Sunday evening or whenever you meal prep—to ensure consistent maintenance even during busy weeks with less cooking.
Even if you’re not cooking much, maintain the schedule.
Weekly flash benefits:
Catches degradation early
Builds layers consistently
Takes 5 minutes for all your pans
Prevents problems from developing
Sample schedule:
Sunday: Flash season all cast iron (3-4 pans = 12 minutes)
Monday-Saturday: Flash season opportunistically after cooking
End result: minimum 52 layers per year, usually more
Quarterly deep maintenance:
Every 3 months: Full oven seasoning session
Addresses sides, handles, exteriors
Complements weekly flash seasoning
Keeps pans in top condition
Combine flash (weekly) with oven (quarterly). Best of both worlds.
Signs It’s Time for Full Re-Seasoning
Stop flash seasoning and do complete oven re-seasoning when you see bare metal, widespread rust, or if flash seasoning shows no improvement after 4-5 applications—foundation damage requires foundation repair.
Flash seasoning can’t fix everything.
Red flags:
Bare iron visible in multiple spots
Rust that won’t scrub off
Food sticking despite multiple flash seasons
Seasoning flaking off in large pieces
Pan looks worse after flash seasoning
When foundation is compromised, maintenance doesn’t help.
Decision matrix:
Condition
Flash Season?
Full Re-Season?
Slight dullness
Yes
No
One bare spot
Yes, 2-3 times
Maybe
Multiple bare spots
No
Yes
Rust patches
No
Yes
Good but could be better
Yes
No
Know when to cut your losses. Strip it. Start fresh with oven seasoning. Then maintain with flash seasoning going forward.
Flash Seasoning Myths and Facts
Myth: Flash Seasoning Damages the Pan
Flash seasoning causes no thermal damage to cast iron when done properly—the 400-450°F temperature range is well within cast iron’s tolerance (handles 700°F+), and rapid heating from cooking temperature poses no warping risk.
People worry about thermal shock. Warping. Damage.
Wrong.
Cast iron can handle this. Easily.
The facts:
Cast iron withstands temperatures above 700°F
Flash seasoning uses 450°F max
You’re not going from cold to hot (which might cause issues)
You’re going from 350°F to 450°F (nothing)
The pan doesn’t care. It’s metal. Designed for high heat.
What actually damages cast iron:
Cold water on super-hot pan (rapid contraction)
Dropping it (physical impact)
Dishwasher (chemical damage to seasoning)
Extreme neglect (rust)
Flash seasoning? Not even close to harmful.
Myth: You Need Special Oils
Regular vegetable, canola, or even bacon grease works perfectly for flash seasoning—expensive specialty oils offer no measurable advantage for quick maintenance layers.
Marketing says buy fancy oils. Your wallet says otherwise.
Truth:
$3 bottle of vegetable oil works great
$15 bottle of flaxseed oil works… great
$20 bottle of special “seasoning oil” works great
They all polymerize. They all protect. The differences are tiny.
What actually matters:
Smoke point above 400°F ✓
Applying it thin ✓
Proper temperature ✓
Adequate smoking time ✓
Bacon grease from your cooking? Free and effective.
Save your money. Buy bacon instead.
Myth: Flash Seasoning Replaces Full Seasoning
Flash seasoning maintains existing seasoning but cannot replace initial foundation layers—new or stripped pans still need 5-6 complete oven seasoning cycles before flash seasoning becomes effective maintenance.
Flash is maintenance. Not creation.
What flash seasoning can do:
Maintain good seasoning
Repair minor wear
Build on existing foundation
Add layers over time
What it can’t do:
Create seasoning from bare metal
Fix severely damaged pans
Replace oven seasoning entirely
Work miracles on neglected cookware
The right approach:
Start with full oven seasoning (5-6 layers)
Maintain with flash seasoning (weekly or after cooking)
Re-oven every 6-12 months as needed
They’re complementary. Not interchangeable.
Myth: More Heat = Better Flash Seasoning
Flash seasoning works best at 425-450°F—higher temperatures (500°F+) burn off oil before it can properly bond, while lower temperatures (under 400°F) prevent complete polymerization.
Hotter isn’t better.
Temperature sweet spot: 425-450°F
Go higher?
Oil burns too fast
Doesn’t bond properly
Creates weak, flaky seasoning
Waste of time and oil
Go lower?
Incomplete polymerization
Sticky residue
No protection
Also a waste
Goldilocks zone:
Hot enough for polymerization
Cool enough for bonding
Right where bacon cooking temps naturally are
Precision matters more than maximum heat.
Measuring Flash Seasoning Success
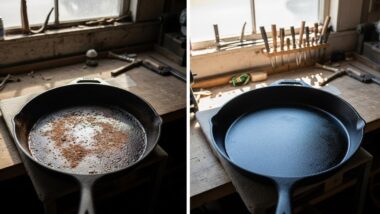
Visual Indicators of Good Flash Seasoning
Successfully flash-seasoned cast iron shows a uniform matte black finish, subtle darkening from the previous color, and no shiny wet spots or dull bare patches.
How do you know it worked?
Look at it.
Good flash seasoning appearance:
Even color across surface (no patches)
Matte finish, not glossy
Slightly darker than before
Smooth appearance
No visible oil sitting on surface
Bad flash seasoning appearance:
Shiny spots (too much oil)
Sticky feel
Blotchy color
Dull gray patches (didn’t polymerize)
Obvious oil pooling
Take a photo before and after your first few flash seasons. You’ll start seeing the improvements.
Performance Tests
Test flash seasoning success by frying an egg with minimal oil—if it slides easily and releases cleanly, your seasoning is working; if it sticks, continue flash seasoning after each cooking session.
Visual is one thing. Performance is what matters.
The egg test:
Heat pan to medium
Add small amount of butter
Crack egg
Wait 2 minutes
Try to slide it
Good seasoning = egg slides around like an air hockey puck.
Bad seasoning = egg welds to pan, tears when moved.
Other performance indicators:
Water beads up on cool pan (hydrophobic = well-seasoned)
Food releases easily during cooking
Less oil needed than before
Cleanup is easier
After 5-6 flash seasons, run the egg test. Compare to before you started.
Longevity Metrics
Single flash seasoning layers last 3-5 cooking sessions before showing wear—regular weekly flash seasoning builds cumulative protection that becomes increasingly durable over months.
How long does flash seasoning last?
Depends on use.
Durability expectations:
One flash season: 3-5 cooks before needing refresh
Three flash seasons: 10-15 cooks
Ten flash seasons: Weeks of heavy use
Regular maintenance: Indefinite
Factors affecting longevity:
What you cook (acidic foods strip faster)
How hot you cook
Cleaning methods
Frequency of use
Refresh timing:
Weekly flash (preventive): Builds faster than it degrades
Monthly flash: Maintains status quo
Less than monthly: Slowly degrading
The sweet spot? Flash season every 3-5 cooking sessions. You’ll always be ahead of degradation.
Flash Seasoning in Different Environments
High-Humidity Conditions
Flash season cast iron more frequently in humid climates—once or twice weekly minimum—since moisture accelerates rust formation on any thin or damaged seasoning spots.
Live near the ocean? Humid basement? Florida?
You need more flash seasoning.
Humidity challenges:
Moisture penetrates weak seasoning
Rust forms faster
Protection degrades quicker
Storage rust is common
High-humidity schedule:
Flash season after every cooking session
Additional weekly flash even without cooking
Inspect for rust spots daily
Wipe with oil after every wash
Storage protection:
Flash season before storing
Paper towel between stacked pans
Dry storage location
Small amount of oil on surface
Humid environments are hard on cast iron. Flash seasoning is your defense.
Commercial Kitchen Applications
Restaurant kitchens benefit from flash seasoning between service periods—quick 3-minute maintenance during prep keeps high-use pans performing without taking them out of rotation for hours.
Restaurants use cast iron hard. All day. Every day.
Flash seasoning keeps them running.
Commercial benefits:
No downtime (3 minutes vs. hours for oven)
Between lunch and dinner service
Maintains performance under heavy use
Multiple pans can be flash seasoned in 15 minutes
Staff training:
Simple enough for any cook
Part of closing duties
Consistent results
Keeps pans in rotation
Volume approach:
Flash season 2-3 most-used pans daily
Others on rotation (weekly)
Full oven seasoning monthly for all pans
High-volume cooking actually makes flash seasoning more effective. More cooking = more opportunities.
Outdoor and Camp Cooking
Flash season cast iron over campfires or camp stoves between cooking rounds—the uneven heat requires more frequent rotation and longer smoking times, but builds seasoning in field conditions.
Camping with cast iron? Flash season works there too.
Campfire flash seasoning:
Move pan to edge of fire (medium heat zone)
Clean with water and stick/cloth
Apply oil (bring a small bottle)
Hold over coals until smoking
Rotate frequently (fire is uneven)
Challenges:
Temperature control is rough
Smoke blends with campfire smoke
Less precision
Advantages:
Maintains pan during trip
Prevents rust in damp conditions
Uses cooking heat you’ve already got
No oven access needed
Works fine. Just takes more attention than stovetop.
Small Living Spaces
Flash seasoning is ideal for apartments and small kitchens without ovens or where oven use heats the entire living space—stovetop maintenance provides full seasoning capability in minimal space.
Studio apartment? Dorm room? RV?
Flash seasoning is perfect.
Small space advantages:
No oven required
Minimal smoke with good technique
Quick process (important when kitchen is living room)
Doesn’t heat entire space
Ventilation in tight quarters:
Single window with fan
Cook during cooler parts of day
Use less oil (less smoke)
Shorter smoking times
Setup:
Portable burner if no stove (induction or butane)
Small oil container
Paper towels
Can do on balcony if needed
You don’t need a big kitchen to maintain cast iron. Flash seasoning fits anywhere.