Table of Contents
- 1 Can You Really Save a Gunked-Up Cast Iron Skillet?
- 2 Identifying What’s Wrong with Your Gunked-Up Skillet
- 3 Assessing Whether Your Skillet Is Worth Saving
- 4 Safety Precautions Before Starting the Stripping Process
- 5 Stripping Method 1: Lye-Based Oven Cleaner (Most Popular)
- 6 Stripping Method 2: Lye Bath (For Heavy Gunk)
- 7 Stripping Method 3: Self-Cleaning Oven Cycle
- 8 Stripping Method 4: Electrolysis (For Rust + Gunk)
- 9 Dealing with Rust After Stripping Gunk
- 10 Evaluating Your Stripped Skillet
- 11 Cleaning Bare Iron Before Re-Seasoning
- 12 Choosing Your Re-Seasoning Oil
- 13 The Complete Re-Seasoning Process for Stripped Skillets
- 14 Building Durable Seasoning on Your Restored Skillet
- 15 Special Considerations for Vintage Skillets with Gunk
- 16 Troubleshooting Common Stripping Problems
- 17 Troubleshooting Re-Seasoning Issues on Restored Skillets
- 18 The Timeline: How Long Full Restoration Takes
- 19 Maintaining Your Newly Restored Skillet
- 20 Preventing Future Gunk Accumulation
- 21 Alternative to Full Stripping: Partial Restoration
- 22 Cost Analysis: DIY Stripping vs. Professional Restoration
- 23 Success Stories: Before and After Transformations
- 24 Environmental and Disposal Considerations
- 25 Tools and Supplies Checklist
- 26 Comparing Restoration to Buying New
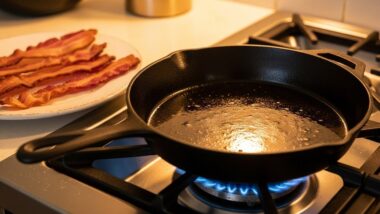
Can You Really Save a Gunked-Up Cast Iron Skillet?
Yes, you can absolutely save a cast iron skillet with years of carbonized buildup, sticky residue, and crusty gunk—stripping removes all the damaged layers down to bare iron, and proper re-seasoning rebuilds a clean, functional cooking surface that often performs better than the gunked-up mess you started with.
I’ve seen some nasty skillets. Decades of crud. Sticky black tar. Rust spots peeking through. Crusty bottoms that look like they’ve never been cleaned.
All saved.
The process isn’t complicated. Takes time. Requires some elbow grease and patience. But it works. You can take a skillet that looks ready for the trash and turn it into a beautiful, functional piece of cookware that’ll last another 50 years.
What “Years of Gunk” Actually Means
Years of gunk refers to thick layers of carbonized oil, burned-on food residue, and failed seasoning that have accumulated through improper cleaning, overheating, or neglect—this buildup creates a crusty, uneven, often sticky surface that prevents proper cooking and looks terrible but hasn’t damaged the iron underneath.
Gunk is superficial. That’s the good news.
It’s sitting ON the iron, not IN the iron. No matter how thick or disgusting, it’s removable. The cast iron beneath is almost certainly fine—cast iron is basically indestructible unless someone deliberately tries to destroy it.
What you’re seeing is layers upon layers of organic material (oils, fats, food particles) that have been heated, burned, partially polymerized, and built up over months or years. Thick. Crusty. Ugly. But not permanent.
The Difference Between Saveable and Unsaveable Skillets
Saveable skillets have gunk, rust, or failed seasoning but intact iron underneath—unsaveable skillets have cracks, severe warping that prevents flat contact with burners, or extensive pitting that compromises structural integrity, though these are rare and most gunked-up pans are absolutely worth restoring.
Saveable (99% of gunky skillets):
- Thick carbonized buildup
- Sticky or gummy layers
- Rust combined with old seasoning
- Flaking, peeling coating
- Crusty exterior residue
- Years of neglect and abuse
Unsaveable (extremely rare):
- Cracks through the iron
- Severe warping (wobbles badly on flat surface)
- Holes rusted completely through
- Broken handles or major structural damage

If your skillet is just gross and gunky, it’s saveable. Period.
Why Stripping and Re-Seasoning Works
Stripping removes all the problematic layers—the gunk, the failed seasoning, the sticky residue—exposing clean bare iron that accepts new seasoning perfectly, and starting fresh with proper seasoning technique creates a smooth, durable, non-stick surface that will outperform the damaged coating it replaced.
You’re hitting reset. Back to bare metal. Then building good seasoning from a clean foundation.
The gunk was preventing proper cooking and would’ve kept getting worse. Strip it all away and you’ve got virgin iron ready to be seasoned correctly this time.
Setting Realistic Expectations for Your Restoration
Expect stripping and re-seasoning to take 2-4 days total (mostly waiting time), require multiple applications of stripping agents for heavy gunk, and produce a skillet that looks and cooks great but may show cosmetic imperfections like slight pitting or discoloration that don’t affect performance.
This isn’t magic. Takes time and work.
Your restored skillet will be functional and beautiful, but it might not look factory-new if the iron has some age-related pitting or surface irregularities. That’s normal. That’s character. Doesn’t hurt cooking performance at all.
Identifying What’s Wrong with Your Gunked-Up Skillet
Before stripping, identify what you’re dealing with—thick carbonized buildup, sticky gummy layers, rust, or combination issues—because this determines which stripping method works best and how much effort the restoration will require.
Look at your skillet. Really examine it.
Thick Carbonized Buildup on Cooking Surface
Carbonized buildup appears as thick, hard, black or dark brown crusty layers on the cooking surface—it feels rough to the touch, creates an uneven cooking surface, and often chips or flakes when scraped, though it’s firmly adhered and won’t wash off with normal cleaning.
This is burned oil and food that’s been heat-hardened into a carbon layer. Like coal. Hard. Crusty. Ugly.

It builds up gradually from cooking at too-high temperatures, inadequate cleaning, or leaving residue that gets re-cooked multiple times until it forms this hard shell.
Sticky, Gummy Layers That Won’t Clean Off
Sticky gunk feels tacky or gummy to the touch and may leave residue on your fingers—this is oil that never properly polymerized, often from too much oil during seasoning or from cooking foods that left behind sticky residues that were never fully cleaned.
Touch it. Finger comes away sticky or oily? That’s failed seasoning.
This stuff is frustrating because it’s not hard like carbonized buildup—it’s soft, sticky, and impossible to clean with soap and water alone. Needs chemical stripping.
Crusty Residue on Bottom and Sides
The exterior of your skillet probably has thick crusty buildup from stovetop drips, oven spills, and oils that ran down the sides during cooking—this exterior gunk doesn’t affect cooking but looks terrible and needs removing for a complete restoration.
People focus on the cooking surface. Forget the exterior. Both need attention.
The outside of a neglected skillet can have a half-inch of crusty buildup in places. Disgusting but removable.
Rust Combined with Old Seasoning
Some gunked skillets have rust showing through in spots—usually in areas where the gunk or seasoning has flaked away, exposing bare iron that oxidized—this combination of rust plus gunk requires both rust removal and seasoning stripping.
Red-orange spots. That’s rust. Iron oxide.
Common on neglected skillets that were stored damp or had seasoning damage that exposed bare metal. Not a problem. Just means you need rust removal in addition to gunk stripping.
Flaking, Peeling, or Bubbling Coating

Flaking coating peels away in sheets or chunks, sometimes revealing multiple layers of old seasoning underneath—this happens when seasoning wasn’t properly bonded, was applied too thick, or when newer layers separated from older layers beneath.
Lift-off coating. Comes away in pieces.
This is failed seasoning trying to escape. Let it go. Strip everything and start fresh.
Assessing Whether Your Skillet Is Worth Saving
Most cast iron is worth saving regardless of how gunked-up it looks—the question isn’t usually “can I save it” but rather “is it worth my time” based on the skillet’s age, brand, sentimental value, and your available time and interest.
Worth saving? Probably yes.
Signs Your Skillet Can Be Restored
Your skillet can definitely be restored if the iron underneath the gunk is solid—check for this by scraping a small area to bare metal and looking for smooth, gray iron without cracks, holes, or severe pitting that goes deep into the metal.
Good signs:
- Solid iron with no cracks
- Sits relatively flat (minor warping is fine)
- Handle is intact and solid
- Gunk is the only problem (not structural damage)
- It’s a known brand (Griswold, Wagner, Lodge) or has sentimental value
Gunk is fixable. Broken iron isn’t.
Damage That Can’t Be Fixed (Cracks, Severe Warping)
Don’t waste time on skillets with cracks running through the iron (even small ones will spread with heating), severe warping that creates a 1/4-inch or more gap when placed on a flat surface, or holes rusted completely through the metal—these are structurally compromised beyond practical repair.
Cracks mean garbage. Unfortunately.

Cast iron can’t be welded effectively for cookware use. A cracked skillet is done.
Warping depends on severity—slight warping is fine, severe warping that prevents even contact with burners makes the pan unusable.
Age and Value Considerations
Vintage skillets (pre-1960s Griswold, Wagner, favorite pieces from defunct manufacturers) are almost always worth restoring regardless of gunk because they have value and superior quality—modern Lodge or cheap imports are worth restoring only if you need them or they have sentimental value.
Old = probably worth it
New = maybe, depending
A gunked-up Griswold? Absolutely restore it. Could be worth $50-200 once cleaned.
A gunked-up modern Lodge? Restore it if you need a skillet or it’s grandma’s. Otherwise you could buy new Lodge for $25.
Sentimental vs. Monetary Worth
Sentimental value trumps everything—if it’s your grandmother’s skillet, your first cast iron, or has memories attached, restore it regardless of condition or monetary value, because the connection matters more than the cooking performance.
Family heirloom? Fix it. No question.
The money doesn’t matter. The memories do.
Safety Precautions Before Starting the Stripping Process
Before stripping your gunked-up skillet, gather proper safety equipment including chemical-resistant gloves, eye protection, and respiratory protection if working indoors, and set up a well-ventilated workspace away from children and pets where chemical spills won’t damage surfaces.
Safety first. Not negotiable.
Protective Equipment You Must Wear
Wear heavy-duty rubber or nitrile gloves rated for chemical resistance (not thin latex), safety glasses or goggles to protect your eyes from splashes, and if working indoors, a respirator mask rated for organic vapors to avoid breathing fumes from oven cleaner or other chemicals.
Required gear:
- Chemical-resistant gloves (thick rubber, not cheap latex)
- Safety glasses or goggles
- Long sleeves to protect arms
- Respiratory protection for indoor work
- Old clothes you don’t mind destroying
Lye burns skin. Seriously burns. Don’t learn this the hard way.
Ventilation Requirements
Work outdoors whenever possible when using chemical strippers—if you must work indoors, do it in a garage with doors open or a workshop with good cross-ventilation, and never use chemical strippers in enclosed living spaces where fumes can accumulate.
Outside. Garage. Workshop. Not your kitchen.
The fumes aren’t acutely toxic (usually) but they’re unpleasant and you don’t want them in your living space.
Safe Chemical Handling
Read product labels completely before using any stripping chemicals, never mix different chemicals together (creates dangerous reactions), keep original containers for reference, and have a plan for disposing of used chemicals according to local regulations.
Read labels. Follow directions. Don’t improvise.
Chemical safety isn’t complicated but it does require attention and respect for what you’re working with.
Protecting Your Work Area
Cover your work surface with plastic sheeting or multiple layers of cardboard, have water immediately available for rinsing chemical splashes, keep paper towels or rags handy for wiping spills, and never work where chemical drips could damage flooring, concrete, or lawn areas.
Your driveway might get stained. Your wife might get mad.
Protect surfaces. Clean up spills immediately.
Stripping Method 1: Lye-Based Oven Cleaner (Most Popular)
Lye-based oven cleaner (specifically Easy-Off yellow cap or similar sodium hydroxide products) is the most popular stripping method for gunked-up skillets because it’s readily available, relatively safe when used properly, and effectively dissolves years of carbonized buildup and failed seasoning over 24-72 hours.
This is the go-to method. What most people use.
Why Lye Works on Carbonized Buildup
Lye (sodium hydroxide) breaks the molecular bonds in polymerized oils and carbonized residue through a process called saponification—it literally converts the hard, stuck-on gunk back into softer compounds that wash away, though it doesn’t harm the iron underneath since lye doesn’t react with metallic iron.
Chemistry magic. Turns hard gunk into soft goop.
The lye attacks the organic compounds (oil, fat, carbon) but leaves the inorganic iron alone. Perfect for our purposes.
Choosing the Right Oven Cleaner Product
Use Easy-Off Heavy Duty oven cleaner with the yellow cap (lye-based formula), not the blue cap (lye-free) or fume-free versions which don’t work nearly as well—generic store-brand lye-based oven cleaners work fine too, just verify the active ingredient is sodium hydroxide.
Yellow cap Easy-Off. That’s the standard.
The blue cap and “fume-free” versions are weaker formulas that barely touch cast iron gunk. Don’t waste your time.
Step-by-Step Lye Stripping Process
The complete lye stripping process involves applying oven cleaner to your gunked skillet, sealing it in a garbage bag to prevent drying, waiting 24-72 hours for the chemicals to work, then scrubbing off the dissolved gunk and neutralizing any remaining lye.
Here’s the full process from start to finish.
Preparing Your Gunked-Up Skillet
Start with your skillet as-is—don’t bother washing it first since the oven cleaner works on everything—and work outdoors or in a well-ventilated garage wearing gloves and eye protection.
No prep needed. Attack the gunk directly.
Applying Oven Cleaner Thoroughly
Spray oven cleaner liberally over every surface of the skillet—cooking surface, exterior, bottom, handle, inside any grooves or crevices—using enough that the entire pan is wet with white foam, paying extra attention to areas with heavy buildup.
Saturate it. Don’t be stingy.
A heavily gunked 10-inch skillet might use half a can of oven cleaner. Use what it takes to coat everything thoroughly.
The Garbage Bag Method
Place your oven-cleaner-coated skillet into a heavy-duty garbage bag (or better yet, a 2-gallon zip-loc bag), seal the bag to prevent the oven cleaner from drying out, and place it somewhere safe—outside, in a garage, somewhere away from people and pets.
Bag it. Seal it. Forget it.
The bag keeps the oven cleaner wet and active. If it dries out, it stops working.
Waiting Period (24-72 Hours)
Let your bagged skillet sit for at least 24 hours, though 48-72 hours works better for heavy gunk—check it after 24 hours and if the gunk isn’t scrubbing off easily, spray more oven cleaner and bag it for another 24-48 hours.
Patience. Let the chemicals work.
Light gunk: 24 hours might do it
Moderate gunk: 48 hours
Heavy gunk: 72 hours or multiple applications
Scrubbing Off Dissolved Gunk
After the waiting period, remove the skillet from the bag (wearing gloves), rinse with water to remove excess oven cleaner, then scrub with a stiff brush or steel wool—the gunk should now scrub off relatively easily as soft brown or black residue.
The gunk that was rock-hard? Now it’s soft and scrubs away.
Use steel wool, brass brushes, or stiff plastic brushes. The crud should come off without heroic effort.
Neutralizing and Rinsing
After scrubbing, wash the skillet thoroughly with dish soap and hot water, then neutralize any remaining lye by rinsing with a 50/50 vinegar-water solution, followed by final rinsing with plain water and immediate drying to prevent rust.
Soap. Vinegar rinse. Water rinse. Dry immediately.
The vinegar neutralizes lye (acid neutralizes base). Extra insurance that no chemical residue remains.
What to Do If One Application Isn’t Enough
If significant gunk remains after the first stripping, don’t be discouraged—simply repeat the process with fresh oven cleaner, and heavily gunked skillets might need 2-3 complete cycles to remove decades of buildup.
Round two. Sometimes round three.
Really neglected skillets can have gunk so thick it takes multiple applications. That’s normal.
Dealing with Stubborn Spots
For spots where gunk stubbornly remains after lye stripping, use a plastic scraper or putty knife to gently chip away the loosened crud, re-apply oven cleaner to those specific areas, or move to a more aggressive method like a lye bath for complete removal.
Some spots cling harder. Hit them again with focused treatment.
Stripping Method 2: Lye Bath (For Heavy Gunk)
A lye bath—where you submerge your entire skillet in a container of lye-water solution—is more effective than spray-on oven cleaner for heavily gunked skillets because it provides complete, even coverage and continuous contact with the crud for as long as you leave it soaking.
Nuclear option for serious gunk.
When to Use a Lye Bath Instead of Spray
Use a lye bath when spray oven cleaner failed after 2-3 applications, when your skillet has extremely thick carbonized buildup (1/8 inch or more), when you’re restoring multiple skillets at once, or when you want the most thorough stripping possible regardless of effort.
Oven cleaner didn’t work? Try a lye bath.
Or if you’ve got multiple skillets to strip, a bath handles them all at once.
Creating a Lye Solution Safely
Create a lye bath using a 5-gallon plastic bucket, add 1-2 pounds of pure lye crystals (sodium hydroxide, available as drain cleaner), then slowly add water while stirring—always add lye to water, never water to lye, to prevent dangerous chemical reactions and splashing.
Lye bath recipe:
- 5-gallon plastic bucket
- 1-2 pounds lye crystals
- 4 gallons of water
- Add lye TO water slowly while stirring
The solution heats up as you mix it. That’s normal. Don’t panic.
Submerging Your Skillet
Once the lye solution has cooled to room temperature, fully submerge your gunked skillet—make sure it’s completely covered by solution, and if needed, weight it down with a brick or rock to keep it submerged (nothing aluminum, which reacts with lye).
Under the surface. Completely covered.
Any part sticking out won’t get stripped. Full submersion is critical.
Soaking Duration for Heavy Buildup
Leave your skillet in the lye bath for 2-7 days depending on gunk severity—check it every few days by pulling it out (wear gloves!), rinsing, and seeing if the gunk scrubs off easily, returning it to the bath if needed.
Days. Not hours.
The lye works slowly but thoroughly. A week-long soak will remove absolutely everything.
Removal and Cleaning Process
When the gunk scrubs off easily, remove the skillet from the lye bath, rinse thoroughly with water while scrubbing with steel wool or a brush, wash with soap, neutralize with vinegar rinse, final water rinse, and dry immediately.
Same cleaning process as oven cleaner method. Just after a longer soak.
Disposing of Lye Solution Properly
Used lye solution can be neutralized with white vinegar (add slowly until it stops fizzing), then diluted heavily and poured down the drain, or take it to a hazardous waste facility—never pour concentrated lye solution on lawn or plants (it kills them) or down drain without neutralizing first.
Don’t dump it on your grass. Dead grass teaches expensive lessons.
Neutralize first. Always.
Stripping Method 3: Self-Cleaning Oven Cycle
The self-cleaning oven method strips gunked skillets by heating them to 800-900°F in your oven’s self-clean cycle—this extreme temperature incinerates all organic material including gunk and seasoning, reducing it to ash that wipes away to reveal bare iron.
High heat. Burn it all off.
How Extreme Heat Removes Gunk
Self-cleaning ovens reach temperatures around 800-900°F to burn food residue into ash—at these temps, the polymerized oils, carbonized crud, and all organic gunk on your cast iron literally burn away, leaving only the iron and a light coating of ash.
Incineration. Complete destruction of organic material.
It’s effective. Really effective. But controversial because…
Pros and Cons of This Method
Self-cleaning is fast (3-4 hours), requires no chemicals, and completely removes all gunk—but it risks warping thinner cast iron or cracking pieces with casting flaws, voids some manufacturers’ warranties, and creates substantial smoke and smell.
Pros:
- No chemicals needed
- Completely removes everything
- Minimal effort (just load and run)
Cons:
- Risk of warping or cracking
- Extreme smoke and smell
- Voids some manufacturer warranties
- Can’t do it if you need your oven for cooking
Many people use this method successfully. Some people have warping disasters. Your call.
Step-by-Step Self-Clean Process
Place your gunked skillet in the oven (remove oven racks if you want to protect them), start the self-clean cycle (usually 3-4 hours), leave it alone until the cycle completes and the oven cools enough to unlock, then remove the skillet and wipe away the ash with a damp cloth.
Load. Lock. Run. Wait. Wipe.
The oven does all the work. You just wait for it to finish and cool down.
Risks of Warping or Cracking
The extreme heat can cause warping in thinner vintage pieces or crack cast iron with internal casting flaws or stress points—modern Lodge rarely has issues, but thin vintage skillets or pieces with existing damage are at higher risk.
Thick modern iron: probably fine
Thin vintage iron: higher risk
Already damaged: definitely risky
If it’s a valuable vintage piece, maybe use chemicals instead.
What to Expect After the Cycle
After self-cleaning, your skillet will be gray bare iron covered in light ash—the gunk will be completely gone, the pan will look raw and almost new, and you’ll need to wash off the ash then immediately oil to prevent rust.
Bare. Gray. Clean.
All the organic material is gone. You’re at bare iron. Start fresh.
Stripping Method 4: Electrolysis (For Rust + Gunk)
Electrolysis uses electrical current in a water bath to simultaneously remove rust and gunk from cast iron—you create a setup with a power source, washing soda solution, and a sacrificial metal anode, and the current strips everything from your skillet over 12-24 hours.
Fancy method. Requires setup.
When Electrolysis Is the Best Choice
Use electrolysis when your skillet has heavy rust combined with heavy gunk (it removes both simultaneously), when you’re regularly restoring multiple pieces and want a reusable system, or when you want the gentlest possible stripping method that doesn’t risk thermal damage.
Rust + gunk together? Electrolysis handles both.
Basic Equipment and Setup
You need a plastic tub, a battery charger (manual, not automatic), a sacrificial steel anode (rebar or steel plate), washing soda, water, and wire to connect everything—the setup takes 30-60 minutes but then handles multiple skillets over time.
Shopping list:
- 5-10 gallon plastic tub
- Manual battery charger (6-12 amps)
- Steel sacrificial anode (rebar works)
- Washing soda (not baking soda)
- Wire for connections
Investment upfront. Worth it if you’re doing multiple pieces.
The Science Behind Electrolysis Stripping
Electrolysis works by running current through the water solution—the iron in your skillet becomes the cathode (negative), the sacrificial anode becomes the positive, and the current causes rust and crud to migrate off the skillet onto the anode while releasing hydrogen gas.
Electrical chemistry. It works. Don’t need to fully understand it.
Safety Considerations with Electricity
Never operate electrolysis setups indoors without ventilation (hydrogen gas is flammable), keep electrical connections away from water, never touch the water while the charger is on, and always double-check your connections before powering up.
Electricity plus water equals respect required.
Not dangerous if you’re careful. Potentially dangerous if you’re careless.
Duration and Results
Electrolysis typically needs 12-24 hours for heavily gunked and rusted skillets—check progress periodically, and when everything wipes off easily, remove the skillet, wash it, dry it immediately, and start seasoning.
Overnight usually does it. Sometimes longer for really bad pieces.
The result is perfectly clean bare iron. No rust. No gunk. Ready to season.
Dealing with Rust After Stripping Gunk
After stripping gunk with lye or heat, you’ll often find rust on the exposed bare iron—this is normal because the iron was protected by the gunk and oxidizes quickly once exposed, and rust must be removed before seasoning or it’ll compromise the new coating.
Gunk comes off. Rust appears. Frustrating but normal.
Why Rust Appears on Stripped Iron
Bare iron exposed to air and moisture begins oxidizing (rusting) within minutes—after stripping, your skillet has no protective coating and will develop surface rust almost immediately unless you oil it right away, and any rust that was hidden under the gunk is now visible.
Oxygen plus iron plus moisture equals rust. Fast.
Don’t panic. Surface rust is superficial and easily removed.
Vinegar Bath for Rust Removal
A vinegar bath removes rust through mild acid dissolving the iron oxide—this works quickly and effectively but can damage the iron itself if left too long, so careful timing is critical.
Vinegar eats rust. Also eats iron if you’re not careful.
White Vinegar Solution Recipe
Mix 50/50 white vinegar and water in a container large enough to submerge your skillet—this diluted solution works well for rust removal while being less aggressive than pure vinegar that can etch the iron surface.
Half vinegar. Half water. Simple.
Soaking Duration (30-60 Minutes Maximum)
Submerge the rusty skillet and check it every 15 minutes—most surface rust comes off in 30-60 minutes, but never exceed 1-2 hours total because vinegar will start etching the iron itself, creating pitting and surface damage.
Set a timer. Check frequently. Don’t forget about it.
I’ve seen people leave cast iron in vinegar for days. The result is ugly—gray, pitted, damaged. Don’t do this.
Preventing Over-Etching
Pull the skillet from vinegar as soon as rust scrubs off easily—if you see excessive fizzing or the solution turning very dark orange, the acid is working too fast and you should remove the piece immediately.
Watch for signs the process is going too far.
Scrubbing Rust with Steel Wool
After vinegar soaking (or instead of it for light rust), scrub with 0000 steel wool and a little oil—the combination of fine abrasive and lubricant removes rust without damaging the iron surface.
Steel wool plus oil. Old-school method that works great.
The oil lubricates and prevents scratching. The steel wool provides gentle abrasive action.
Immediate Protection After Rust Removal
The second rust is removed, dry your skillet thoroughly and apply a thin coat of any oil—bare iron will start rusting again within minutes of exposure to air, so protecting it immediately is non-negotiable.
Dry. Oil. Now.
Not in five minutes. Not after lunch. Now.
Evaluating Your Stripped Skillet
Once your skillet is stripped to bare iron, carefully inspect it before re-seasoning—check for previously hidden damage, evaluate the surface condition, and decide if any additional treatment is needed before building new seasoning.
Take a good look at what you’ve got.
What Bare Iron Should Look Like
Properly stripped bare iron appears uniform gray (sometimes with slight color variation), feels smooth or slightly textured depending on the original casting, and shows no remaining black seasoning, sticky residue, or rust—it should look like raw metal.
Gray. Clean. Bare.
Color can range from light gray to dark gray depending on the iron composition and any remaining carbon absorbed into the surface. All normal.
Identifying Surface Damage or Pitting
Look for pitting (small pockmarks in the surface), casting flaws, or rough patches—light pitting is cosmetic and doesn’t affect performance, but deep pitting or rough casting quality might impact how smooth your final seasoning becomes.
Little pockmarks? Fine. Character.
Deep holes or severe roughness? Still functional but won’t season as smoothly as pristine iron.
Checking for Warping or Structural Issues
Place your stripped skillet on a flat surface and check for wobbling—slight warping (1/16 inch or less) is acceptable, but severe warping affects cooking performance and can’t be fixed at home.
Flat surface test. Does it wobble?
Minor wobble: cook-able
Major wobble: problem
Deciding If Further Treatment Is Needed
If the iron is clean, rust-free, and structurally sound, proceed to seasoning—if rust remains, treat it with vinegar or more scrubbing, and if you want to smooth out rough casting texture, now’s the time to sand it (though this is optional and labor-intensive).
Clean bare iron = ready to season
Rusty or rough = needs more work
Cleaning Bare Iron Before Re-Seasoning
Before applying the first seasoning coat, thoroughly clean your stripped bare iron to remove all chemical residue, rust dust, and contaminants that could interfere with seasoning adhesion.
One final cleaning before you start building.
Washing Away All Stripping Residue
Wash your bare iron skillet with dish soap and hot water using a scrub brush—this removes any remaining lye, ash, or chemical residue from the stripping process plus any loose rust particles or metal dust.
Soap and water. Thorough scrubbing.
Get it properly clean. First seasoning layer needs to bond to clean metal.
Neutralizing Any Remaining Chemicals
If you used lye stripping, rinse your washed skillet with diluted vinegar (1 part vinegar to 3 parts water) to neutralize any residual sodium hydroxide, then rinse again with plain water to remove the vinegar.
Acid neutralizes base. Chemistry 101.
The Crucial Drying Step
After final rinsing, dry your skillet immediately with towels, then place it in a 200-250°F oven or on a warm burner for 10 minutes to evaporate every trace of moisture—any water left on bare iron will create rust within minutes.
Towel dry. Heat dry. Completely dry.
Bare iron and water are enemies. Never let them spend time together.
Preventing Flash Rust Formation
As soon as your skillet is hot and dry, apply a very thin coat of any cooking oil while it’s still warm—this prevents flash rust from forming while you prepare for the formal seasoning process.
Immediate protection. Don’t wait.
Even 5 minutes of exposed bare iron can develop visible rust. Oil it right away.
Choosing Your Re-Seasoning Oil
For re-seasoning stripped cast iron, choose oils with high smoke points (400°F+) like canola, vegetable, or Crisco that polymerize reliably—avoid trendy oils like flaxseed which creates beautiful but brittle seasoning prone to flaking after the effort you just invested in stripping.
Pick the right oil. Matters more on bare iron.
Best Oils for Rebuilding Seasoning
Canola oil, generic vegetable oil (usually soybean), and Crisco vegetable shortening consistently produce durable, reliable seasoning on stripped cast iron—they’re cheap, readily available, and have been proven over decades to create seasoning that lasts.
Top choices:
- Canola oil (cheap, reliable, good smoke point)
- Vegetable oil (usually soybean blend, works great)
- Crisco vegetable shortening (traditional choice, excellent results)
- Grapeseed oil (pricier but works well)
Any of these will serve you well.
Oils to Avoid on Restored Skillets
Avoid flaxseed oil despite internet hype (creates brittle seasoning that chips and flakes), olive oil (too low smoke point), and butter or bacon grease for initial coats (save these for cooking, not formal seasoning).
Flaxseed is pretty initially. Fails later. Don’t use it.
After all the work you just did stripping, don’t create future problems with problematic oil choices.
Why Oil Choice Matters More on Stripped Iron
Bare iron gives you a fresh start—the first few seasoning layers set the foundation for everything built on top, so using reliable oils for these initial coats ensures you’re building on a solid base rather than creating future flaking or failure issues.
Foundation matters. Build it right.
You can always add bacon grease layers later through cooking. Start with something proven.
The Complete Re-Seasoning Process for Stripped Skillets
Re-seasoning stripped cast iron requires applying 5-7 thin coats of oil baked at 450°F, with complete cooling between each coat—this builds durable, properly-bonded seasoning that will outperform the gunky mess you stripped away and last for years with proper care.
Now the real work begins. Rebuilding seasoning from scratch.
Why Stripped Skillets Need More Coats
Bare iron needs 5-7 seasoning coats minimum to build adequate protection and non-stick properties—fewer coats leaves you with weak, easily-damaged seasoning that won’t perform well, while 5-7 coats creates the thick, durable finish your skillet deserves after restoration.
One coat: barely protected
Three coats: minimal
Five coats: good
Seven coats: excellent
Don’t stop too early. You’ve come this far.
Applying the First Seasoning Coat
The first coat is critical—it must bond perfectly to the bare iron because everything else builds on this foundation.
Oil Application on Bare Iron
Pour about 1/2 teaspoon of your chosen oil onto the cooking surface of your warm (not hot) skillet, then use a paper towel or lint-free cloth to spread it across every surface—cooking surface, sides, bottom, handle, everywhere there’s exposed iron.
Thin application. Cover everything.
Wiping to Paper-Thin Layer
After spreading oil everywhere, take a fresh paper towel and wipe the skillet like you’re trying to remove all the oil you just applied—keep wiping and buffing until the surface looks almost dry with barely any sheen visible.
Wipe hard. Really hard.
The oil you remove is oil that would create sticky seasoning. The microscopic amount left behind is perfect.
Positioning for Baking
Place your oil-wiped skillet upside-down on the middle oven rack, with aluminum foil or a baking sheet on the rack below to catch any drips—the inverted position prevents oil from pooling in the center.
Upside-down. Like we covered in the other article.
Gravity pulls excess oil away from cooking surface instead of toward it.
Oven Temperature and Timing
Bake your oiled skillet at 450°F for exactly one hour—this temperature is hot enough to fully polymerize most vegetable oils without burning them, and one hour provides adequate time for complete bonding and hardening.
450°F. One hour. Every coat.
Consistency across all coats creates uniform seasoning.
Cooling Completely Between Coats
After the hour is up, turn off the oven but leave the skillet inside to cool naturally—this slow cooling completes the polymerization process and prevents thermal shock that could crack or weaken fresh seasoning.
Cool in the oven. Door closed. Don’t rush.
Each coat needs to cure completely before the next. That means cool to room temp.
How Many Coats Your Gunked Skillet Needs (5-7 Minimum)
Plan on at least 5 coats for adequate seasoning, with 7 coats providing excellent protection and performance—each coat builds on the previous, creating thickness and durability that single or double coats can’t match.
Five: minimum
Seven: recommended
More: diminishing returns
After seven coats, you’re getting minimal additional benefit. Stop and start cooking.
Building Durable Seasoning on Your Restored Skillet
Proper technique during the seasoning process creates durable coating that won’t flake, chip, or fail—rushing or cutting corners now wastes all the effort you invested in stripping.
Do it right. You’ve come this far.
Layer-by-Layer Strategy
Each of your 5-7 coats should follow identical technique—oil, wipe thoroughly, bake at 450°F for one hour, cool completely—this consistency creates uniform layers that bond well to each other and build up gradually into thick protection.
Same process. Every time. No shortcuts.
Signs of Proper Polymerization
After each coat cools, the skillet should feel completely dry and hard (not sticky or tacky), show a slight darkening of color, and have a subtle sheen but not look wet—these signs indicate successful polymerization.
Dry. Hard. Slight sheen. Good.
Sticky or tacky. Bad.
What Good Seasoning Looks and Feels Like
After 5-7 coats, your restored skillet should have uniform dark brown to black color, feel smooth and hard like glass or plastic (accounting for the underlying iron texture), and show water beading up on the surface rather than absorbing.
The transformation is dramatic. Your gunked-up disaster now looks professional.
Common Re-Seasoning Mistakes to Avoid
Don’t use too much oil (creates sticky coating), don’t skip thorough wiping (leaves excess that won’t polymerize), don’t season at temperatures too low (under 400°F creates gummy results), and don’t rush cooling between coats (weakens bonding).
Mistakes that ruin your work:
- Too much oil
- Not wiping thoroughly enough
- Temperature too low
- Removing from oven too soon
- Stopping after 2-3 coats
You’ve invested days in this restoration. Don’t screw it up at the finish line.
Special Considerations for Vintage Skillets with Gunk
Vintage cast iron requires extra care during restoration—these older pieces often have thinner iron, smoother surfaces, and value that demands gentle treatment even when they’re covered in decades of gunk.
Handle vintage with care.
Extra Care for Griswold, Wagner, and Other Collectibles
Valuable vintage brands need gentle stripping methods—avoid self-cleaning oven (too much risk of warping or cracking), use lye-based methods that won’t damage the iron, and take your time to preserve the value of pieces that might be worth $100-500 in good condition.
Griswold isn’t Lodge. Treat it accordingly.
These pieces have value. Both monetary and historical. Don’t destroy that with aggressive restoration.
Preserving Maker’s Marks and Numbers
Maker’s marks, size numbers, and pattern codes on the bottom add value and historical interest—clean these areas carefully without using aggressive scraping that could damage the markings, and document them with photos before and after restoration.
Those numbers and logos matter to collectors. Preserve them.
Handling Thin Vintage Iron
Pre-1960s cast iron is often significantly thinner than modern Lodge—this makes it lighter and better performing but also more susceptible to warping from extreme heat, so use chemical stripping rather than self-cleaning oven method.
Thin iron = no self-clean cycle. Too risky.
Stick with lye methods for thin vintage pieces.
Value Considerations During Restoration
A properly restored vintage Griswold or Wagner can be worth $50-300 depending on size and rarity—rushing or damaging the piece during restoration destroys value, so invest the extra time to do it right and preserve both functionality and collectibility.
Patience preserves value. Rushing destroys it.
Troubleshooting Common Stripping Problems
Even with proper technique, stripping problems occur—knowing how to handle them prevents wasted time and frustration during restoration.
Things go wrong. Here’s how to fix them.
Lye Not Removing All the Gunk
If lye oven cleaner or lye bath isn’t removing gunk after 72 hours, the buildup might be especially thick or contain substances resistant to lye—try extending the soak to a week, increasing lye concentration, or switching to self-cleaning oven method for stubborn cases.
Round two. Or three. Or switch methods.
Really thick gunk can take multiple applications. Don’t give up.
Chemical Residue That Won’t Rinse
White powdery residue after lye stripping is dried sodium hydroxide—remove it with extra washing and vinegar neutralization, scrubbing with a brush while rinsing, and if it persists, soak in vinegar-water for 10 minutes then scrub again.
Vinegar dissolves lye residue. Problem solved.
Persistent Sticky Spots After Stripping
Sticky areas remaining after stripping are usually modern synthetic oils or resins that resist lye—spot-treat these areas with acetone or paint thinner (wear gloves!), scrub hard, then re-wash before seasoning.
Different chemicals for different crud. Acetone for sticky spots.
Gray Discoloration on Bare Iron
Gray, black, or mottled coloring on stripped bare iron is normal—it’s carbon absorbed into the surface from decades of cooking and doesn’t affect function or prevent seasoning adhesion.
Color variation is normal. Not a problem.
The iron doesn’t need to be shiny silver. Gray is fine.
Pitting Revealed After Stripping
Pitting (small pockmarks) hidden under gunk becomes visible after stripping—this is manufacturing variation or age-related corrosion, it’s cosmetic unless very severe, and seasoning will fill in light pitting to create a relatively smooth cooking surface.
Pitting happens. Especially on old iron.
Doesn’t hurt cooking performance. Seasoning fills it in mostly.
Troubleshooting Re-Seasoning Issues on Restored Skillets
Re-seasoning problems on stripped iron usually stem from technique errors—identifying and fixing them quickly prevents having to strip and start over.
Seasoning problems have solutions.
Seasoning That Won’t Stick to Bare Iron
If seasoning wipes off easily or doesn’t seem to bond, the iron might have chemical residue from stripping—wash again thoroughly with soap, scrub with steel wool, rinse with vinegar solution, dry, then try seasoning again.
Clean iron bonds seasoning. Contaminated iron doesn’t.
Sticky or Tacky Fresh Seasoning
Sticky new seasoning means too much oil or temperature too low—put the sticky skillet back in a 450°F oven for another hour to try completing polymerization, or if that fails, wash off the sticky layer and start that coat over with less oil.
Fix it now. Before adding more coats on top of stickiness.
Uneven Coloring After Multiple Coats
Blotchy seasoning with light and dark areas is usually from uneven oil application or oven hot spots—it’s mostly cosmetic and will even out with continued coats and eventual cooking use.
Ugly but functional. Keep going.
Flaking New Seasoning
Fresh seasoning that flakes or peels indicates poor bonding—this happens from contaminated iron, rushed cooling, or using oils like flaxseed that create brittle coatings—strip the failed seasoning and start over with proper technique and reliable oil.
Flaking = do-over required. Unfortunately.
Better to fix it now than cook on failing seasoning.
The Timeline: How Long Full Restoration Takes
Complete restoration of a heavily gunked skillet takes 3-5 days total—1-3 days for stripping (mostly waiting), a few hours for rust removal and prep, and 12-15 hours for applying 5-7 seasoning coats (again, mostly waiting for cooling between coats).
This is a weekend project. Minimum. Maybe two weekends.
| Stage | Time Required |
|---|---|
| Lye stripping | 24-72 hours (mostly waiting) |
| Rust removal | 30-60 minutes active |
| Re-seasoning (5 coats) | 12-15 hours (spread over 2-3 days) |
| Total | 3-5 days |
Not a Saturday afternoon project. Plan accordingly.
Stripping Duration by Method
Oven cleaner bag method: 24-72 hours
Lye bath: 2-7 days
Self-clean cycle: 3-4 hours (plus cooldown)
Electrolysis: 12-24 hours
Rust Removal Time
Vinegar soak: 30-60 minutes
Steel wool scrubbing: 15-30 minutes
Combined approach: about an hour total
Quick part of the process.
Re-Seasoning Time Commitment
Each seasoning coat takes about 2.5 hours (application, baking, cooling)
Five coats: 12-13 hours total
Seven coats: 17-18 hours total
Spread over multiple days. Can’t rush chemistry.
Total Project Timeline
Realistically plan for:
- Day 1: Strip (apply oven cleaner, bag it)
- Day 2-3: Wait
- Day 3: Remove gunk, treat rust, apply first 2 seasoning coats
- Day 4: Apply coats 3-4
- Day 5: Apply coats 5-7, done
A week from start to finish if you’re thorough.
Maintaining Your Newly Restored Skillet
After investing days in restoration, proper maintenance prevents future gunk buildup—clean properly after each use, dry thoroughly, maintain the seasoning, and your restored skillet will last another lifetime without needing this process again.
Don’t let it get gunked up again.
First Cooks After Re-Seasoning
Start with fatty foods (bacon, sausage, fried chicken) for the first 5-10 uses to build natural seasoning on top of your oven-applied base—avoid acidic foods like tomato sauce for the first month while the seasoning develops thickness.
Break it in gently. Build up the seasoning through use.
Breaking In Rebuilt Seasoning
Fresh seasoning needs use to reach its full potential—cook regularly for 2-3 months, using adequate fat, and the seasoning will continue improving and becoming more non-stick with each meal.
Gets better with age. Like it should.
Preventing Gunk Buildup in the Future
Prevent future gunk by cleaning after every use (hot water and scrubbing), avoiding overheating that carbonizes oils, and never letting grease or food residue build up even slightly—small amounts of neglected crud are how the gunk cycle starts.
Prevention rules:
- Clean after every use
- Don’t overheat (medium heat is plenty)
- Dry thoroughly every time
- Light oil after cleaning
- Actually use it (builds good seasoning naturally)
Neglect creates gunk. Attention prevents it.
Long-Term Care Strategy
With proper care, your restored skillet will develop beautiful seasoning over years—clean it properly, use it regularly, add maintenance seasoning coats if needed (maybe once a year), and it’ll perform better than when you bought it.
Use it. Care for it. Enjoy it.
That’s the whole point of restoration—bringing it back to life for years of cooking.
Preventing Future Gunk Accumulation
The best way to avoid future stripping is preventing gunk in the first place—understanding what causes buildup and changing habits eliminates the conditions that create those crusty layers.
Learn from the gunk. Don’t repeat the mistakes that created it.
What Causes Years of Buildup
Gunk accumulates from inadequate cleaning (leaving grease and food residue), cooking at too-high temperatures that carbonize oils, applying too much oil during seasoning or storage, and years of these small problems compounding into thick crusty layers.
Gunk creators:
- Not cleaning properly after cooking
- Heat too high (burns and carbonizes everything)
- Too much oil during maintenance
- Letting the pan sit dirty
Fix these habits. No more gunk.
Proper Cleaning After Each Use
Clean your skillet while still warm using hot water and a stiff brush or scrub pad—scrub thoroughly to remove all food particles and grease, and don’t be afraid to use a small amount of soap despite what purists claim (modern dish soap doesn’t hurt seasoning).
Hot water. Scrub brush. Thoroughness.
Actually clean it. Don’t just wipe it out and call it good.
Storage Practices That Prevent Problems
Store cast iron completely dry with a very thin oil coating—ensure good air circulation (don’t stack pans tightly), and keep them in a dry environment away from moisture that could cause rust or create conditions for gunk formation.
Dry storage. Good airflow. Slight oil coating.
When to Do Maintenance Seasoning
Add maintenance seasoning coats when you notice food starting to stick in areas, when you see dull or gray patches appearing, or about once a year as preventive care—catching small issues early prevents major problems.
Yearly maintenance beats future stripping projects.
One coat now prevents hours of work later.
Alternative to Full Stripping: Partial Restoration
If your skillet has gunk in some areas but good seasoning in others, consider partial stripping that targets only problem zones—this saves time while addressing actual issues without redoing what’s working fine.
Surgical approach. Fix what’s broken, keep what works.
When Partial Stripping Makes Sense
Partial stripping works when less than 30% of the skillet has gunk or sticky problems, when the base seasoning is generally good with isolated bad spots, or when you want to preserve well-developed seasoning while fixing specific areas.
Mostly good with some bad spots? Spot-treat.
Targeting Problem Areas Only
Apply oven cleaner or use scraping tools only on gunked or sticky areas, protecting good seasoning with masking or careful application—after removing problem spots, blend them into existing seasoning with targeted re-seasoning coats.
Precision work. Not wholesale stripping.
Blending New and Old Seasoning
After spot-treating problem areas, apply 1-2 full-pan seasoning coats to blend the repairs with original seasoning—this creates more uniform appearance while preserving the good base you already had.
Bridge the old and new. Make it uniform.
Pros and Cons of Partial Approach
Partial restoration saves time and preserves good existing seasoning—but it’s harder to execute cleanly, might leave visible differences between old and new areas, and only works when damage is truly limited to specific zones.
Faster but trickier. Works for the right situations.
Cost Analysis: DIY Stripping vs. Professional Restoration
DIY restoration costs $15-25 in supplies and requires your time investment—professional restoration services cost $50-150 per piece but save you all the labor and mess.
Do it yourself or pay someone?
DIY Supply Costs
Oven cleaner ($5-7), gloves ($3-5), steel wool ($3), vinegar ($3), seasoning oil ($3-8), garbage bags ($2)—total investment around $20-25 for restoring one skillet, with leftover supplies for future projects.
Under $25. Pretty cheap.
Time Investment Value
Your time is worth something—if DIY takes 15-20 hours spread over a week and you value your time at $20/hour, you’re investing $300-400 worth of your time to save $100-125 in professional fees.
Do the math for your situation. Sometimes paying makes sense.
Professional Restoration Services
Cast iron restoration services charge $50-150 depending on size and condition—they strip, de-rust, and sometimes re-season, returning a ready-to-use skillet without you doing any of the messy work.
Google “cast iron restoration near me” if you’re interested.
When to Pay for Professional Help
Consider professional restoration for valuable vintage pieces (where mistakes cost money), when you don’t have space or equipment for DIY, when you value your time highly, or when you have physical limitations that make the work difficult.
High-value pieces? Maybe pay a pro.
Common Lodge you found at a yard sale? DIY it.
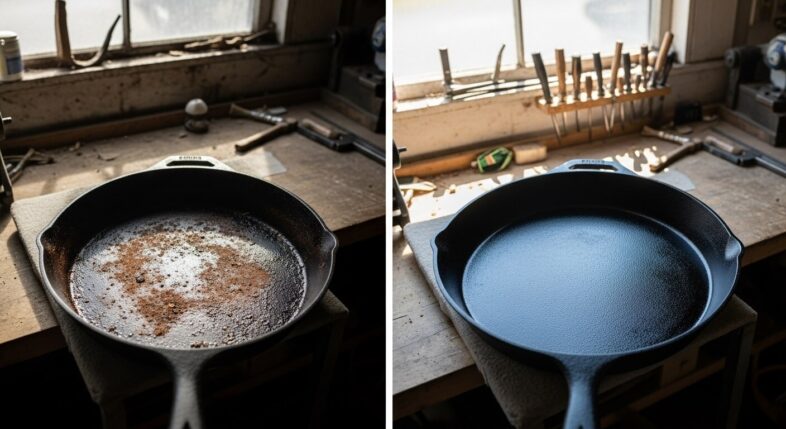
Success Stories: Before and After Transformations
Heavily gunked skillets can be completely restored to excellent condition—I’ve personally restored pans with half-inch of crud that now cook eggs without sticking, and the transformation from disgusting to beautiful is immensely satisfying when you see bare iron emerge from years of neglect.
The transformations are dramatic. Addictive, even.
What to Expect from Heavily Gunked Skillets
Even skillets with extreme gunk (1/4 inch thick crud, sticky tar-like coating, rust showing through) strip down to clean iron and re-season beautifully—the gunk is superficial and the iron beneath is almost always intact and functional.
Worse the starting condition, more dramatic the transformation.
Realistic Transformation Timelines
Light to moderate gunk: 3-4 days total for complete restoration
Heavy gunk: 5-7 days
Extreme cases with rust and damage: up to 2 weeks
Plan accordingly. Patience required.
Performance After Full Restoration
Properly restored skillets often perform better than they ever did—with clean iron and properly-applied seasoning, you’re starting fresh with none of the accumulated problems that plagued the gunked version.
Better than new. Seriously.
Your restored skillet will cook eggs, sear steaks, and bake cornbread beautifully once you’ve finished the process.
Visual Results You Can Achieve
From crusty, sticky, rusty disaster to smooth, dark, properly-seasoned beauty—the visual transformation proves the work was worth it and gives you a sense of accomplishment every time you look at the restored piece.
Before and after photos are stunning. Take them.
Environmental and Disposal Considerations
Responsible restoration includes proper disposal of chemicals—don’t dump lye or other stripping agents down drains, on lawns, or in ways that harm the environment.
Be responsible with chemical waste.
Safely Disposing of Chemical Solutions
Neutralize lye solutions with vinegar before disposal, dilute heavily, then pour down drain or take to hazardous waste facility—never dump concentrated chemicals on grass, gardens, or storm drains.
Neutralize first. Always.
Environmental Impact of Different Methods
Chemical stripping (lye) requires careful disposal but the chemicals themselves are relatively benign when neutralized—self-cleaning oven uses only heat (zero chemical waste), and electrolysis creates minimal waste (dirty washing soda solution can go down the drain).
Heat method is cleanest environmentally. But has other drawbacks.
Reusing or Recycling Stripping Materials
Lye baths can be reused for multiple skillets—the solution stays effective through many uses, and you can add more lye as needed to maintain strength, making it economical and reducing waste for serial restorers.
One lye bath handles multiple pieces over months.
Tools and Supplies Checklist
Before starting restoration, gather everything you need—having supplies on hand prevents mid-project trips to the store and lets you work efficiently.
Shopping list. Get it all before you start.
Must-Have Items for Stripping
Required:
- Lye-based oven cleaner (yellow cap Easy-Off) or pure lye crystals
- Heavy-duty garbage bags or plastic bucket
- Chemical-resistant gloves
- Safety glasses
- Steel wool (0000 grade)
- Stiff brush
Get the yellow cap. Not the blue.
Re-Seasoning Essentials
- Your chosen seasoning oil (canola, vegetable, or Crisco)
- Paper towels or lint-free cloths
- Aluminum foil for drip catching
- Working oven that reaches 450°F
Basic stuff. Nothing exotic.
Optional Tools That Help
- Plastic putty knife for scraping stubborn gunk
- Wire brush for heavy scrubbing
- Vinegar for rust removal and neutralization
- Oven thermometer to verify temperature
- Battery charger for electrolysis (if going that route)
Nice to have. Not required.
Where to Buy Supplies
Hardware stores carry oven cleaner, gloves, steel wool—grocery stores have oils and vinegar—home improvement stores have lye crystals in the drain cleaner section—everything is readily available locally and cheap.
No specialty items. No mail-order needed.
Comparing Restoration to Buying New
Sometimes restoration makes total sense—for vintage pieces, sentimental skillets, or when you enjoy the process—but sometimes buying a new $25 Lodge is smarter than spending 20 hours restoring a gunked-up modern piece.
Be honest about whether restoration is worth it.
When Restoration Makes Sense
Restore when the skillet is vintage and valuable (Griswold, Wagner, collectible pieces), has sentimental value (family heirloom), represents quality unavailable in new pans (smooth vintage iron), or when you genuinely enjoy restoration as a hobby.
Restore if:
- It’s vintage and worth $50+
- Grandma’s skillet
- You enjoy the process
- You want smooth vintage iron
When to Just Buy a New Skillet
Buy new Lodge instead of restoring if your gunked skillet is modern production cast iron with no special value, if you need a pan immediately and can’t wait for restoration, if you don’t enjoy DIY projects, or if your time is worth more than the savings.
Buy new if:
- It’s just a gunked-up modern Lodge
- You need a pan now
- Your time is valuable
- The gunk is too disgusting and you can’t deal
New Lodge is $20-30. Sometimes that’s the smart choice.
Sentimental Value Factor
Sentimental value overrides all practical considerations—if it’s your grandmother’s skillet or carries memories, restore it regardless of time investment or monetary value because the connection matters more than economics.
Family heirloom? Restore it. No debate.
Quality of Old vs. New Cast Iron
Vintage cast iron (pre-1960) is generally smoother, lighter, and better-finished than modern Lodge—if you have good vintage pieces under that gunk, they’re worth restoring because you can’t buy that quality new anymore.
Old Griswold beats new Lodge. Worth the restoration effort.
Modern Lodge beats nothing. But isn’t special enough to justify restoring if it’s heavily gunked.