Why Traditional Oven Seasoning Heats Your Entire House
Traditional oven seasoning requires heating your oven to 450-500°F for multiple hours, which radiates heat throughout your home and makes your kitchen unbearably hot—especially problematic during summer months.
Here’s the thing: oven seasoning works. Nobody’s disputing that. But running your oven at max temperature for 3-4 hours in July? That’s asking a lot.
The Heat Problem With Conventional Seasoning Methods
Oven seasoning generates massive amounts of residual heat that spreads beyond your kitchen, forcing air conditioning systems to work overtime and creating uncomfortable living conditions.
The oven doesn’t just heat the pan. It heats the oven cavity, the oven door, the surrounding cabinets, the air in your kitchen, and eventually your entire house. All that thermal energy has to go somewhere.
In winter? Fine, maybe even helpful. In summer? You’re basically paying to heat your house while simultaneously paying to cool it back down. Makes zero sense.
And if you don’t have central air? You’re sweating through the entire process. Not fun.
Understanding Oven Seasoning Temperature Requirements
Cast iron seasoning requires temperatures between 450-500°F to properly polymerize oil, with most guides recommending 1-2 hours per layer and 3-6 layers for complete coverage.
Why so hot? Polymerization—the chemical process that turns liquid oil into hard, plastic-like seasoning—happens faster and more completely at higher temperatures. You need to exceed the oil’s smoke point significantly.
Most seasoning oils smoke around 400-450°F. To get proper polymerization, you’re aiming for 475-500°F. For multiple layers, you’re looking at 4-6 hours of oven time total.
You should consider alternative seasoning methods during hot weather, in homes without adequate ventilation, when energy costs are high, or when you need to season a pan but can’t dedicate your oven for hours.
Situations where you need alternatives:
Summer months when indoor temps already high
Apartments with poor ventilation
Homes without central AC
When your oven is broken (or occupied with dinner)
Basically, if turning on your oven sounds miserable, you need another option.
Method 1: Stovetop Seasoning to Season Your Skillet Without Heating Your House
Stovetop seasoning uses direct burner heat to polymerize oil on your skillet’s cooking surface, generating significantly less ambient heat than oven methods while still building effective protective layers.
This is the most accessible alternative. If you’ve got a stove, you can do this.
How Stovetop Seasoning Works for Cast Iron
Stovetop seasoning heats only the pan’s bottom surface through direct contact with a burner, allowing the rest of your kitchen to remain cool while still achieving temperatures high enough for oil polymerization.
The burner heats the pan. The pan gets hot enough to polymerize oil. But the heat stays localized—you’re not warming up 5 cubic feet of oven cavity that then radiates into your kitchen for hours.
It’s targeted. Efficient. And way less miserable in summer.
The catch? You’re only directly heating the bottom of the pan. The sides and exterior need special attention (more on that in a minute).
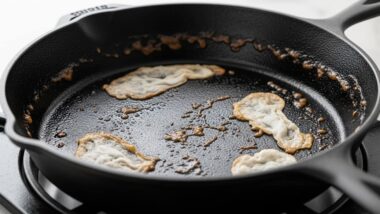
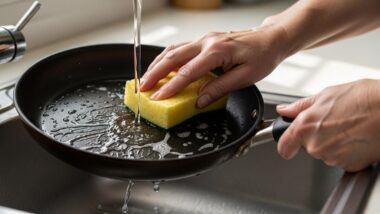
Clean your skillet thoroughly with soap and water, dry completely, and ensure the surface is free from rust, old flaking seasoning, or food residue before beginning the stovetop process.
Start with a clean slate. If you’ve got old crusty seasoning or rust, deal with that first. Scrub it off. Use steel wool if needed. Get down to smooth metal (or smooth existing seasoning if you’re adding layers to an already-decent pan).
Dry it completely. Water and hot oil don’t mix well.
Choosing the Right Oil for Stovetop Application
Use oils with high smoke points like grapeseed (420°F), avocado (520°F), or vegetable oil (400-450°F) for stovetop seasoning, avoiding low smoke point options like butter or olive oil that will burn before polymerizing properly.
Best oils for stovetop seasoning:
Oil Type
Smoke Point
Stovetop Suitability
Notes
Avocado oil
520°F
Excellent
Expensive but handles any heat you throw at it
Grapeseed oil
420°F
Excellent
Great polymerization, affordable
Vegetable oil
400-450°F
Very good
Cheap, works fine, readily available
Canola oil
400°F
Good
Solid budget option
Flaxseed oil
225°F
Poor for stovetop
Burns too easily with direct heat
Flaxseed gets recommended a lot for oven seasoning. Don’t use it on the stovetop. It’ll burn and smoke like crazy before it polymerizes.
Heating and Polymerization on the Burner
Apply a thin layer of oil to the pan’s interior, heat over medium-high until the oil smokes continuously for 5-10 minutes, then reduce heat slightly and maintain smoking temperature for another 10-15 minutes to complete polymerization.
Step by step:
Apply oil to the cooking surface (thin coat, wipe off excess until it looks almost dry)
Place pan on burner, set to medium-high heat
Wait 3-5 minutes for pan to heat up
Oil will start smoking—that’s what you want
Keep it smoking for 10-15 minutes total
The oil will darken, eventually looking dry and matte
Let the pan cool on the burner (turn off heat)
The smoking is the polymerization happening. Don’t panic. It’s supposed to smoke. Just make sure your smoke detector isn’t going to freak out (open a window, turn on the hood vent).
Repeating Layers Without Oven Heat
Allow the pan to cool for 15-20 minutes between layers, then repeat the oil application and heating process 3-6 times to build up adequate seasoning thickness.
Let it cool enough to handle (or use a towel). Apply another thin coat of oil. Heat it up again. Smoke it out. Cool. Repeat.
Three layers minimum. Six is better if you’re starting from bare metal. Each layer adds protection and smoothness.
And here’s what’s great—you can stop between layers to do other stuff. Make lunch. Check email. Whatever. You’re not committed to standing there for 4 straight hours like with oven seasoning.
Advantages of Stovetop Seasoning Over Oven Methods
Stovetop seasoning offers several practical benefits that make it superior for warm weather or energy-conscious situations.
Localized Heat Control and Kitchen Comfort
The burner heats only the pan and immediate air around it, keeping your kitchen 15-25°F cooler than oven seasoning while still achieving proper polymerization temperatures.
This is the main selling point. Your kitchen doesn’t turn into a sauna.
The heat goes into the pan, does its job, and dissipates relatively quickly. There’s no giant metal box radiating 450°F heat in all directions for hours. Your kitchen stays comfortable. Your AC doesn’t run nonstop. You don’t sweat through your shirt.
In summer, this alone makes stovetop worth it.
Faster Cool-Down Times Between Layers
Cast iron on a burner cools to handleable temperatures in 15-20 minutes versus 45-60 minutes when heated in an oven, making the multi-layer process significantly faster overall.
Smaller thermal mass heating up means faster cool-down. Simple physics.
Oven seasoning: heat the pan, heat the oven, wait for everything to cool, repeat. Each cycle takes 90+ minutes.
Stovetop: heat the pan, turn off burner, wait 20 minutes, go again. Each cycle takes maybe 40 minutes.
You can finish 3-4 layers in the time oven seasoning takes for 1-2 layers.
Better Visibility During the Seasoning Process
Watching the pan directly on the stovetop lets you monitor oil color, smoke production, and polymerization progress in real-time, unlike oven seasoning where the pan is hidden behind a closed door.
You can see what’s happening. If the oil starts smoking too aggressively, you dial back the heat immediately. If it’s not smoking enough, you bump it up.
With oven seasoning, you set it and hope. You can’t adjust mid-cycle without opening the oven (which releases all that heat into your kitchen anyway).
Visual feedback makes the process more controllable and less mysterious.
Limitations and Challenges of Stovetop Seasoning
Nothing’s perfect. Stovetop seasoning has real drawbacks you should know about.
Uneven Heat Distribution Issues
Burners heat the pan’s center more intensely than the edges, creating darker, thicker seasoning in the middle and thinner, lighter seasoning toward the rim.
This is the big problem with stovetop. Heat concentrates where the burner contacts the pan. The edges get less heat. Result? Uneven seasoning development.
The center might look perfect—dark, glossy, well-polymerized. The rim might be barely seasoned at all.
You can work around this (rotating the pan, using multiple burners, etc.). But you can’t eliminate it completely. The physics don’t allow for perfectly even heating on a stovetop.
Difficulty Seasoning the Exterior and Handle
Direct stovetop heat doesn’t reach the pan’s exterior walls or handle, leaving these areas unprotected unless you use additional techniques or accept partial coverage.
The bottom gets seasoned. The cooking surface gets seasoned. The outside? Not so much.
For some people, that’s fine. The outside doesn’t touch food anyway. But if you want complete protection (or if you care about aesthetics), stovetop-only won’t cut it.
You’d need to flip the pan, prop it at angles, or use other creative methods. Possible, but awkward.
Managing Smoke Without Ventilation Problems
Stovetop seasoning produces substantial smoke that can overwhelm kitchen ventilation systems, trigger smoke alarms, and linger in your home if you don’t have adequate exhaust capability.
That smoke has to go somewhere. If your hood vent is weak or you don’t have one, your kitchen fills with smoke. Then your living room. Then the bedrooms.
Smoke detectors start screaming. Your eyes water. The dog hides. Your neighbors wonder if you’re okay.
Smoke management requirements:
Strong hood vent running on high
Open windows for cross-ventilation
Nearby doors closed to contain smoke
Disabled or covered smoke detectors (but stay in the room—don’t actually cause a fire)
If you can’t manage the smoke, stovetop seasoning becomes impractical fast.
Tips for Maximizing Stovetop Seasoning Results
Make it work better with these tricks.
Rotating the Pan for Even Coverage
Turn the pan 90-180 degrees every 3-4 minutes during heating to distribute heat more evenly across the cooking surface and minimize the center-heavy seasoning pattern.
Simple fix. Doesn’t eliminate the problem entirely, but it helps.
Heat for 3 minutes. Rotate a quarter turn. Heat for 3 more minutes. Rotate again. The heat exposure evens out somewhat.
You’ll still get some variation, but it’s less dramatic than leaving it stationary.
Using Multiple Burners for Larger Skillets
For skillets 12 inches or larger, heat over two adjacent burners simultaneously to improve heat distribution and reduce the intensity of the center hot spot.
Big pan, small burner = terrible heat distribution.
Big pan, two burners = much better.
If you’ve got a 12-inch or 14-inch skillet, straddle it across two burners set to medium. The heat spreads out. You get more even seasoning. The center doesn’t get nuclear while the edges stay cool.
Just make sure both burners are set to similar temperatures.
Optimal Timing and Temperature Control
Start at medium-high heat until smoking begins, then reduce to medium to maintain continuous smoking without overheating, adjusting as needed to keep smoke production steady but not excessive.
Too hot = smoking so hard you can’t see, oil burns instead of polymerizing properly.
Too cool = oil sits there getting warm but not smoking, minimal polymerization.
Just right = steady smoke production, you can still breathe, oil is clearly transforming.
You’ll probably need to adjust the heat 2-3 times during each layer as the pan temperature changes. That’s normal. Stay with it and make small adjustments.
Method 2: Grill Seasoning – Season Your Skillet Outdoors Without Indoor Heat
Grill seasoning moves the entire process outside by using your gas, charcoal, or pellet grill as an outdoor oven, eliminating all indoor heat while providing complete pan coverage including exterior surfaces.
Take it outside. Problem solved.
Why Outdoor Grilling Works for Skillet Seasoning
Grills reach and maintain the 450-500°F temperatures needed for polymerization while keeping all heat, smoke, and odors outside your home, making them functionally equivalent to oven seasoning without the indoor comfort issues.
A grill is basically an outdoor oven. It gets hot. It maintains temperature. It has enough space for a skillet. The physics are identical to oven seasoning.
Except all the heat stays outside. Your kitchen stays cool. Your AC doesn’t fight a losing battle. You’re not sweating. Your house doesn’t smell like burning oil for three days.
Best of both worlds—proper seasoning plus a comfortable house.
Setting Up Your Grill for Cast Iron Seasoning
Different grill types need different approaches, but all can work.
Gas Grill Setup and Temperature Control
Preheat your gas grill to 450-475°F with all burners on medium-high, place the oiled skillet on the grate away from direct flame, close the lid, and adjust burners to maintain steady temperature throughout the process.
Gas grills are the easiest for this. They’re basically outdoor ovens already.
Turn on all burners to medium-high. Close the lid. Wait 10-15 minutes until the thermometer reads 450-475°F. Put your oiled pan on the grate (not directly over a burner if possible—indirect heat works better). Close the lid. Monitor temperature.
Adjust burners as needed to hold steady temp. Most gas grills overshoot initially, then you dial back to maintain.
Charcoal Grill Configuration for Even Heating
Arrange hot coals in a two-zone setup with most coals on one side, place the skillet on the cooler side for indirect heat, and adjust vents to maintain 450-475°F on a grill thermometer.
Charcoal takes more finesse but works great once dialed in.
Light a full chimney of charcoal. When ashed over, dump most of them to one side of the grill. Leave the other side empty or with just a few coals. That’s your two-zone setup.
Put the skillet on the cool side. The hot coals radiate heat, creating oven-like conditions. Close the lid. Adjust top and bottom vents to hit your target temp.
Vent settings for temperature control:
Too hot (500°F+) — close bottom vent halfway, close top vent slightly
Too cool (under 425°F) — open both vents fully, add a few coals if needed
Just right (450-475°F) — maintain current vent positions
Pellet Grill Options for Low-Maintenance Seasoning
Set your pellet grill to 450-475°F, place the oiled skillet on the grate, and let the automatic temperature control maintain consistent heat for hands-off seasoning.
Pellet grills are sneaky good for this. Set the temp, walk away, come back in an hour.
The auger feeds pellets automatically. The controller maintains temperature. You just monitor occasionally to make sure nothing’s gone sideways.
Easiest of the three grill options. Also the most expensive if you don’t already own one.
Complete Grill Seasoning Process
Here’s the full outdoor approach.
Preparing Your Skillet for Outdoor Seasoning
Clean and dry your skillet completely before taking it outside, ensuring no moisture remains that could cause dangerous flare-ups when the oiled pan heats up.
Same prep as any seasoning method. Clean, dry, ready to go.
Do this inside before heading out. Don’t try to wash your pan at the grill. That’s awkward and you’re just asking to drop it.
Oil Application Techniques for Grill Seasoning
Apply oil in a thin, even layer to all surfaces including the exterior and handle, then wipe aggressively with paper towels until the pan looks almost dry—excess oil will create sticky, unpolymerized spots.
Thin means thin. Like, “did I even put oil on this?” thin.
Apply with a paper towel or cloth. Rub it everywhere—inside, outside, handle, everything. Then take a clean paper towel and wipe like you’re trying to remove it all. What’s left is the right amount.
Too much oil is the #1 mistake in any seasoning method. The grill won’t fix that.
Achieving Proper Temperature on the Grill
Use an oven thermometer placed near the skillet to verify actual grate-level temperature, as built-in grill thermometers often read 25-50°F higher than the actual cooking surface temperature.
Grill lid thermometers lie. They’re measuring temperature at the lid level, which is hotter than the grate where your pan sits.
Get a cheap oven thermometer (the kind that stands or hangs). Put it right next to your skillet. That’s your real temperature.
Adjust your grill settings based on that reading, not the lid gauge.
Monitoring and Adjusting During the Process
Check the skillet every 15-20 minutes to verify proper polymerization progress, looking for a matte, dry finish rather than wet or shiny oil that indicates insufficient heat or excess application.
You should see changes:
0-15 minutes: oil looks wet, might be smoking
15-30 minutes: oil starts drying out, darkening
30-45 minutes: surface looks dry and darker
45-60 minutes: clearly polymerized, matte finish
If it still looks wet at 30 minutes, your temp is too low. Bump it up.
If it’s smoking violently from the start, you used too much oil or your temp is too high.
Benefits of Grill Seasoning Your Skillet
Why the grill wins in specific situations.
Zero Indoor Heat and Kitchen Comfort
Grill seasoning keeps your home’s temperature completely unaffected by the seasoning process, making it the absolute best option for hot weather or homes without air conditioning.
This is the complete solution to the whole-house heating problem. Zero heat enters your home. Period.
Your kitchen is comfortable. Your living room is comfortable. Your bedroom is comfortable. You can season six pans in succession on a 95°F day and your house stays cool.
Can’t beat that.
Complete Pan Coverage Including Exterior
The surrounding heat in a closed grill seasons the entire pan uniformly, including exterior walls and handles that stovetop methods can’t reach effectively.
Unlike stovetop, the grill heats from all directions. Hot air surrounds the pan. Everything gets seasoned—inside, outside, handle, every surface.
The result looks more professional. More complete. More like factory seasoning or proper oven seasoning.
If you care about the exterior (and you should—it needs protection from rust too), grilling delivers.
Natural Ventilation for Smoke Management
All smoke vents into the outdoor environment naturally, eliminating concerns about indoor air quality, smoke alarms, or lingering odors in your home.
Smoke doesn’t matter outside. It dissipates. Drifts away. Doesn’t set off alarms. Doesn’t stink up your curtains. Doesn’t make your eyes water.
You can season in peace without feeling like you’re hotboxing your kitchen.
Potential Drawbacks of Grill Seasoning Method
Nothing’s perfect. The grill method has issues too.
Weather Dependency and Seasonal Limitations
Rain, high winds, extreme cold, or excessive heat can make grill seasoning impractical or impossible, limiting this method to favorable weather conditions.
Can’t grill in a thunderstorm. Shouldn’t grill in 20 MPH winds (temperature control becomes impossible). Winter grilling in subzero temps is miserable and burns through fuel.
This method only works when weather cooperates. That’s fine in spring and fall. Potentially problematic other times.
Temperature Consistency Challenges
Outdoor temperature fluctuations, wind, and varying fuel consumption make maintaining steady 450-475°F more difficult on a grill than in a temperature-controlled oven.
Grills aren’t precision instruments. The temp bounces around. Wind cools things down. Clouds block sun and drop ambient temps. Charcoal burns down. Propane tank pressure varies.
You’re constantly adjusting. It’s not set-and-forget like an oven.
Gas grills are most consistent. Pellet grills are second. Charcoal requires the most attention.
Extended Process Time Requirements
Grill heat-up, monitoring, and cool-down times typically extend the process 30-60 minutes beyond equivalent oven seasoning, especially with charcoal grills that require fire building.
Getting charcoal ready takes 20-30 minutes before you even start. Gas grills need 10-15 minutes preheat. Then there’s the actual seasoning time. Then waiting for things to cool before adding the next layer.
It’s not fast. If you’re doing multiple layers, budget 3-5 hours for the full process.
Still better than heating your house, though.
Best Practices for Grill Seasoning Success
Make it work better.
Temperature Monitoring Tools and Techniques
Use multiple thermometers—one near the skillet and one at the opposite end of the grill—to verify even heat distribution and adjust burner or coal placement as needed.
Two thermometers tell you if you’ve got hot spots. If one reads 475°F and the other reads 400°F, your heat distribution needs work.
Move the pan to the hotter zone. Adjust burners. Rearrange coals. Fix the problem before you waste an hour on suboptimal seasoning.
Multiple Layer Application on the Grill
Apply 3-6 thin layers with 60-90 minute intervals between each, allowing the pan to cool enough to handle before applying fresh oil and returning it to the grill.
Same multi-layer approach as oven seasoning. One layer isn’t enough.
The cool-down between layers takes longer with a grill because you’re working outdoors and the pan cools slower in warm ambient temps. Be patient.
Or bring the pan inside to cool faster between layers (just don’t heat it back up inside—that defeats the whole purpose).
Dealing With Temperature Fluctuations
Accept that grill temperatures will vary by 25-50°F during the process and focus on maintaining average temps in the 425-500°F range rather than obsessing over exact numbers.
Perfect consistency isn’t happening. Don’t stress about it.
As long as you’re mostly in the 450-475°F range, polymerization will occur. Brief dips to 425°F or spikes to 500°F won’t ruin anything.
Adjust when you can, but don’t micromanage every 5-degree fluctuation.
Method 3: Natural Seasoning Through Cooking – Build Layers Without Dedicated Heating
Cooking-based seasoning builds protective layers gradually through regular use rather than dedicated seasoning sessions, generating only normal cooking heat that doesn’t warm your whole house like oven seasoning does.
This isn’t technically “seasoning your pan.” It’s using your pan and letting seasoning happen as a side effect.
But it works. And it generates zero extra heat.
How Cooking-Based Seasoning Avoids Whole-House Heating
Regular cooking uses burner heat for 15-45 minutes at a time rather than oven heat for 3-4 hours, producing minimal ambient kitchen warming while still depositing thin seasoning layers with each meal.
When you cook dinner, you’re heating one burner for maybe 20 minutes. That’s not enough to warm up your whole house (unless you’re searing steaks at maximum heat with inadequate ventilation, which is a different problem).
Compare that to oven seasoning’s hours-long heat output. Not even close.
You’d have to cook 8-10 meals to generate the same total heat as one oven seasoning session. And those meals are spread across different days, different times, with your house cooling between each one.
The cumulative heat exposure to your home is way lower.
The Science of Building Seasoning Through Regular Use
Cooking naturally replicates the seasoning process whenever you heat oil above its smoke point, making every high-heat meal a micro-seasoning session.
Polymerization During Normal Cooking Temperatures
Stovetop cooking for searing, sautéing, or stir-frying reaches 375-500°F—exactly the temperature range needed for oil polymerization—meaning these everyday cooking methods actively build seasoning.
Searing a steak? Your pan hits 450-500°F. Oil smokes. Polymerization happens. You’re seasoning while you cook.
Stir-frying vegetables? 450-500°F easy. Smoking oil. More polymerization. More seasoning.
Even medium-high sautéing hits 375-425°F. That’s borderline for polymerization, but it’s still contributing something.
The chemistry doesn’t care whether you’re “seasoning” or “cooking dinner.” It just responds to heat and oil.
How Everyday Fats Create Protective Layers
Each cooking session deposits microscopic polymerized layers that accumulate over weeks and months, eventually creating seasoning comparable to deliberate oven or stovetop seasoning applications.
One meal = one very thin layer. Barely noticeable.
Fifty meals = fifty very thin layers. Now we’re talking. The accumulation matters.
After 3-6 months of regular cooking, you’ve built legitimate seasoning. Not as fast as dedicated sessions, but you got there without special effort.
Accelerated Cooking Seasoning Techniques
You can speed this up with strategic choices.
High-Heat Stovetop Methods That Build Layers Fast
Searing meat, stir-frying, and pan-frying at 450-500°F deposit thicker seasoning layers per session than gentle cooking methods, accelerating the development timeline significantly.
Not all cooking is equal for seasoning purposes.
Cooking methods ranked by seasoning contribution:
Searing steaks/chops — Maximum heat, lots of fat, excellent seasoning
Stir-frying — High heat, oil everywhere, great for seasoning
Pan-frying chicken — Moderate heat but lots of fat and time
Sautéing vegetables — Decent if done hot enough with adequate oil
Scrambling eggs — Minimal contribution, too gentle
Simmering sauce — Basically nothing, might even damage new seasoning
Focus on the top three if you’re trying to build seasoning fast.
Strategic Food Choices for Maximum Seasoning Benefit
Fatty proteins like bacon, skin-on chicken thighs, and sausages release grease during cooking that enhances seasoning development beyond what the cooking oil alone provides.
Best foods for building seasoning while eating:
Bacon (the king—renders tons of fat at perfect temps)
Skin-on chicken thighs (fat renders from skin during cooking)
Sausages (similar to bacon, continuous fat release)
Burgers (ground beef releases fat, high heat searing)
Pork chops with fat cap
Any protein you’re searing hard
These foods are basically self-seasoning. They maintain your pan while feeding you.
Frequency and Consistency for Quick Development
Cooking 5-7 times per week builds functional seasoning within 2-3 months, while cooking 2-3 times weekly extends the development timeline to 6-9 months for comparable results.
Daily cooking is the fast track. Your pan gets better every single day. The improvement is visible week to week.
Couple times a week? Still works, just slower. You’ll get there eventually.
Once a week? Too slow. You’re barely maintaining existing seasoning, not really building new layers effectively.
Step-by-Step Cooking Seasoning Approach
How to actually do this.
Starting With a Basic Initial Layer
Apply 1-2 stovetop or grill seasoning layers as a foundation to prevent rust and sticking, then let regular cooking build additional layers from that baseline.
Don’t start from completely bare metal. Give yourself a foundation.
One or two quick stovetop seasoning layers takes 90 minutes total. Not a huge time investment. But it gives you a base that prevents rust and makes early cooking less frustrating.
Then start cooking normally. Let the layers accumulate.
Foods That Build Seasoning Most Effectively
Begin with fatty, high-heat foods like bacon, sausages, and seared steaks for the first month to accelerate layer development before graduating to more challenging foods.
Week 1-4: Easy stuff that builds seasoning fast. Bacon every weekend. Seared proteins 3-4 times per week. Stir-fries when possible.
You’re building layers quickly. The pan is getting noticeably better.
Week 5-8: Add sautéed vegetables, pan-fried chicken, burgers. Still mostly high-fat or high-heat, but more variety.
Week 9-12: Now you can start trying trickier things like eggs or delicate fish. Your seasoning should handle it.
Creating a Cooking Schedule for Layer Development
Plan 4-6 high-heat meals per week for the first 2-3 months, ensuring each cooking session uses adequate fat and reaches temperatures above 400°F for optimal layer building.
That’s five high-quality seasoning sessions in a week. Do that for 8-12 weeks and your pan will be well-seasoned.
Progressing From Easy to Challenging Foods
Start with foods that don’t stick easily (fatty meats, vegetables in oil) and gradually introduce challenging items (eggs, fish, pancakes) as seasoning develops over months.
Don’t try to cook eggs in week one. You’ll hate cast iron forever.
Wait until month 2-3. By then your seasoning can handle it (with proper technique—you still need adequate heat and fat).
Same with fish. Same with pancakes. These are graduation-level foods. Earn your way there.
Why Cooking Seasoning Doesn’t Heat Your Whole House
This is the core advantage for the heat-averse.
Localized Burner Heat vs. Whole Oven Heat
A single stovetop burner running for 20 minutes produces approximately 1/10th the total heat output of an oven running at 475°F for one hour, making the cumulative heat impact minimal.
Math time. One burner at high for 20 minutes = maybe 6,000 BTUs total heat into your kitchen.
One oven at 475°F for an hour = 60,000+ BTUs radiating into your kitchen.
Even cooking 10 meals generates less total heat than one oven seasoning session.
Shorter Duration Compared to Multi-Hour Oven Sessions
Individual cooking sessions last 15-45 minutes rather than the 3-6 hour commitment of oven seasoning, giving your kitchen time to cool completely between each layer-building session.
Short bursts of heat don’t accumulate like sustained heat does.
Cook dinner for 25 minutes. Burner shuts off. Kitchen cools down over the next hour. Totally normal.
Versus: Oven runs for 4 hours straight. Kitchen never cools down. Heat builds and builds. Miserable.
The thermal recovery time between cooking sessions keeps your house comfortable.
Natural Kitchen Ventilation During Cooking
Normal cooking already requires some ventilation for steam and cooking odors, so the smoke from high-heat seasoning-building meals doesn’t create additional ventilation demands beyond your usual cooking routine.
You’re already running the hood vent when you cook, right? (Please say yes.)
So the smoke from searing a steak isn’t a special burden. It’s part of normal cooking. Your ventilation setup already handles it.
Versus dedicated seasoning sessions where you’re producing smoke continuously for an hour with no food benefit, no meal to show for it—that feels wasteful and annoying.
Advantages of the Cooking-Based Seasoning Method
Why some people prefer this approach entirely.
No Dedicated Seasoning Time Required
Cooking seasoning requires zero additional time investment because layer building happens during meals you’re preparing anyway, making it the most time-efficient approach despite slower development.
You’re cooking anyway. The seasoning is free. No extra time spent standing over a smoking pan or babysitting a grill.
From a pure time-efficiency perspective, this wins. Even though it takes longer in calendar time, your active time investment is zero beyond normal cooking.
Functional Use While Building Protection
The pan serves its primary purpose of cooking food from day one rather than sitting unused until a multi-step seasoning process completes, providing immediate value while improvement continues.
A pan going through 6 layers of oven seasoning sits idle for days. It’s not cooking anything. It’s just consuming time and energy.
A pan being seasoned through cooking is feeding you every time it gets better. You’re getting value immediately.
Plus you’re learning how to actually cook with cast iron while the seasoning develops. By the time it’s fully seasoned, you’re also skilled at using it.
Self-Correcting and Continuous Improvement
Minor seasoning damage from acidic foods or aggressive cleaning repairs itself automatically during subsequent cooking sessions, unlike dedicated seasoning that must be perfect or requires complete redoing.
Scrape off a bit of seasoning while cleaning? Next three meals fix it.
Cook something slightly acidic and damage a small area? Next week of cooking repairs it.
The seasoning is constantly renewing itself. Small problems disappear without intervention.
Most Energy-Efficient Seasoning Approach
Cooking seasoning uses energy that was already going to be expended on meal preparation, adding zero additional energy consumption compared to dedicated seasoning sessions that serve no purpose beyond pan maintenance.
You’re eating dinner regardless. Using that heat to season your pan costs nothing extra.
Dedicated seasoning sessions—whether oven, stovetop, or grill—consume energy solely for pan maintenance. That’s an additional expense.
From a purely economic and environmental perspective, cooking wins.
Limitations of Relying Solely on Cooking for Seasoning
Real talk about the downsides.
Slower Initial Development Period
Building functional seasoning through cooking alone takes 2-4 months of regular use versus 4-6 hours for dedicated oven seasoning, making this approach impractical if you need immediate results.
If you just bought a bare cast iron pan and want to use it properly tomorrow, cooking seasoning won’t cut it.
You need at least a basic foundation layer. Bare metal is too prone to rust and sticking.
Most people should do 1-3 initial seasoning layers through stovetop or grill methods, then switch to cooking maintenance. Pure cooking-from-scratch is the slow road.
Uneven Coverage in Early Stages
Foods typically cook in the pan’s center, creating thicker seasoning in high-use areas while edges and sides develop slower, resulting in visible color variation for several months.
Your center will be dark and slick after 6 weeks. Your edges might still be bronzy and thin.
Eventually it evens out (mostly). But it looks weird for a while.
If aesthetics matter to you, this will bother you. If you only care about function, it’s whatever.
Requires Consistent Cooking Frequency
Infrequent cooking (less than 3 times weekly) extends development timelines dramatically and may allow existing seasoning to degrade between sessions, making this method unreliable for occasional cooks.
This only works if you actually cook regularly. Like, really regularly.
Cook twice a month? This method will take years to build decent seasoning. Literally years.
You need consistent use. Minimum 3-4 times weekly. Daily is way better.
Optimizing Your Cooking Routine for Faster Seasoning
Speed it up within the cooking framework.
Best Cooking Methods for Layer Building
Prioritize searing, stir-frying, and pan-frying over braising, simmering, or baking to maximize polymerization during everyday cooking sessions.
Every meal doesn’t have to be high-heat. But if half your meals are, your seasoning develops twice as fast.
Make conscious choices. Choose stir-fry over soup. Choose seared chicken over baked chicken. Choose pan-fried over steamed.
Not every time. Just often enough to keep the layers building.
Ideal Temperature Ranges and Fat Amounts
Cook at medium-high to high heat (400-500°F) using 1-2 tablespoons of cooking fat minimum to ensure adequate polymerization and complete surface coverage during each session.
Skimping on fat slows seasoning development. You need enough oil to coat the entire cooking surface.
Low temps don’t build seasoning effectively. Medium or below is mostly neutral—not helping much, not hurting much.
Crank the heat. Use adequate fat. That’s the formula.
Avoiding Foods That Damage New Seasoning
Skip acidic tomato sauces, wine-based braises, and extended simmering for the first 2-3 months while foundational layers establish, then gradually introduce these foods as seasoning matures.
After 3-4 months of building layers, these become less problematic. But early seasoning is vulnerable.
Comparing the 3 Methods: Which Way to Season Without Oven Heat is Best
Let’s break down how these actually stack up against each other.
Heat Generation Comparison Across All Three Methods
Method
Indoor Heat Impact
Kitchen Temp Increase
Summer Viability
Stovetop seasoning
Low to moderate
5-15°F
Good with ventilation
Grill seasoning
Zero
0°F
Excellent
Cooking seasoning
Minimal
3-8°F per session
Excellent
Grill wins for absolute zero indoor heat. Cooking seasoning is second. Stovetop is third but still way better than oven.
Time Investment for Each Seasoning Approach
Stovetop seasoning: 2-3 hours for 3-6 layers (all in one session if desired)
Grill seasoning: 3-5 hours for 3-6 layers (including heat-up and cool-down)
Cooking seasoning: Zero dedicated time, but 2-4 months of calendar time for full development
Depends on whether you value active time or calendar time more.
Quality and Durability of Seasoning Results
Grill seasoning produces the most complete, even coverage comparable to oven seasoning. Stovetop creates functional but potentially uneven coverage. Cooking seasoning eventually matches or exceeds other methods but takes months to reach that point.
For immediate, professional-looking results: Grill
For quick functional seasoning: Stovetop
For best long-term performance: Cooking (but you wait for it)
Convenience and Accessibility Factors
Most convenient: Cooking seasoning (happens automatically)
Most accessible: Stovetop seasoning (everyone has a stove)
Least hassle: Grill seasoning (if you own a grill and weather cooperates)
What you have access to matters more than theoretical best practices.
Seasonal Considerations for Each Method
Summer: Grill or cooking methods strongly preferred, stovetop acceptable with good ventilation
Spring/Fall: Any method works fine, weather supports grilling
Winter: Stovetop or cooking preferred (cold weather grilling is miserable), oven heat might even be welcome
Match your method to the season and you’ll be way happier with the process.
Hybrid Approach: Combining Methods to Season Your Skillet Efficiently
Why choose one? Use different methods strategically.
Using Stovetop for Initial Layers, Cooking for Maintenance
Apply 2-3 stovetop seasoning layers to create a rust-resistant foundation, then build additional layers through regular high-heat cooking for a time-efficient hybrid approach.
This is probably the best strategy for most people.
Spend 90 minutes doing stovetop seasoning. Get a solid base. Your pan is immediately functional.
Then just cook normally. Let the seasoning build from there. No more dedicated sessions needed.
You get quick initial results plus long-term improvement through use. Win-win.
Starting With Grill Seasoning, Continuing With Regular Use
Complete 3-6 grill seasoning layers during favorable weather for comprehensive initial coverage, then rely on cooking maintenance to refresh and add layers over time.
If you’re setting up a new pan in May or September, grill seasoning is perfect. Weather’s nice. Heat doesn’t matter. You get complete coverage.
Then you’re done with special seasoning. Just cook. The grill gave you such a good foundation that cooking maintenance handles everything from there.
Strategic Method Selection Based on Weather and Schedule
Use grilling during cool evenings or weekends when time permits, stovetop for quick weeknight re-seasoning of problem spots, and cooking for ongoing daily maintenance.
You don’t have to commit to one method forever.
Nice evening and you’ve got time? Grill a layer onto your pan.
Rushed Tuesday night? Just cook dinner, let that handle it.
Got a sticky spot that needs attention? Quick stovetop session targeted at that area.
Be flexible. Use what works for your situation.
Common Mistakes When Seasoning Without an Oven
Don’t screw this up.
Using Too Much Oil in Alternative Methods
Excess oil creates thick, sticky, unpolymerized layers that feel tacky and perform poorly, a problem that’s worse with stovetop and grill methods because you can’t rely on oven heat to slowly burn off extra oil.
The “wipe it on, wipe it off” rule applies double for non-oven methods.
Thick oil = gummy mess. Always. The method doesn’t matter.
Apply oil. Wipe it off aggressively. What remains is plenty. If you can see obvious wetness, you’ve used too much.
Insufficient Heat Leading to Poor Polymerization
Running stovetop burners on medium or grills at 375°F doesn’t generate enough heat for complete polymerization, creating soft, easily damaged seasoning that wears off quickly.
You need real heat. 450°F minimum. 475°F is better.
“Medium heat” doesn’t cut it. “Pretty warm” isn’t enough. You need smoking oil, proper polymerization temperatures, the whole deal.
Don’t be timid with the heat. Go hot or don’t bother.
Rushing the Process and Skipping Layers
Applying only 1-2 layers produces thin, fragile seasoning that’s easily damaged during cooking, wasting the time invested in seasoning and requiring frequent repair.
One layer is never enough. I don’t care what method you’re using.
Three layers minimum. Six is better. More is fine too.
Each layer adds durability. Skipping layers to “save time” just means you’ll spend that time later fixing damaged seasoning.
Inadequate Ventilation During Stovetop Seasoning
Insufficient smoke management fills your home with smoke regardless of not using the oven, defeating the purpose of avoiding whole-house heating by creating whole-house smoke instead.
If you fill your house with smoke, you haven’t actually solved the problem. You’ve just traded one discomfort for another.
Strong vent hood or open windows are non-negotiable for stovetop seasoning. If you can’t manage the smoke, choose a different method.
Ignoring Exterior Seasoning Needs
Focusing only on the cooking surface while leaving the exterior bare creates rust problems and incomplete protection, particularly problematic with stovetop methods that naturally neglect exterior surfaces.
The outside of your pan matters too. It’s iron. It rusts.
If you’re using stovetop seasoning, you need to manually address the exterior (flip the pan, prop it at angles, or just accept that you’ll do a grill session occasionally for complete coverage).
Or switch to grilling/cooking methods that handle the exterior better.
Troubleshooting Alternative Seasoning Methods
When things go wrong.
Dealing With Sticky Residue From Stovetop Seasoning
Sticky seasoning from stovetop application indicates too much oil or insufficient heat—fix by heating the pan on medium for 10-15 minutes to complete polymerization or scrubbing off the tacky layer with coarse salt.
Tackiness is fixable. Don’t panic.
Option 1: Heat it out. Put the sticky pan back on the burner, medium heat, 10-15 minutes. Often the incomplete polymerization will finish and the stickiness disappears.
Option 2: Scrub it off. Salt and a paper towel. Remove the gummy layer. Start over with less oil.
Fixing Uneven Coverage From Grill Seasoning
Uneven grill seasoning results from hot spots or poor heat circulation—correct by using a two-zone setup, positioning the pan away from direct heat, or rotating it every 20 minutes during the process.
Hot spots create dark, over-seasoned areas next to light, under-seasoned areas.
Move the pan around. Don’t leave it in one spot the whole time. Every 15-20 minutes, rotate or relocate it.
Use indirect heat zones. Don’t put the pan directly over flames or coals.
Addressing Slow Progress With Cooking-Only Method
If cooking seasoning shows minimal improvement after 6-8 weeks, increase cooking frequency to 5-7 times weekly, raise cooking temperatures, and add more fatty/high-heat meals to accelerate layer development.
Not building layers fast enough? You’re probably not cooking hot enough or often enough.
Quick diagnostic:
Cooking less than 4 times per week? That’s your problem—increase frequency
Using mostly medium or low heat? Bump it up—cook hotter
Minimal fat in your cooking? Add more oil—seasoning needs fat
Fix whichever applies and you’ll see faster progress.
Managing Excessive Smoke During Indoor Methods
Excessive smoke from stovetop seasoning means too much oil, too-high heat, or inadequate ventilation—reduce oil amount, lower burner to medium-high, and improve airflow before continuing.
Smoke should be steady but not overwhelming. If you literally can’t see across your kitchen, something’s wrong.
Cut the heat back slightly. Make sure you wiped off excess oil. Open more windows. Run the vent harder.
Don’t just suffer through it. Adjust the variables.
Tools and Materials for Seasoning Without Whole-House Heat
What you actually need.
Essential Oils for All Three Methods
Stock grapeseed, avocado, or vegetable oil for their high smoke points and reliable polymerization, avoiding specialty oils like flaxseed that create brittle seasoning or low-smoke-point options that burn before polymerizing.
Recommended oils:
Grapeseed oil (best bang for buck)
Avocado oil (handles highest heat)
Generic vegetable oil (cheap and effective)
Canola oil (fine, works well enough)
Skip these:
Flaxseed oil (too brittle, flakes off)
Olive oil (smoke point too low)
Butter (smokes way too early)
Coconut oil (wrong type of fat for seasoning)
Ventilation Solutions for Indoor Seasoning
Use a high-power range hood (minimum 300 CFM), open windows on opposite sides of the kitchen for cross-ventilation, and consider a box fan in the window to actively exhaust smoke outside.
Your built-in hood vent might not be enough. Especially in apartments where they’re often decorative rather than functional.
Add a window fan if needed. Aim it outward to pull smoke out. Creates negative pressure that helps.
Open windows on both sides of the room if possible. Cross-breeze helps clear smoke faster.
Temperature Monitoring Equipment
Buy an infrared thermometer for instant surface temperature readings, an oven thermometer for grill monitoring, or both for comprehensive temperature control across all seasoning methods.
Useful temp tools:
Infrared thermometer ($15-30) — point and shoot surface temp readings
Oven thermometer ($5-10) — sits on grill grate for actual cooking zone temp
Grill thermometer with probe ($30-50) — if you’re serious about grill seasoning
You don’t need all of these. But having at least one helps dramatically with heat control.
Application Tools and Wiping Materials
Use lint-free paper towels, clean cotton rags, or dedicated microfiber cloths for oil application, avoiding regular towels that leave fibers or printed paper towels that can transfer ink.
Paper towels work fine for most people. Grab a bunch, apply oil, wipe it off, toss them.
If you’re eco-conscious, get some cheap cotton rags. Wash and reuse. They work better anyway—more durable, can scrub harder.
Avoid anything that sheds lint. Avoid anything with printing that might transfer to your pan (some cheap paper towels do this).
Safety Equipment and Protective Gear
Keep heavy-duty oven mitts or welding gloves nearby for handling 500°F pans, use safety glasses if oil splattering occurs, and have a fire extinguisher accessible when working with smoking oil at high temperatures.
Hot cast iron will absolutely destroy regular potholders. They’ll smoke, maybe catch fire, definitely get ruined.
Get real oven mitts rated for high heat. Or welding gloves if you’re handling the pan a lot—they give better dexterity.
Fire extinguisher should already be in your kitchen anyway. If it’s not, fix that now.
Environmental and Energy Considerations
Worth thinking about.
Energy Consumption: Stovetop vs. Grill vs. Oven
Gas stovetops use approximately 7,000-9,000 BTU/hour per burner, gas grills use 20,000-40,000 BTU/hour but outdoors where waste doesn’t matter, and ovens consume 3,000-5,000 watts (10,000-17,000 BTU equivalent) plus lose significant heat to kitchen ambient air.
Approximate energy use for 3 seasoning layers:
Oven method: 12-18 kWh or 40,000-60,000 BTU
Stovetop method: 4-6 kWh equivalent or 15,000-20,000 BTU
Grill method: 30,000-50,000 BTU (but no indoor energy cost)
Cooking method: 0 additional (energy already spent on meals)
Cooking method wins. Stovetop is second. Oven is worst.
Carbon Footprint of Different Seasoning Methods
Cooking seasoning adds zero carbon emissions beyond normal meal preparation, stovetop/grill methods produce emissions from dedicated heating sessions, and oven seasoning adds the largest carbon footprint through extended high-temperature operation plus AC load if used in summer.
If you care about environmental impact:
Cooking method (zero additional impact)
Stovetop method (minimal dedicated fuel use)
Grill method (moderate fuel use, no AC cost)
Oven method (high fuel use, possible AC costs)
The differences aren’t huge. But they’re real.
Cost Analysis of Alternative Seasoning Approaches
Stovetop seasoning costs $0.25-0.75 in energy per complete session, grill seasoning costs $1-3 in propane or charcoal, oven seasoning costs $2-4 in electricity or gas plus potential AC costs of $3-8, and cooking seasoning costs nothing beyond normal meal preparation.
Pure economics favor cooking maintenance. Free is free.
For dedicated seasoning sessions, stovetop is cheapest. Grill is moderate. Oven is most expensive (especially factoring in AC).
Summer Seasoning Without Air Conditioning Waste
Grill and cooking methods prevent the counterproductive cycle of heating your home with oven seasoning while running AC to cool it back down, eliminating $5-15 in wasted cooling costs per seasoning session.
Here’s the stupid part about summer oven seasoning: you’re paying to heat your house, then paying again to cool it back down.
The oven might cost $3 to run. The AC to counteract it might cost another $8. Total waste: $11 to season one pan.
Grill it outside? $2 in propane. No AC cost. Net savings: $9.
Do that a few times and the savings add up.
When You Should Use Traditional Oven Seasoning Despite the Heat
Sometimes the oven is still the right answer.
Situations Where Oven Seasoning Remains Best Option
Oven seasoning still makes sense for complete pan restoration, seasoning multiple pans simultaneously, or when you want foolproof, hands-off seasoning regardless of heat generation.
If you’re restoring a rusty yard-sale find that’s completely stripped, oven seasoning gives the most complete, even coverage.
If you’re seasoning 4-6 pans at once (maybe you found a Griswold collection at an estate sale), the oven’s efficiency wins—one session handles everything.
If you’re not confident with stovetop temperature control or don’t own a grill, the oven is the known-quantity option.
Complete Restoration Projects and Oven Necessity
Pans stripped to bare metal or covered in heavy rust benefit from comprehensive oven seasoning that covers all surfaces evenly, something difficult to achieve with stovetop methods alone.
Restoration is different from maintenance. When you’re starting from completely bare metal, you want perfection.
The oven gives you that. Complete coverage, inside and out, handle included, perfectly even heating.
You can approximate it with a grill. But the oven is simpler and more reliable for this specific use case.
Cool Weather as Ideal Oven Seasoning Time
Winter oven seasoning provides free supplemental heat to your home, turning the energy consumption into a feature rather than a bug when outdoor temperatures are low.
If it’s 20°F outside and your furnace is running anyway, oven heat isn’t a problem—it’s helpful.
Your house needs warming. The oven provides it. You season your pan and reduce your heating bill simultaneously.
This is the one situation where oven seasoning’s heat output is actually beneficial.
Building Long-Term Seasoning Success Without Oven Heat
Looking ahead.
Maintaining Seasoning Built Through Alternative Methods
Seasoning from stovetop, grill, or cooking methods maintains identically to oven seasoning through regular use, requiring only normal cooking and cleaning rather than periodic re-seasoning sessions.
Once you’ve built good seasoning—regardless of method—maintenance is the same.
Cook regularly. Clean properly. Don’t abuse the pan with prolonged acidic cooking or soaking in water.
The seasoning maintains itself through use. Method doesn’t matter at this point.
Progressive Improvement Over Time
All three alternative methods create seasoning that improves continuously with use, becoming smoother, darker, and more non-stick over months and years of cooking.
Month 1: Functional but not amazing Month 3: Noticeably better, getting smooth Month 6: Actually good, reliable non-stick for most foods Month 12: Excellent, performs as well as vintage iron Year 5: Basically bulletproof
The trajectory is the same regardless of how you built the initial layers.
Transitioning to Minimal Maintenance Phase
After 6-12 months of regular use, seasoning becomes self-sustaining through normal cooking alone, requiring intervention only for damage from accidents or extended non-use rather than routine maintenance.
Eventually you stop thinking about seasoning. It just is.
Cook. Clean. Done. The pan takes care of itself.
That’s the goal. And you can get there without ever heating up your whole house with oven seasoning.