The best ergonomic kitchen layout for seniors with arthritis positions frequently used skillets within easy reach—typically in pull-out drawers 24-36 inches from the floor—while creating work zones that minimize repetitive reaching, bending, and heavy lifting.
Here’s the thing. Arthritis doesn’t mean you stop cooking. But it does mean your kitchen setup matters. A lot.
Table of Contents
- 1 Understanding Arthritis-Friendly Kitchen Design for Seniors
- 2 Essential Layout Considerations for the Best Ergonomic Kitchen for Seniors with Arthritis
- 3 Best Kitchen Layout Styles for Seniors with Arthritis
- 4 Strategic Placement of Cookware and Skillets in an Ergonomic Kitchen Layout
- 5 Appliance Positioning in the Best Ergonomic Kitchen Layout for Seniors
- 6 Counter Space Optimization for Skillet Use and Food Preparation
- 7 Cabinet and Storage Solutions for Arthritis-Friendly Kitchens
- 8 Choosing the Right Skillets for Seniors with Arthritis
- 9 Flooring Choices for the Best Ergonomic Kitchen Layout
- 10 Lighting Design in Arthritis-Friendly Kitchen Layouts
- 11 Hardware and Fixture Modifications for Easier Kitchen Use
- 12 Workspace Clearance and Wheelchair Accessibility
- 13 Safety Features in the Best Ergonomic Kitchen Layout for Seniors
- 14 Technology Integration for Easier Skillet and Kitchen Use
- 15 Color and Contrast Considerations for Seniors with Arthritis and Vision Changes
- 16 Adapting Existing Kitchens: Modifications for Arthritis-Friendly Layouts
- 17 Island and Peninsula Design for Seniors with Arthritis
- 18 Organizing Kitchen Tools and Utensils for Easy Skillet Cooking
- 19 Ventilation Systems and Their Placement in Ergonomic Kitchens
- 20 Creating Multiple Cooking Heights in Your Kitchen Layout
- 21 Garbage and Recycling Placement in Arthritis-Friendly Layouts
Understanding Arthritis-Friendly Kitchen Design for Seniors
An arthritis-friendly kitchen design reduces joint stress by placing everything you use daily at comfortable heights, typically between waist and shoulder level, eliminating the constant bending and overhead reaching that aggravates inflamed joints.
How Arthritis Affects Kitchen Tasks and Skillet Use
Gripping hurts. Lifting hurts more. And twisting? Forget about it.
When you’re dealing with arthritis, even a lightweight skillet becomes a challenge. Your fingers don’t close around handles like they used to. Wrists don’t rotate smoothly when you’re trying to flip an omelet. Shoulders scream when you’re reaching into that upper cabinet for your favorite pan.
The weight issue sneaks up on you. A 3-pound cast iron skillet you’ve used for decades suddenly feels like 10 pounds. Transferring it from stove to sink—that simple movement—now requires planning (and sometimes help).
Common pain points:
- Gripping handles becomes difficult with swollen knuckles
- Lifting heavy cookware from low cabinets strains shoulders and back
- Turning and twisting motions at the stove aggravate wrist joints
- Prolonged standing while cooking causes knee and hip pain
- Reaching overhead for stored skillets stresses shoulder joints
The Connection Between Kitchen Layout and Arthritis Pain Management
Smart layout = less pain. Period.
When your kitchen’s designed right, you’re not constantly aggravating those joints. Everything you touch regularly sits where you can grab it without the gymnastics—no squatting down to floor-level cabinets, no stretching on tiptoes for that skillet you use three times a week.
Think about it. You probably make the same movements hundreds of times each week. Coffee in the morning, lunch prep, dinner cooking. If each of those movements involves painful reaching or awkward bending, you’re looking at cumulative damage to your joints.
But here’s what works: positioning your most-used items (including your go-to skillets) in what designers call the “golden zone”—between your hips and shoulders. Game over. You’ve just eliminated 70% of the painful movements.
Key Ergonomic Principles for Senior-Friendly Kitchen Spaces

The core principles focus on accessibility, safety, and reducing repetitive strain through thoughtful placement of every element.
Universal height positioning. Everything important lives between 15 and 48 inches from the floor. That’s it. Your skillets, utensils, plates, glasses—all within this range.
Continuous counter space. You need landing zones. Places to set down that hot skillet without turning, reaching, or holding it while you search for a spot. At least 15 inches on either side of your cooktop. Non-negotiable.
One-motion access. Pull-out drawers beat cabinets every time (more on this later). One smooth pull and you see everything. No stooping, no digging around in dark corners.
Essential Layout Considerations for the Best Ergonomic Kitchen for Seniors with Arthritis
The best ergonomic kitchen layout for seniors with arthritis modifies traditional work triangles into compact zones where everything sits within a 4-foot radius, cutting down on walking and reaching while you cook.
The Work Triangle Concept Modified for Arthritis Needs
Shorter distances. That’s the modification.
The classic work triangle (stove, sink, refrigerator) typically spans 12-26 feet total. Too much. When every step hurts, when your knees protest walking back and forth, you need that distance cut in half.
Aim for 10-15 feet total. Closer is better—but not so close you’re cramped.
And here’s something most people miss: you don’t always need the full triangle active. Set up mini-zones instead. A coffee station with everything in one 2-foot area. A skillet-cooking zone with your pans, utensils, and oils all within arm’s reach of the stove.
Zone approach beats triangle:
- Coffee/breakfast zone (toaster, mugs, filters, all together)
- Skillet cooking zone (pans, spatulas, oils near stove)
- Prep zone (cutting board, knives, mixing bowls clustered)
- Cleanup zone (dish soap, towels, scrubbers by sink)
Optimal Counter Heights for Seniors with Joint Pain

Standard counters sit at 36 inches. Sometimes that’s too high, sometimes too low—depends on your height and which joints hurt most.
If you’re working seated or have knee problems, you want sections at 28-32 inches. For standing work when you’ve got decent leg mobility but bad shoulders, stick with 36 inches or even go to 38 inches (prevents hunching over).
Multi-height counters work best. One section at 32 inches for seated prep work. Main section at 36 inches. Maybe a raised back counter at 38 inches for appliances you operate standing up.
Your skillet storage? Should sit at whatever height lets you grab them without bending OR reaching up. For most people, that’s 24-30 inches off the floor.
Reducing Reaching and Bending in Kitchen Design
Every time you bend down to grab a skillet from a lower cabinet, you’re asking your knees, hips, and back to do work they increasingly can’t handle. So don’t ask.
Pull-out drawers instead of cabinets. Can’t stress this enough. Deep lower cabinets are torture. You’re bent over, reaching to the back, trying to grab a heavy pan while maintaining balance. Recipe for pain (or falling).
Pull-out drawer = you pull, you grab, you’re done. Takes 2 seconds, zero bending.
Wall cabinets should be lowered. Standard installation puts them 18 inches above the counter (54 inches from floor). Drop them to 15 inches above counter maximum. Or skip them entirely—open shelving at 40-50 inches works better.
Creating Multiple Work Zones to Minimize Movement
Think stations, not one big workspace.
Skillet station: Your 2-3 most-used pans live in a drawer right next to the stove. Spatulas and cooking spoons in a crock on the counter above. Cooking oils on a small lazy Susan within arm’s reach. You don’t leave this 3-foot zone while cooking.

Prep station: Cutting board, knife block, mixing bowls, measuring cups. All in one 4-foot counter section with storage directly below. You prep without walking.
Beverage station: Coffee maker, mugs, filters, tea bags, sugar. Everything in one upper cabinet (lowered) or on open shelving. Make coffee without crossing the kitchen.
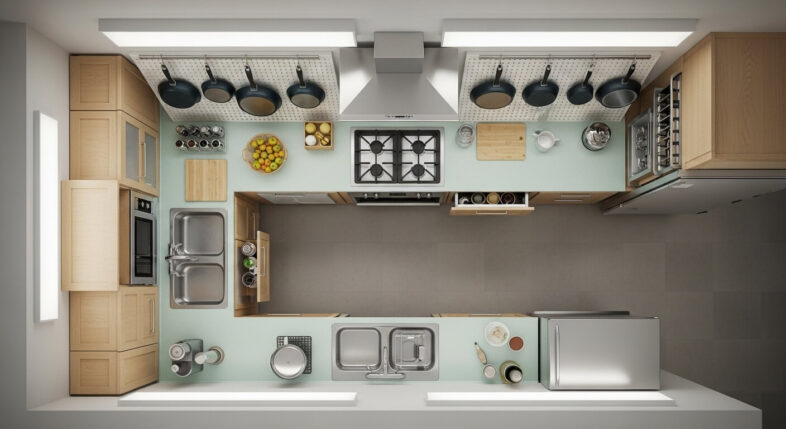
Best Kitchen Layout Styles for Seniors with Arthritis
Galley and L-shaped layouts work best for seniors with arthritis because they minimize walking distances and keep everything within a compact, accessible zone—usually 6-8 feet across.
Galley Kitchen Layout: Pros and Cons for Arthritis Sufferers
Two parallel counters. That’s galley style. And honestly? It’s sneaky good for arthritis.
Why it works:
- Everything’s close—turn around and you’re at the other counter
- No corners to navigate (corners = awkward reaching)
- Compact workflow means less walking
- Easy to install grab bars on both sides if balance is an issue
Where it fails:
- Can feel cramped if the aisle’s too narrow (need 48 inches minimum for wheelchair access)
- Only one cook fits comfortably
- Limited counter space for multiple landing zones
You need at least 4 feet between counters. Less than that and you’re bumping into things, can’t turn around easily. More than 5 feet and you’ve defeated the purpose—too much walking between sides.
Adapting Galley Kitchens for Better Ergonomics
Put your stove on one side, sink on the other. Refrigerator at one end. This creates a natural workflow without backtracking.
Install pull-out counters at one or both ends—gives you extra landing space when you need it, tucks away when you don’t. Perfect for setting down hot skillets.
Consider putting your dishwasher raised (on a 12-inch platform). Sounds weird but loading and unloading from 20 inches off the floor instead of 8 inches? Your back will thank you.
L-Shaped Kitchen Layout for Reduced Strain

L-shaped is the sweet spot for most seniors with arthritis. Two perpendicular walls of cabinets creating a natural work triangle that’s actually walkable.
Corner location works perfectly for your main prep counter. You’re centered between stove and sink, minimal pivoting required. Set up your skillet storage in the corner base cabinet (with a lazy Susan or pull-out system—never a blind corner cabinet).
What makes L-shaped work:
- Open on one or two sides (easy entry, no tight squeezes)
- Natural landing zones on both counter sections
- Corner can house your most-used items with smart storage solutions
- Wheelchair accessible without modifications
Why L-Shaped Designs Work Well for Skillet Storage and Use
The corner cabinet in an L-shaped layout is controversial. Done wrong, it’s a black hole where pans go to die. Done right? It’s your skillet command center.
Magic corner units pull out and swing—bringing those back-corner pans right to you. No reaching, no forgetting what you own. Another option: corner drawers that angle out. Expensive but worth it if you cook daily.
Put your cooktop on one leg of the L, your main skillet drawer on the other leg within 2 feet. You grab the pan, pivot slightly, and you’re cooking. That’s it.
U-Shaped Kitchen Layout: Maximum Accessibility
Three walls of cabinets and counters. Sounds like a lot but can be perfect if you’ve got the space and can’t walk long distances.
Everything’s within a 180-degree turn. Stove on one wall, sink on another, refrigerator on the third. You’re standing in the middle, and nothing’s more than a step or two away.
But. Big but. You need at least 5 feet of clearance in the center—preferably 6 feet if you’re using a walker or wheelchair. Less than that and you’re trapped in a tight box.
Customizing U-Shaped Spaces for Seniors with Limited Mobility
Remove the base cabinets on one section. Create a desk-height (30 inches) counter with knee space underneath for seated work. You can roll a chair or wheelchair right up, prep food sitting down.
This works especially well on the sink wall—seated dishwashing is way easier on the back and knees than standing for 15 minutes scrubbing pots.
Install your skillet storage on the wall opposite the stove. Sounds backwards but trust this—you turn around, grab the pan, turn back. Two movements. If the skillets were RIGHT next to the stove, you’d be bending down at an awkward angle while heat’s blasting at you.
Open Concept Kitchen Layouts and Arthritis-Friendly Features
Open concept can work but needs smart boundaries.
The benefit: no tight spaces to navigate, easy to move around, can rest at a nearby table or island between cooking tasks. The problem: if it’s too open, you’re walking 20 feet to get from refrigerator to stove.
Solution? Create a defined cooking zone even in an open space. Use the island as a boundary. Keep your work triangle tight (10 feet or less total) even if the room itself is massive.
Islands in open kitchens should be 36 inches high on the cooking side, 42 inches on the seating side. This gives you counter space at a good working height plus a raised bar where you can sit on a stool while doing light prep.
Strategic Placement of Cookware and Skillets in an Ergonomic Kitchen Layout
Store your most-used skillets in pull-out drawers positioned 24-30 inches from the floor and within 3 feet of your cooktop—this eliminates bending, reduces lifting distance, and keeps your go-to pans exactly where you need them.
Best Locations for Storing Skillets and Heavy Cookware
Next to the stove. Not under it, not across the kitchen. Next to it.
Here’s what actually works: a 30-inch wide pull-out drawer system placed to the right or left of your cooktop (whichever matches your dominant hand). Bottom drawer holds your 2-3 most-used skillets. Middle drawer has lids. Top drawer (shallower) stores your utensils.
One motion, three items. Grab skillet, grab lid, grab spatula. Done.
Heavy cookware (like cast iron or enameled Dutch ovens) should live higher than you’d think—not in floor-level cabinets. Put them in drawers that sit 20-24 inches off the ground instead of 4-6 inches. Yeah, it’s still low, but you’re cutting the bending angle in half.
Pull-Out Drawers vs. Cabinets for Skillet Storage
Drawers win. Every single time.
| Feature | Pull-Out Drawers | Traditional Cabinets |
|---|---|---|
| Visibility | See everything at once | Dig around, forget what you own |
| Bending required | Minimal (just slight lean) | Full squat or deep bend |
| Weight distribution | Drawer supports pan weight | You hold it while bent over (ouch) |
| Access to back items | Everything pulls forward | Requires reaching into dark corners |
Deep drawers (12-15 inches) can hold skillets nested with protective layers between them. But honestly? Better to store them standing upright using vertical dividers. Takes more space but you can grab what you want without lifting other pans.
Soft-close mechanisms aren’t optional anymore—they’re essential. When your hands are weak or shaky, regular drawers can slam shut on your fingers. Soft-close prevents that. Also means you can push the drawer with your hip or elbow if your hands are full.
Installing Cookware Organizers at Optimal Heights
The golden zone again: 24-36 inches from floor.
Vertical dividers let you file your skillets like records—8-inch pan, 10-inch pan, 12-inch pan, all standing on edge. Pull out what you want without moving the others. These dividers should be adjustable (your cookware collection changes over time).
Peg systems work too. Adjustable pegs in a drawer let you customize the layout, secure lids separately, keep things from sliding around. Downside? More expensive and slightly fiddly to set up initially.
Positioning Your Most-Used Skillets Within Easy Reach
Your daily skillet (the one you use for eggs, sautéing, reheating) should be the easiest thing in your kitchen to grab. Not joking.
Put it in a drawer that’s 28-30 inches from the floor, first position (front of the drawer), directly adjacent to your cooktop. You should be able to turn, pull the drawer, grab the pan, and be back at the stove in under 3 seconds.
Second-most-used skillet? Behind the first one or in the next drawer down. Everything else can live in less convenient spots.
Some people do a countertop organizer. Not my favorite (takes up workspace) but if you’ve got the room and severe arthritis, having your #1 skillet sitting out on a pot rack right next to the stove eliminates even drawer-pulling.
Creating a Skillet Station Near the Stove
Everything you need for skillet cooking in one 4-foot zone:
- Skillets in drawer (right next to stove)
- Lids in drawer (same location or directly above)
- Utensils in crock (on counter, no reaching)
- Cooking oils on lazy Susan (counter or upper cabinet, eye level)
- Seasonings on tiered shelf (counter or lowered upper cabinet)
- Trivets/hot pads in shallow drawer (above the skillets)
You don’t leave this zone while cooking. Everything’s there.
Appliance Positioning in the Best Ergonomic Kitchen Layout for Seniors
Position your cooktop at standard counter height (36 inches) with landing zones on both sides, place the sink with its rim at 32-34 inches for less bending, and install a raised dishwasher 12 inches off the floor to eliminate the worst of the stooping.
Stove and Cooktop Placement for Safe Skillet Handling
Your cooktop shouldn’t be in a corner. Ever. You need access from the front and at least one side—this lets you safely position your body when lifting heavy skillets, gives you escape routes if something spills or catches fire.
Standard 30-inch cooktops work fine. The 36-inch models are actually harder to use (too much reaching across hot burners to get to the back). Stick with 30 inches and put your most-used burners at the front.
Landing zones matter more than people think. You need a minimum 15 inches of counter on the side where you’ll set down hot pans (usually your dominant hand side). Heat-resistant surface required—quartz, granite, or solid surface. Not laminate (it’ll melt or scorch).
Wall Ovens vs. Range Ovens for Arthritis Sufferers
Wall ovens beat ranges for arthritis. Not even close.
With a wall oven installed at the right height (door opening at 30-36 inches from floor), you’re reaching straight ahead to pull out a roasting pan or casserole. No bending down to floor level. No opening a door while you’re off-balance.
Ranges require squatting or deep bending every single time you check what’s cooking. That’s your knees, hips, and back getting hammered. For someone with arthritis, that’s multiple times a day, every day.
Plus—wall ovens let you separate the cooktop from the oven (more flexible layout). You can put the cooktop at ideal height and position while the oven goes wherever it’s most accessible.
Single wall oven placement: Center it so the middle rack is at your shoulder height when standing. Makes checking and removing food easier.
Induction Cooktops and Their Benefits for Seniors
Induction is worth the premium price when you’ve got arthritis.
Why? Surface stays cool except directly under the pan. You can touch the burner area 2 inches from an active skillet and it’s barely warm. Means you won’t burn yourself if your hand slips or shakes while positioning a pan.
Also—precise temperature control with a touch or dial. No more fighting with knobs you can’t grip properly. Many models have touch controls big enough for arthritic fingers (get one with actual buttons though, not those finicky flat panels).
Cleanup’s easier too. Spills don’t bake onto the surface. Wipe it with a cloth while it’s still slightly warm and you’re done.
The catch: your skillets must be magnetic (cast iron, magnetic stainless steel). Aluminum and copper won’t work unless they have a magnetic base.
Sink Positioning to Minimize Strain When Washing Skillets
Your sink rim should sit at 32-34 inches from the floor. Lower than standard counters (which are 36 inches).
This 2-4 inch drop means you’re not lifting heavy, water-filled skillets up and over a high rim. You’re setting them down into the sink with minimal strain on your wrists and shoulders.
Single-bowl sinks work better than double-bowl for washing large skillets. One big 30-33 inch sink accommodates your largest pans without awkward angling. Double-bowl means your big skillet doesn’t fit flat, or you’re only using one side anyway.
Choosing the Right Sink Depth and Style
Shallow sinks (6-7 inches deep) are easier for people with limited reach. But. They’re also terrible for washing skillets—water splashes everywhere, you can’t fit a 12-inch pan comfortably.
Go for 8-9 inches deep. Compromise depth that handles large cookware without requiring you to reach down too far.
Undermount sinks are superior to drop-in. Why? No rim to lift things over. You can slide items across the counter directly into the sink. Makes maneuvering heavy skillets way easier.
Touchless faucets or lever faucets with the handle on the side (not center). Your hands are full, wet, or hurting—being able to turn on water with your wrist or elbow instead of gripping and twisting is everything.
Refrigerator Placement for Easy Access
Bottom freezer models beat top freezer when you’ve got knee and hip arthritis (frozen food weighs less, so the bending’s not as bad as it sounds). Side-by-side models split the difference but give you less usable space.
French door refrigerators with the freezer drawer at bottom are probably the best compromise. Main fridge section is eye-to-waist level (easy access), freezer drawer pulls out (no deep bending and digging).
Position your refrigerator at the end of a counter run, not in the middle. This gives you landing space right next to it—you open the door, grab items, set them on adjacent counter. No carrying stuff across the kitchen.
Counter-depth refrigerators are easier to access (less reach to the back) but hold less food. Trade-off worth considering if you shop frequently and don’t stock up for weeks at a time.
Dishwasher Installation Height and Location
Standard dishwashers sit on the floor. Which means you’re bending down to load and unload. Terrible for arthritis.
Raise it 12 inches off the floor. You’ll need a custom base or platform, but now the bottom rack is at 20 inches instead of 8 inches. Top rack hits at a comfortable 40 inches. You can load and unload while standing fairly upright.
Dishwasher drawers are another option. Two separate drawer units that pull out. Top drawer is easily accessible. Bottom drawer’s still low, but you can use it for stuff you wash less frequently.
Position your dishwasher within 3 feet of the sink (traditional placement). Lets you rinse and load without walking. Also makes plumbing installation easier and cheaper.
Counter Space Optimization for Skillet Use and Food Preparation
You need at least 15 inches of heat-resistant counter space immediately adjacent to your cooktop for safely setting down hot skillets, plus another 18-24 inches of prep space on the other side for ingredients and plating.
Recommended Counter Space Near the Stove for Skillet Transfers
Both sides of your cooktop should have landing zones. Not negotiable.
Dominant hand side: 15-18 inches minimum. This is where you’ll set hot pans 90% of the time. Make this section a heat-resistant material (granite, quartz, or use a large built-in trivet).
Other side: 12-15 inches. Less critical but still important for juggling multiple pans or setting down lids.
If you’re working with a 30-inch cooktop, you’re looking at 57-63 inches of total counter (cooktop plus landing zones). Plan your layout accordingly.
Corner installations are tempting (they save space) but they eliminate one landing zone. Don’t do it.
Landing Zones for Hot Skillets and Cookware
Beyond the immediate stove area, you need secondary landing zones—places to set pans while you’re plating food or grabbing serving dishes.
Primary landing zone: Right of cooktop (or left if you’re left-handed), 15-18 inches
Secondary zone: Near the sink, 12-15 inches (for pans waiting to be washed)
Tertiary zone: On island or peninsula if you have one, 24 inches (for serving/plating)
These zones should be clear (no appliances, no clutter). Mark them in your head as no-storage areas. They’re for working, not for that mixer you use twice a year.
Counter Height Variations for Seated and Standing Work
Multi-height counters accommodate different tasks and mobility levels.
| Counter Height | Best Use | Who It Helps |
|---|---|---|
| 28-30 inches | Seated prep work, rolling dough | Wheelchair users, severe knee/hip arthritis |
| 36 inches | Standard cooking and prep | Most people, general tasks |
| 38-40 inches | Appliance operation, kneading | Taller individuals, tasks requiring downward pressure |
| 42 inches | Eating bar, light standing tasks | Perching on stool while working |
You don’t need all of these. Pick two. Usually 30 inches for a seated section (one end of a galley or peninsula) and 36 inches for everything else.
Heat-Resistant Counter Materials Adjacent to Cooking Areas
Laminate counters will scorch if you set a hot skillet down. Don’t use them near the stove.
Best materials:
- Granite (handles heat, durable, looks good)
- Quartz (slightly less heat-resistant than granite but still solid for brief contact)
- Soapstone (bulletproof for heat, softer surface, needs sealing)
- Stainless steel (commercial kitchen choice, won’t scorch, shows scratches)
Even with heat-resistant materials, use trivets for pans that’ve been on high heat for extended periods. But for quick transfers? These materials handle it.
Cabinet and Storage Solutions for Arthritis-Friendly Kitchens
Pull-out shelving with soft-close mechanisms and storage positioned between 15-48 inches from the floor eliminates 80% of the painful bending and reaching that makes cooking difficult for seniors with arthritis.
Pull-Out Shelves and Drawers for Skillet Storage
Standard cabinets = you bend, you reach, you lift while twisted. Pull-out shelves = you pull, you grab, you’re upright the whole time.
Retrofit kits can convert existing cabinets to pull-out shelves. Not cheap ($100-200 per cabinet) but cheaper than replacing everything. Full-extension slides are critical—they let the shelf come all the way out so you can access items at the back.
For skillets specifically, get pull-outs rated for 100+ pounds. Cookware is heavy. Cheap slides will fail within a year.
Drawer systems beat pull-out shelves for heavy items. Actual drawers with 4 sides keep things contained, prevent pans from sliding off the sides when you’re pulling out. Pull-out shelves (just a shelf on slides) work better for lighter items like Tupperware or baking sheets.
Soft-Close Mechanisms to Reduce Joint Strain
Soft-close isn’t a luxury feature anymore. It’s a safety feature.
When you’re pushing a heavy drawer shut and it slams at the end, your wrist absorbs that impact. Do that 10 times a day for a year? You’re making arthritis worse.
Soft-close lets you push gently (or even just give it a nudge) and the mechanism takes over, easing the drawer closed. No impact, no joint stress.
Most modern drawer slides include soft-close. If you’re retrofitting, make sure you’re buying slides with this feature—it’s worth the extra $20 per drawer.
Lazy Susans and Corner Solutions for Hard-to-Reach Spaces
Corner cabinets are wasted space unless you’ve got the right hardware.
Lazy Susans: Round shelves that spin. Simple, cheap, effective for lighter items (spices, oils, canned goods). Not great for heavy skillets—they can tip or make the whole unit wobbly.
Magic corner units: Pull out and swing—bringing the back corner shelves to you. Perfect for skillets. Expensive ($400-600 installed) but if you cook daily, it’s worth it.
Corner drawers: Angled drawers that make use of corner space. More expensive than magic corners but easier to use. Your skillets are in a drawer you can see completely.
Skip the blind corner cabinets. They’re torture. You’ll forget what’s back there, you’ll never use it, and accessing anything requires being 20 years old with flexible shoulders.
Upper Cabinet Alternatives for Seniors with Limited Reach
Upper cabinets are problematic. You’re reaching overhead, you’re lifting dishes and glasses above your head (risky when grip strength is compromised).
Lower the uppers. Install them 15 inches above counter instead of 18. Small change, big difference. Items on the bottom shelf are now at eye level instead of above your head.
Skip uppers entirely on at least one wall. Use that wall for a pegboard or magnetic strips for utensils. Or just leave it open as backsplash—more light, less claustrophobic, nothing to reach for.
Open shelving at 40-50 inches replaces uppers. You can see everything, grab what you need without opening doors. Downside: looks cluttered if you’re not organized, items get dusty.
Installing Lowered Upper Cabinets
Standard upper cabinets sit with their bottom at 54 inches from floor (18 inches above a 36-inch counter). Lower them to 51 inches (15 inches above counter).
This means the top shelf of a 30-inch upper cabinet is now at 81 inches instead of 84 inches. Doesn’t sound like much. But the bottom shelf goes from 54 to 51 inches—and that’s the shelf you’ll use most.
You’re not reaching as high, not straining your shoulders, not going on tiptoes. Especially important if you’re storing frequently-used items like glasses or coffee mugs.
The trade-off: you lose the visual space between counter and cabinets. Kitchen might feel slightly more closed in. But function beats aesthetics when you’re in pain.
Using Open Shelving at Accessible Heights
40-48 inches from the floor is the sweet spot. High enough that you’re not bending, low enough that you’re not reaching up.
Put your everyday dishes here. Glasses, mugs, frequently-used bowls. Stuff you grab multiple times a day. Behind the sink is a classic spot—you unload the dishwasher, you put things directly onto these shelves.
Use shelf risers or small organizers to create visual separation and prevent things from getting lost. Group items by type.
Don’t put heavy items on open shelving (especially not at the higher end of this range). A stack of dinner plates at 48 inches is a disaster waiting to happen if you fumble while reaching.
Vertical Dividers for Storing Skillets and Pans Upright
Filing your skillets vertically (like papers in a filing cabinet) is the smartest storage solution for arthritis.
You see every pan at a glance. No lifting the 12-inch skillet to get to the 8-inch skillet underneath. No nesting them together (which requires grip strength to separate).
Adjustable dividers let you customize spacing. Your 8-inch skillet needs less space than your 12-inch. Some dividers are spring-loaded (tension-mounted), others screw into the drawer. Spring-loaded is easier to adjust later.
Install these in drawers 24-30 inches off the ground. Deep drawers (12+ inches) work best—handles don’t hang over the edge.
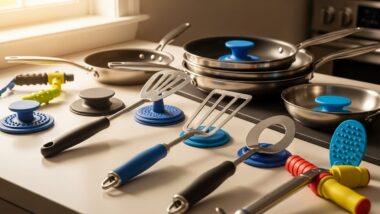
Choosing the Right Skillets for Seniors with Arthritis
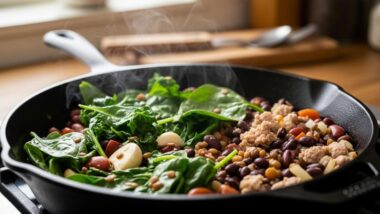
Lightweight skillets with large, ergonomic handles and helper grips—like hard-anodized aluminum or ceramic-coated pans weighing under 2.5 pounds—reduce wrist and hand strain significantly compared to traditional cast iron.
Lightweight Skillet Materials: Aluminum, Hard-Anodized, and Ceramic
Cast iron is out. Sorry, but it’s too heavy. A 12-inch cast iron skillet weighs 8-9 pounds empty. Add food and you’re pushing 12 pounds. That’s not happening when your wrists are shot.
Hard-anodized aluminum: 2-3 pounds for a 12-inch skillet. Durable, distributes heat well, dishwasher-safe (mostly). This is your best bet.
Ceramic-coated: 2-2.5 pounds. Super slick surface (less scrubbing = easier cleanup). Doesn’t last as long as hard-anodized (coating can chip after a few years) but while it’s good, it’s great.
Regular aluminum with non-stick coating: 1.5-2 pounds. Lightest option. Less durable, needs replacing every 2-3 years, but if weight is your primary concern, this wins.
Avoid stainless steel for daily use. Even “lightweight” stainless is 3-4 pounds. Tri-ply stainless can hit 5+ pounds for larger skillets.
Ergonomic Handle Design Features for Arthritic Hands
Handles matter more than most people realize. You’re gripping this thing every time you cook. Bad handle = pain.
Silicone-wrapped handles give you better grip and stay cooler than bare metal. The soft material is easier on tender knuckles.
Large diameter handles (at least 1.25 inches thick) are easier to grip than thin handles. Your whole hand wraps around without excessive finger curl.
Long handles (8-10 inches) provide better leverage—you’re not using as much grip strength to lift the pan. Flip side: they can hit other burners or hang off the edge of your counter. Balance this with your cooktop layout.
Helper Handles and Their Importance
Helper handles are that second little handle opposite the main handle. Non-negotiable for skillets 10 inches and larger.
Even a lightweight skillet gets heavy when full. That helper handle lets you use both hands, distributes weight more evenly, takes pressure off your primary wrist.
Look for helper handles that are actual loops (like a d-ring) not just nubs. You want to be able to grip it properly or even use a pot holder hooked through it.
Soft-Grip vs. Traditional Handles
Soft-grip (silicone or rubberized coating) beats bare stainless or hard plastic.
When your fingers don’t close properly, when your grip strength is 30% of what it used to be, that cushioned surface gives you extra friction. The pan doesn’t slip. You’re using less effort to maintain hold.
Traditional handles can get slippery when wet or greasy. Soft-grip handles maintain friction even with oil on them.
The downside: soft-grip handles aren’t oven-safe above 350-400°F (check manufacturer specs). If you’re doing a stovetop-to-oven technique, you need traditional metal handles.
Optimal Skillet Sizes for Reduced Lifting Strain
Smaller pans = less weight. But too small and you’re making multiple batches, which means more standing time, more movements, more total strain.
8-inch skillet: 1-2 servings. Perfect for eggs, single chicken breast, small batch of vegetables. Should be your lightest pan (under 2 pounds).
10-inch skillet: 2-3 servings. This is your daily driver. Most recipes are written for this size. Target weight: under 2.5 pounds.
12-inch skillet: 4-5 servings. For family meals, larger batches. Should have a helper handle. Keep weight under 3 pounds if possible.
Skip the 14-inch monsters unless you’re cooking for a crowd regularly. They’re too heavy and unwieldy for arthritic hands even when empty.
Non-Stick Surfaces to Minimize Cleaning Effort
Non-stick coating = less scrubbing. And scrubbing is terrible for arthritic hands.
The circular scrubbing motion aggravates every knuckle, every wrist joint. If you can just wipe the pan clean with a sponge, you’ve eliminated 90% of the pain.
Modern ceramic non-stick is better than old-school Teflon (PTFE). Slicker surface, lasts longer (if you’re careful), no concerns about heating it too high.
Metal utensils will destroy non-stick. Use silicone or wood exclusively. That’s the trade-off for easy cleanup.
Expect to replace non-stick skillets every 3-5 years. The coating degrades. When food starts sticking consistently, time for a new pan.
Flooring Choices for the Best Ergonomic Kitchen Layout
Anti-fatigue cushioned flooring like cork or luxury vinyl reduces joint stress by 30-40% compared to hard surfaces like tile, making it easier to stand for the extended periods required when cooking.
Anti-Fatigue Flooring Materials for Seniors
Standing on hard tile or stone for 30 minutes while cooking dinner? Every minute hurts more.
Cushioned flooring absorbs impact, reduces the constant pressure on knee and hip joints. It’s the difference between tolerable discomfort and needing to sit down every 10 minutes.
Cork: Natural cushion, warm underfoot, sustainable. Needs sealing (moisture isn’t its friend). About $5-8 per square foot installed.
Luxury vinyl plank: Decent cushion (not as good as cork), waterproof, looks like wood or tile. $3-6 per square foot. Easiest to maintain.
Rubber flooring: Best cushion available. Commercial kitchen favorite. Can look industrial (might not match your home aesthetic). $4-8 per square foot.
Slip-Resistant Surfaces to Prevent Falls
Textured surfaces beat smooth surfaces. Period.
Look for flooring with a dynamic coefficient of friction (DCOF) of 0.42 or higher. That’s the technical measurement for slip resistance. Most manufacturers list this in their specs.
Matte finishes over glossy. Glossy tile looks nice but becomes an ice rink when wet. Matte or textured tile gives you traction.
Avoid smooth laminate in kitchens. Water hits it, you slip. Seen it too many times.
Grout lines in tile actually improve traction (the raised lines give your shoes something to grip). Small tiles (2×2 or 4×4) have more grout lines than large format tiles.
Cushioned Flooring Options: Cork, Vinyl, and Rubber
Cork is underrated. It’s got natural antimicrobial properties, it’s renewable (harvested from tree bark that regrows), and it feels good underfoot. The cushion is real—about 15-20% give compared to hard surfaces.
Downside: can dent from heavy furniture, needs resealing every few years, not great with standing water (spills need to be wiped quickly).
Luxury vinyl plank (LVP) or luxury vinyl tile (LVT): Waterproof core, cushioned backing, looks convincing. The attached underlayment provides decent cushion (not cork-level but better than tile). Maintenance is minimal—sweep and mop occasionally.
Rubber is the ultimate for cushion but it’s polarizing aesthetically. Looks at home in a commercial kitchen or modern industrial design. Might look weird in a traditional home kitchen. But if you’re standing for hours and comfort is priority #1, rubber wins.
Lighting Design in Arthritis-Friendly Kitchen Layouts
Bright, layered lighting with task lights over work areas and under-cabinet LED strips eliminates shadows and reduces eye strain, making it easier to see what you’re doing without leaning in close (which stresses your neck and back).
Task Lighting Over Stove and Skillet Work Areas
Your cooktop area needs bright, focused light. You’re watching for visual cues (is it sizzling, is it browning, is it burning), and poor lighting leads to mistakes or accidents.
Pendant lights directly over the stove work if you’ve got a 9+ foot ceiling. Hang them 30-36 inches above the cooktop. LED bulbs, 60-75 watt equivalent brightness.
Recessed lights (4-6 inch cans) positioned directly above the cooktop if you’ve got 8-foot ceilings. Two lights for a 30-inch cooktop, three for 36-inch.
Range hood lights aren’t enough. They create shadows and the angle is wrong. Use them as supplemental lighting only.
Under-Cabinet Lighting for Better Visibility
LED strips under your wall cabinets illuminate the counter without harsh overhead glare.
Install them toward the front of the cabinet (not the back). This angles the light onto your work surface instead of creating a bright line on the backsplash with the counter still in shadow.
Hardwired is better than plug-in (no cords to deal with) but more expensive to install. Battery-powered LED strips work in a pinch but you’re changing batteries every 2-3 months if you use them daily.
Color temperature matters. Go for 3000-4000K (warm white to neutral white). Anything cooler looks sterile and harsh.
Motion-Sensor Lighting to Eliminate Switch Reaching
Flipping light switches requires grip and arm reach. Motion sensors eliminate this.
Install motion-sensor switches for your main kitchen lights. You walk in, lights come on. Walk out, they turn off after 2-3 minutes.
The technology works. It’s reliable. Cost about $25-40 per switch (higher if you want dimming capability).
Under-cabinet LED strips with motion sensors are available too. Wave your hand, lights on. Perfect for midnight snack runs or early morning coffee when you don’t want to fumble for switches.
Hardware and Fixture Modifications for Easier Kitchen Use
Lever-style handles and D-pulls on cabinets require 80% less grip strength than traditional knobs, making them essential for seniors with hand arthritis who open drawers and cabinets dozens of times daily.
Lever-Style Faucets and Cabinet Handles
Knobs require a pinch grip (thumb and fingers). That’s the worst motion for arthritic hands. Levers require only a push with the palm or side of your hand.
Cabinet lever handles: 4-6 inch pulls mounted horizontally. You can open them with a closed fist, your wrist, even your elbow if your hands are full. Replace all your cabinet knobs with these. Costs about $3-8 per pull, so maybe $150-300 for a full kitchen retrofit.
Faucet levers: Single-lever faucets that you move up/down or left/right. Way easier than twist knobs. Bonus if you get a high-arc faucet—easier to fit skillets under for filling or rinsing.
Touch or Motion-Activated Faucets
Tap the faucet with your wrist or forearm, water turns on. Tap again, off. Or motion-sensor models detect your hands and activate automatically.
Game-changer when your hands are covered in raw chicken or dough. Game-changer when gripping and twisting the lever hurts.
Price jumps significantly—$200-500 for quality touchless faucets vs. $100-150 for a good manual lever faucet. Worth it if you cook frequently.
Battery-powered touchless faucets eliminate the need for electrical hookup. Change batteries every 12-18 months (or get one with AC adapter option).
D-Shaped Pulls and Their Benefits for Arthritic Hands
D-pulls are semicircular (shaped like the letter D). They provide more gripping surface than straight pulls and they’re easier to hook your fingers through when you can’t make a tight fist.
Get them in 3.5-4 inch sizes minimum. Smaller ones defeat the purpose—you want enough space to get multiple fingers through the opening.
Mounting orientation matters. Mount them vertically on drawers (so you’re pulling down with gravity helping). Mount them horizontally on doors (you’re pulling toward you).
Textured or knurled finish helps with grip. Smooth, polished pulls can slip when your hands are wet or oily.
Touchless Cabinet Opening Systems
Electric cabinet openers that activate with a push or tap. These are premium solutions ($100-200 per cabinet) but they eliminate all gripping.
Push-to-open mechanisms are cheaper ($10-20 per cabinet). Push the door or drawer face, it pops open slightly, then you can hook your fingers behind it. No handles required.
The downside of push-to-open: you need clean door fronts (no handles interrupting the smooth surface), and they can be finicky—requires precise installation and adjustment.
Workspace Clearance and Wheelchair Accessibility
Standard wheelchair-accessible kitchens require 60-inch turning radius, 30×48 inch clear floor space at appliances, and at least 30 inches of knee space under counters for seated work.
Knee Space Under Counters and Sinks
Remove the base cabinet under one section of counter. Create a 30-inch wide by 27-inch deep by 29-inch high empty space. This lets you roll a wheelchair or regular chair up to the counter.
Best locations for knee space:
- Under the sink (for seated dishwashing)
- At one end of an L-shaped counter (for food prep)
- Under a section of island (for working seated while others work standing)
You lose storage. That’s the trade-off. But if standing for more than 10-15 minutes is impossible, this makes your kitchen usable again.
Install the sink off-center in its counter section (pushed to one side) to maximize usable knee space on the open side.
Aisle Width Requirements for Walkers and Wheelchairs
Standard wheelchair needs 32 inches minimum to pass through. Comfortable wheelchair maneuvering needs 36 inches. Walker users need 36 inches.
Kitchen aisles in a galley layout: 48 inches minimum for one cook in a wheelchair. 60 inches if two people need to pass or work simultaneously.
In U-shaped or L-shaped kitchens, you need 60 inches of clear turning space somewhere in the room. This is the circle where a wheelchair can do a 360-degree turn.
Measure from counter edge to counter edge (or counter to island). Don’t measure from where the cabinets start—that’s not the true clearance.
Side-Approach vs. Front-Approach Access to Appliances
Front approach = roll up to the appliance straight on. Requires knee space underneath (sink, cooktop if it’s on an island).
Side approach = pull up parallel to the appliance. Works for dishwashers, wall ovens, refrigerators. Easier to implement (doesn’t require removing lower cabinets).
For dishwashers: side approach is actually better. You pull up alongside, open the door, pull out the rack. Everything’s at your side, easy to load/unload.
For sinks: front approach is necessary if you’re doing seated dishwashing or food prep. Side approach doesn’t give you good access to the basin.
Safety Features in the Best Ergonomic Kitchen Layout for Seniors
Automatic stove shut-off devices, anti-scald faucets limiting water temperature to 120°F, and rounded countertop edges prevent the most common kitchen injuries affecting seniors with arthritis and reduced mobility.
Anti-Scald Devices on Faucets
Water over 120°F can scald. And when your hands are numb from arthritis or you’ve got reduced sensation, you might not pull your hand back quickly enough.
Thermostatic mixing valves blend hot and cold water to maintain a set maximum temperature. Install one at your kitchen faucet (or at the water heater for whole-house protection). They cost $50-150 plus installation.
Most modern faucets have temperature limiters built in—you can set the maximum temp. Check your faucet’s manual or manufacturer website.
Why this matters for skillet users: you’re rinsing hot pans under water. If the water temperature spikes suddenly (someone flushes a toilet, dishwasher kicks on), you could drop the pan or burn your hands.
Automatic Shut-Off Features for Stoves
Memory issues, distraction, mobility problems—all increase the risk of forgetting you’ve got something on the stove.
Induction cooktops with auto-shutoff: Detects when no pan is present (or pan is removed). Shuts off after 60-90 seconds. Also shuts off if something boils over and covers the controls.
Aftermarket stove shut-off devices: Install on electric or gas stoves. Motion sensors detect if you’ve left the kitchen. After a set time (usually 5-10 minutes), they shut off the stove and sound an alarm. $200-400 installed.
Smart stove guards can send alerts to your phone if the stove’s been on too long. Helpful if you’ve got family members checking in on you.
Fire Suppression Systems Near Cooking Areas
Residential fire suppression systems (like commercial kitchens have) are available for home installation. About $1000-2000 including installation.
They mount above the stove. If they detect flames or excessive heat, they automatically discharge fire suppressant chemical. Way faster than you grabbing an extinguisher (which requires bending, lifting, and aiming).
More practical: keep a fire extinguisher mounted at 36-40 inches height (eye level) within 10 feet of the stove. ABC-rated (handles grease, electrical, and wood/paper fires). Replace every 5-10 years.
Fire blankets work for small skillet fires. Hang one on the wall near the stove. If oil catches fire, grab the blanket, cover the pan. No aiming required.
Rounded Counter Edges to Prevent Injury
Sharp 90-degree counter edges = painful impacts. You bump your hip, it hurts. You catch your ribs on the edge, you bruise.
Bullnose or eased edges round off the corner slightly. If you bump into it, the impact is distributed over a curve instead of hitting a sharp point.
This is especially important for counters at hip height (36 inches) where you’re most likely to make contact. Islands and peninsulas should definitely have rounded edges (you walk around them, more bump potential).
Cost difference between square edge and bullnose is minimal when installing new counters—maybe $5-10 per linear foot.
Technology Integration for Easier Skillet and Kitchen Use
Voice-controlled smart devices let you set timers, activate vent fans, and adjust lighting without interrupting your cooking to hunt for switches—critical when your hands are occupied with hot skillets.
Voice-Activated Appliances and Controls
“Hey Google, set a timer for 10 minutes.” “Alexa, turn on the kitchen lights.” No reaching, no button pushing.
Smart speakers (Amazon Echo, Google Home) cost $30-100. Place one on your counter. Now you’ve got voice control for timers, lighting (if you’ve got smart bulbs), even some appliances.
Smart plugs ($10-25 each) make regular appliances voice-controllable. Plug your coffee maker into a smart plug, now you can turn it on with your voice.
Some range hoods have voice control built in. Turn on/off, adjust fan speed—all by voice command.
Smart Timers for Monitoring Cooking Times
Multiple timers running simultaneously (pasta in one pot, chicken in a skillet, vegetables roasting) is easy to mess up when you’re managing pain and fatigue.
Smart displays (like Echo Show or Nest Hub) show all active timers on screen. You can see at a glance what’s about to finish. They’re loud enough to hear from another room if you need to sit down.
Some induction cooktops have built-in timers for each burner. The burner shuts off automatically when time expires. No forgetting and burning your food.
Stove Alerts and Safety Monitors
Smart sensors that monitor your stove and send alerts if something’s wrong.
Wallflower and similar devices monitor stove temperature. If it detects unattended cooking (you’ve left the kitchen) or dangerous temps, it alerts your phone and can automatically shut off the stove. About $200-300.
Some systems include notification to family members—so if you’re having a bad day cognitively and you leave the stove on, your daughter gets an alert and can call you.
Works with electric and gas stoves. Requires either cutting power (electric) or closing a gas valve (gas). Professional installation recommended.
Color and Contrast Considerations for Seniors with Arthritis and Vision Changes
High-contrast color schemes—like dark countertops against white cabinets or black stove controls on stainless steel—help seniors with declining vision distinguish surfaces and controls more easily while cooking.
High-Contrast Countertops and Backsplashes
Your countertop and backsplash should contrast sharply. Not just for aesthetics—for functionality.
White counter, dark backsplash (or vice versa). This helps you see the edge where counter meets wall. Prevents you from knocking things off the counter or misjudging placement.
If you’re choosing dark counters (black, dark gray, dark brown), use light-colored dishes and bowls. You can see them clearly on the dark surface. Light counters? Use some dark dishes in your rotation.
Patterned counters (busy granite, multi-color quartz) can make it hard to see items sitting on them. Solid colors or subtle patterns work better.
Visibility of Stove Controls and Burners
Black stove, black knobs = can’t see which setting you’re on. Terrible design for anyone with vision issues.
Look for:
- White or silver control markings on dark stoves
- Illuminated knobs (light up when burner is on)
- Large, clear numbers and indicators
- Colored LED rings around burners (many induction cooktops have this—red when hot, changes color as it cools)
Touch controls can be hard to see (flat black surface with black icons). Get a model with bright white icons or backlighting.
Color-Coding for Different Kitchen Zones
Use color to define areas and make items easier to find.
Example system:
- Red handles/pulls on drawers with cookware
- Blue handles on drawers with utensils
- Green handles on food storage cabinets
- Yellow for cleaning supplies
Your brain learns the associations. Need a skillet? Red drawer. Spatula? Blue drawer. Faster than reading labels, easier than remembering.
Colored cutting boards: red for meat, green for vegetables. Standard in commercial kitchens for food safety. Also helps you grab the right board quickly.
Adapting Existing Kitchens: Modifications for Arthritis-Friendly Layouts
Converting existing kitchens to arthritis-friendly layouts starts with three high-impact changes: replacing cabinet hardware with lever pulls ($150-300), installing pull-out shelves in base cabinets ($400-800), and adding task lighting under wall cabinets ($200-400).
Prioritizing Changes Based on Budget and Impact
Can’t afford a full remodel? Start here:
Under $500:
- Replace all cabinet hardware with D-pulls or lever handles ($150-300)
- Add LED under-cabinet lighting ($100-200)
- Install a touchless faucet ($200-400)
$500-$2000:
- Convert 3-4 base cabinets to pull-out shelves ($600-1200)
- Raise your dishwasher on a platform ($200-500)
- Add a motion-sensor stove shut-off device ($300-400)
$2000-$5000:
- Install a wall oven at proper height ($1500-3000)
- Replace flooring with cushioned LVP ($2000-4000 for average kitchen)
- Add pull-down shelving to upper cabinets ($400-800)
$5000+:
- Full counter height adjustment ($3000-8000)
- Complete cabinet replacement with pull-out systems ($8000-15000)
- Kitchen layout reconfiguration ($15000-40000)
DIY Modifications vs. Professional Remodeling
Some changes are DIY-friendly even with limited mobility or strength:
Easy DIY:
- Swapping cabinet hardware
- Installing LED strip lights (adhesive-backed)
- Adding drawer organizers
- Mounting magnetic knife strips
Moderate DIY (requires some skill and tools):
- Installing pull-out shelf retrofit kits
- Replacing faucet with touchless model
- Adding open shelving
Hire a pro:
- Anything involving gas lines
- Electrical work beyond simple plug-in lights
- Countertop replacement or modification
- Cabinet installation or height changes
- Flooring replacement
Temporary Solutions for Rental Properties
Landlord won’t let you modify? Here’s what you can do without permanent changes:
Removable options:
- Over-the-cabinet organizers (hang on existing doors)
- Freestanding baker’s racks for accessible storage
- Adhesive LED lights (peel off when you move)
- Drawer organizers (no installation required)
- Countertop organizers for frequently-used items
- Anti-fatigue mats on existing flooring
Swap cabinet hardware but keep the originals. When you move out, swap back. Takes 30 minutes.
Installing Pull-Out Shelves in Existing Cabinets
This is the single best modification you can make. Turns useless base cabinets into actually usable storage.
Retrofit kits mount inside existing cabinets. You’re attaching slides to the cabinet sides, then the shelf sits on the slides. DIY-possible if you’re comfortable with a drill and level.
Get full-extension slides rated for heavy weight (100+ pounds). Cheaper slides only extend 75% of the way—you still can’t reach items at the back.
Measure your cabinet interior carefully. Width, depth, and height. Most retrofit kits are adjustable but only within certain ranges.
Island and Peninsula Design for Seniors with Arthritis
Kitchen islands work best for seniors with arthritis when they’re 36 inches high with 15 inches of knee space on at least one side, allowing for both standing and seated work at the same surface.
Optimal Island Height and Overhang for Seating
Standard island height: 36 inches (same as base counters). Works for standing prep and cooking.
Add a raised bar section at 42 inches if you want seating—this gives you stool-height space for perching while doing light tasks.
Overhang requirements:
- 12 inches minimum for knee space (tight but functional)
- 15 inches for comfortable seating
- 18 inches if you’re using the space regularly for meals or extended work
The overhang needs structural support (corbels, brackets, or a structural design that handles the cantilevered weight). Don’t just hang 18 inches of countertop off the edge without support.
Including Cooktop or Sink in Islands: Pros and Cons
Island cooktop pros:
- Work triangle can be tighter (stove in the middle of the room)
- Multiple people can cook (one at island, one at wall stove)
- Wheelchair accessible (knee space on sides)
Island cooktop cons:
- Requires downdraft ventilation or ceiling-mounted hood (more expensive)
- Hot pots and pans around seating area (safety concern)
- Less counter landing space (burners take up room)
Island sink pros:
- Face into room while washing dishes (more social)
- Wheelchair accessible
- Creates additional work zone
Island sink cons:
- Plumbing and electrical more complex (higher installation cost)
- Splashing water toward seating area
- Dirty dishes visible from living areas
For seniors with arthritis, an island prep surface (no cooktop or sink) is usually the best option. Storage underneath, open knee space on one side, clean counter for working.
Storage Solutions Within Islands for Skillets
Islands are perfect for skillet storage if designed right.
Deep drawers on the stove-facing side. Your skillets live here, 2 feet from where you’ll use them. Vertical dividers keep them organized and accessible.
Open shelving on the seating side works if you don’t mind seeing your cookware on display. Makes grabbing things easy but creates visual clutter.
Combination approach: drawers on the working side, open shelving or cabinets on the back side. Gives you visible storage for pretty items (serving bowls, cookbooks) and hidden storage for daily-use skillets and pots.
Organizing Kitchen Tools and Utensils for Easy Skillet Cooking
Store cooking utensils in a wide-mouth crock directly next to your stove at counter height—this eliminates opening drawers with wet or greasy hands and keeps your most-used tools within immediate reach.
Utensil Placement Near the Stove
Counter crock beats drawer storage for your daily cooking tools. Here’s why: no bending, no pulling, no gripping a handle. Reach over, grab what you need.
Use a heavy crock (ceramic or weighted base) so it doesn’t tip when you’re grabbing utensils. Wide mouth (4-5 inches diameter minimum) makes it easier to see everything and grab without knocking others over.
What goes in the crock:
- Silicone spatula (primary skillet tool)
- Wooden spoon or two
- Tongs
- Whisk
- Serving spoon
That’s it. Five tools maximum. More than that and you’re digging around searching.
Drawer Organizers for Spatulas and Cooking Tools
If you’re using drawers for utensil storage (backup tools, specialty items), get organizers with divided sections.
Skip the silverware-style organizers with tiny compartments. Get ones with larger sections (3×4 inches minimum) that hold bulky items like whisks and mashers.
Store drawers at 24-30 inches height (not the standard 36-inch counter drawers—those are for frequently accessed items). Lower drawers work fine for occasionally-used tools.
Bamboo organizers are lightweight and easy to remove for cleaning. Plastic organizers are cheaper. Both work.
Magnetic Strips for Metal Utensils
Mount a magnetic strip on the wall next to your stove (backsplash area, 40-48 inches from floor).
Your metal spatula, tongs, ladles—anything with ferrous metal—sticks magnetically. Grab and go. No opening drawers, no digging through crocks.
This only works for metal utensils. Silicone, wood, and plastic won’t stick (duh). But metal tools are easier to see hanging on the wall anyway.
18-24 inch magnetic strips cost $15-30. Easy installation (screw mount or heavy-duty adhesive). Game-changer for accessibility.
Ventilation Systems and Their Placement in Ergonomic Kitchens
Range hoods should mount at 24-30 inches above the cooktop surface for effective ventilation while remaining accessible to seniors who can’t reach overhead controls—use wall-mounted models with front-facing controls instead of bottom-mounted switches.
Range Hood Height for Easy Access and Safety
Standard installation puts range hoods 30-36 inches above the cooktop. That’s high enough to avoid head-bumping but low enough for ventilation effectiveness.
If you’re short or have limited shoulder mobility, 24-28 inches works better. You can reach the controls without stretching. Trade-off: you might bump your head if you lean over the stove. Be aware.
Controls should be on the front face (eye level when standing at stove) not underneath where you’re reaching up blindly. Touch controls or large paddle switches are easier than small buttons.
Downdraft Ventilation as an Alternative
Downdraft vents pop up from the cooktop or are built into the back edge. They pull smoke and steam downward instead of upward.
Benefits for seniors:
- No overhead unit to maintain
- Nothing to bump your head on
- Controls are at cooktop level (easy to reach)
Downsides:
- Less effective than overhead hoods (fighting natural heat rise)
- More expensive ($800-2000 vs. $200-600 for a basic hood)
- Can’t use tall pots (vent blocks them)
If you’ve got a cooktop in an island and don’t want a ceiling-mounted hood ruining your sightlines, downdraft is your option.
Quiet Ventilation Systems to Reduce Stress
Loud range hoods (4+ sones) are stressful. You can’t hear timers, can’t have a conversation, can’t hear if something’s going wrong on the stove.
Look for hoods rated at 3 sones or less. Modern hoods with larger fans running at slower speeds achieve this (less noise for same airflow).
Variable speed controls let you run the fan at low speed for simmering (quieter) and crank it up only when you’re searing and creating smoke.
Inline blowers (fan mounted in attic or exterior wall instead of in the hood) are the quietest option. Hood itself is silent—fan noise is 20 feet away. But installation cost is 2-3x higher.
Creating Multiple Cooking Heights in Your Kitchen Layout
Adjustable-height counters using motorized or hand-crank systems let you customize work surface height from 28-45 inches, accommodating both seated work and different tasks that require varying levels of leverage.
Adjustable-Height Counters and Work Surfaces
Electric lift systems (like standing desks but for counters) are available. Push a button, counter moves up or down. About $1000-2000 per counter section plus installation.
These work best for prep areas, not for sinks or cooktops (too much plumbing/electrical to move).
Manual crank-adjustable counters are cheaper ($400-800) but require hand strength to operate. Defeats the purpose for severe arthritis.
Most people don’t need truly adjustable. Just two or three fixed heights throughout the kitchen: 30 inches for seated work, 36 for standard standing, 38-40 for tasks requiring downward pressure.
Incorporating a Lower Counter Section for Seated Work
One 3-4 foot section of counter at 30 inches (with knee space underneath) lets you sit while chopping, mixing, or doing other prep tasks.
Position this in your prep zone, not near the stove (sitting while cooking over heat isn’t safe or comfortable).
Depth should be 24-30 inches (standard counter depth). Knee space underneath needs to be 27 inches high, 30 inches wide, 19 inches deep minimum.
Accessible sink installation: mount sink shallow (6-7 inches deep) in the lowered counter section. Insulate pipes underneath (prevents burns if legs contact hot water pipes). Offset faucet to maximize knee space.
Raised Edges to Prevent Items from Sliding
A small lip (1/2 to 1 inch tall) along counter edges prevents items from sliding off—especially important for people with tremors or reduced fine motor control.
This works best on counters adjacent to the stove (prevents pans or utensils from sliding onto burners) and on islands (prevents items from falling off the back side).
Metal or wood trim mounted to counter edge. About $50-150 for materials plus installation. Can be retrofitted to existing counters.
Downside: makes it slightly harder to wipe crumbs off the counter (they catch against the lip). But that’s a minor inconvenience compared to dropping a hot skillet.
Garbage and Recycling Placement in Arthritis-Friendly Layouts
Pull-out trash bins mounted in base cabinets at toe-kick height let you dispose of scraps by pushing the cabinet door with your foot—eliminating the need to bend over or touch dirty lids with arthritic hands.
Pull-Out Waste Bins at Accessible Heights
Trash cabinet with pull-out bin. Door opens, bin slides out automatically. No lifting a lid, no bending to drop items in.
Mount these in standard base cabinets (34-36 inches high). When the bin pulls out, the opening is at waist height—perfect for scraping plates or disposing of food waste while cooking.
Single large bin (simplest) or dual bins for trash/recycling. Dual bins require a wider cabinet (18 inches minimum vs. 12 inches for single).
Soft-close slides prevent slamming. Touch-latch doors mean you don’t need handles (push to open).
Positioning Trash Near Food Prep Areas
Your trash should be within 3 feet of your main prep counter. You’re peeling vegetables, trimming fat, disposing of packaging—constant trips to the trash adds up when you’re managing joint pain.
Corner of the L in an L-shaped kitchen is ideal. Or at one end of a galley run. Not under the sink (that space is better used for cleaning supplies and the plumbing gets in the way).
If you’ve got an island, put a small trash opening in the counter—knock scraps through into a bin below. Keeps your hands free (no opening doors) but requires emptying more frequently (smaller capacity).
Touchless Trash Can Options
Sensor-operated lids open automatically when you approach. Hold a plate over the can, lid opens, scrape food off, walk away.
Battery-powered (cheaper, $50-100) or AC adapter models (more reliable, $100-200). Batteries last 3-6 months depending on usage.
Standard sizes (13 gallon) fit in most under-sink cabinets if you want a touchless can in a cabinet. Larger models (20+ gallon) work as freestanding units next to your prep area.
These reduce the number of times you’re touching dirty surfaces, which is good for hygiene and means you’re washing your hands less often (hand-washing aggravates arthritis).