One-pan skillet dinners help seniors with arthritis mainly by cutting down the physical workload of cooking — fewer pots to lift, less standing at the stove, way less to wash when you’re done. That’s the real benefit. Let’s be straight about what this isn’t, though: a recipe format doesn’t treat arthritis. It doesn’t prevent flare-ups. Nothing in a skillet is medicine.
What it does do is take a chunk of the physical effort out of making dinner. Less lifting. Less chopping. Less standing around waiting for three different pots to finish at three different times. And yeah — some of these recipes lean on ingredients that show up a lot in general anti-inflammatory dietary research. Worth mentioning. Not a guarantee for you specifically, and definitely not a substitute for talking to your doctor or a dietitian about your actual situation.
| Benefit | Why It Matters | Medical Claim? |
|---|---|---|
| One pan to lift and clean | Less repetitive lifting, less dishwashing | Nope — just physical |
| Less chopping | Less wrist and hand motion | Nope — just physical |
| Shorter cook time | Less standing, less fatigue | Nope — just physical |
| Anti-inflammatory ingredients | Linked to inflammation markers in nutrition studies | General association only — not treatment |
Table of Contents
- 1 Why One-Pan Dinners Make So Much Sense When You’re Dealing with Arthritis
- 2 What Actually Makes a Skillet Dinner Easier on Your Hands
- 3 One-Pan Skillet Dinners for Seniors: The Recipe Roundup
- 4 Picking the Right Skillet for Easier One-Pan Cooking
- 5 Meal Prep Tricks to Cut Down Physical Strain Even Further
Why One-Pan Dinners Make So Much Sense When You’re Dealing with Arthritis
Think about what a regular dinner actually demands from your body. You’re lifting a pot for the side dish. Managing a separate pan for the protein. Watching two or three things on the stove at once, juggling timers in your head. And then — after all that — you’re washing every single piece. That’s a lot of repetitive lifting, gripping, and standing stacked into one evening. Every single night.
Multi-pan cooking doesn’t just add up the physical demand. It compounds it. Your wrists, hands, shoulders — all of it gets hit across the entire session instead of just once. And here’s something people don’t think about enough: washing up afterward is often the most physically demanding part of the whole process. Not the cooking. The cleanup. Fewer dishes is a bigger deal than it sounds.
And standing time matters too. Longer cooking sessions with multiple components mean more time on your feet. Which stacks right on top of whatever hip or knee arthritis you’re already managing, on top of your hands. It’s not just one joint dealing with one task. It’s everything, all at once, for longer than it needs to be.
How One Pan Actually Cuts That Down
One pan means one thing to lift onto the burner. One thing to watch. One thing to wash when dinner’s done. That’s just fewer total physical tasks, full stop.
Building a meal in stages — sear the protein, add vegetables, finish with a quick sauce, all in the same skillet — means you’re never juggling multiple hot surfaces and multiple timers at once. Simpler recipes with fewer steps also cut down on decision fatigue. That’s not a joint-specific benefit, sure, but it matters for whether cooking feels sustainable night after night or like something you dread.
Again — this is about cutting physical task volume. Not treating the condition. Keep that distinction in your head as we go through this.
The Pan Itself Still Matters, Though
Here’s a wrinkle worth pointing out: a one-pan recipe doesn’t help much if the pan itself is a brick. A heavy cast iron skillet kind of defeats the whole purpose of “easy one-pan cooking” if it hurts to lift and maneuver in the first place.
Go lightweight. Hard-anodized aluminum or a good nonstick aluminum pan in the 10 to 12-inch range works well — same general guidance you’d find in any solid arthritis-friendly cookware roundup. And the handle matters just as much as the pan’s weight. Wide, contoured, or silicone-wrapped grips make the stirring and tossing these recipes ask for genuinely easier on your hands.
What the Research Actually Says About Diet and Inflammation

Quick, honest note here. Certain dietary patterns — Mediterranean-style eating gets mentioned a lot — show up in nutrition research associated with lower markers of general inflammation in some studies. That’s real. It’s also population-level research, not a personal guarantee, and definitely not a treatment for arthritis or a way to prevent flare-ups in any individual person.
If you want to make dietary changes specifically because of your arthritis, talk to your doctor or a registered dietitian. They know your situation. This article doesn’t. The recipes below just happen to include ingredients common in these general dietary patterns — think of that as a nice bonus, not a medical strategy.
What Actually Makes a Skillet Dinner Easier on Your Hands
Less Chopping, Less Fuss
Recipes with fewer ingredients and simpler cuts — sliced instead of diced, pre-cut or frozen vegetables where it makes sense — cut down on the repetitive knife-gripping that wears on your hands. And look, there’s no shame in pre-minced garlic from a jar, or frozen pre-chopped onion. None. These aren’t shortcuts for lazy cooks. They’re smart tools for reducing strain. A single spice blend instead of measuring out eight different jars helps too — less fine motor work, less twisting lids open and shut.
Built in Stages, Not Constant Stirring
Recipes that work in stages — sear, then add vegetables, then simmer — are just easier on arthritic hands than recipes demanding constant stirring or precise flipping technique. A lid-friendly recipe, one where you cover and simmer instead of hovering and stirring nonstop, cuts down your standing time near the stove. And recipes that finish in the oven? Even better. Sear on the stovetop, then let the oven do the rest hands-off.
Right-Sized Pan, Right-Sized Portions
A 10 or 12-inch skillet covers most 2 to 4-serving dinners just fine — no need for an oversized, heavier pan you’ll struggle to lift. Recipes built for realistic portions (not scaled-up family-style batches) keep the loaded pan lighter while you’re cooking and serving. And here’s a small trick: serve straight from the skillet. Skip the extra serving dish. One less thing to lift, one less thing to wash.
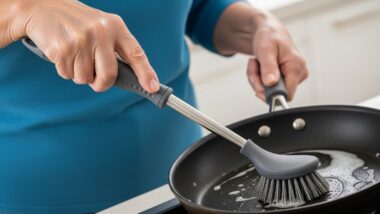
Cleanup That’s Actually Built Into the Recipe
Recipes that avoid heavy browning or burnt-on starches mean less scrubbing later — that’s just smart recipe design. A single sauce or liquid base that wipes or rinses away easily beats one that leaves stubborn, stuck-on residue every time. And here’s a tip that sounds obvious but gets skipped constantly: let the pan soak in warm water for a bit instead of attacking it with a scrub brush the second dinner’s over. Less effort right when you’re already tired from cooking.
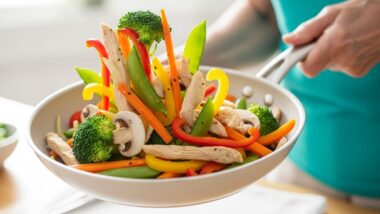
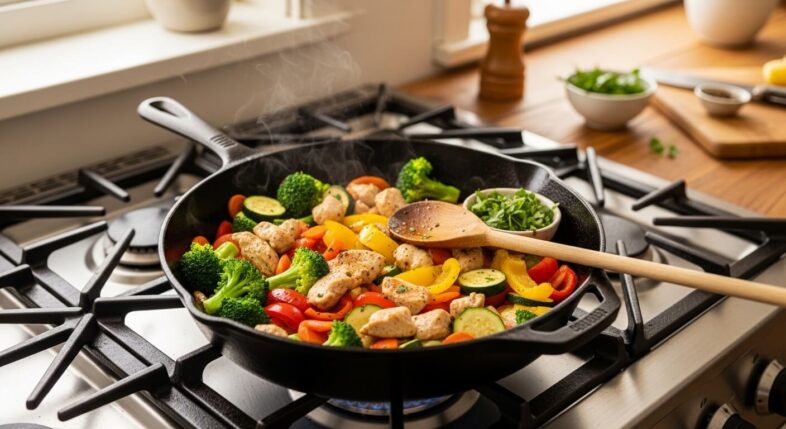
One-Pan Skillet Dinners for Seniors: The Recipe Roundup
One-Pan Lemon Garlic Chicken and Vegetables
A simple sear-and-simmer dinner. Boneless chicken thighs, quick-cooking vegetables, a light lemon-garlic pan sauce to finish. Minimal chopping. One pan. One cleanup.
- Cost: $10–$14 for 4 servings
- Time: 30 minutes
- Uses pre-cut or frozen vegetable blends (green beans, baby potatoes, broccoli florets) — skip the chopping entirely if you want
- Three stages: sear the chicken, add vegetables, finish with the sauce
- Mostly occasional turning, not constant stirring
Ingredients:
- 4 boneless, skinless chicken thighs (trimmed of excess fat)
- 2 tbsp olive oil
- 1 lb green beans, baby potatoes, or broccoli florets (fresh, frozen, or pre-cut bag)
- 3 cloves garlic, minced (or 1 tbsp jarred minced garlic)
- 1 cup low-sodium chicken broth
- Juice of 1 lemon (or ¼ cup bottled lemon juice)
- 1 tsp dried oregano
- Salt and pepper, to taste
Instructions:
- Pat chicken thighs dry. Season both sides with salt, pepper, and oregano.
- Heat olive oil in a 12-inch skillet over medium-high heat.
- Add chicken thighs and sear 5–6 minutes per side, until browned. Remove and set aside on a plate.
- Add vegetables to the same skillet. Stir once to coat in the leftover oil.
- Add garlic, chicken broth, and lemon juice. Stir once to combine.
- Return chicken thighs to the skillet, nestling them among the vegetables.
- Cover and reduce heat to medium-low. Simmer 12–15 minutes, until chicken reaches 165°F internally and vegetables are tender.
- Serve directly from the skillet.
Pros: Very little chopping if you’re using pre-cut veggies. The staged process means you’re never watching three things at once. Reheats easily without extra dishes.

Cons: You’ll do some turning with tongs, which involves a bit of wrist motion. And boneless thighs need a quick one-time trim of fat — brief knife work, but it’s there.
Best for: Anyone who wants a complete, balanced dinner without much hands-on time and only light, occasional stirring.
One-Pan Sausage, Peppers, and Sweet Potato Skillet
Hearty. Mostly hands-off. Pre-cooked sausage, sliced peppers, pre-cubed sweet potato (seriously, buy it pre-cubed — it’s in every produce section now), finished with one simple spice blend.
- Cost: $9–$13 for 4 servings
- Time: 35 minutes
- Pre-cooked sausage means no monitoring raw meat doneness
- Pre-cubed sweet potato removes the single most physically demanding chopping job in this whole recipe
- Covered simmer step — let it soften without standing over it
- One seasoning blend (smoked paprika, garlic powder, salt) instead of five different jars
Ingredients:
- 1 lb pre-cooked smoked sausage (kielbasa or similar), sliced into ½-inch rounds
- 2 tbsp olive oil
- 2 bell peppers, sliced into strips
- 1 lb pre-cubed sweet potato (about 3 cups)
- 1 tsp smoked paprika
- ½ tsp garlic powder
- ½ tsp salt
- ¼ cup water or broth (for steaming)
Instructions:
- Heat olive oil in a 12-inch skillet over medium heat.
- Add sliced sausage. Cook 4–5 minutes, turning occasionally, until lightly browned.
- Add sweet potato cubes and bell peppers to the skillet.
- Sprinkle smoked paprika, garlic powder, and salt over everything. Stir once to coat.
- Add water or broth. Cover the skillet.
- Reduce heat to medium-low. Simmer 15–18 minutes, stirring once or twice, until sweet potato is fork-tender.
- Remove lid for the final 2 minutes to let any extra liquid cook off.
Pros: That covered-simmer step gives you real hands-off time. Pre-cooked sausage cuts down both the cook time and the food-safety worrying. Filling enough that you don’t need a separate side.
Cons: Slicing the peppers still needs some knife use, though it’s an easy, forgiving cut. Sweet potato takes a little longer to soften than other vegetables, so the total time runs a touch longer.
Best for: Anyone who wants a mostly hands-off dinner with one seasoning blend and a lot of lid-on simmering.
One-Pan Shrimp and Orzo Skillet
Fast. Genuinely fast. Frozen pre-peeled shrimp, orzo pasta, a simple tomato or broth base — everything cooks together in one skillet, no separate pasta pot required.
- Cost: $12–$16 for 4 servings
- Time: 25 minutes
- Frozen, pre-peeled, deveined shrimp — zero knife work once it’s thawed
- Orzo cooks right in the skillet liquid, no boiling a separate pot
- One stir to combine, then a covered simmer
- Quick overall, which keeps standing time low
Ingredients:
- 1 lb frozen, pre-peeled and deveined shrimp, thawed
- 2 tbsp olive oil
- 1 cup orzo pasta (uncooked)
- 2 cups low-sodium chicken or vegetable broth
- 1 cup canned diced tomatoes (or tomato sauce)
- 2 cloves garlic, minced (or 2 tsp jarred minced garlic)
- ½ tsp dried Italian seasoning
- Salt and pepper, to taste
- Optional: grated parmesan for serving

Instructions:
- Heat olive oil in a 12-inch skillet over medium heat.
- Add garlic and orzo. Stir for 1 minute to lightly toast the pasta.
- Add broth, diced tomatoes, and Italian seasoning. Stir once to combine.
- Cover and simmer over medium-low heat for 10 minutes, stirring once halfway through to prevent sticking.
- Add shrimp on top of the orzo. Cover again and cook 4–5 minutes, until shrimp turn pink and opaque.
- Season with salt and pepper. Top with parmesan if desired and serve from the skillet.
Pros: One of the fastest recipes here, period. No separate pasta pot means meaningfully less to wash. Frozen shrimp means zero prep beyond thawing.
Cons: Shrimp overcooks fast if you walk away too long — needs a little attentiveness on timing. Orzo wants an occasional stir to keep it from sticking, though way less than boiling pasta the normal way.
Best for: Anyone who wants the fastest dinner on this list with virtually no chopping and minimal pot-watching.
One-Pan Beef and Broccoli Skillet
A gentler, home-style take on classic stir-fry. Pre-sliced beef (look in the meat section, it’s usually labeled for stir-fry) and bagged broccoli florets do most of the heavy lifting here.
- Cost: $13–$18 for 4 servings
- Time: 25 minutes
- Pre-sliced beef means no precise knife work on raw meat
- Bagged, pre-cut broccoli florets — chopping eliminated completely
- Simple two-ingredient sauce: soy sauce plus a little brown sugar or honey
- Gentle tossing instead of the aggressive high-heat tossing real stir-fry technique demands
Ingredients:
- 1 lb pre-sliced stir-fry beef
- 2 tbsp vegetable or canola oil
- 1 (12 oz) bag pre-cut broccoli florets
- 3 tbsp soy sauce
- 1 tbsp brown sugar or honey
- 1 tsp cornstarch (optional, for thickening)
- 2 tbsp water
- 1 tsp jarred minced garlic (optional)
Instructions:
- In a small bowl, stir together soy sauce, brown sugar, water, and cornstarch (if using). Set aside.
- Heat oil in a 12-inch skillet over medium-high heat.
- Add beef in a single layer. Cook 3–4 minutes without much stirring, then gently turn pieces and cook another 2 minutes, until browned.
- Add broccoli florets and garlic (if using) to the skillet.
- Pour the sauce mixture over everything. Toss gently to coat.
- Cover and reduce heat to medium. Cook 5–6 minutes, until broccoli is bright green and tender.
- Serve immediately, straight from the skillet.
Pros: Fast cook time keeps standing demand low. Pre-sliced beef and bagged broccoli mean almost zero prep. The sauce is two ingredients — barely any measuring fuss.
Cons: Gentle tossing still asks some wrist motion, even if it’s nowhere near traditional stir-fry intensity. Pre-sliced stir-fry beef runs a bit pricier per pound than other cuts.
Best for: Anyone who likes stir-fry flavors but wants a gentler, lower-effort version of the technique.
One-Pan Vegetarian White Bean and Spinach Skillet
Simple. Mostly pantry staples. Canned white beans, frozen spinach, a light tomato base. No meat to manage at all.
- Cost: $6–$9 for 4 servings
- Time: 20 minutes
- Canned beans need just opening and draining — no chopping, no cooking from raw
- Frozen spinach instead of fresh, which skips washing and wilting prep entirely
- Mostly combining and heating through, minimal stirring
- Includes ingredients (leafy greens, legumes) often discussed in general anti-inflammatory dietary research — again, that’s a population-level association, not a personal guarantee, and not medical advice

Ingredients:
- 2 (15 oz) cans white beans (cannellini or great northern), drained and rinsed
- 2 tbsp olive oil
- 1 (10 oz) bag frozen spinach (no need to thaw first)
- 1 (14 oz) can diced tomatoes
- 2 cloves garlic, minced (or 2 tsp jarred minced garlic)
- ½ tsp dried oregano or Italian seasoning
- Salt and pepper, to taste
- Optional: grated parmesan or crumbled feta for serving
Instructions:
- Heat olive oil in a 10-inch skillet over medium heat.
- Add garlic and cook for 30 seconds, just until fragrant.
- Add frozen spinach directly to the skillet. Cover and let it cook down for 3–4 minutes, stirring once.
- Add drained white beans and diced tomatoes. Stir once to combine.
- Season with oregano, salt, and pepper.
- Reduce heat to medium-low. Simmer uncovered for 8–10 minutes, stirring occasionally, until heated through and slightly thickened.
- Top with parmesan or feta if desired and serve from the skillet.
Pros: The cheapest recipe in this whole roundup, built almost entirely from pantry and freezer staples. No raw meat handling, no timing stress. Barely any chopping — really just opening cans and a bag.
Cons: Some people will want more protein alongside or instead of the beans, depending on personal needs. And canned bean lids can be tough on weaker grip — a comfortable hand-can opener helps a lot here.
Best for: Anyone wanting a quick, budget-friendly, vegetarian dinner with minimal physical prep — including anyone leaning toward more plant-forward eating in general.
Picking the Right Skillet for Easier One-Pan Cooking
Weight Still Matters, Even for “Easy” Recipes
Worth saying again: a one-pan recipe loses most of its physical benefit if the pan itself is heavy to lift, tilt, or carry to the table. Go with a lightweight hard-anodized aluminum or nonstick aluminum skillet, somewhere in the 10 to 12-inch range — that’s the same advice you’d find in any decent arthritis-friendly cookware guide. And the handle design matters just as much. Wide, contoured, silicone-wrapped grips make the stirring and tossing these recipes need genuinely easier.
What Size Actually Fits These Recipes
A 10-inch skillet comfortably handles 2 to 3 servings of most recipes here. A 12-inch is better if you’re going for the full 4-serving batch. And here’s a counterintuitive tip: going slightly bigger than seems necessary can actually reduce strain, since a too-small pan means more careful, anxious stirring to avoid spills and overflow. A wide, shallow pan also beats a deep, narrow one — easier to reach every part of the pan without twisting or extending your wrist further than you need to.
Nonstick Surfaces and Why They Matter for Cleanup
A good nonstick or ceramic coating cuts down scrubbing more than just about anything else. These recipes are designed to avoid heavy browning or starchy stuck-on residue in the first place, which helps too. One thing worth remembering: nonstick coatings wear out eventually. Replace them when they start losing their slickness, or you’ll lose the easy-cleanup benefit that made the pan worth buying in the first place.
Meal Prep Tricks to Cut Down Physical Strain Even Further
Prep on Your Good Days
Wash, portion, or pre-cut vegetables when your joints are feeling better, then refrigerate or freeze them for later in the week. That front-loads the more demanding work into the moments your hands can actually handle it. And if even light prep isn’t manageable some weeks? Buy the frozen pre-cut stuff. Same result, zero at-home effort.
Don’t Feel Guilty About Shortcuts
Pre-minced garlic. Bottled lemon juice. Pre-made spice blends. These aren’t cheating — they’re tools. The goal here is a cooking routine you can actually keep up, not some imagined standard of culinary perfectionism nobody’s grading you on. And fewer little jars and containers to open and measure from means fewer repetitive grip-and-twist motions during prep. That adds up more than you’d think.
Build a Small Rotation You Can Lean On
Settle into 4 to 6 go-to one-pan recipes — some from this roundup, maybe some of your own — instead of constantly chasing new, more complicated meals. Familiarity cuts down the mental and physical decision-load of cooking, which frees up energy for the actual physical tasks involved. And here’s a genuinely useful trick: double a recipe on a good day, then freeze the extra portion for a rougher day later in the week. Future-you will be glad you did.