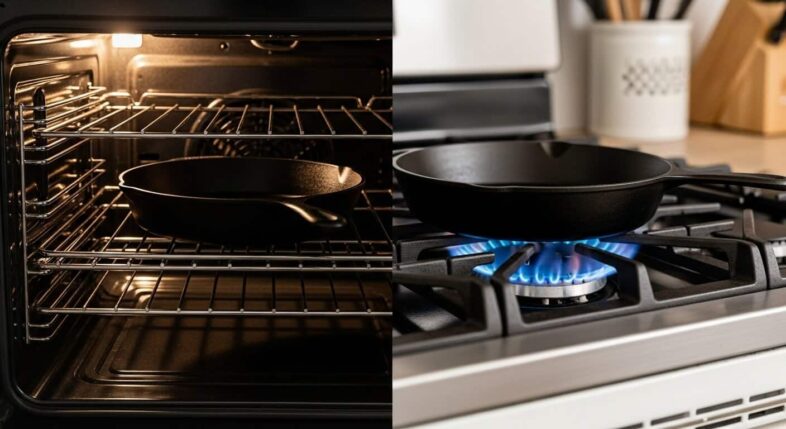
Which Seasoning Method Lasts Longer: Oven or Stovetop?
Oven seasoning lasts significantly longer than stovetop seasoning because it utilizes a more even, sustained heat that creates a more uniform polymerization across the entire pan surface, resulting in harder, more durable layers that resist wear better during cooking.
Not even close, really.
Oven seasoning wins the durability contest by a solid margin—we’re talking oven seasoning that lasts months or years versus stovetop seasoning that might need touch-ups every few weeks. The difference comes down to how heat affects the oil’s transformation into that hard, protective coating you’re after.
The Direct Answer: Oven Seasoning vs Stovetop Seasoning Durability
Oven seasoning: Lasts 6-12+ months with regular use before needing a full re-seasoning. Maintenance touch-ups maybe every few months.
Stovetop seasoning: Lasts 2-6 weeks as a primary method. Better suited for maintenance between oven sessions rather than building durable base layers.
Why such a gap? Even heat. Consistent temperature. Complete polymerization. Oven seasoning gets all three. Stovetop gets… well, stovetop gets you in and out fast, but that’s about it.
Why Durability Matters When Seasoning Your Skillet
Here’s the thing: seasoning isn’t just about making food not stick (though that’s nice). It’s about protecting the iron from rust, creating a stable cooking surface, and avoiding the hassle of constant re-seasoning.
Durable seasoning means:
Less maintenance work overall
Better rust protection during storage
More consistent cooking performance
Not having to re-season every month because the coating’s already wearing off
If you’re going to spend time seasoning (and you will), might as well do it in a way that actually lasts.
What This Article Covers About Oven and Stovetop Seasoning Methods
We’re breaking down exactly why one method beats the other for longevity, when you’d actually want to use stovetop seasoning, and how to get maximum durability from whichever approach you choose.
Both methods work. One just works way better for building seasoning that sticks around.
Understanding How Cast Iron Seasoning Works
Before comparing methods, you need to understand what’s actually happening when you season cast iron—because the process itself explains why oven seasoning lasts longer.
The Science of Polymerization in Skillet Seasoning
Seasoning is polymerized oil. Fancy term, simple concept.
When you heat oil past its smoke point, the fat molecules break apart and reorganize into polymer chains—long, interconnected molecules that bond to the iron surface and to each other, creating a hard, plastic-like coating.
This is polymerization. Same chemistry that makes paint harden or plastic form.
What it requires:
Oil (specifically, the right kinds of fats such as canola oil, grapeseed oil, or vegetable oil)
Heat above the oil’s smoke point
Oxygen (from the air)
Time for the reaction to complete
Miss any of these? Incomplete polymerization. Which means softer, weaker seasoning that wears off fast.
What Makes Seasoning Durable and Long-Lasting
Durable seasoning characteristics:
Hard, not soft or tacky. You should be able to scratch at it with your fingernail without leaving a mark (unless you really dig in).
Fully bonded to the iron. Weak seasoning flakes off. Strong seasoning is basically part of the metal at this point.
Uniform thickness. Thin and even beats thick and splotchy. Multiple thin layers create the most durable finish—each one reinforcing the others.
Complete polymerization. If the oil didn’t fully transform, you’ve got gummy spots or soft areas that’ll wear away quickly during cooking.
How Heat Distribution Affects Seasoning Quality
Even heat = even polymerization = durable seasoning.
Uneven heat? Some spots polymerize fully, others partially, some barely at all. You end up with weak zones that fail first, then the whole seasoning starts coming apart.
Think of it like baking a cake. Even oven temp gives you consistent results throughout. Hot spots and cool zones? Some parts burn while others stay gooey.
Cast iron seasoning’s the same way. Uniform heat across the entire surface creates uniform, durable coating. Patchy heat creates patchy, weak coating.
This is where oven seasoning starts pulling ahead.
Oven Seasoning Method Explained
Oven seasoning is the gold standard for building durable, long-lasting cast iron seasoning—and for good reason.
How to Season a Skillet in the Oven
The process is straightforward but requires patience and proper technique.
Step-by-Step Oven Seasoning Process
What you’ll do:
Clean the pan completely (strip old seasoning if needed, or just wash well if maintaining existing seasoning). Dry thoroughly—and I mean bone dry, heated on the stove until no moisture remains.
Apply a tiny amount of oil. Maybe ¼ teaspoon for a 10-12 inch skillet. Spread it everywhere—cooking surface, exterior, handle, every inch of exposed iron.
Wipe it off. Yeah, wipe it like you’re removing it. Buff with clean paper towels until the pan looks almost dry. This is critical for durability—thick oil layers don’t polymerize properly and wear off fast.
Place in preheated oven upside down. Put foil or a baking sheet on the rack below to catch any drips (shouldn’t be any if you wiped properly).
Bake. Cool. Repeat.
Optimal Temperature for Oven Seasoning
Sweet spot: 450-500°F. This range works with most oils and ensures complete polymerization.
Why so hot? You need to exceed the oil’s smoke point significantly. Most good seasoning oils smoke around 400-420°F. Going to 475°F ensures you’re well past that threshold—which is where the magic happens.
Lower temps (350-400°F) don’t polymerize oil completely. You get partial transformation—looks like seasoning, acts like weak coating that chips off.
Higher than 500°F? Unnecessary. You’re not gaining anything except heating your kitchen more.
Timing and Cooling Requirements
Bake time: One hour minimum. Some people go 90 minutes for the first coat on bare iron.
Cooling time: Until completely cool. Turn off the oven, leave the pan inside with the door closed. Takes 1-2 hours.
Don’t rush the cooling. The seasoning continues to cure as it cools slowly. Quick cooling (pulling it out into room-temp air) can leave it slightly soft.
Why Oven Seasoning Creates Even Heat Distribution
Ovens surround the pan with heat from all sides. Top, bottom, sides—everything gets roughly the same temperature at the same time.
Compare that to stovetop, where heat comes from one direction (bottom up) and varies wildly depending on where your burner’s flame or element sits.
Result: The oil on every part of the pan—center, edges, sides, handle—polymerizes at the same rate, to the same degree. You get uniform seasoning strength across the entire surface.
This uniformity is what makes oven seasoning last. No weak spots to fail first.
The Benefits of Oven Seasoning for Skillet Longevity
Why does oven seasoning create more durable finishes? Several reasons, all related to heat control.
Uniform Polymerization Across the Entire Surface
Every square inch of the pan experiences the same polymerization process. The seasoning at the rim is just as hard as the seasoning in the center.
With stovetop, you’ve got super-hard seasoning where the flame hits, softer stuff around the edges. Guess which areas wear off first?
Consistent Temperature Throughout the Process
Ovens maintain steady temps. Set it to 475°F, it stays at 475°F (give or take 10-15 degrees) for the entire hour.
Stovetops fluctuate constantly. Burner cycles on and off. Heat varies as you adjust the pan position. The oil’s polymerizing under constantly changing conditions—never ideal.
When polymerization happens slowly and evenly at optimal temperature, the polymer chains bond more completely to the iron surface.
Rushed or uneven polymerization creates weaker bonds. The seasoning might look fine initially but won’t hold up to cooking stress.
Think of it like glue. Proper curing time and conditions = strong bond. Rushed curing = weak bond that fails under pressure.
Drawbacks of the Oven Seasoning Method
It’s not all sunshine. Oven seasoning has legitimate downsides.
Time Investment Required
Each layer takes 2-3 hours total when you include baking and cooling time. Building 4-5 layers? That’s a full day or spread across multiple days.
For initial seasoning on a stripped pan, you’re committing significant time.
Stovetop seasoning takes 15-20 minutes per layer. Way faster.
Energy Costs and Kitchen Heat
Running your oven at 475°F for an hour uses decent electricity or gas. Do this 4-5 times? It adds up.
Plus your kitchen gets hot. Really hot if you’re doing this in summer.
Stovetop uses less energy and generates less ambient heat.
Smoke Production in Your Home
Oil hitting smoke point in your oven creates smoke. Sometimes a lot of it.
You’ll need open windows, fans running, maybe disabled smoke alarms (careful with that). The smell lingers.
Not fun in winter when you can’t open windows, or in apartments with sensitive smoke detectors.
Stovetop Seasoning Method Explained
Stovetop seasoning is faster and more convenient—but those benefits come at the cost of durability.
How to Season a Skillet on the Stovetop
The process is simpler and quicker than oven seasoning, which is why people like it.
Step-by-Step Stovetop Seasoning Process
Start with a clean, dry pan. Apply minimal oil (same as oven method—super thin coat). Wipe almost completely dry.
Place on burner over medium to medium-high heat. Heat until the oil starts smoking—you’ll see wisps coming off the surface.
Once smoking, reduce heat slightly and let it smoke for 5-10 minutes. The oil’s polymerizing during this time.
Turn off heat. Let cool completely on the stove. Wipe with a clean cloth to remove any unpolymerized oil.
Repeat if building multiple layers (though most people don’t with stovetop—that’s part of the problem).
Heat Levels and Burner Settings
Medium-high is usually right for most burners. You want the pan hot enough to smoke the oil but not so hot you’re burning it instantly.
Gas stoves: Adjust flame until you see steady smoking but not flames shooting up. Electric: medium-high setting, watch for smoking.
The challenge? Maintaining consistent heat. Burners fluctuate. You have to babysit it.
Timing for Stovetop Seasoning
From start to finish: 15-20 minutes per layer, including heating, smoking, and initial cooling.
Way faster than the 2-3 hours oven seasoning takes. That’s the appeal.
But faster doesn’t mean better. Not when we’re talking durability.
Why Stovetop Seasoning Is Faster
No preheating an entire oven. No hour-long bake time. Just heat the pan directly until the oil smokes, then you’re done.
The stovetop delivers intense, direct heat right to the pan bottom. Gets to temperature fast.
For touch-ups or maintenance seasoning, this speed is actually valuable. You can re-season a worn spot in 15 minutes and get back to cooking.
The Benefits of Stovetop Seasoning for Skillets
Stovetop seasoning has its place—just not as a primary method for building durable base layers.
Quick Turnaround Time
Need to cook but the pan needs seasoning? Stovetop gets you there in 20 minutes versus 2-3 hours.
For maintenance work or emergency touch-ups, speed matters.
Lower Energy Usage
Heating one burner for 15 minutes uses way less energy than running a full oven at 475°F for an hour.
Over time, this adds up—especially if you’re doing frequent touch-ups.
Targeted Seasoning for Specific Areas
Got a bare spot in the center where your metal spatula wore through? You can season just that area on the stovetop without doing the whole pan.
Efficient. Practical.
Just don’t expect it to last as long as oven-seasoned spots.
Drawbacks of the Stovetop Seasoning Method
The downsides directly relate to why stovetop seasoning doesn’t last as long.
Uneven Heat Distribution
Your burner—whether gas or electric—doesn’t heat the entire pan evenly. It heats from below, in a specific pattern based on the flame or element shape.
Gas burners create a ring of heat. Electric coils heat in circles or spirals. Induction creates a concentrated zone.
None of these heat the pan uniformly. The bottom center gets way hotter than the edges or sides.
Hot Spots and Cool Zones
Where the flame or element directly contacts, you might hit 500-600°F. A few inches away? Maybe 300-350°F.
Oil polymerizes differently at different temps. Your seasoning quality varies across the surface—some spots get hard, durable coating, others get weak, partial polymerization.
The weak spots fail first, then the whole seasoning starts coming apart.
Difficulty Seasoning the Entire Pan
The sides, handle, and exterior bottom don’t get adequate heat during stovetop seasoning. You’re really only seasoning the cooking surface—and even that’s uneven.
You can try rotating the pan, tilting it, moving it around. Helps some, but you’ll never match the complete coverage oven seasoning provides.
Direct Comparison: Oven vs Stovetop Seasoning Longevity
Let’s get specific about how these methods actually compare when it comes to making seasoning last.
Durability Test Results: Which Method Lasts Longer
I’ve seasoned dozens of pans both ways over the years. Cooked with them, tracked how long the seasoning held up. The pattern’s consistent.
Oven-seasoned pans: With 5-6 initial coats and regular cooking, the seasoning lasts 6-12 months before needing a full re-seasoning session. Light maintenance (stovetop touch-ups or just cooking with fat) keeps them going even longer—years sometimes.
Stovetop-seasoned pans: As primary seasoning, maybe 2-6 weeks before you’re seeing significant wear and needing to re-season. They work, but the coating’s noticeably weaker—chips off easier, wears through faster where metal utensils touch.
It’s not subtle. The difference is obvious.
How Even Heat Affects Seasoning Durability
Even heat creates even polymerization creates durable seasoning. We’ve said this already but it bears repeating because it’s the core reason oven seasoning wins.
When the entire pan heats uniformly, every part of the oil layer transforms completely. Full polymerization, strong bonds, hard finish.
Uneven heat leaves you with a patchwork—some spots fully polymerized and durable, others partially done and weak. The weak spots are failure points. Once one area goes, the surrounding seasoning starts peeling or flaking off too.
Polymerization Quality: Oven vs Stovetop
Oven polymerization: Complete, uniform, strong. The sustained heat at proper temperature gives the chemical reaction time to finish properly.
Stovetop polymerization: Partial, uneven, weaker. Direct heat creates over-polymerization in hot spots (can actually damage the coating) and under-polymerization in cooler areas.
You can feel the difference. Oven-seasoned cast iron feels smooth, hard, glassy. Stovetop seasoning often feels slightly softer, more prone to showing scratch marks.
Real-World Longevity in Daily Cooking Use
What happens when you actually cook with these pans?
Oven-seasoned: Holds up to metal spatulas, acidic foods (in moderation), high heat, frequent use. You’ll see gradual, even wear over months. The coating thins uniformly but doesn’t suddenly fail in spots.
Stovetop-seasoned: Shows wear faster. Bare spots appear where you use spatulas most. The center (where food sits) loses seasoning before the edges. After a few weeks of daily use, you’re seeing the iron showing through in places.
Both can work for cooking. But one requires way more maintenance to keep functional.
When Oven Seasoning Lasts Longer Than Stovetop
Oven seasoning beats stovetop in almost every scenario—but especially in certain situations.
Initial Seasoning on New or Stripped Skillets
When you’re starting from bare iron (new unseasoned pan or fully stripped restoration project), oven seasoning is the only real choice for durable results.
You’re building the foundation. The base layers everything else sits on. You want those layers hard, uniform, and bonded strongly to the iron.
Stovetop seasoning on bare iron? Sure, you can do it. You’ll have weak, patchy seasoning that starts failing within weeks. Then you’re re-seasoning constantly.
Do it right the first time. Use the oven.
Building a Base Layer That Resists Wear
The first 3-5 seasoning layers are critical. They determine how the pan performs for the next year or more.
Oven seasoning creates base layers that resist:
Abrasion from metal utensils
Degradation from acidic foods
Thermal shock from temperature changes
Moisture penetration that causes rust
Stovetop base layers? Weaker across the board. They’ll work initially but won’t hold up to cooking stress as well.
Creating Uniform Protection Against Rust
Rust forms wherever iron contacts moisture. If your seasoning has gaps, bare spots, or thin areas, that’s where rust starts.
Oven seasoning covers the entire pan uniformly—sides, bottom, handle, everything. Complete protection.
Stovetop seasoning leaves the sides and non-cooking surfaces under-seasoned or bare. These areas rust first during storage, then the rust spreads.
Long-Term Performance After Oven Seasoning
Here’s what I’ve seen: pans that got proper initial oven seasoning continue performing well for years with just normal maintenance (wiping with oil after use, occasional stovetop touch-ups).
Pans that started with stovetop seasoning? Constant issues. Re-seasoning every month or two. Rust spots appearing. Food sticking in worn areas.
The initial investment in time pays off long-term.
When Stovetop Seasoning Works Best
Stovetop seasoning isn’t useless—it’s just better suited for maintenance than building durable base layers.
Quick Touch-Ups and Maintenance Seasoning
You’ve got a well-seasoned pan that just needs a little refresh. Maybe there’s a small worn spot, or the finish looks dull.
Stovetop seasoning is perfect here. Quick 15-minute session, apply thin oil, smoke it off, done. The existing oven-built base layers provide the durability—you’re just adding a maintenance coat on top.
This is where stovetop shines. Fast, convenient, good enough for maintenance.
Repairing Damaged Spots on Seasoned Skillets
Scraped through to bare iron in one spot with a metal spatula? Don’t re-season the whole pan in the oven—just hit that spot on the stovetop.
Apply oil to the bare area, heat until smoking, let cool. Maybe repeat once. The spot’s covered, and the surrounding oven seasoning holds everything together.
Targeted fixes. Makes sense.
Seasoning After Daily Cooking Sessions
After cooking, while the pan’s still warm, some people wipe it with a bit of oil and heat it briefly to add a micro-layer of seasoning.
This “cooking builds seasoning” approach works well as ongoing maintenance. The stovetop provides quick heat to smoke the oil and add a thin protective layer.
Over time, these tiny layers accumulate and reinforce the base oven seasoning underneath.
Situations Where Speed Matters More Than Longevity
Sometimes you just need a functional pan right now. Maybe you’re camping. Maybe you found a rusty pan at a yard sale and want to use it tonight.
Quick stovetop seasoning gets you there. It won’t last months, but it’ll work for immediate cooking.
Know what you’re getting—temporary solution rather than permanent fix.
Combining Both Methods for Maximum Skillet Durability
Smart approach: use oven seasoning for the foundation, stovetop for maintenance. Best of both worlds.
Using Oven Seasoning for Base Layers
Start every pan (new or stripped) with 4-6 oven seasoning coats. This builds the durable foundation that’ll last months or years.
Thin coats. High heat. Proper cooling. Do it right.
These base layers are your insurance policy against rust and wear.
Adding Stovetop Seasoning for Maintenance
Once you’ve got that solid base, maintain it with quick stovetop touch-ups as needed:
After cooking acidic foods
When you notice a spot looking dull
If you scrubbed a bit too hard during cleaning
Five minutes of stovetop work reinforces the base without requiring a full oven session.
The Hybrid Approach to Long-Lasting Seasoning
The system:
Initial seasoning: Oven method, 5-6 coats
Monthly maintenance: Stovetop touch-up, one coat
Annual deep seasoning: Oven method, 2-3 coats
This gives you maximum durability with minimal ongoing effort. The oven layers provide the structure, stovetop layers fill in gaps and refresh the surface.
When to Use Each Method in Your Seasoning Routine
Use oven when:
Seasoning a new pan
Re-seasoning a stripped pan
Building or rebuilding base layers
You want maximum durability
You’ve got time for proper seasoning
Use stovetop when:
Touching up worn spots
Quick maintenance between oven sessions
Repairing small damaged areas
Adding a protective layer after cooking
You need something fast
Follow this and you’ll rarely need full re-seasoning sessions.
Temperature Control: How It Impacts Seasoning Durability
Temperature consistency is everything in creating durable seasoning—and ovens have the advantage here.
Oven Temperature Consistency vs Stovetop Fluctuations
Modern ovens maintain temp within ±15-25°F of the set point. Set it to 475°F, it actually runs between 460-490°F throughout the cycle.
Pretty consistent. Good enough for uniform polymerization.
Stovetops? All over the place. Gas burners cycle flame up and down. Electric elements go full-hot then off, then full-hot again. The pan temperature swings 100°F+ as it responds to these cycles.
Oil polymerizes best at steady temps. Temperature swings = inconsistent polymerization = weaker seasoning.
The Role of Smoke Point in Lasting Seasoning
The smoke point is where oil breaks down and begins polymerizing. You need to exceed it significantly for complete transformation.
Common seasoning oils and their smoke points:
Oil
Smoke Point
Ideal Oven Temp
Canola
400°F
450-475°F
Grapeseed
420°F
465-500°F
Vegetable
400-450°F
460-480°F
Going 50-75°F above smoke point ensures complete polymerization. Ovens excel at maintaining these temps. Stovetops either overshoot (burning) or undershoot (incomplete polymerization).
Why Higher Temperatures Create Harder Finishes
Higher heat provides more energy for the polymerization reaction. More energy = more complete transformation = harder coating.
Seasoning done at 350°F is noticeably softer than seasoning done at 475°F (assuming same oil). You can scratch it easier, it wears faster, it’s just weaker.
This is why low-temp stovetop seasoning (people who keep the burner on medium-low) doesn’t last. The chemistry isn’t finishing properly.
Temperature Uniformity and Seasoning Adhesion
When the entire pan hits the same temperature at the same time, the oil bonds uniformly to the iron surface. Strong, consistent adhesion everywhere.
Variable temps (hot bottom, cool sides) create variable bonding. The coating literally grips the metal better in some spots than others. Weak adhesion areas peel or flake first.
Oil Selection for Oven vs Stovetop Seasoning Methods
Does oil choice differ between methods? Somewhat—certain oils work better with each approach.
Best Oils for Oven Seasoning Longevity
High Smoke Point Oils That Last
For oven seasoning, you want oils that polymerize into hard, durable finishes:
Top choices:
Grapeseed oil — Creates very hard seasoning, smoke point 420°F, polymerizes beautifully at 475-500°F
Canola oil — Reliable, cheap, works great, smoke point 400°F
Vegetable oil — Similar to canola, widely available
Crisco/shortening — Old-school favorite, smoke point 490°F, extremely durable
All of these create hard finishes when properly heated in an oven.
Oils That Polymerize Best in Ovens
High polyunsaturated fat content = better polymerization. Look for oils with:
Low saturated fat
High linoleic or linolenic acid content
Smoke points 400-450°F
These polymerize completely at oven temps (450-500°F), creating the hardest, most durable finishes.
Best Oils for Stovetop Seasoning
Oils That Work Well with Direct Heat
Stovetop’s intense, uneven heat requires oils that polymerize quickly and don’t burn easily:
Good options:
Canola (tolerates temperature swings well)
Vegetable oil (similarly forgiving)
Grapeseed (though a bit expensive for frequent stovetop touch-ups)
Avoid for stovetop:
Flaxseed (burns too easily with direct heat)
Low smoke point oils like olive oil
Quick-Polymerizing Options for Stovetop Use
Since stovetop sessions are shorter, you want oils that transform quickly:
Canola and vegetable oils polymerize fast enough for 10-15 minute stovetop sessions. You’ll see smoking within minutes, and the coating forms quickly.
Slower-polymerizing oils (some nut oils, certain specialty oils) don’t finish the transformation in stovetop timeframes—you end up with sticky, incomplete seasoning.
Does Oil Choice Affect Which Method Lasts Longer?
Somewhat, but not dramatically.
With proper technique:
Oven seasoning with any good oil lasts longer than stovetop with the best oil
The method matters more than the specific oil choice
Choose decent oil, focus on proper technique, use oven method for durability.
Common Mistakes That Reduce Seasoning Longevity
Both methods have pitfalls that shorten seasoning life.
Oven Seasoning Mistakes That Shorten Durability
Using Too Much Oil in Oven Method
Thick oil layers don’t polymerize completely—they get gummy and sticky instead of hard. This coating wears off fast during cooking.
Wipe until nearly dry. Always. Can’t emphasize this enough.
Incorrect Temperature Settings
Too low (below 400°F): Incomplete polymerization, soft coating, wears off quickly.
Too high (above 525°F): Risk burning the oil instead of polymerizing it, can damage the coating.
Stick to 450-500°F for best results.
Not Cooling Properly
Pulling the pan out while still hot stops the curing process early. The coating hasn’t fully hardened.
Turn off oven, leave pan inside, wait until completely cool. Every time.
Stovetop Seasoning Mistakes That Reduce Lifespan
Overheating and Burning Oil
Crank the burner to high, the oil burns instead of polymerizing. You get carbonized crud, not seasoning.
It might look dark and seem okay, but it’s brittle and flakes off easily.
Medium to medium-high heat. Watch for smoking, not flames.
Uneven Application Due to Hot Spots
Oil pools in the center where the heat’s concentrated. Runs off the edges where it’s cooler.
Result: thick (weak) seasoning in the middle, thin (also weak) seasoning on the sides.
Try to distribute heat by moving the pan, but honestly? You’re fighting physics. This is why stovetop doesn’t work as well.
Rushing the Process
“I’ll just heat it for 2-3 minutes until it smokes, then I’m done.”
Won’t work. The oil needs time to fully polymerize—minimum 5-10 minutes of smoking. Rushing leaves incomplete transformation that wears off fast.
The Role of Multiple Layers in Seasoning Durability
Layer count matters—but how you build them matters more.
Building Durable Seasoning with Oven Method
How Many Oven Layers Last Longest
Minimum: 3-4 layers before first use Recommended: 5-6 layers for excellent durability Overkill: More than 10 layers initially (diminishing returns)
Each properly done oven layer adds measurable durability. The 5th coat makes the pan noticeably better than the 3rd. The 10th coat? Barely better than the 8th.
Layer Thickness and Adhesion
Each individual layer should be ultra-thin—nearly invisible. Multiple thin layers bond together better than fewer thick layers.
Think: 10 coats of primer on a wall versus one thick coat. The thin coats create a stronger, more uniform finish.
Same with cast iron. Five whisper-thin oven layers beat two thick layers every time.
Building Durable Seasoning with Stovetop Method
Stovetop Layer Accumulation
Most people don’t build multiple stovetop layers intentionally—they just add one quick coat and call it done.
If you do build layers (stovetop coat, cool, repeat 4-5 times), you’ll get better results than a single coat. But still not as durable as oven layers because each individual coat is weaker.
Quality vs Quantity in Stovetop Seasoning
Ten stovetop layers don’t equal five oven layers in durability. The uneven heat during application means each stovetop layer has inherent weak points.
Stacking weak layers creates a thick coating, but it’s still fundamentally weaker than oven-built seasoning.
Which Method Builds Stronger Multi-Layer Seasoning?
Oven. Not close.
Each oven layer bonds strongly to the previous layer because polymerization happens uniformly. The layers integrate into a cohesive coating.
Stovetop layers don’t bond as well to each other (uneven polymerization creates inconsistent surfaces for the next layer to grip). You get a stack of mediocre layers rather than a unified, strong coating.
Testing Seasoning Durability: What Actually Matters
How do you know if your seasoning will last?
How to Test if Your Seasoning Will Last
Hardness test: Press your fingernail into the seasoning. Can’t leave a mark easily? Hard coating that’ll last. Leaves an impression? Too soft, won’t hold up.
Water bead test: Drop water on the surface. Beads up and rolls off? Good seasoning. Spreads out or soaks in? Weak or incomplete seasoning.
Scratch test: Gently scratch with a metal utensil. Seasoning holds up? Durable. Immediately shows scratches or bare metal? Weak.
Cooking test: Fry an egg with minimal oil. Slides around easily? Good seasoning. Sticks significantly? Not ready yet.
Signs of Durable vs Weak Seasoning
Durable seasoning looks like:
Dark brown to black color
Semi-gloss or matte finish (not shiny-wet)
Smooth, uniform surface
Hard to the touch
Weak seasoning looks like:
Uneven, splotchy color
Very shiny or tacky feel
Soft enough to scratch with fingernail
Flaking or peeling in spots
Visual inspection tells you a lot.
Cooking Tests That Reveal Seasoning Strength
Cook something challenging. Eggs are the classic test—they stick to everything.
Scrambled eggs with butter: Should release easily, pan should wipe clean with paper towel.
Fried eggs sunny-side up: Should slide around the pan, flip easily, leave minimal residue.
If eggs stick despite proper preheating and adequate fat, your seasoning needs work.
Visual and Tactile Indicators of Long-Lasting Seasoning
Run your hand across the surface. Should feel smooth, almost slippery. Not rough, not sticky, not powdery.
Look at it under light. Uniform color with maybe slight variations—but no obvious bare spots, thick areas, or flaking patches.
Tap it with your fingernail. Should sound solid, feel hard. Not soft or yielding.
These simple checks tell you if the seasoning will last.
Maintenance Seasoning: Extending Longevity with Either Method
Even durable seasoning needs occasional maintenance.
When to Add Maintenance Layers
Add maintenance seasoning when:
Pan looks dull instead of semi-gloss
Small bare spots appear from normal use
Food starts sticking more than usual
Every 2-3 months with heavy use
Don’t re-season when:
Pan still looks dark and performs well
Just because you think you should
After every single use (overkill)
Let the pan tell you when it’s time.
Oven Maintenance Seasoning for Long-Term Care
Every 6-12 months, do 1-2 full oven seasoning coats to refresh the finish. This maintains the base layers and extends the overall seasoning life.
Think of it like repainting a fence—small touch-ups along the way, full repaint every few years.
Stovetop Touch-Ups Between Deep Seasonings
Between oven sessions, stovetop touch-ups keep things looking good:
After cleaning, wipe with oil while pan’s warm
Heat briefly until smoking
Wipe and cool
Takes 5 minutes, adds a protective layer, prevents rust.
Frequency of Maintenance for Each Method
Oven maintenance: Every 6-12 months (1-2 coats) Stovetop touch-ups: Every 2-4 weeks with regular use After cooking: Light oil wipe every time
This schedule keeps well-seasoned pans in excellent shape indefinitely.
Environmental Factors That Affect Seasoning Longevity
Your cooking and storage habits impact how long seasoning lasts, regardless of method.
Humidity and Storage Conditions
High humidity accelerates rust, which destroys seasoning. Store pans in dry places.
Bad storage:
Under the sink (humid)
Uncovered in damp basements
Stacked directly on other metal (traps moisture)
Good storage:
Dry cabinets with air circulation
Hung on walls (excellent air exposure)
Stacked with paper towels between pans
Even great oven seasoning fails in terrible storage conditions.
Cooking Frequency and Seasoning Wear
Pans used daily wear seasoning faster than pans used weekly—but they also build natural seasoning faster through cooking.
The sweet spot? Regular use (few times per week) maintains and strengthens seasoning through natural fat accumulation while not wearing it down too fast.
Pans sitting unused for months can develop rust even through intact seasoning (moisture eventually penetrates).
Types of Foods That Degrade Seasoning
Acidic foods (tomatoes, vinegar, wine) strip seasoning if you cook them frequently:
Occasional acidic cooking: fine
Simmering tomato sauce for hours: will damage even strong oven seasoning
Very sticky/sugary foods can leave residue that’s hard to clean without aggressive scrubbing, which wears seasoning.
Boiling water for extended periods gradually degrades seasoning (though slowly).
How Usage Patterns Impact Oven vs Stovetop Seasoning
Oven seasoning: Tolerates varied cooking better. Holds up to occasional acidic foods, high heat, metal utensils. Degrades slowly and evenly.
Stovetop seasoning: Shows wear faster with aggressive cooking. Acidic foods damage it quicker. Metal utensils create bare spots faster.
Usage patterns affect both, but stovetop seasoning is more vulnerable.
Cost and Time Analysis: Oven vs Stovetop Seasoning
Let’s talk practical considerations beyond just durability.
Time Investment for Each Method
Oven seasoning:
Per layer: 2-3 hours (includes baking and cooling)
Initial seasoning (5 layers): 10-15 hours spread over 2-3 days
Oven: Running at 475°F for one hour uses roughly 2-2.5 kWh of electricity (about $0.25-0.40 depending on local rates) or equivalent gas.
Stovetop: One burner for 15 minutes uses roughly 0.2-0.3 kWh (about $0.03-0.05).
Over 5 layers: oven costs $1.25-2.00, stovetop costs $0.15-0.25.
Stovetop’s cheaper to run.
Long-Term Value Based on Durability
But here’s the thing: if oven seasoning lasts 12 months and stovetop lasts 6 weeks, you’re re-seasoning way more often with stovetop.
Annual re-seasoning frequency:
Oven method: 1-2 times per year
Stovetop method: 8-12 times per year (if using as primary method)
Total annual time investment:
Oven: 6-12 hours
Stovetop: 12-18 hours (more sessions, each one shorter)
The upfront time investment in oven seasoning actually saves time long-term.
Which Method Offers Better Return on Investment?
Oven seasoning wins on durability, long-term time savings, and better performance.
Stovetop wins on immediate convenience and lower per-session costs.
For most people: Initial oven seasoning + stovetop maintenance is the optimal balance.
Expert Opinions on Oven vs Stovetop Seasoning Durability
What do the pros say?
What Cast Iron Manufacturers Recommend
Lodge (the biggest cast iron manufacturer) recommends oven seasoning for initial seasoning and building durable coatings. Their official instructions: thin oil coat, 450-500°F oven, one hour, cool completely.
They mention stovetop as an option for “quick touch-ups” but not primary seasoning.
Other manufacturers (Field Company, Stargazer, etc.) echo this: oven for durability, stovetop for maintenance.
Professional Chef Preferences
Most chefs I’ve talked to (and read interviews from) prefer oven-seasoned pans because they hold up better to restaurant use—constant high heat, metal utensils, heavy cooking.
Stovetop seasoning doesn’t survive the abuse of professional kitchens. Too many touch-ups needed.
Home cooks can get away with stovetop more easily because usage is gentler.
Restoration Expert Insights
People who restore vintage cast iron universally recommend oven seasoning for the initial coats after stripping.
Why? Because they’ve seen what lasts. They’re seasoning dozens or hundreds of pans—they know what works.
None of them build base layers on the stovetop. It’s always oven for foundation, maybe stovetop for later maintenance.
Why Traditionalists Prefer Oven Seasoning
“The way it’s always been done” is sometimes just tradition, but in this case, there’s solid reasoning: oven seasoning was the standard method for decades because it works better.
Before modern non-stick pans existed, cast iron was THE non-stick cookware. People needed it to perform perfectly. Oven seasoning delivered that performance.
Troubleshooting Durability Issues with Each Method
Use metal utensils carefully (they’ll wear through any seasoning eventually if you’re rough)
Add stovetop touch-ups monthly
Do full oven re-seasoning annually
This maintains even weak initial seasoning reasonably well.
Special Considerations for Different Cookware
Does the oven vs stovetop debate change for different pans?
Seasoning Longevity on Carbon Steel vs Cast Iron
Carbon steel seasons identically to cast iron—same oils, same chemistry, same methods.
Difference: Carbon steel is thinner, so it heats and cools faster. But durability of oven vs stovetop seasoning? Same pattern. Oven lasts longer.
Maybe slightly more pronounced difference on carbon steel since the thinner metal shows seasoning failures more obviously.
Dutch Ovens and Large Pieces: Which Method Lasts?
Dutch ovens are nearly impossible to season properly on stovetop—too much surface area, can’t heat evenly.
Oven seasoning is basically required. Good news: it works great. The large surface area actually shows off oven seasoning’s advantages (uniform coverage, complete polymerization).
Same durability expectations as skillets—6-12 months between full re-seasonings.
Griddles and Flat Surfaces
Flat griddles on stovetop get uneven heating (center hot, edges cool). Stovetop seasoning on griddles performs poorly—wears off fast in the middle, stays weak on the edges.
Oven seasoning works perfectly for griddles. Even heat across the entire flat surface.
Vintage vs Modern Cast Iron Seasoning Durability
Vintage iron (Griswold, Wagner, etc.) has smoother surfaces than modern Lodge. Smooth surfaces take and hold seasoning slightly better—whether oven or stovetop.
But the oven vs stovetop durability difference remains the same: oven lasts way longer on both smooth vintage and rough modern iron.
Surface texture matters less than seasoning method for longevity.