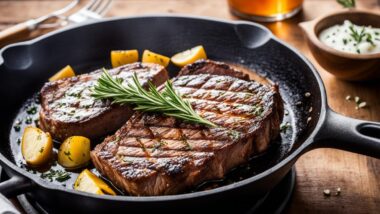
Cast iron skillet cream pies deliver some of the best homemade desserts you can make — rich, satisfying, and way easier than they look. The skillet does most of the heavy lifting. Even heat distribution means no burnt edges, no soggy bottoms, just a perfectly set filling every time.
These recipes serve a family of four. Most take under an hour of active work.
Table of Contents
- 1 The Magic of Cast Iron Skillet Desserts
- 2 Essential Equipment for Perfect Cream Pies
- 3 Mastering the Cream Filling
- 4 Step-by-Step Guide to Making a Cast Iron Skillet Cream Pie
- 5 Classic Chocolate Cream Pie: A Southern Tradition
- 6 Vanilla Bean Cream Pie
- 7 Apple Cinnamon Cream Pie: A Cozy Comfort Dessert
- 8 Banana Cream Pie
- 9 Lemon Shaker Pie: A Tart Twist on Tradition
- 10 Cherry Coconut Cream Pie: A Summer Sensation
- 11 Salted Caramel Cream Pie
- 12 Peanut Butter Cream Pie
- 13 Maple Pecan Cream Pie
- 14 Lemon Meringue Cream Pie
- 15 Pecan Cheesecake Pie: Elevating Special Occasions
- 16 Plum and Nutmeg Cream Pie: A Unique Flavor Profile
- 17 Blueberry Rhubarb Cream Pie: A Berry Good Combination
- 18 Toppings and Garnishes for Cast Iron Skillet Cream Pies
The Magic of Cast Iron Skillet Desserts
Cast iron baking is genuinely different from anything else in the kitchen. The pan holds heat in a way a glass dish never will. That means your crust crisps properly. Your filling sets evenly. No cold spots. No guesswork.
Skillet desserts also look impressive without much effort. Pull a bubbling pie from the oven in a seasoned cast iron pan and people think you’ve been cooking for hours.
Why Cast Iron Works for Cream Pies
Here’s the thing about cream pies specifically: the crust needs a fighting chance. In a standard pie dish, the bottom can stay soft and pale. In a cast iron skillet, the bottom crust actually browns. Crunchy, buttery, golden. That contrast against a cool, creamy filling? It’s the whole point.
A few other reasons it works:
- Retains heat longer, so chilled pies hold their set better after baking
- Conducts heat evenly — no overcooked edges
- Goes from stovetop to oven without issue (great for custard-based fillings)
- Looks rustic and beautiful on the table
Quick Reference: Cast Iron Baking Times
| Dessert Type | Oven Temp | Bake Time | Notes |
|---|---|---|---|
| Cream Pie | 350°F | 50-60 min | Cool fully before chilling |
| No-Bake Cream Pie | N/A | N/A | Chill minimum 3-4 hours |
| Fruit Cream Pie | 375°F | 45-55 min | Check for bubbling filling |
| Cheesecake Pie | 375°F | 35-40 min | Use water bath to prevent cracks |
Essential Equipment for Perfect Cream Pies

You don’t need much. But what you do need matters.
Choosing the Right Cast Iron Skillet
A 10-inch cast iron skillet is the sweet spot for family-sized cream pies. It’s deep enough for a generous filling, wide enough for 6-8 slices, and the right size for most standard pie crust recipes. Go smaller and you’re squeezing filling in. Go bigger and your crust goes paper-thin.
For homemade cream pies, pre-seasoned cast iron is fine. If you’ve got an older pan that’s been well-loved, even better.
What Else You Need
Not everything matters equally. The essentials:
- Heavy-bottomed saucepan — for custard without scorching
- Whisk — get a good one, use it constantly
- Rubber spatula — for folding whipped cream and scraping pans
- Stand or hand mixer — especially for no-bake pies
- Digital thermometer — custard should hit 170-175°F
How to Season Your Cast Iron Skillet
If your skillet’s new or losing its non-stick surface, season it before baking desserts. You don’t want metallic flavors anywhere near a cream pie.
- Preheat oven to 450°F
- Scrub skillet clean and dry completely
- Rub a thin layer of vegetable oil or flaxseed oil all over — inside, outside, handle
- Place upside-down in oven with foil underneath to catch drips
- Bake 30 minutes, turn off oven, let cool inside
Do this a few times and you’ve got a non-stick surface that will outlast everything else in your kitchen. Seriously. Learn more about what cast iron is made of and why seasoning matters so much.
Mastering the Cream Filling
Get the filling right and everything else falls into place. Get it wrong and no fancy crust will save you.
The Base Recipe That Works for Almost Everything
This is the master cream pie filling — vanilla custard base — that you’ll adapt for most of the recipes below. Serves 4-6.
Ingredients:
- 2-1/4 cups whole milk
- 1/2 cup granulated sugar
- 1/4 teaspoon salt
- 2 tablespoons cornstarch
- 3 tablespoons all-purpose flour
- 3 large egg yolks
- 1 tablespoon salted butter
- 1 teaspoon vanilla extract
Method:
- Whisk together sugar, salt, cornstarch, and flour in a cold saucepan
- Slowly pour in milk, whisking the entire time
- Cook over medium heat, whisking constantly
- Once it starts to thicken, reduce heat slightly — keep whisking
- Remove from heat once it coats the back of a spoon
- Temper your egg yolks: add a small spoonful of hot mixture to yolks, whisk fast, then add yolks back to pan
- Return to medium heat for 2 more minutes, stirring constantly
- Take off heat, stir in butter and vanilla
- Cool completely before adding to crust
Fixing Common Problems
Lumpy filling? Strain it through a fine-mesh sieve. Done.
Filling won’t thicken? Cook longer, or add 1 teaspoon more cornstarch dissolved in a tablespoon of cold milk.
Crust getting soggy? Always — always — cool your filling completely before pouring it in. Warm filling steams the crust from below. That’s the whole problem.
| Problem | Fix |
|---|---|
| Lumpy texture | Strain through fine-mesh sieve before cooling |
| Won’t set | More cornstarch, or longer cooking time |
| Eggy taste | Temper eggs properly — don’t rush that step |
| Soggy crust | Cool filling to room temp before pouring |
Step-by-Step Guide to Making a Cast Iron Skillet Cream Pie
This is the process. Follow it once and it becomes second nature.
Making the Crust From Scratch
For a 10-inch skillet crust (serves 4-6):
Ingredients:
- 1-1/2 cups all-purpose flour
- 1/2 teaspoon salt
- 1/2 cup cold unsalted butter, cubed
-
3-4 tablespoons ice water
-
Combine flour and salt in a bowl
- Cut in cold butter until it looks like coarse crumbs — use your fingers or a pastry cutter
- Add ice water one tablespoon at a time, mixing just until dough comes together
- Flatten into a disk, wrap in plastic, refrigerate 30 minutes
- Roll out on a lightly floured surface to about 12 inches across
- Press into the greased skillet, trim and crimp edges
Cold butter. Cold water. Don’t overwork the dough. That’s all crust-making is.
Pre-Baking (Blind Baking) the Crust
For custard pies, you need a pre-baked crust. Otherwise — soggy bottom.
- Line chilled crust with parchment
- Fill with pie weights or dried beans
- Bake at 400°F for 15 minutes
- Remove weights and parchment
- Bake another 5-10 minutes until lightly golden
That’s it. Cool completely before adding filling.
Filling, Assembly, and Chilling
- Make your filling according to the specific recipe
- Cool filling to room temperature — at least 45 minutes
- Pour into pre-baked, cooled crust
- Cover with plastic wrap (press it directly against the filling to prevent a skin)
- Refrigerate minimum 2 hours, ideally 4+
- Add any toppings just before serving
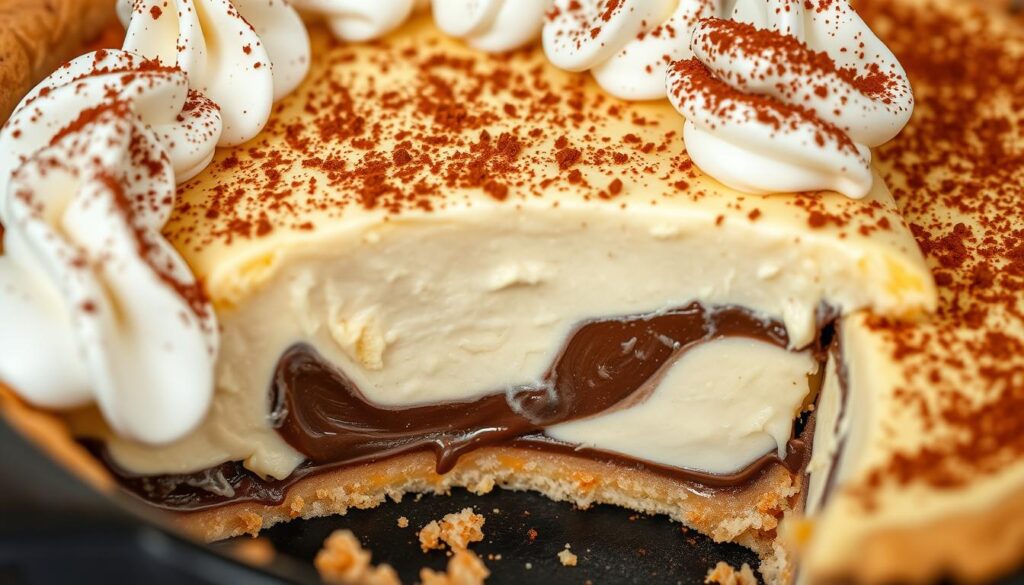
Classic Chocolate Cream Pie: A Southern Tradition
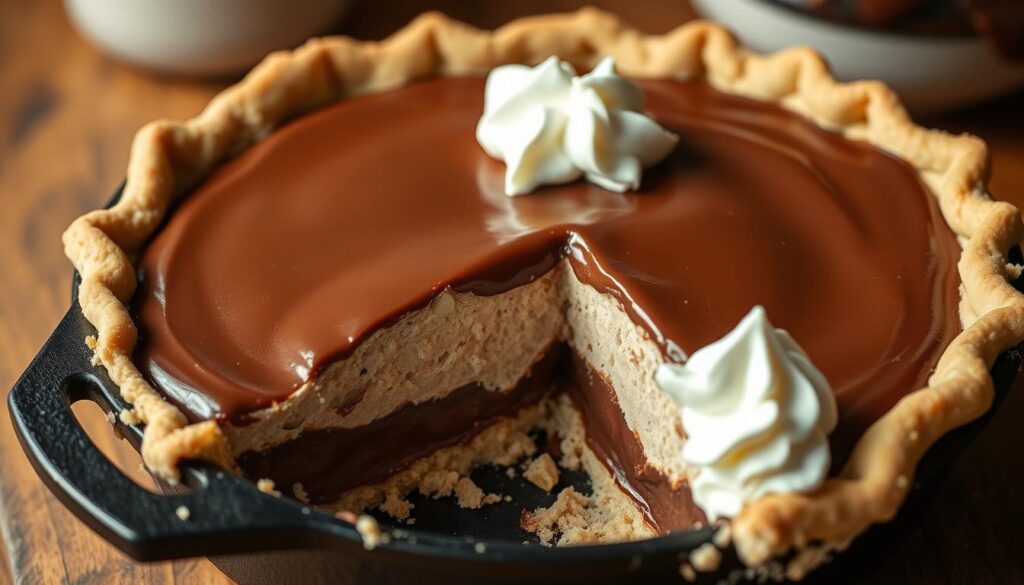
Classic southern chocolate cream pie is rich, silky, deeply chocolatey. Not fancy. Just deeply good. It’s been on southern kitchen tables for over a century — for good reason.
Ingredients (Serves 4-6)
For the filling:
- 3 large egg yolks
- 3 tablespoons all-purpose flour
- 4 tablespoons unsweetened cocoa powder
- 1/8 teaspoon salt
- 1 cup granulated sugar
- 2 cups whole milk
- 2 tablespoons unsalted butter
- 1 teaspoon vanilla extract
For the crust:
- 1 pre-baked 10-inch pie crust (homemade or store-bought)
For the topping:
- 1-1/2 cups heavy whipping cream
- 3 tablespoons powdered sugar
How to Make It
- Whisk together flour, cocoa, salt, and sugar in a cold saucepan
- Gradually whisk in milk until smooth — no lumps
- Cook over medium heat, stirring constantly, until mixture thickens (about 10-12 minutes)
- Remove from heat
- Temper egg yolks, then stir into filling
- Return to heat for 2 more minutes, stirring
- Off heat, stir in butter and vanilla
- Pour into pre-baked, cooled crust
- Refrigerate at least 4 hours — overnight is better
- Whip cream with powdered sugar to stiff peaks, spread over pie just before serving
Tips for Getting it Right
Use good cocoa. Dutch-process gives a deeper, less bitter flavor. Natural cocoa works too.
Strain the filling after cooking. Takes 30 seconds. Worth it.
Make this 1-2 days ahead — it tastes better the next day.
Nutritional Information (Per Serving)
| Nutrient | Amount per Serving |
|---|---|
| Calories | 487 |
| Carbohydrates | 58g |
| Protein | 8g |
| Fat | 26g |
| Fiber | 2g |
| Sodium | 218mg |
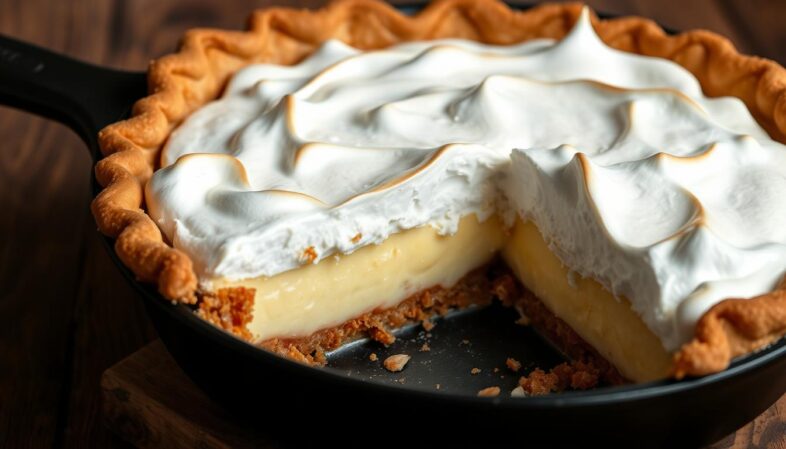
Vanilla Bean Cream Pie
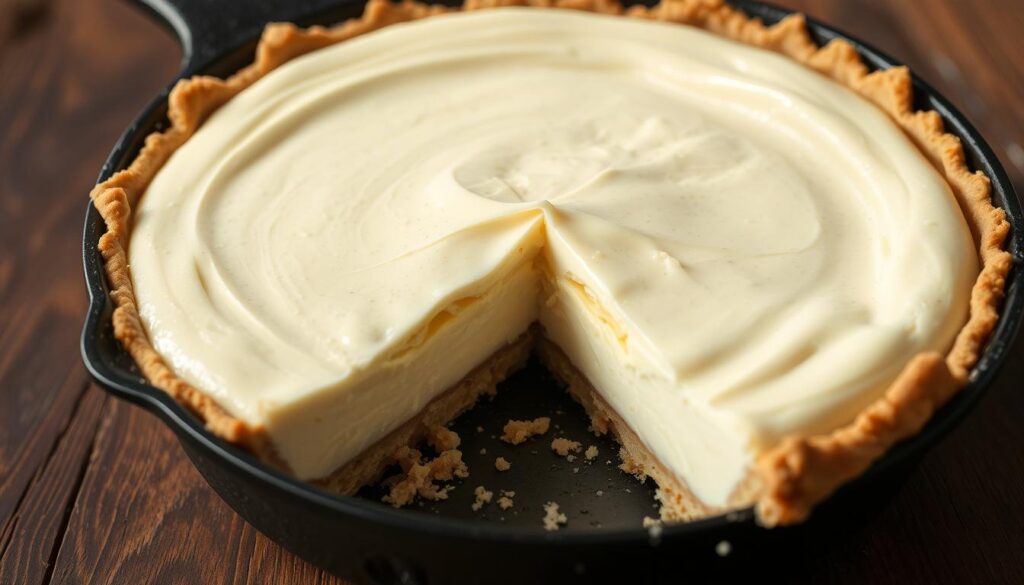
Simple doesn’t mean boring. A real vanilla bean cream pie — made with actual vanilla beans, not extract — is one of those desserts that makes people stop mid-bite. The flecks of vanilla in a perfectly set, ivory custard. The crisp crust. The cloud of whipped cream on top.
It’s the pie you bring to things when you want people to talk about it.
Ingredients (Serves 4-6)
For the crust:
- 1-1/2 cups all-purpose flour
- 1/2 teaspoon salt
- 1/2 cup cold unsalted butter, cubed
- 3-4 tablespoons ice water

For the filling:
- 2 cups whole milk
- 1/2 cup granulated sugar
- 1/4 cup cornstarch
- 4 large egg yolks
- 2 tablespoons unsalted butter
- 2 vanilla beans, split and scraped (or 2 teaspoons pure vanilla extract)
For the topping:
- 1 cup heavy cream
- 2 tablespoons powdered sugar
How to Make It
- Preheat oven to 375°F
- Make and blind bake crust (see method above) — cool completely
- In a medium saucepan, whisk together milk, sugar, and cornstarch
- Add egg yolks and vanilla bean seeds (or extract), whisk to combine
- Cook over medium heat, stirring constantly, until mixture reaches 170-175°F and thickens
- Remove from heat, stir in butter
- Pour into cooled crust
- Press plastic wrap onto surface of filling
- Refrigerate 3-6 hours until fully set
- Whip cream with powdered sugar, spread over pie before serving
Notes
If you can find Meyer lemons, try stirring 1 teaspoon of zest into the filling — it’s quietly spectacular. This is also one of those pies that works great in a well-seasoned cast iron because the crust gets genuinely golden.
Nutritional Information (Per Serving)
| Nutrient | Amount per Serving |
|---|---|
| Calories | 462 |
| Carbohydrates | 48g |
| Protein | 7g |
| Fat | 27g |
| Fiber | 0.5g |
| Sodium | 195mg |
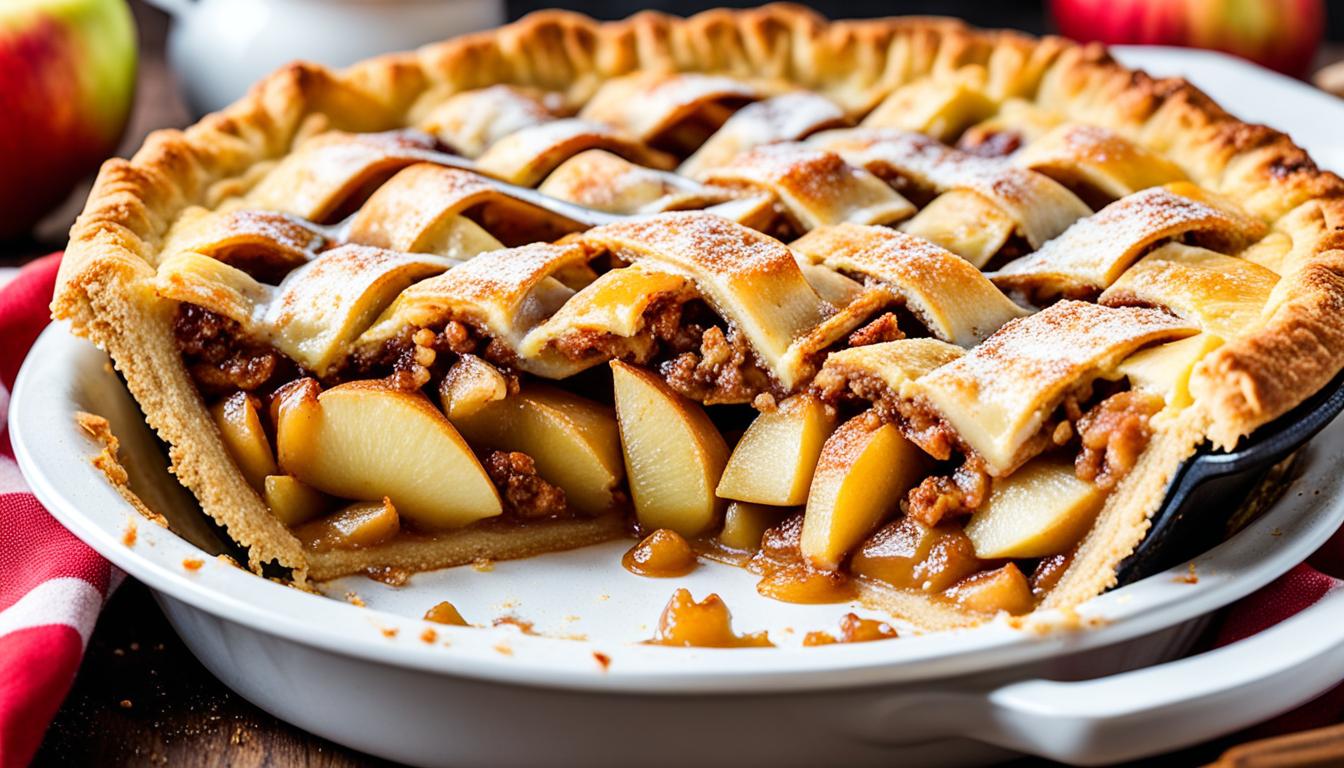
Apple Cinnamon Cream Pie: A Cozy Comfort Dessert
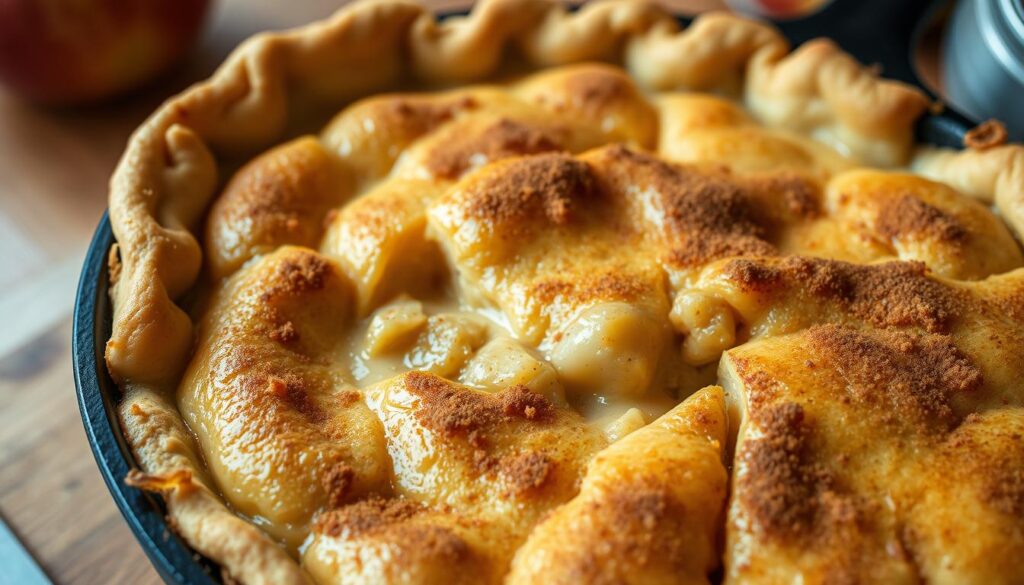
Fall baking, done right. This is apple pie and cream pie combined into one skillet, and somehow it’s better than both separately. The apples caramelize in the cast iron. The cream layer settles over them. The crumb topping gets golden and crunchy in the oven.
It’s the dessert for when the weather turns and you want something warm and comforting on a Sunday afternoon.
Ingredients (Serves 4-6)
For the apple layer:
- 4 medium Granny Smith apples, peeled, cored, and sliced thin
- 1/2 cup brown sugar, packed
- 2 tablespoons unsalted butter
- 1-1/2 teaspoons ground cinnamon
- 1 tablespoon lemon juice
For the cream filling:
- 1-1/2 cups whole milk
- 1/3 cup granulated sugar
- 2 tablespoons cornstarch
- 2 large egg yolks
- 1 tablespoon unsalted butter
- 1 teaspoon vanilla extract
For the crumb topping:
- 1/2 cup all-purpose flour
- 1/2 cup rolled oats
- 1/3 cup brown sugar, packed
- 1/4 cup cold unsalted butter, cubed
- 1 teaspoon ground cinnamon
Also needed:
- 1 pre-baked or refrigerated pie crust for the 10-inch skillet
How to Make It
- Preheat oven to 375°F
- Toss apple slices with lemon juice, brown sugar, and cinnamon
- Melt butter in the cast iron skillet over medium heat
- Add apple mixture, cook about 6 minutes until just softened — not mushy
- Remove skillet from heat, let apples cool slightly
- Meanwhile, make cream filling using method in the master recipe section above
- Lay pie crust over apples in the skillet
- Pour cream filling over crust
- Combine crumb topping ingredients by cutting butter into dry ingredients until crumbly
- Spread crumb mixture over filling
- Bake 45-50 minutes until golden and set
- Cool 30 minutes before serving
Nutritional Information (Per Serving)
| Nutrient | Amount per Serving |
|---|---|
| Calories | 512 |
| Carbohydrates | 68g |
| Protein | 6g |
| Fat | 24g |
| Fiber | 3g |
| Sodium | 168mg |
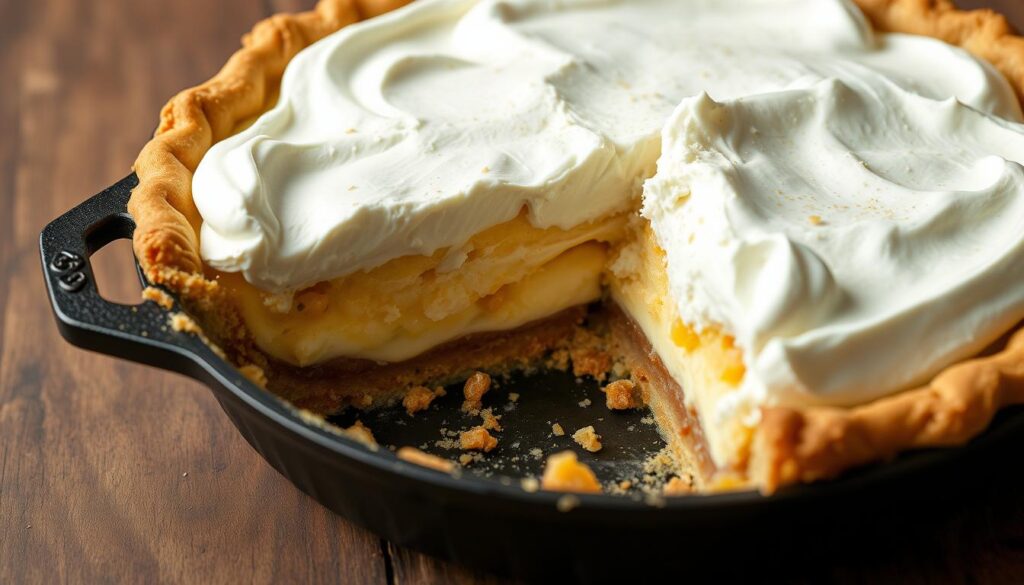
Banana Cream Pie
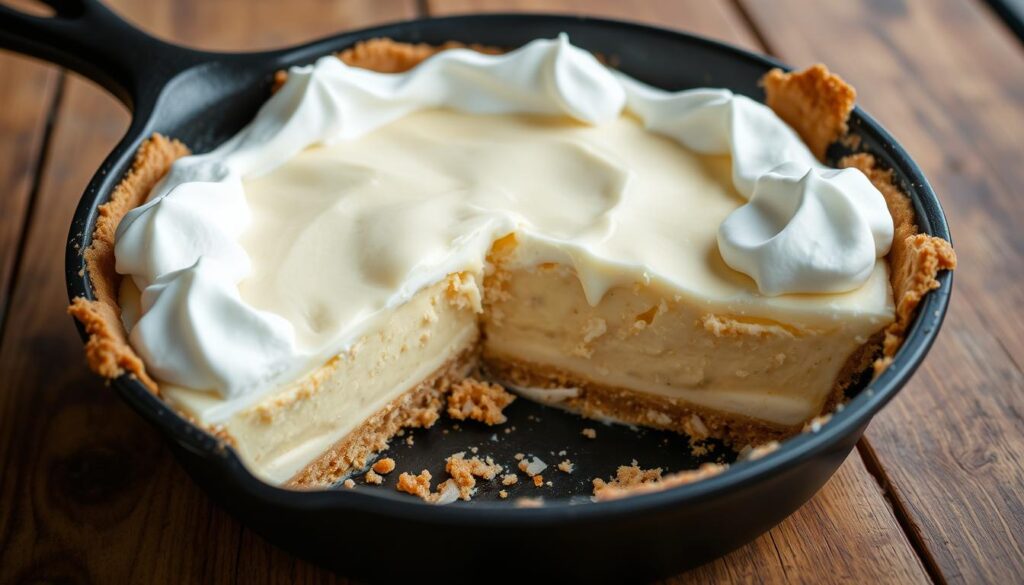
Banana cream pie is one of those classic southern skillet desserts nobody says no to. Vanilla wafer crust. Creamy banana custard. Fresh banana slices layered throughout. Mountain of whipped cream on top. Sounds like a lot. It’s not.
Ingredients (Serves 4-6)
For the crust:
- 2 cups crushed Nilla wafers (about 60 wafers)
- 1/4 cup unsalted butter, melted
- 2 tablespoons granulated sugar
For the custard:
- 1 cup granulated sugar
- 1/4 cup cornstarch
- 1/4 teaspoon salt
- 2-1/2 cups whole milk
- 3 large egg yolks
- 2 tablespoons unsalted butter
- 1-1/2 teaspoons vanilla extract
For assembly:
- 2 ripe but firm bananas, sliced
- 1 cup heavy whipping cream
- 3 tablespoons powdered sugar
How to Make It
- Preheat oven to 375°F
- Mix crushed wafers, melted butter, and sugar — press firmly into skillet
- Bake crust 10-12 minutes until lightly golden, set aside to cool
- In a saucepan, whisk sugar, cornstarch, and salt together
- Gradually whisk in milk
- Cook over medium heat, stirring constantly until thickened (about 10 minutes)
- Temper egg yolks — spoon some hot custard into yolks while whisking, then add yolks to pan
- Cook 2 more minutes, stirring constantly
- Off heat, stir in butter and vanilla
- Cool to room temperature
- Layer half the banana slices over the cooled crust
- Pour custard over bananas
- Layer remaining banana slices on top
- Refrigerate at least 2 hours
- Top with whipped cream and extra banana slices right before serving
Nutritional Information (Per Serving)
| Nutrient | Amount per Serving |
|---|---|
| Calories | 534 |
| Carbohydrates | 72g |
| Protein | 8g |
| Fat | 24g |
| Fiber | 1.5g |
| Sodium | 312mg |
Lemon Shaker Pie: A Tart Twist on Tradition
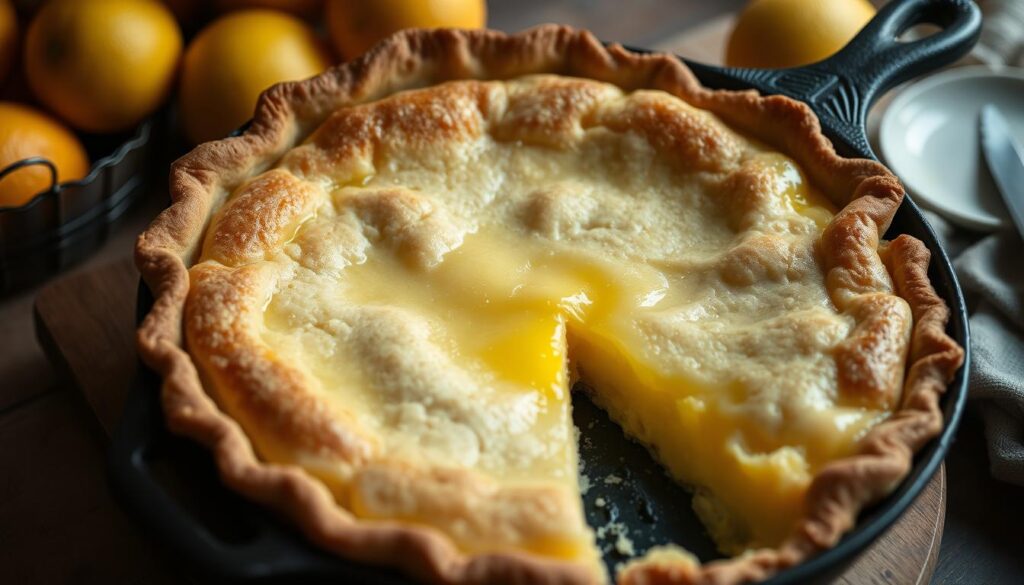
Not a cream pie in the traditional sense. But it belongs on this list because it’s one of the most interesting pies you’ll ever make. Whole lemons — rind and all — macerated in sugar overnight, then baked into a custardy, intensely lemony filling.
The Ohio Shaker community invented this pie out of practicality. Nothing goes to waste. Every bit of the lemon ends up in the pie. The result is tart, complex, and unlike anything else.
Ingredients (Serves 4-6)
For the lemon filling:
- 3 medium Meyer lemons (about 300g), sliced paper thin — use a mandolin if you have one
- 10 oz (about 1-1/3 cups) granulated sugar
- 4 large eggs
- 1/4 teaspoon almond extract (or vanilla)
- 1 tablespoon all-purpose flour
For the crust:
- 2 pre-made or homemade pie crusts — one for bottom, one for top
- 2 tablespoons large-grain sugar for sprinkling
How to Make It
- Slice lemons as thin as possible — paper thin, 1/8 inch or less
- Toss lemon slices with sugar in a bowl
- Cover and let macerate at room temperature 4-5 hours, or overnight in the fridge
- Preheat oven to 425°F
- Line skillet with bottom pie crust
- Whisk eggs, flour, and almond extract into macerated lemon mixture
- Pour filling into crust
- Top with second pie crust — crimp edges, cut a few slits for steam
- Sprinkle with large-grain sugar
- Freeze the whole pie for 15 minutes before baking — this sets the crust and prevents shrinkage
- Bake at 425°F for 30-35 minutes until deep golden brown
- Cool completely before slicing — at least 2 hours
Tips
Meyer lemons are sweeter and more complex. Can’t find them? Regular lemons work — just expect more tartness. The overnight maceration really matters. Don’t skip it. The sugar draws moisture from the rind and softens it dramatically.
Nutritional Information (Per Serving)
| Nutrient | Amount per Serving |
|---|---|
| Calories | 448 |
| Carbohydrates | 69g |
| Protein | 7g |
| Fat | 17g |
| Fiber | 2g |
| Sodium | 276mg |
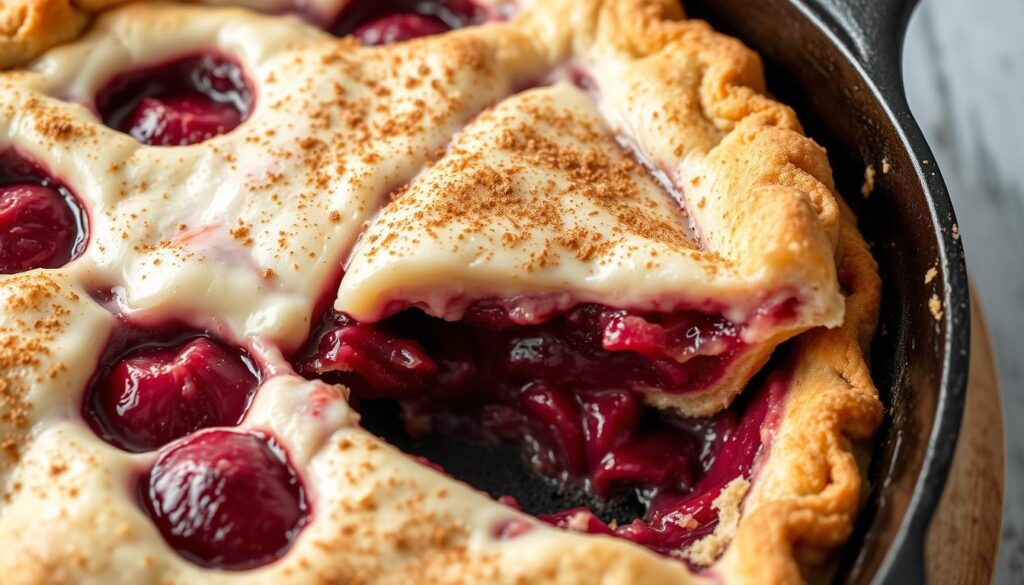
Cherry Coconut Cream Pie: A Summer Sensation
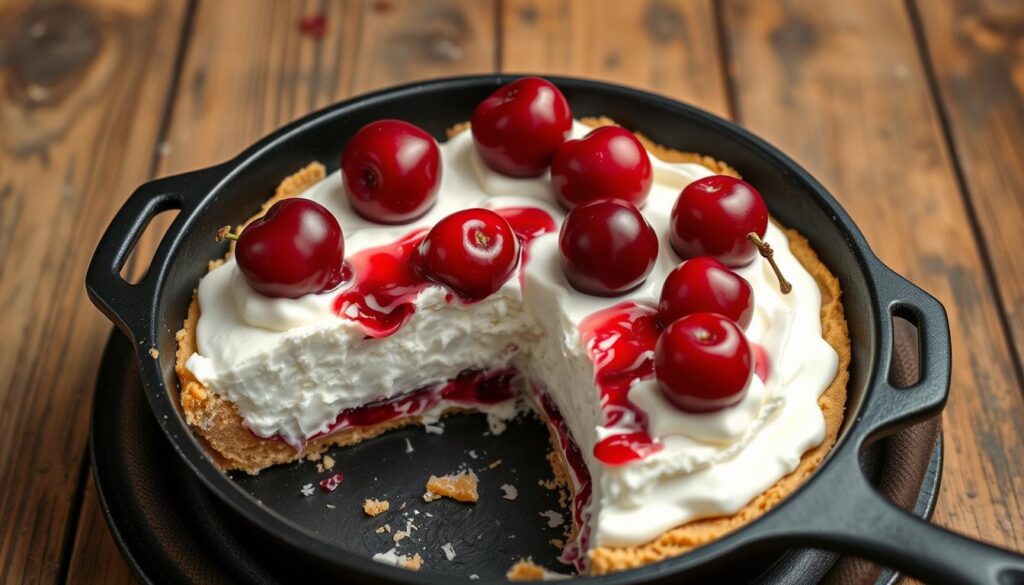
This one’s all summer. Tart cherries, toasted coconut, creamy custard. The contrast between fruit and rich coconut cream is the whole point — refreshing and indulgent at the same time.
Canned tart cherries work nearly as well as fresh when cherries aren’t in season.
Ingredients (Serves 4-6)
For the crust:
- 2 cups vanilla wafer crumbs
- 1/4 cup unsalted butter, melted
- 2 tablespoons sugar
For the coconut custard:
- 2-1/2 cups whole milk
- 4 large egg yolks
- 2/3 cup granulated sugar
- 3 tablespoons cornstarch
- 1/4 teaspoon salt
- 1 tablespoon unsalted butter
- 1 teaspoon vanilla extract
- 1 cup sweetened shredded coconut, toasted
For the cherry layer:
- 1-1/2 cups fresh or canned tart cherries, pitted and drained
For the topping:
- 1 cup heavy whipping cream
- 2 tablespoons powdered sugar
- 1/4 cup toasted coconut, for garnish
How to Make It
- Preheat oven to 375°F
- Mix wafer crumbs, melted butter, and sugar — press into skillet
- Par-bake crust 10 minutes, cool completely
- Toast shredded coconut in a dry skillet over medium heat until golden, set aside
- Whisk egg yolks, sugar, cornstarch, and salt in a saucepan
- Gradually whisk in milk
- Cook over medium heat, stirring constantly, until thick — about 12 minutes
- Remove from heat, stir in butter, vanilla, and toasted coconut
- Layer cherries across cooled crust
- Pour coconut custard over cherries
- Press plastic wrap onto surface
- Refrigerate 4 hours minimum
- Whip cream with powdered sugar, spread over pie, top with toasted coconut
Nutritional Information (Per Serving)
| Nutrient | Amount per Serving |
|---|---|
| Calories | 568 |
| Carbohydrates | 64g |
| Protein | 8g |
| Fat | 32g |
| Fiber | 2g |
| Sodium | 284mg |
Salted Caramel Cream Pie
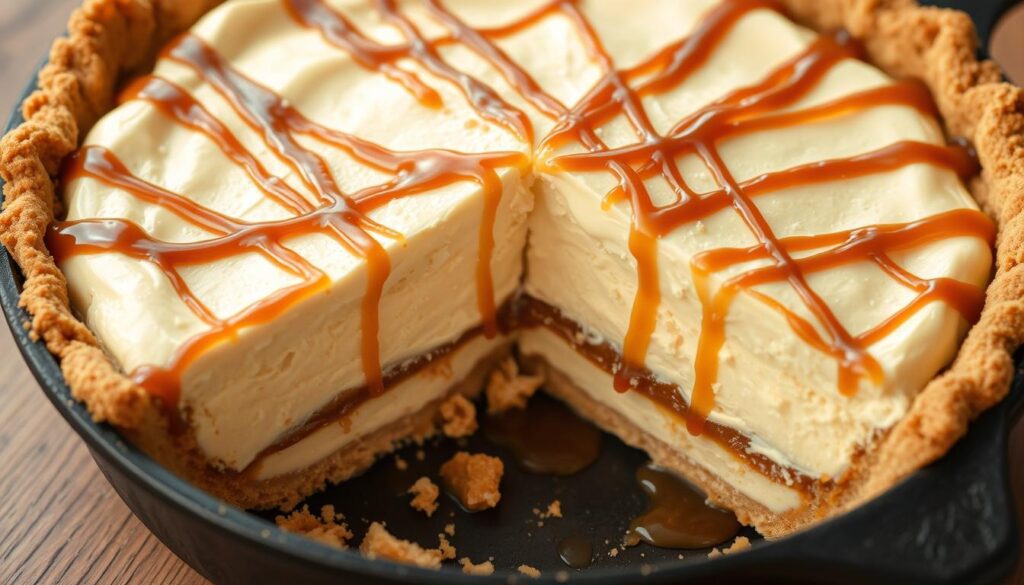
Sweet and salty is not a trend. It’s just correct. Salted caramel cream pie is one of those gourmet cream pies that sounds complicated but comes together fast — especially because this version is no-bake for the filling. The cast iron skillet gives the Oreo crust that pressed, solid structure it needs.
The sea salt on top isn’t optional.
Ingredients (Serves 4-6)
For the crust:
- 20 Golden Oreos, finely crushed
- 4 tablespoons unsalted butter, melted
For the filling:
- 10 oz full-fat cream cheese, softened to room temperature
- 1/2 cup salted caramel sauce (store-bought or homemade)
- 1/2 cup powdered sugar
- 1 teaspoon vanilla extract
- 1-1/2 cups heavy whipping cream
For the topping:
- 1/2 cup heavy whipping cream
- 2 tablespoons powdered sugar
- Flaky sea salt for finishing
- Extra caramel sauce for drizzling (optional)
How to Make It
- Crush Oreos in a food processor or sealed bag until fine crumbs
- Mix with melted butter, press firmly into bottom and up sides of skillet
- Refrigerate crust for 20 minutes to set
- Beat cream cheese until completely smooth — no lumps
- Add caramel sauce, powdered sugar, and vanilla, beat until combined
- In a separate bowl, whip 1-1/2 cups cream to stiff peaks
- Fold whipped cream gently into cream cheese mixture in thirds
- Pour filling into chilled crust
- Smooth the top, cover with plastic wrap
- Refrigerate at least 3 hours — overnight is ideal
- Before serving, whip remaining cream with powdered sugar
- Top pie with whipped cream, drizzle caramel, finish with flaky sea salt
Make-Ahead Tip
Better the next day. Make it the night before, pull it out 10 minutes before serving.
Nutritional Information (Per Serving)
| Nutrient | Amount per Serving |
|---|---|
| Calories | 618 |
| Carbohydrates | 52g |
| Protein | 6g |
| Fat | 45g |
| Fiber | 0.5g |
| Sodium | 398mg |
Peanut Butter Cream Pie

Peanut butter cream pie is the one people ask for again and again. Rich, creamy, hits that sweet-and-salty note without being over the top. Graham cracker crust is the perfect vehicle. And this is a no-cook filling — bonus when you’re short on time.
Ingredients (Serves 4-6)
For the crust:
- 1-1/4 cups graham cracker crumbs (about 10 full crackers)
- 1/4 cup granulated sugar
- 1/3 cup unsalted butter, melted
For the filling:
- 1 cup creamy peanut butter (not the natural, drippy kind — regular Jif or Skippy works best here)
- 8 oz full-fat cream cheese, softened
- 1 cup powdered sugar
- 1 teaspoon vanilla extract
- 1-1/2 cups heavy whipping cream
For the topping:
- Remaining whipped cream from filling, or make fresh
- Crushed graham crackers or chocolate shavings
How to Make It
- Preheat oven to 350°F
- Mix graham crumbs, sugar, and melted butter until combined
- Press firmly into skillet — bottom and sides
- Bake crust 10 minutes, let cool completely
- Beat peanut butter and cream cheese together until smooth
- Add powdered sugar and vanilla — mix until no lumps remain
- In a separate, chilled bowl, whip heavy cream to stiff peaks
- Fold whipped cream into peanut butter mixture in thirds — go gently or you’ll deflate it
- Pour filling into cooled crust
- Smooth top, refrigerate at least 4 hours
- Top with extra whipped cream and garnish before serving
Nutritional Information (Per Serving)
| Nutrient | Amount per Serving |
|---|---|
| Calories | 698 |
| Carbohydrates | 54g |
| Protein | 14g |
| Fat | 50g |
| Fiber | 2g |
| Sodium | 428mg |
Maple Pecan Cream Pie
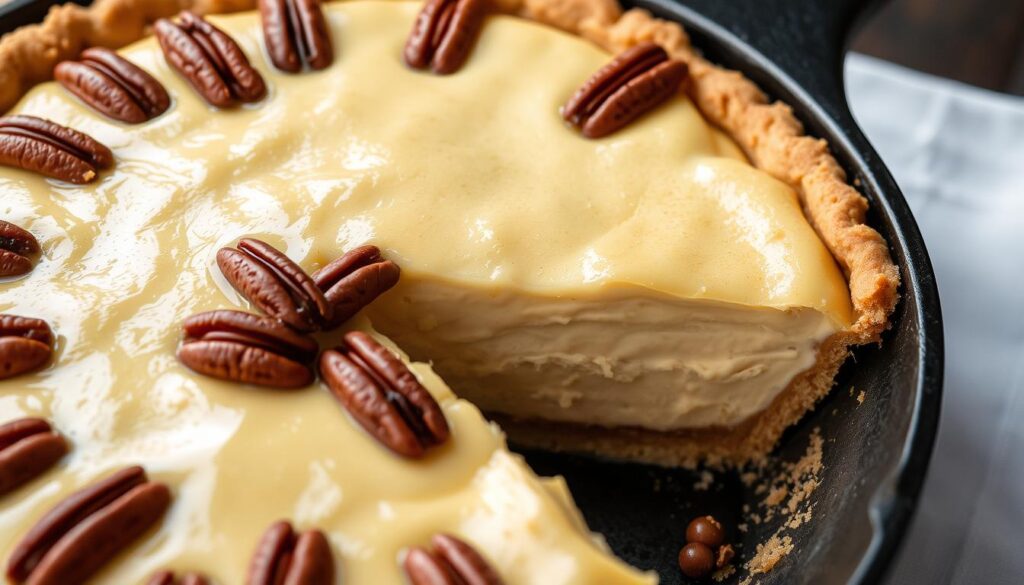
This is autumn in pie form. Real maple syrup — not the fake stuff, not pancake syrup — mixed into a cream cheese filling with toasted pecans. It’s warm and sweet without being cloying. It’s the kind of dessert that makes the kitchen smell incredible.
The cast iron skillet gives the crust that caramelized edge that makes pecan pie variations especially good.
Ingredients (Serves 4-6)
For the crust:
- 1-1/4 cups graham cracker crumbs
- 3 tablespoons brown sugar
- 1/3 cup unsalted butter, melted
For the filling:
- 12 oz full-fat cream cheese, softened
- 1/2 cup packed brown sugar
- 1/4 cup real maple syrup (Grade B or dark amber for best flavor)
- 1 teaspoon vanilla extract
- 1 cup heavy whipping cream
- 1 cup pecans, finely chopped and toasted
For the topping:
- 1/2 cup pecan halves, roughly chopped and toasted
- Drizzle of maple syrup
How to Make It
- Preheat oven to 350°F
- Mix graham crumbs, brown sugar, and melted butter
- Press into skillet, bake 10 minutes until set — cool completely
- Toast pecans in a dry pan over medium heat until fragrant, about 4-5 minutes, let cool
- Beat cream cheese until smooth
- Add brown sugar, maple syrup, and vanilla — beat until combined and creamy
- Whip heavy cream to stiff peaks in a separate chilled bowl
- Fold whipped cream into maple cream cheese mixture
- Fold in the finely chopped toasted pecans
- Pour into cooled crust
- Refrigerate at least 8 hours — overnight is the call here
- Top with remaining pecans and a drizzle of maple syrup just before serving
Notes
This one really does need to chill overnight. The filling firms up significantly and the flavors deepen. Don’t rush it.
Nutritional Information (Per Serving)
| Nutrient | Amount per Serving |
|---|---|
| Calories | 682 |
| Carbohydrates | 48g |
| Protein | 8g |
| Fat | 54g |
| Fiber | 2g |
| Sodium | 318mg |
Lemon Meringue Cream Pie
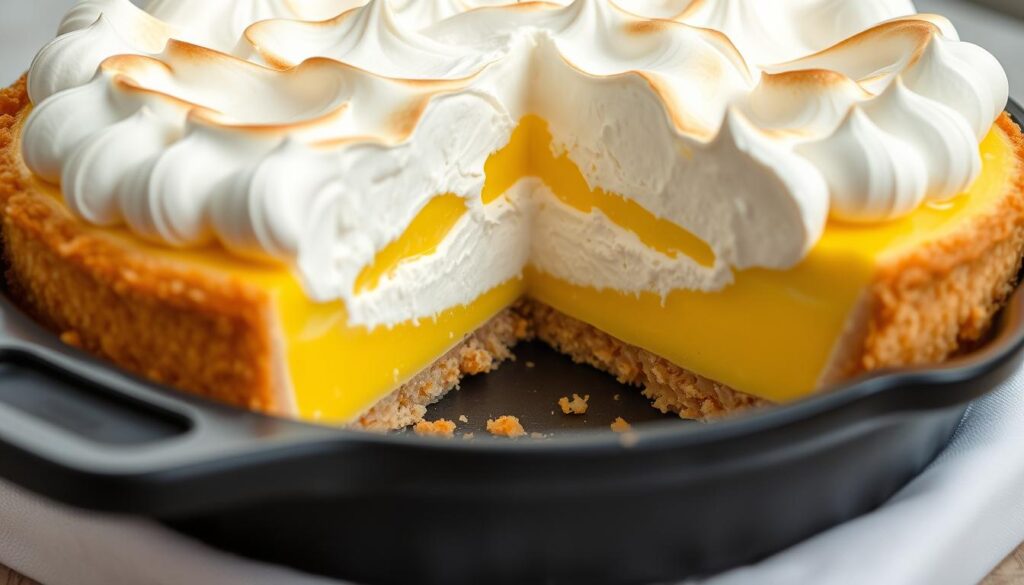
Lemon meringue cream pie is a showstopper. Tart, bright lemon filling. Pillowy, toasted meringue. The cast iron skillet gives the crust a stability that glass pie dishes don’t — so when you broil that meringue, everything holds together perfectly.
It’s also one of those pies that looks incredibly impressive and is genuinely not that hard. The meringue takes some attention, but it’s forgiving once you know the basics.
Ingredients (Serves 4-6)
For the crust:
- 1 pre-baked 10-inch pie crust (graham cracker or traditional pastry)
For the lemon filling:
- 4 large eggs, yolks and whites separated
- 1 cup granulated sugar
- 1/2 cup fresh lemon juice (about 4-5 lemons)
- 2 tablespoons lemon zest
- 1 cup plain Greek yogurt or sour cream
- 1/4 teaspoon salt
For the meringue:
- 4 large egg whites (from above)
- 1/4 cup granulated sugar
- 1/2 teaspoon vanilla extract
- 1/4 teaspoon cream of tartar
How to Make It
- Preheat oven to 400°F
- Whisk together egg yolks, sugar, Greek yogurt, lemon juice, lemon zest, and salt until smooth
- Pour into pre-baked crust in the skillet
- Bake 38-42 minutes until filling is set — it should jiggle slightly in the center but not slosh
- Cool pie completely to room temperature — this is important for the meringue to hold
- Make the meringue: beat egg whites with cream of tartar on medium speed until foamy
- Increase speed to medium-high, gradually add sugar one tablespoon at a time
- Add vanilla, continue beating to stiff, glossy peaks
- Spread meringue over cooled pie — make sure it reaches the crust edges (prevents shrinking)
- Use a spatula to create swirls and peaks
- Broil on the middle rack 2-4 minutes, watching closely, until peaks are golden brown
- Refrigerate until ready to serve — up to 3 days
Meringue Tips
Room temp egg whites whip higher — pull them out 30 minutes ahead. Not even a trace of yolk in your whites or it won’t whip. Spread meringue while the filling is still slightly warm to prevent that weeping layer between curd and meringue.
Nutritional Information (Per Serving)
| Nutrient | Amount per Serving |
|---|---|
| Calories | 412 |
| Carbohydrates | 62g |
| Protein | 10g |
| Fat | 15g |
| Fiber | 0.5g |
| Sodium | 284mg |
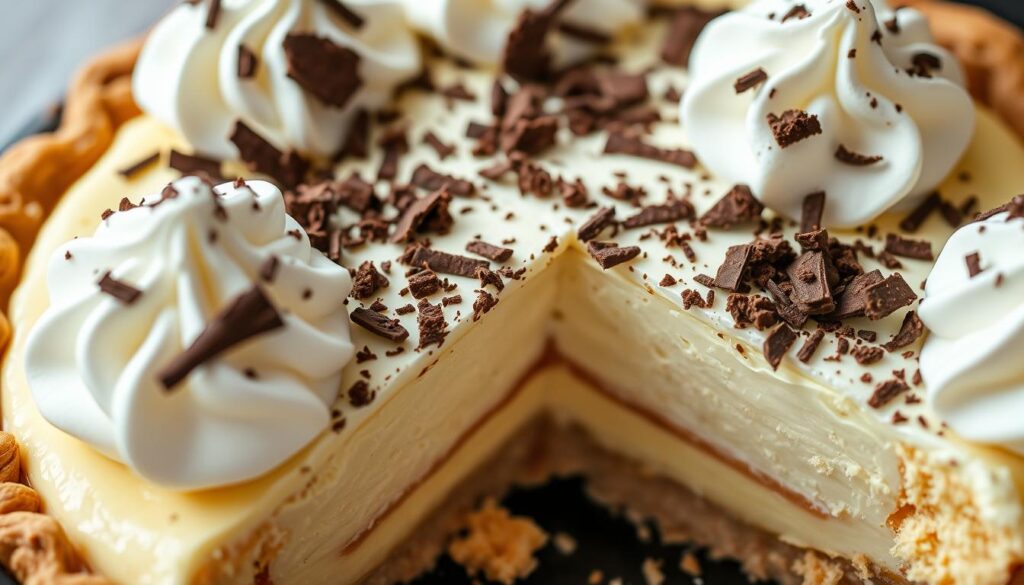
Pecan Cheesecake Pie: Elevating Special Occasions
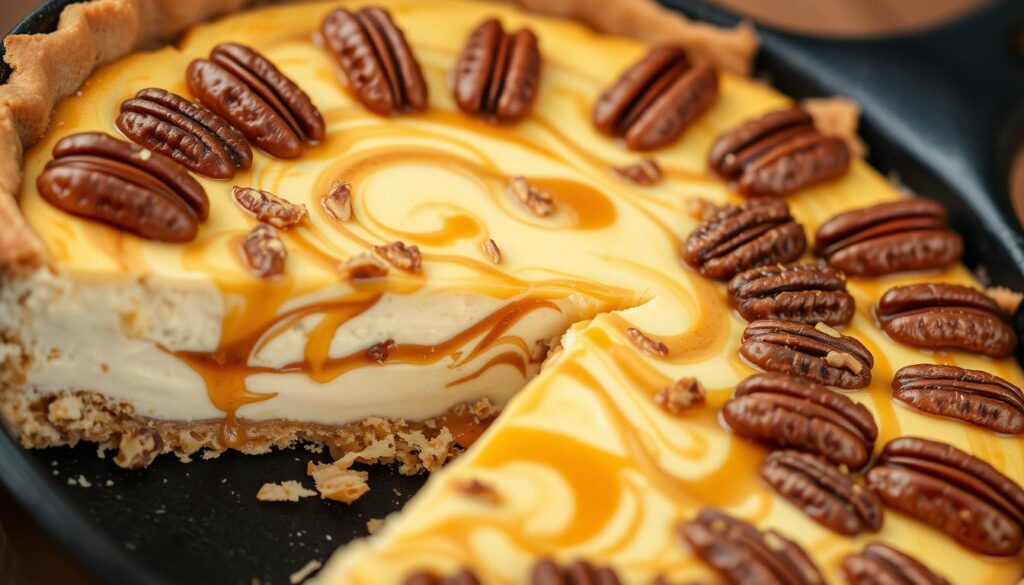
This is two desserts in one. Creamy cheesecake layer on the bottom. Sticky, caramelized pecan topping above it. Cast iron ensures even baking and gives the crust the structure it needs.
Make this for Thanksgiving. It’ll disappear first.
Ingredients (Serves 4-6)
For the crust:
- 1-1/2 cups graham cracker crumbs
- 3 tablespoons sugar
- 1/3 cup unsalted butter, melted
For the cheesecake layer:
- 16 oz full-fat cream cheese, softened to room temperature
- 1/2 cup granulated sugar
- 2 large eggs
- 1 teaspoon vanilla extract
For the pecan topping:
- 1-1/2 cups pecan halves, lightly toasted
- 1/4 cup heavy cream
- 1/3 cup light corn syrup
- 1/4 cup brown sugar, packed
- 1 tablespoon unsalted butter
- 1/2 teaspoon vanilla extract
How to Make It
- Preheat oven to 375°F
- Make crust: mix crumbs, sugar, and melted butter — press firmly into a 9-inch or 10-inch cast iron skillet
- Blind bake crust 8 minutes, set aside to cool slightly
- Beat cream cheese until completely smooth and fluffy
- Add sugar, eggs, and vanilla — mix on medium until combined (don’t overmix)
- Pour cheesecake batter over crust
- Make pecan topping: combine cream, corn syrup, brown sugar, and butter in a small saucepan
- Cook over medium heat 3-4 minutes, stirring, until sugar dissolves
- Off heat, stir in vanilla and toasted pecans
- Gently pour pecan mixture over cheesecake batter — do this slowly so it floats on top
- Place skillet inside a larger roasting pan, fill roasting pan with 1 inch of hot water (the water bath prevents cracks)
- Bake 35-40 minutes — edges should be set, center should have a slight jiggle
- Remove from water bath, cool to room temperature on a wire rack
- Refrigerate at least 4 hours before slicing
Why the Water Bath Matters
Cheesecakes crack when they cook too fast. The water bath regulates the heat around the skillet. It’s not optional if you want a smooth, crack-free surface.
Nutritional Information (Per Serving)
| Nutrient | Amount per Serving |
|---|---|
| Calories | 724 |
| Carbohydrates | 58g |
| Protein | 11g |
| Fat | 52g |
| Fiber | 2g |
| Sodium | 412mg |
Plum and Nutmeg Cream Pie: A Unique Flavor Profile
Plum desserts are underrated. Full stop. Plums have an earthy, jammy sweetness that deepens beautifully in the oven, and nutmeg adds a warm, almost mysterious spice note that ties everything together. This is one of those spiced fruit pies that surprises people.
Not traditional, not overly fancy. Just genuinely delicious.
Ingredients (Serves 4-6)
For the skillet cake/pie:
- 10-12 small Italian plums (or 6-7 regular plums), halved and pitted
- 1 cup granulated sugar
- 1/2 cup unsalted butter
- 2 large eggs
- 1 cup all-purpose flour
- 1 teaspoon baking powder
- 1/4 teaspoon kosher salt
- 2 teaspoons fresh lemon juice
- 1 teaspoon ground cinnamon
- 1/2 teaspoon freshly grated nutmeg (freshly grated makes a real difference)
Optional serving:
- Whipped cream or vanilla ice cream
How to Make It
- Preheat oven to 350°F
- Place butter in the cast iron skillet and set over low heat until melted — then remove from heat
- In a mixing bowl, whisk together sugar and eggs until light
- Add flour, baking powder, and salt — stir until just combined
- Pour batter directly over melted butter in the skillet. Do not stir
- Arrange plum halves cut-side up over the batter, pressing them in gently
- Sprinkle lemon juice, cinnamon, and nutmeg over the top
- Bake 45-50 minutes until a toothpick comes out clean and top is golden brown
- Let cool in skillet at least 20 minutes before serving
A Note on Timing
This pie gets better as it sits. Leave it at room temperature overnight — the plums release their juices into the batter and the flavor intensifies. Refrigerate if keeping more than 2-3 days.
Nutritional Information (Per Serving)
| Nutrient | Amount per Serving |
|---|---|
| Calories | 388 |
| Carbohydrates | 56g |
| Protein | 5g |
| Fat | 17g |
| Fiber | 2g |
| Sodium | 182mg |
Blueberry Rhubarb Cream Pie: A Berry Good Combination
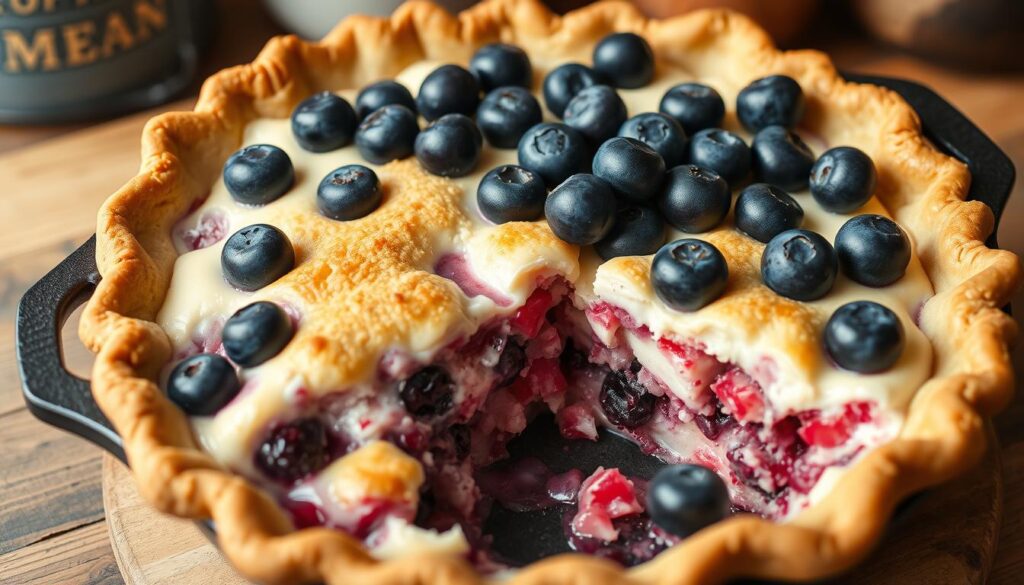
Blueberries and rhubarb is one of those pairings that sounds odd until you taste it. The rhubarb brings tartness and structure. The blueberries bring sweetness and color. Together in a cream pie filling? It’s a summer fruit pie that’s genuinely memorable.
This one takes a bit more time because the crust needs to be made from scratch. Worth it. Really.
Ingredients (Serves 4-6)
For the crust:
- 2-1/2 cups all-purpose flour
- 1 teaspoon salt
- 1 cup cold unsalted butter, cubed
- 6-8 tablespoons ice water
For the fruit filling:
- 1 pound rhubarb, cut into 1-inch pieces (about 3 cups)
- 2 cups fresh or frozen blueberries
- 3/4 cup granulated sugar
- 3 tablespoons tapioca starch (or cornstarch)
- 1 tablespoon lemon juice
- 1-1/2 teaspoons vanilla extract
- 1/2 teaspoon ground cinnamon
- 1/4 teaspoon ground nutmeg
For the cream element:
- 3/4 cup heavy cream
- 2 tablespoons sugar
- 1 egg yolk (for egg wash on top crust)
How to Make It
- Make pie dough: whisk flour and salt, cut in cold butter until crumbly, add ice water until dough just comes together
- Divide dough in half, wrap each in plastic, refrigerate 30 minutes
- Preheat oven to 375°F
- Combine rhubarb, blueberries, sugar, tapioca starch, lemon juice, vanilla, cinnamon, and nutmeg in a large bowl — toss to coat
- Let sit 10 minutes while you roll out the dough
- Roll one dough half into a 13-inch circle, lay into skillet
- Pour in fruit filling
- Whisk cream and sugar together, pour over fruit filling in the skillet
- Roll out second dough half, lay over filling as a top crust
- Trim, crimp edges, cut a few slits for steam to escape
- Brush top crust with egg yolk mixed with 1 tablespoon water
- Bake 50-55 minutes until crust is deep golden and filling bubbles through slits
- Cool completely before slicing — at least 2 hours
The total process including chilling is about 3-4 hours, but most of it is hands-off.
Nutritional Information (Per Serving)
| Nutrient | Amount per Serving |
|---|---|
| Calories | 624 |
| Carbohydrates | 79g |
| Protein | 7g |
| Fat | 32g |
| Fiber | 4g |
| Sodium | 312mg |
Toppings and Garnishes for Cast Iron Skillet Cream Pies
Great toppings aren’t decoration. They’re part of the pie. The right garnish adds texture, flavor contrast, and makes the whole thing look like you know what you’re doing.
Whipped Cream — the Right Way
This matters more than you’d think. Badly made whipped cream is either greasy or weeping within an hour. Here’s how to get it right:
For every 4-6 slices:
- 1-1/2 cups heavy whipping cream, very cold
- 3 tablespoons powdered sugar
- 3/4 teaspoon vanilla extract
Chill your bowl and whisk in the freezer 10 minutes first. Beat on medium until cream thickens. Add sugar and vanilla. Increase to medium-high until stiff peaks form. Stop there — over-whipped cream turns grainy and greasy.
Meringue — What Goes Wrong
Weeping (liquid pooling under meringue): filling was too warm. Cool it fully first.
Shrinking: didn’t reach the crust edges. Always spread edge-to-edge.
Won’t stiffen: fat in the bowl. Wipe everything with paper towel dipped in white vinegar before starting.
Garnish Ideas Worth Trying
Match the garnish to the filling:
| Pie | Best Garnish |
|---|---|
| Chocolate cream | Chocolate shavings or cocoa dusted |
| Lemon meringue | Lemon zest curls |
| Banana cream | Toasted coconut and fresh banana slices |
| Salted caramel | Flaky sea salt and caramel drizzle |
| Blueberry rhubarb | Fresh berries and powdered sugar |
| Maple pecan | Whole toasted pecans and maple drizzle |
Simple and specific. Don’t overthink it — just make sure whatever you put on top actually tastes like it belongs there.