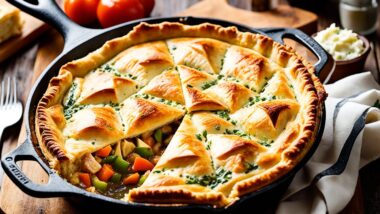
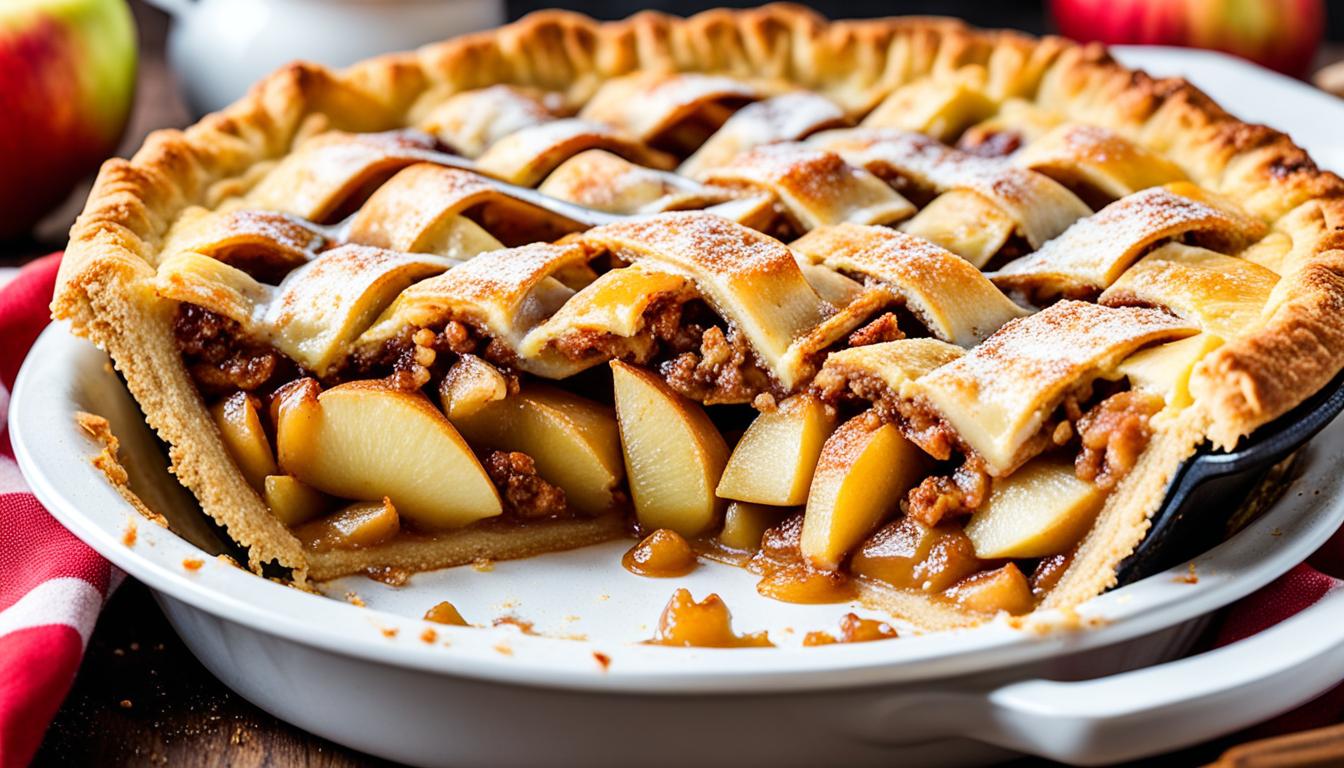
Cast iron skillet cherry pie gives you a crispy, caramelized crust and a bubbling, jammy filling that a standard pie dish simply can’t replicate — and these 11 recipes cover everything from a classic butter-laden double crust to some genuinely unexpected combinations. Each recipe serves four people. Some take 45 minutes, some closer to an hour and a half. All of them are worth it.
The skillet does real work here. Even heat distribution means no soggy bottom, no burnt edges, and cherries that cook through without turning to mush. That’s the whole argument for cast iron baking — and cherry pie makes it perfectly.
Table of Contents
- 1 Getting Started with Cast Iron Skillet Cherry Pies
- 2 Why People Love Indulgent Desserts
- 3 Cast Iron Skillet Cherry Pie Recipes
- 4 Classic Butter-Laden Cherry Pie
- 5 Double-Crust Sugar Bomb Cherry Pie
- 6 Cream Cheese Stuffed Cherry Pie
- 7 Chocolate-Drizzled Cherry Pie Extravaganza
- 8 Caramel Pecan Cherry Pie Delight
- 9 Brown Sugar and Bourbon Cherry Pie
- 10 Marshmallow-Topped Cherry Pie Indulgence
- 11 Coconut Cream Cherry Pie Fusion
- 12 Deep-Fried Cherry Pie Pockets
- 13 Nutella-Swirled Cherry Pie Decadence
- 14 Salted Caramel Cherry Pie Indulgence
- 15 Health Considerations and Moderation
- 16 Serving and Presentation Ideas
Getting Started with Cast Iron Skillet Cherry Pies
Cast iron skillet cherry pies come out with a golden, evenly baked crust and a filling that stays thick and glossy — and the setup is simpler than most people expect.
A 10-inch skillet handles four servings well. Preheat it in the oven while you prep — that hot surface jumpstarts the bottom crust and keeps it from going soft under the filling. It’s the single most important technique in cast iron pie baking. Do it every time.
The basic process, regardless of which recipe you choose:
- Preheat the empty skillet in the oven while it heats up
- Make your cherry filling — fresh, frozen, or canned all work differently (more on that below)
- Roll out the crust and handle it cold
- Assemble the pie in the hot skillet — fast, so you don’t lose the heat
- Bake until golden brown and bubbling at the edges
A note on cherries. Fresh tart cherries are the gold standard. Sweet cherries work but need less sugar. Frozen ones go in straight from the bag, no thawing required — they release more liquid as they bake, so add a little extra cornstarch to compensate. Canned cherry pie filling? Use it without guilt for any recipe that calls for it. It’s a legitimate shortcut, not a downgrade.
| Ingredient | Amount | Purpose |
|---|---|---|
| Fresh tart cherries | 4 cups | Main filling — bright, tangy flavor |
| Granulated sugar | 3/4 cup | Sweetness |
| Cornstarch | 3 tbsp | Thickens the filling |
| Lemon juice | 1 tbsp | Balances the sweetness |
| Pie crust | 2 (9-inch) | Top and bottom |
Don’t skip the seasoning on your pan, either. A properly seasoned skillet lets pie release without a fight, and it lends the bottom crust a depth of flavor that’s hard to put into words but unmistakable the moment you taste it. If your pan is new, or it’s been sitting unused for a while, how to season a cast iron skillet walks through what to do before anything goes in it.
Why People Love Indulgent Desserts
Indulgent desserts like cast iron cherry pie hit something deeper than just sweetness — they’re about the combination of textures, the smell of browning butter and bubbling fruit, and the fact that a good slice of pie genuinely makes a moment feel worth celebrating.
Cherry pie sits in a particular sweet spot. Tart and sweet at the same time, that’s the filling. Buttery and flaky, that’s the crust. And cast iron brings caramelized edges that a ceramic dish has no way of replicating. All together, that combination is exactly why people end up talking about a slice afterward.
A few things that make a real difference:
- A 10-inch cast iron skillet is the right size for 4-6 servings — don’t go smaller
- 425°F for the first 15 minutes, then drop to 375°F to finish — this sets the crust fast
- Prepping the skillet with a light butter coating before you lay in the dough helps with release
- Fresh tart cherries beat sweet cherries here — the contrast with the sugary filling is the whole point
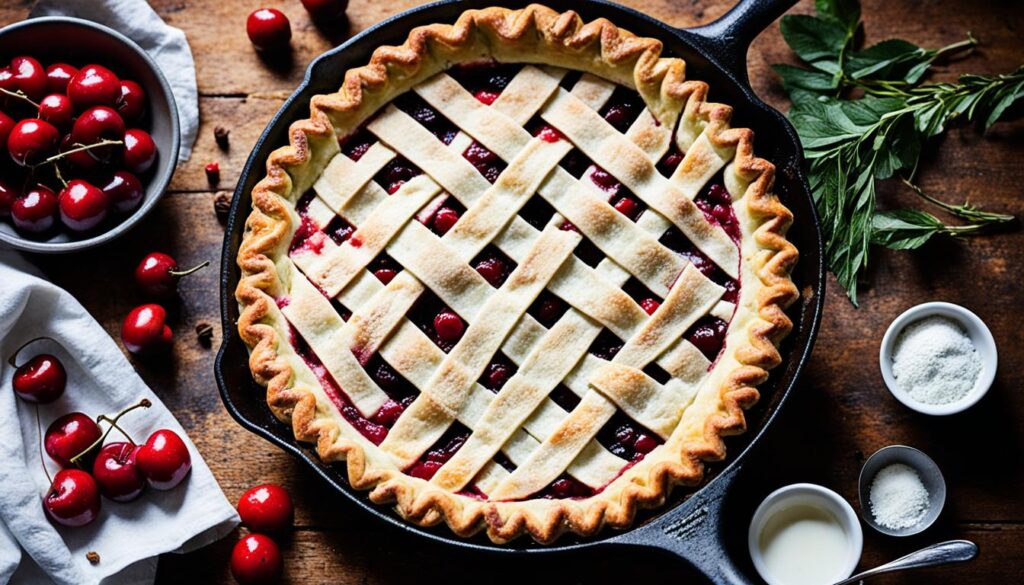
Cast Iron Skillet Cherry Pie Recipes
The best cast iron skillet cherry pie starts with even heat, a well-seasoned pan, and a filling that’s thick enough to hold its shape when you cut into it — and these recipes nail all three.
Why Cast Iron Beats Everything Else Here
Standard pie dishes, ceramic, glass — they all work fine. But cast iron conducts heat differently. The bottom crust browns instead of softening. The edges caramelize. The filling gets hotter, faster, which means it thickens properly before the crust overcooks. For cherry pie specifically, that matters a lot because cherry filling is high in liquid.
The weight of the skillet (typically 6-10 pounds) also means it holds temperature steadily. Open the oven door to check on it — a cast iron skillet barely flinches. That consistency is why the results are so repeatable. You can also use cast iron for everything from stir-fries to deep dish pizza and get the same reliable results.
Essential Ingredients for Cherry Pies
Every recipe here builds on the same core:
- 4 cups fresh or frozen cherries, pitted
- 3/4 to 1 cup sugar (depending on cherry sweetness)
- 3 tbsp cornstarch
- 1 tsp vanilla extract
- 1/4 tsp almond extract — don’t skip this, it deepens the cherry flavor significantly
- Pie crust, homemade or store-bought
Avoiding Common Mistakes
Lean too heavy on the sugar and the filling turns runny and cloying instead of jammy. Skip on cornstarch and it won’t set the way it’s supposed to. Overfill the skillet and you’re cleaning bubbled-over filling off your oven floor later. None of this is complicated, really — it just comes down to paying attention to your ratios.
Cutting sugar without losing flavor is doable, too. Honey works at a 3:4 ratio — 3/4 cup honey for every full cup of sugar called for. Monk fruit sweetener is another option, zero calories, and it actually holds up well once baked into a filling. Neither option is magic, but they work better than you’d expect.
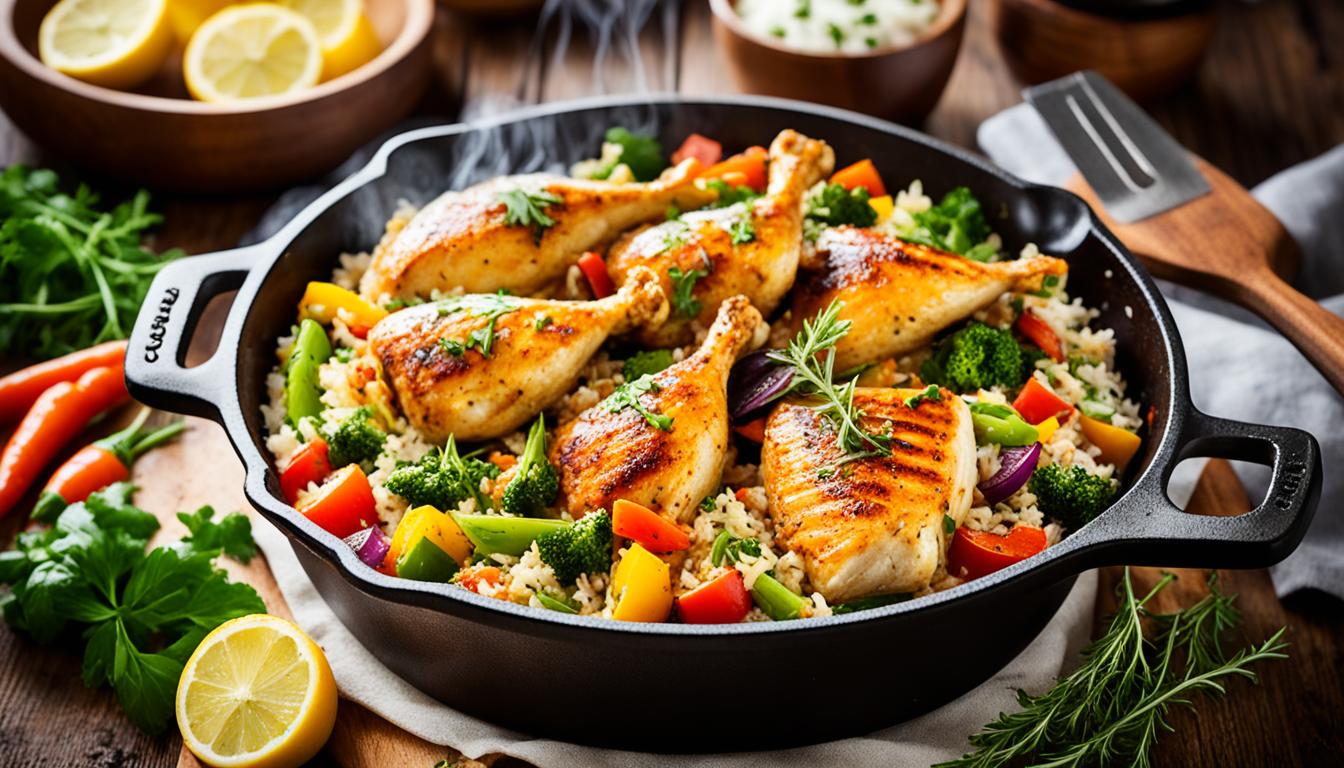
Pair this with a lighter savory main — something like a Chinese chicken and cabbage stir-fry — and the dessert feels earned rather than excessive.
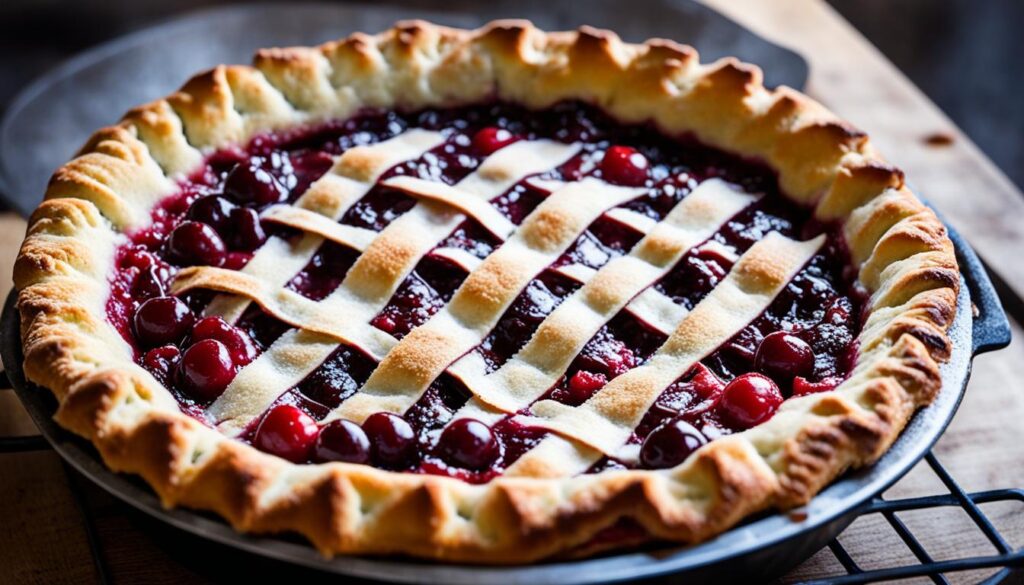
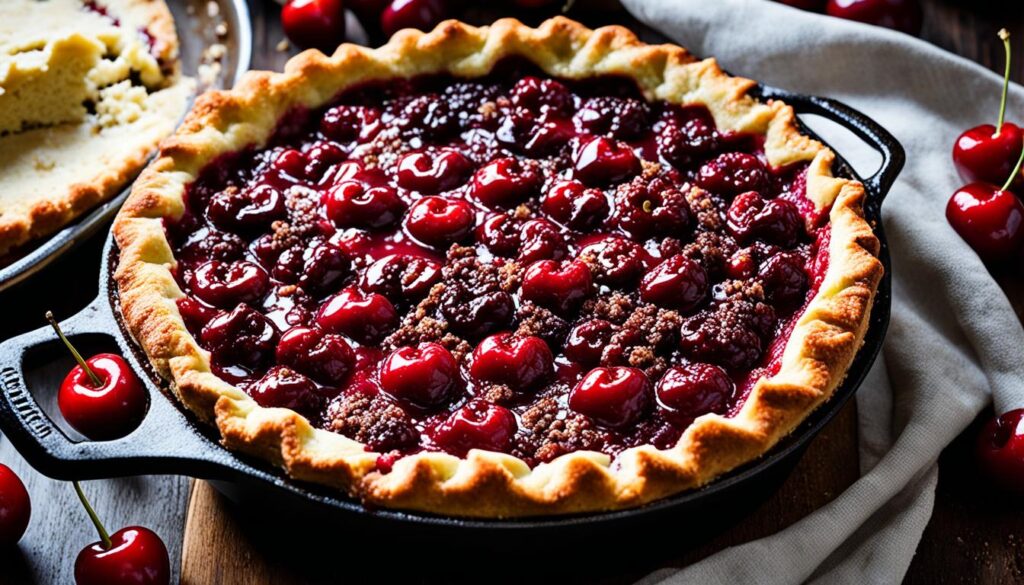
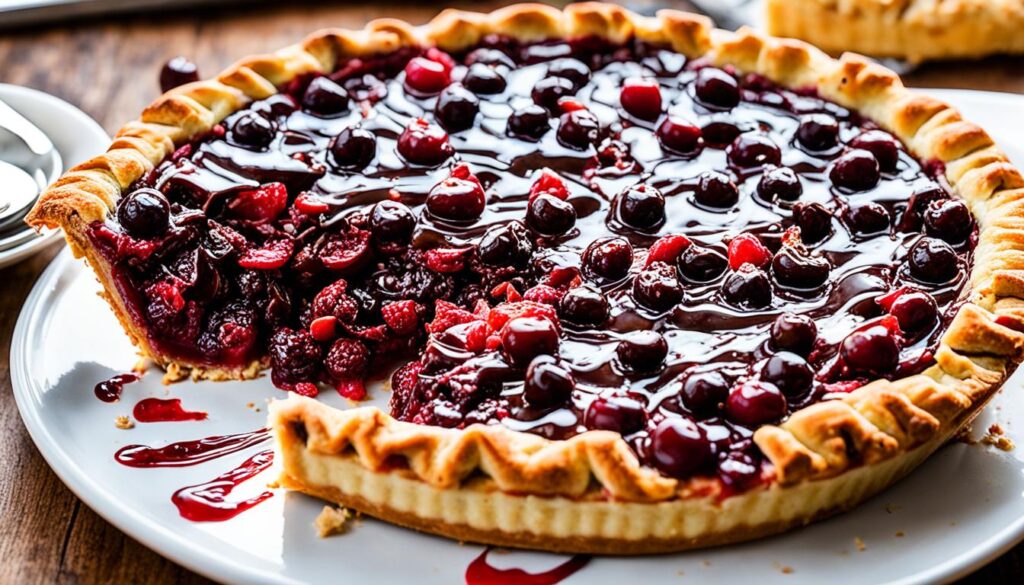
Classic Butter-Laden Cherry Pie
The classic cast iron cherry pie features a flaky, all-butter crust and a thick tart cherry filling — it’s the benchmark recipe that every other version on this list is measured against.
Crust Ingredients
- 2-1/2 cups all-purpose flour
- 1 cup cold unsalted butter, cubed small
- 1/4 cup ice water (add more by the tablespoon if needed)
- 1 tbsp sugar
- 1/2 tsp salt
Cherry Filling
- 4 cups fresh tart cherries, pitted
- 3/4 cup granulated sugar
- 3 tbsp cornstarch
- 1 tsp vanilla extract
- 1/4 tsp almond extract
How to Make It
Combine the flour, sugar, and salt in a bowl first. Work the cold butter in until it resembles coarse crumbs, with a few pea-sized pieces still intact — that’s what gives the crust its flaky layers later, so stop before it gets too uniform. Add ice water a tablespoon at a time, mixing only until the dough holds together. No further than that. Split it into two halves, wrap them up, and chill for 30 minutes minimum.
Toss the cherries with sugar, cornstarch, and both extracts for the filling, stirring until every piece is coated.
Roll out the first half of dough and press it into your preheated, buttered skillet. Add the filling. Roll out the second half for the top, crimp the edges closed, and cut a few slits to vent steam. An egg wash on top is optional, but it does give you a shinier crust.
Bake at 400°F for 40-45 minutes — pull it once the filling’s bubbling through those vents and the crust has turned a deep golden brown.
Nutritional Information (Per Serving)
| Nutrient | Amount per Serving |
|---|---|
| Calories | 350 |
| Carbohydrates | 52g |
| Protein | 4g |
| Fat | 15g |
| Fiber | 2.5g |
| Sodium | 185mg |
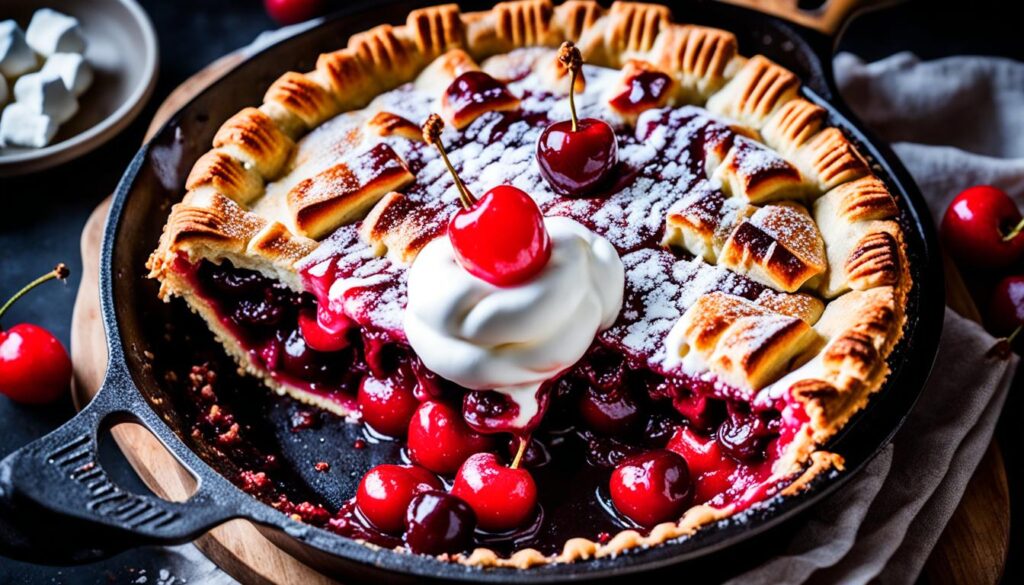
Double-Crust Sugar Bomb Cherry Pie
This cast iron double-crust cherry pie uses significantly more sugar than the classic — it’s unapologetically sweet, rich, and exactly right for people who want their pie to taste like a dessert, not a fruit dish.
What You Need
- 4 cups fresh pitted cherries
- 1-1/2 cups granulated sugar
- 1/4 cup cornstarch
- 3 tbsp cold unsalted butter, cubed
- 1 tbsp lemon juice
- 1/4 tsp almond extract
- 2 (9-inch) pie crusts — store-bought works perfectly here
- 1 egg (for egg wash)
- 2 tbsp coarse sugar for topping
Method
- Preheat your skillet in a 425°F oven.
- Mix cherries, sugar, cornstarch, butter, lemon juice, and almond extract in a large bowl.
- Line the hot skillet with one pie crust. Move fast — you want that crust hitting a hot surface.
- Pour in the cherry mixture.
- Top with the second crust. Lattice looks great but a full top with slits works just as well.
- Brush with egg wash. Scatter coarse sugar over everything.
- Bake 45-50 minutes until golden and bubbling.
Why So Much Sugar?
It’s the lemon juice carrying the real weight in this recipe. Skip it, and that full 1-1/2 cups of sugar up against tart cherries would land squarely in cloying territory. With it, there’s a brightness running through the filling that keeps every bite from tasting flat. The coarse sugar scattered on top isn’t just decorative either — it adds crunch and a slightly caramelized texture on the crust, and skipping it is a small thing that matters more than it seems like it should.
For a lighter dinner before this pie, a shrimp and dumpling stir-fry balances the richness well.
Nutritional Information (Per Serving)
| Nutrient | Amount per Serving |
|---|---|
| Calories | 480 |
| Carbohydrates | 78g |
| Protein | 4g |
| Fat | 17g |
| Fiber | 2g |
| Sodium | 210mg |
Cream Cheese Stuffed Cherry Pie
This cast iron cherry pie layers a tangy cream cheese filling under a thick cherry topping on a chocolate wafer crust — it’s closer to a baked cheesecake-pie hybrid, and it’s one of the most impressive-looking desserts on this list.

Ingredients
Chocolate crust:
- 24 chocolate wafer cookies, finely crushed (about 1-1/2 cups crumbs)
- 1/4 cup melted unsalted butter
- 1-1/2 tbsp granulated sugar
Cream cheese layer:
- 12 oz cream cheese, softened to room temperature
- 1/2 cup confectioners’ sugar
- 1 tsp vanilla extract
Cherry topping:
- 2 cups canned cherry pie filling (or homemade — 3 cups fresh cherries cooked with 1/3 cup sugar and 2 tbsp cornstarch)
How to Build It
Get the oven to 375°F. Combine the wafer crumbs, melted butter, and sugar, then press that mixture firmly into the bottom and up the sides of your 10-inch skillet. Bake for 8-10 minutes. Let it cool all the way — this is one step you genuinely shouldn’t rush.
Beat the cream cheese, confectioners’ sugar, and vanilla together until it’s completely smooth, then spread that over the cooled crust in an even layer.
Spoon the cherry filling on top of the cream cheese layer. Swirl the two together lightly, or leave them as distinct layers — either approach ends up looking good.
Bake at 350°F for 15-20 minutes, just enough to set that cream cheese layer. Cool for at least 30 minutes before you cut into it.
Nutritional Information (Per Serving)
| Nutrient | Amount per Serving |
|---|---|
| Calories | 430 |
| Carbohydrates | 55g |
| Protein | 5g |
| Fat | 22g |
| Fiber | 1.5g |
| Sodium | 320mg |
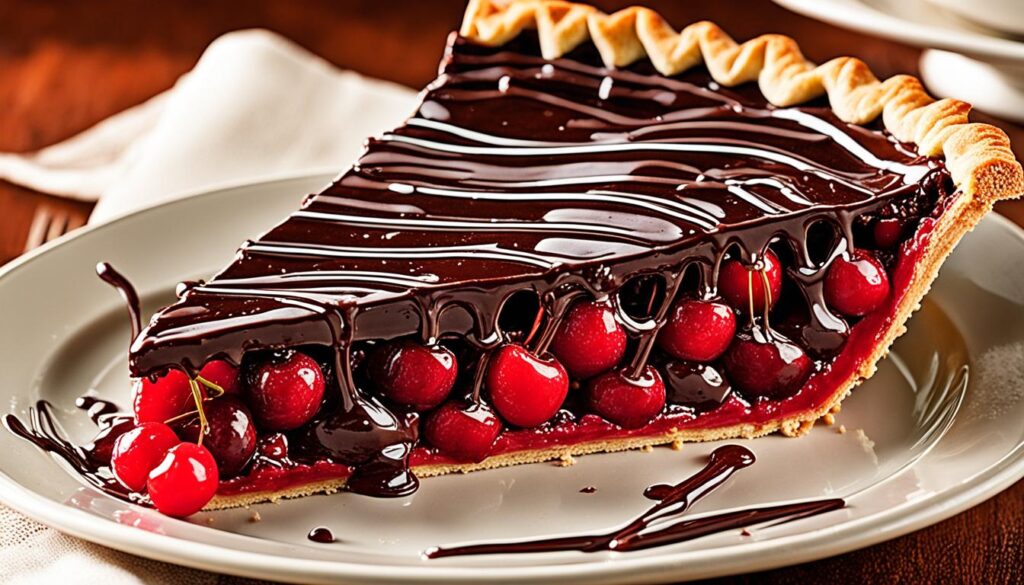
Chocolate-Drizzled Cherry Pie Extravaganza
Dark chocolate ganache drizzled over a standard cherry filling gives this cast iron pie a bitterness that plays off tart cherries in a way that just makes sense the first time you taste it.
Ingredients

Crust:
- 1-1/2 cups all-purpose flour
- 1/4 cup sugar
- 1/2 cup cold unsalted butter, cubed
- 3-4 tbsp ice water
Cherry filling:
- 4 cups pitted cherries
- 3/4 cup sugar
- 3 tbsp cornstarch
- 1/2 tsp vanilla extract
Chocolate drizzle:
- 3 oz dark chocolate (60-70% cocoa), roughly chopped
- 2 tbsp heavy cream
Making the Drizzle
This is the part people overthink. It’s simple. Combine chopped chocolate and cream in a small saucepan over very low heat. Stir until melted and smooth. Pull it off the heat and let it cool for 5 minutes — it needs to thicken slightly before you drizzle or it’ll just run off the pie in a thin sheet.
Use a spoon or a small piping bag. Drag it back and forth across the cooled pie. Don’t try to make it perfect. The casual, uneven drizzle looks better than anything too precise.
Choosing the Right Chocolate
60-70% cocoa is the target. Below 60% and it’s too sweet — the whole point of the drizzle is contrast. Above 70% and it can taste harsh against the cherries. Pick a brand you’d eat on its own. The chocolate flavor comes through clearly in the finished pie, so quality matters here more than it does in, say, a heavily spiced recipe.
Bake the filled pie at 375°F for 45 minutes. Cool completely before drizzling.
Nutritional Information (Per Serving)
| Nutrient | Amount per Serving |
|---|---|
| Calories | 415 |
| Carbohydrates | 58g |
| Protein | 5g |
| Fat | 19g |
| Fiber | 3g |
| Sodium | 175mg |
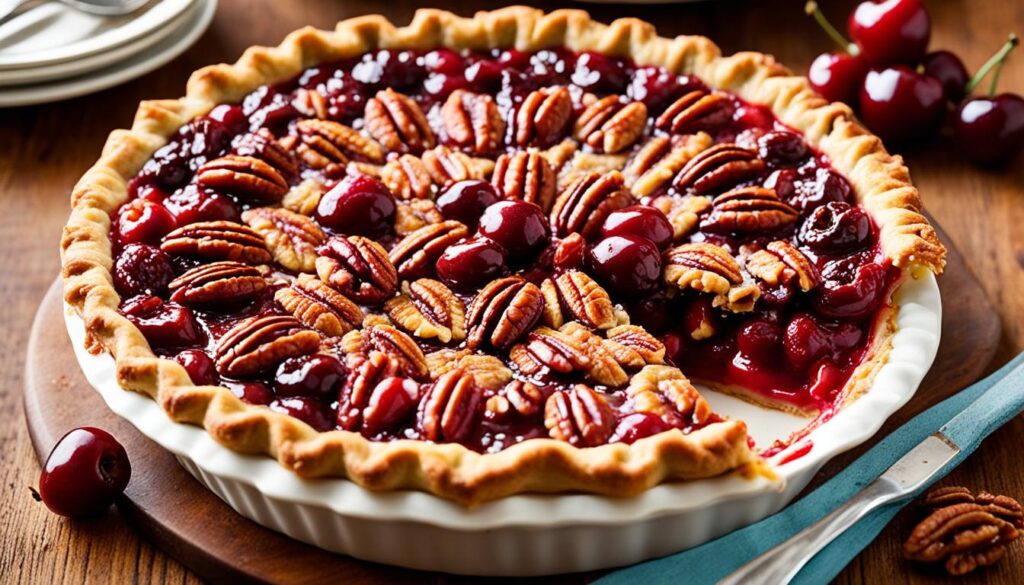
Caramel Pecan Cherry Pie Delight
This cast iron cherry pie adds a homemade caramel sauce and a layer of toasted pecans to a tart cherry filling — the nut crunch and caramel depth turn a simple fruit pie into something considerably more complex.
Ingredients
- 4 cups tart cherries (fresh or from 2 cans, drained — keep 1/2 cup of the juice)
- 3/4 cup granulated sugar
- 3 tbsp cornstarch
- 1/3 cup caramel sauce (store-bought or homemade)
- 3/4 cup chopped pecans, lightly toasted
- 2 (9-inch) pie crusts
Quick caramel sauce (if making your own):
- 1/2 cup granulated sugar
- 2 tbsp water
- 1/4 cup heavy cream
- 1 tbsp butter
- Pinch of salt
Method
If you’re making the caramel yourself: cook the sugar and water together over medium heat, no stirring, until it goes amber. Pull it off the heat, stir in the cream, then the butter and salt right after. Let that cool on its own while you handle the next step.
For the filling, combine the cherries, sugar, cornstarch, and cherry juice (or 1/2 cup water, if you’re using fresh cherries instead) in a separate saucepan. Cook over medium heat until it thickens up, about 5 minutes total. Stir in the caramel sauce once it’s there.
Line your preheated 10-inch skillet with one crust, pour the filling in, then scatter the pecans across the top. Cover with the second crust, crimp the edges, and cut a few vents.
Bake at 400°F for 40-45 minutes.
Inside the pie, the pecans keep toasting as it bakes, picking up a caramelized edge that pairs perfectly with that cherry-caramel filling underneath. Don’t skip toasting them first — raw pecans go soft in there.
Make-Ahead Notes
The filling keeps in the fridge for 2 days. Assembled but unbaked pie freezes well for up to a month — bake straight from frozen, adding 10-15 minutes to the bake time.
Nutritional Information (Per Serving)
| Nutrient | Amount per Serving |
|---|---|
| Calories | 370 |
| Carbohydrates | 50g |
| Protein | 4g |
| Fat | 18g |
| Fiber | 3g |
| Sodium | 195mg |
Brown Sugar and Bourbon Cherry Pie
Brown sugar and bourbon in a cast iron cherry pie add a warm, slightly smoky depth that plain sugar and vanilla can’t touch — and the bourbon flavor stays present even after baking, which is exactly the point.
Filling Ingredients
- 4 cups fresh tart cherries, pitted
- 1/2 cup light brown sugar, packed
- 3 tbsp cornstarch
- 2-3 tbsp bourbon (use the higher amount if you want the flavor prominent)
- 1 tbsp fresh lemon juice
- 1 tsp freshly grated ginger — optional, but sneaky good
- 1 (9-inch) pie crust for the bottom, plus a lattice top
Picking a Bourbon
Don’t use the cheapest bottle on the shelf — the flavor concentrates in the filling and a harsh bourbon comes through. But don’t use anything precious either. A solid everyday bottle with caramel and vanilla notes works best. Think: something you’d drink on ice without embarrassment.
Flavor Balance
Brown sugar’s molasses notes and bourbon were basically made for each other — both bring that same warm, caramelized quality, and together they push the cherries’ tartness into the background without erasing it completely. Lemon juice is what keeps the whole thing from tipping over into sticky-sweet.
Ginger’s optional here, but it’s genuinely worth trying — a single teaspoon of fresh grated ginger adds a subtle heat in the background, enough to make the filling taste more layered without anyone picking out “ginger” specifically.
Bake in an 8-inch or 10-inch skillet at 400°F for 45-50 minutes. The alcohol cooks off in the oven, but the flavor it leaves behind sticks around. Give it at least 20 minutes to cool before slicing — the filling needs that time to fully set.
Nutritional Information (Per Serving)
| Nutrient | Amount per Serving |
|---|---|
| Calories | 390 |
| Carbohydrates | 56g |
| Protein | 4g |
| Fat | 15g |
| Fiber | 2.5g |
| Sodium | 180mg |
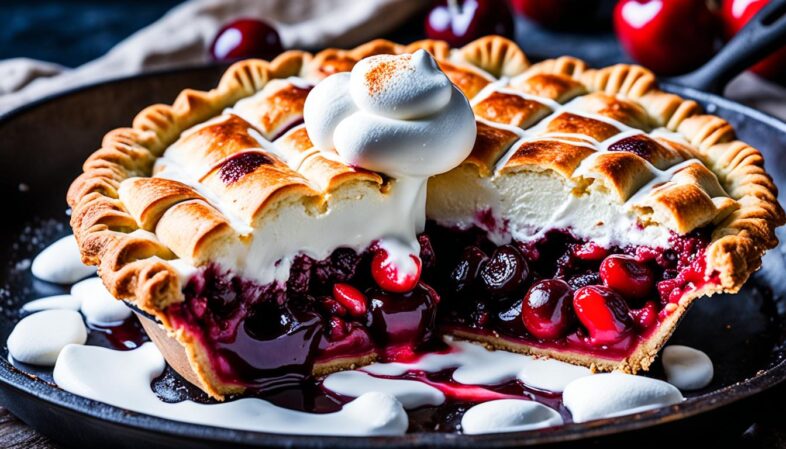
Marshmallow-Topped Cherry Pie Indulgence
This cast iron cherry s’mores pie skips the traditional crust entirely and finishes with a broiled marshmallow topping — it’s fast, fun to make, and the kind of dessert that gets a reaction when you bring it to the table.
What You Need
Cherry filling:
- 4 cups fresh cherries, pitted
- 1/2 cup granulated sugar
- 2 tbsp cornstarch
- 1 tbsp lemon juice
- 1/2 tsp vanilla extract
Topping:
- 2 cups mini marshmallows
That’s the whole ingredient list. No crust, no butter, no rolling pin.
How to Make It
- Preheat oven to 375°F.
- Combine cherries, sugar, cornstarch, lemon juice, and vanilla directly in a 10-inch cast iron skillet. Stir to combine.
- Bake uncovered for 25-30 minutes, until the filling is bubbling and slightly thickened.
- Pull the skillet out. Scatter mini marshmallows evenly over the top — cover the surface completely.
- Switch the oven to broil. Slide the skillet back in for 1-2 minutes. Watch it constantly. Marshmallows go from golden to charred in about 30 seconds of inattention.
- Serve immediately, straight from the skillet.
The marshmallow topping gets golden and slightly crispy on the outside while staying soft underneath. The cherry filling underneath is hot, thick, and bright. It’s a genuinely good dessert for how little effort it takes.
Best served warm, the same day. Marshmallows don’t reheat well.
Nutritional Information (Per Serving)
| Nutrient | Amount per Serving |
|---|---|
| Calories | 245 |
| Carbohydrates | 61g |
| Protein | 2g |
| Fat | 0.5g |
| Fiber | 2.5g |
| Sodium | 45mg |
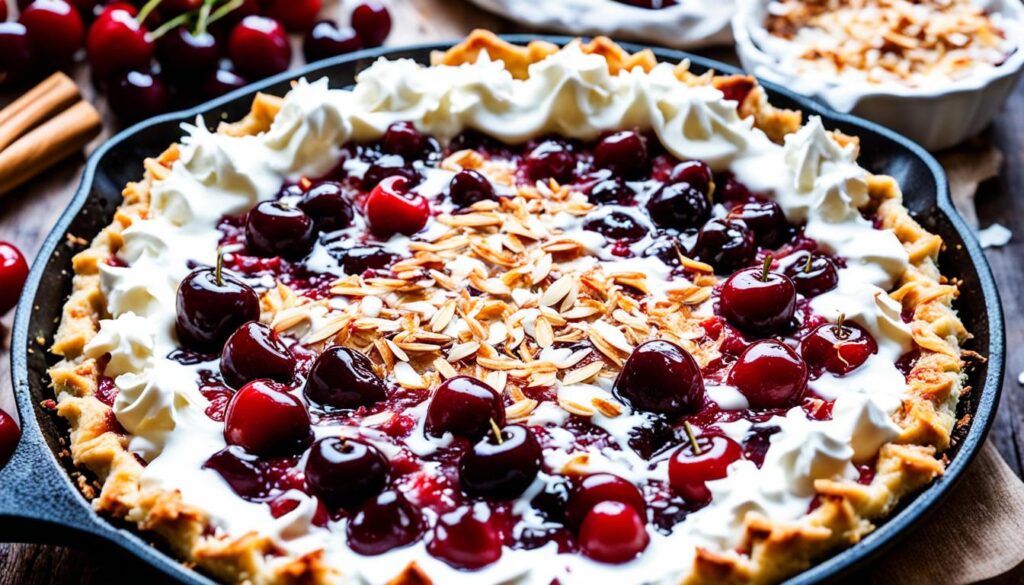
Coconut Cream Cherry Pie Fusion
This cast iron cherry pie layers a coconut cream filling under fresh cherries on a graham cracker crust — it’s tropical without being over-the-top, and the coconut cream cools and sets into something surprisingly elegant.
Ingredients
| Component | Ingredient | Amount |
|---|---|---|
| Crust | Graham cracker crumbs | 1-1/2 cups |
| Crust | Melted butter | 1/4 cup |
| Crust | Sugar | 2 tbsp |
| Coconut cream | Full-fat coconut milk | 1 cup |
| Coconut cream | Sugar | 1/4 cup |
| Coconut cream | Cornstarch | 2 tbsp |
| Cherry layer | Fresh or canned cherries, pitted | 3 cups |
| Cherry layer | Sugar | 3 tbsp |
Making the Coconut Cream
Whisk coconut milk, sugar, and cornstarch together in a small saucepan. Cook over medium heat, stirring constantly, until the mixture thickens noticeably — about 5-7 minutes. It should coat the back of a spoon and hold a line when you drag your finger through it. Pull it off the heat and let it cool to room temperature. Don’t rush this.
Crust and Assembly
Mix graham cracker crumbs, melted butter, and sugar. Press into a 10-inch cast iron skillet, covering the bottom and partway up the sides. Bake at 350°F for 8-10 minutes. Cool completely.
Spread the cooled coconut cream over the crust. Top with cherries.
If using fresh cherries, toss them with 3 tbsp sugar and let sit 15 minutes first — they’ll release some liquid and become glossy. Canned cherry pie filling goes straight on top.
Refrigerate at least 1 hour before slicing. The coconut cream needs that time to fully set.
Nutritional Information (Per Serving)
| Nutrient | Amount per Serving |
|---|---|
| Calories | 340 |
| Carbohydrates | 50g |
| Protein | 3g |
| Fat | 15g |
| Fiber | 2g |
| Sodium | 190mg |
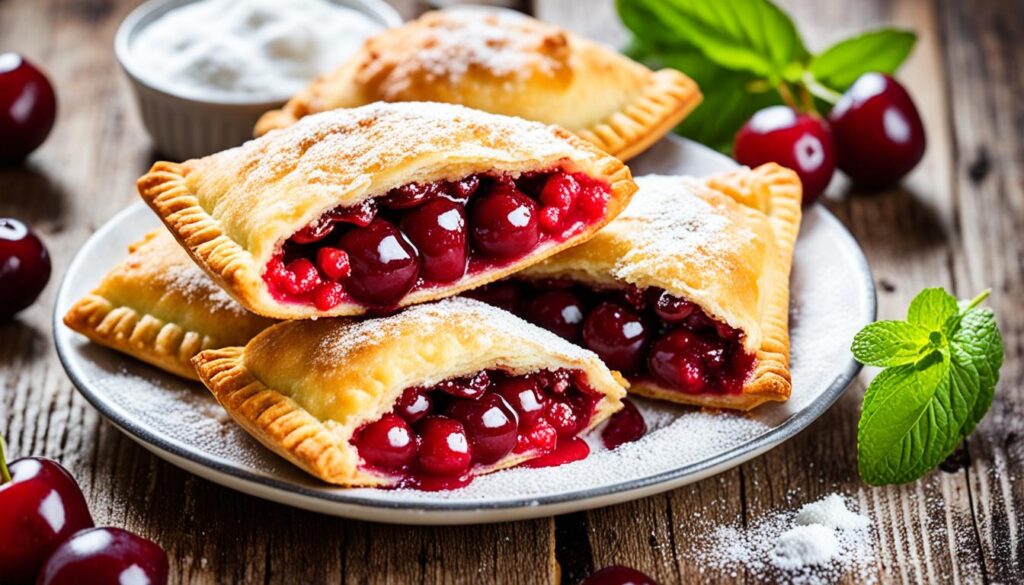
Deep-Fried Cherry Pie Pockets
Deep-fried cherry hand pies made in a cast iron skillet are the portable, fair-food version of this dessert — crispy outside, hot and fruity inside, and genuinely fun to make and eat.
Ingredients (Makes about 8 pockets, serves 4)
- 1 can (16.3 oz) refrigerated biscuit dough (8 biscuits)
- 1-1/4 cups cherry pie filling
- 1 cup canola or vegetable oil, for frying
- 3 tbsp all-purpose flour, for rolling
- Powdered sugar for dusting (optional)
How to Make Them
- Roll each biscuit out on a floured surface into a roughly 5-inch circle. They don’t need to be perfect — rustic is fine.
- Spoon about 2 tbsp of cherry filling into the center of each circle. Don’t overfill — the filling needs room to expand and you need clean edges to seal.
- Fold the dough over into a half-moon shape. Press the edges together firmly, then crimp with a fork. Press hard. The seal needs to hold in hot oil.
- Heat oil in a 10-inch cast iron skillet over medium heat to 350°F. A thermometer helps here.
- Fry the pockets in batches — don’t crowd the pan — for about 2 minutes per side until deep golden brown.
- Drain on a wire rack or paper towels. Dust with powdered sugar if you want.
A Few Things to Know
The oil temperature matters. Too low and the pockets absorb oil and turn greasy. Too high and the outside browns before the dough cooks through. 350°F is the sweet spot. A cast iron skillet maintains that temperature well once it’s up to heat. For a healthy main course before these, a shrimp and broccoli stir-fry is a good contrast to this rich dessert.
Air fryer version: 350°F for 8-10 minutes, flipping halfway. Less crispy but significantly less oil.
Eat them hot. They don’t reheat well and the crust softens quickly.
Nutritional Information (Per Serving — 2 pockets)
| Nutrient | Amount per Serving |
|---|---|
| Calories | 390 |
| Carbohydrates | 52g |
| Protein | 5g |
| Fat | 18g |
| Fiber | 1.5g |
| Sodium | 580mg |
Nutella-Swirled Cherry Pie Decadence
Nutella-swirled cast iron cherry pie pairs the chocolate-hazelnut spread with a tart cherry filling in a way that’s richer than a plain chocolate drizzle and somehow more interesting — the hazelnut flavor adds a nutty warmth that plain chocolate doesn’t have.
Ingredients
- 4 cups fresh tart cherries, pitted
- 2/3 cup granulated sugar
- 3 tbsp cornstarch
- 1/2 tsp vanilla extract
- 1/3 cup Nutella, warmed slightly
- 1 (9-inch) pie crust
- 1 egg + 1 tbsp water (egg wash)
Swirling Technique
Warm the Nutella in the microwave for about 15 seconds — just enough to make it fluid without making it hot. Drop spoonfuls over the top of the cherry filling once it’s in the crust. Then drag a butter knife through in slow, lazy figure-eights. Two or three passes is plenty. Overswirling just muddies everything together.
Baking Adjustments
Nutella burns faster than a regular pie filling because of its sugar content. Keep the oven at 375°F rather than 400°F, and start checking at the 40-minute mark. The crust should be golden and the filling bubbling, but the Nutella swirls on the surface should still look distinct — not dark or caramelized.
If the top is browning too fast, tent it loosely with foil and finish baking.
Cool for at least 20 minutes before slicing. The Nutella needs to re-set slightly as it cools, and cutting into it hot means the swirl just runs.
Nutritional Information (Per Serving)
| Nutrient | Amount per Serving |
|---|---|
| Calories | 400 |
| Carbohydrates | 57g |
| Protein | 5g |
| Fat | 17g |
| Fiber | 2.5g |
| Sodium | 195mg |
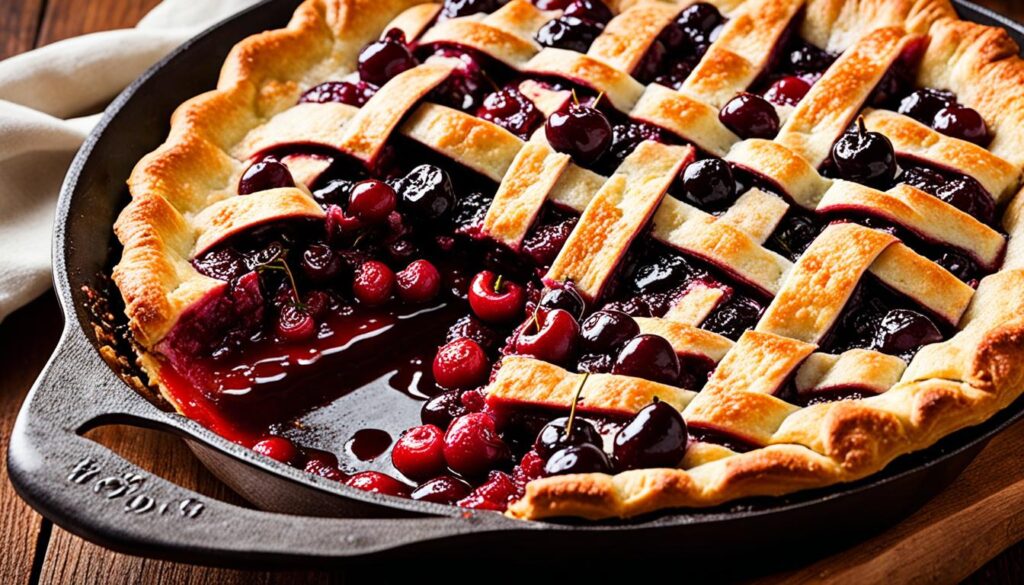
Salted Caramel Cherry Pie Indulgence
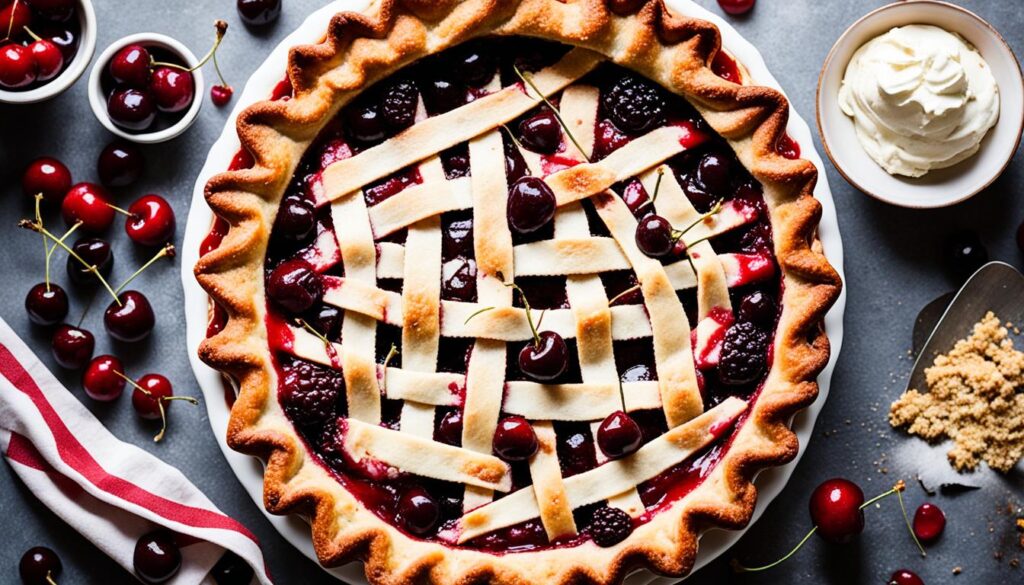
Salted caramel cast iron cherry pie layers a from-scratch caramel sauce into the tart cherry filling and finishes with a lattice crust and a flake of sea salt — it’s the most labor-intensive recipe on this list and the most impressive.
Salted Caramel Sauce
- 3/4 cup granulated sugar
- 3 tbsp water
- 1/2 cup heavy cream, warmed
- 3 tbsp unsalted butter
- 3/4 tsp sea salt
Heat sugar and water in a heavy saucepan over medium heat. Don’t stir — just swirl the pan occasionally. Cook until it turns a deep amber color, about 10 minutes. Pull off heat. Add warm cream slowly and carefully — it will bubble up hard. Whisk in butter and salt. Set aside to cool. You’ll use half in the filling and reserve half for serving.
Cherry Filling
- 4 cups fresh tart cherries, pitted
- 2/3 cup granulated sugar
- 3 tbsp cornstarch
- 1/3 cup cherry juice or water
- 1 tbsp balsamic vinegar — trust this, it deepens the cherry flavor considerably
- 1/3 cup of the salted caramel sauce from above
Combine cherries, sugar, cornstarch, and juice in a saucepan. Cook over medium heat, stirring, until thickened — about 5-6 minutes. Remove from heat. Stir in balsamic vinegar and caramel sauce. Let cool slightly.
Assembly and Baking
Line a preheated 10-inch cast iron skillet with your bottom crust. Pour in the filling. Top with a lattice — 8-10 strips works well and lets the filling show through. Crimp edges. Brush with egg wash.
Refrigerate 30 minutes before baking. This keeps the butter in the crust cold, which means flakier layers.
Bake at 350°F for 35-45 minutes. The lattice should be golden, the filling bubbling through. Immediately after pulling it from the oven, scatter a pinch of flaky sea salt over the entire top.
Drizzle the reserved caramel over each slice when serving. That last drizzle isn’t optional.
Nutritional Information (Per Serving)
| Nutrient | Amount per Serving |
|---|---|
| Calories | 520 |
| Carbohydrates | 72g |
| Protein | 5g |
| Fat | 24g |
| Fiber | 2.5g |
| Sodium | 360mg |
Health Considerations and Moderation
Cast iron skillet cherry pies are high in sugar and fat — that’s true, and it’s also not a reason to avoid them. A balanced approach means eating a reasonable slice, not skipping the pie entirely.
Calorie Range Across These Recipes
| Recipe | Approximate Calories per Slice |
|---|---|
| Marshmallow-topped (no crust) | ~245 |
| Classic butter-laden | ~350 |
| Caramel pecan | ~370 |
| Cream cheese stuffed | ~430 |
| Salted caramel | ~520 |
The crustless marshmallow version is the lightest by a significant margin. The salted caramel is the richest. The rest cluster in the 350-450 range per serving.
Smarter Swaps That Actually Work
- Swap half the all-purpose flour for whole wheat pastry flour — you lose almost nothing in texture
- Monk fruit sweetener replaces sugar 1:1 in the filling and holds up well in baked applications
- Reduced-fat cream cheese works in the cream cheese stuffed version without affecting texture much
- Greek yogurt can replace half the butter in some crusts — the result is less flaky but still good
Enjoying in Moderation
One slice. With a balanced meal — something like a lean protein and vegetables beforehand. That’s really it. These pies aren’t everyday food and they don’t need to be. They’re for occasions, for guests, for Sundays.
The goal isn’t to make cherry pie into health food. It’s to enjoy it without treating every bite like a moral failing.
Serving and Presentation Ideas
Cast iron skillet cherry pies are among the easiest desserts to present well — the skillet itself is the serving vessel, and a bubbling, golden pie straight from the oven is already visually impressive.
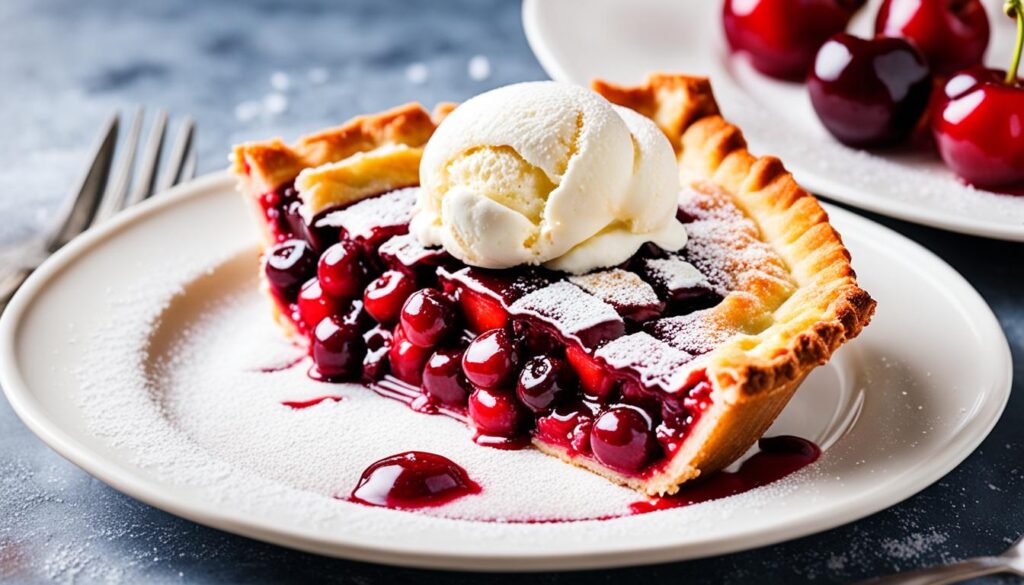
A few things that elevate presentation without much effort:
- Dust the crust with powdered sugar just before serving — it picks up nicely against golden brown
- A small scoop of vanilla ice cream alongside cuts the sweetness and adds a visual contrast
- Fresh whole cherries on the side of the serving plate signal what’s inside and look clean
- Mint leaves add color if you’re serving to guests and want the presentation to feel finished
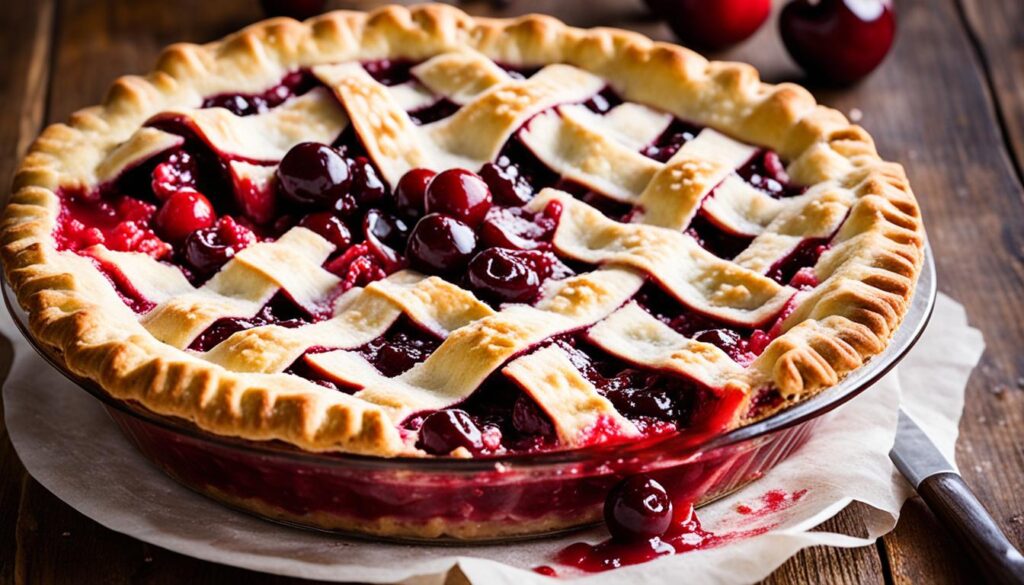
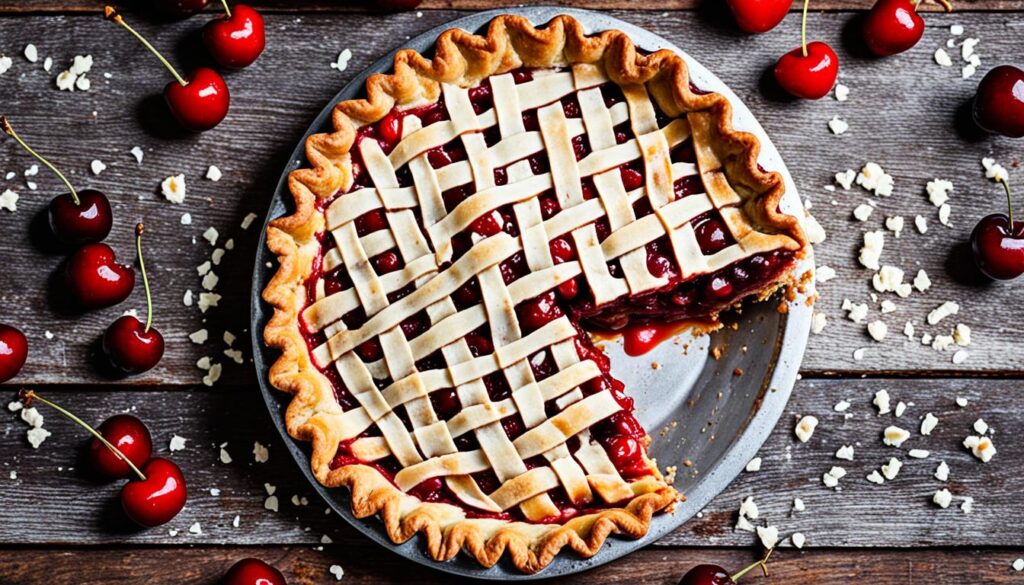
For the lattice-topped pies, let the filling bubble up through the gaps before pulling from the oven — that glossy, jewel-red filling visible through a golden lattice is the most appealing thing a cherry pie can look like.
Serve in the skillet whenever possible. A 10-inch cast iron skillet on a wooden board, with a pie server and a stack of plates, looks better than any fancy plated dessert presentation. And it stays warm longer than anything transferred to a serving dish.
Cookie cutter shapes cut from spare pie dough, baked separately, and placed on top of the finished pie add a decorative touch that takes about 5 minutes of extra effort and looks considerably more impressive than that sounds.