Table of Contents
- 1 Why Helper Handles Are Essential for Arthritis Safety
- 2 Quick Answer: Proper Helper Handle Lifting Technique
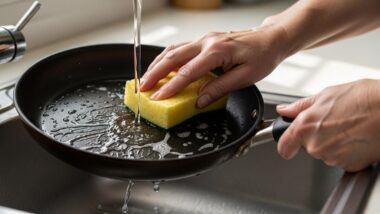
- 3 Understanding Helper Handles on Skillets
- 4 The Biomechanics of Safe Skillet Lifting with Arthritis
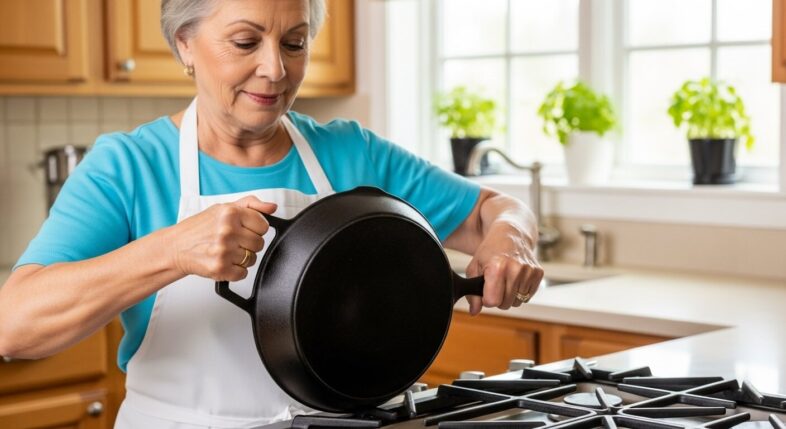
- 5 Proper Two-Handed Lifting Technique Using Helper Handles
- 6 Weight Management Strategies
- 7 Common Mistakes That Cause Injury
- 8 Selecting Skillets with Arthritis-Friendly Helper Handles
- 9 Brand Comparison: Best Helper Handle Designs
- 10 Pot Holder and Grip Considerations
- 11 Specific Lifting Scenarios and Techniques
- 12 Progressive Arthritis Planning
- 13 Safety Equipment and Adaptive Tools
- 14 Teaching Others to Help Safely
- 15 Medical and Occupational Therapy Perspectives
- 16 Real-World Testing and Practice
- 17 Evaluating When Pans Are Too Heavy
- 18 Alternative Solutions to Heavy Pan Lifting
- 19 Long-Term Joint Protection Strategies
Why Helper Handles Are Essential for Arthritis Safety
Seniors with arthritis can safely lift heavy skillets by using both the main handle and helper handle simultaneously to distribute weight across both wrists, reducing single-joint strain by 50% and preventing the grip failure and wrist injuries that occur with one-handed lifting.
Here’s what nobody tells you about helper handles: they’re not optional equipment for making lifting “easier.” They’re essential safety features that prevent serious injuries when arthritis has already compromised your grip strength and joint stability.
Think about it. You’ve got a 10-inch skillet loaded with dinner. That’s 6-8 pounds. Your arthritis has reduced your grip strength by 40-50% (maybe more). You grab the main handle with one hand like you’ve done for 50 years.
Your wrist screams. The pan tips forward. You compensate by gripping harder. Now your fingers hurt too. You make it to the counter without dropping it. Barely.
That’s how people get hurt.
Helper handles change this equation completely. Two hands. Two wrists. Weight splits evenly. Manageable load on each joint instead of dangerous overload on one.
Quick Answer: Proper Helper Handle Lifting Technique
The safe two-handed method (step by step):
- Position both hands before lifting – dominant hand on main handle, support hand on helper handle
- Grip firmly but not desperately – enough to control, not enough to cause pain
- Lift with both arms simultaneously – no jerking, smooth upward motion
- Keep the pan level – watch for tilting that indicates uneven lifting
- Move slowly and deliberately – never rush, clear the path first
- Set down with control – both hands stay engaged until pan is stable
Weight distribution: A 6-pound loaded pan becomes 3 pounds per wrist. A 4-pound pan becomes 2 pounds per wrist. That’s the difference between safe and dangerous for arthritic joints.
Common mistakes that cause injury:
- Using only the main handle (overloads one wrist, causes drops)
- Lifting before both hands are positioned (unbalanced, unstable)
- Gripping too hard out of fear (increases joint pain unnecessarily)
- Moving too fast (loss of control, accidents)
When helper handles aren’t enough: If you can’t safely handle half the pan’s loaded weight in each hand, the pan is too heavy. Period. Time to choose lighter cookware or alternative cooking methods.
Understanding Helper Handles on Skillets
What Helper Handles Are and Why They Exist

Helper handles are secondary grips positioned opposite the main handle on skillets 10 inches and larger, specifically designed to enable two-handed lifting and prevent the wrist injuries that occur when seniors attempt one-handed manipulation of pans weighing 4+ pounds.
Location and purpose:
The helper handle sits directly across from the main handle. Why? Perfect weight distribution. When you lift, each hand supports roughly half the weight. Physics works in your favor.
Size variations:
- Small loop (2-3 inches)
- Stub handle (3-5 inches, looks like mini version of main handle)
- Extended rim grip (reinforced edge for gripping)
Which sizes need them:
- 8-9 inch pans: Optional, helpful for severe arthritis
- 10-11 inch pans: Recommended for moderate arthritis
- 12+ inch pans: Absolutely mandatory for anyone with arthritis
Without a helper handle on a 12-inch pan, you’re attempting to manipulate 7-10 pounds with one wrist. Not happening safely.
How Helper Handles Reduce Arthritis Strain
Using both handles reduces wrist joint compression by approximately 50%, prevents the compensatory gripping that damages finger joints, and eliminates the awkward wrist angles required when trying to balance a heavy pan with one hand.
The mechanics:
One-handed lift: All 6 pounds pressing down on one wrist joint. The cartilage (already damaged by arthritis) compresses. Inflammation increases. Pain follows.
Two-handed lift: 3 pounds on each wrist. Still compression, but manageable. Joints can handle it without triggering severe inflammation.

Grip force reduction: With two hands sharing the load, you don’t have to grip as desperately. Less squeeze pressure on finger joints. Less pain during and after cooking.
Balance improvement: Helper handle prevents the pan from tipping forward (common problem when food loads one side). Better balance means less corrective gripping.
Types of Helper Handles Available
Loop-style helper handles work best for arthritis because they stay cooler, accommodate thick pot holders easily, and provide multiple grip options, while stub handles offer more substantial gripping but conduct heat faster.
| Handle Type | Description | Arthritis Rating | Heat Resistance |
|---|---|---|---|
| Loop handle | Small semicircular grip | Excellent | Stays coolest |
| Stub handle | Mini version of main handle | Very good | Gets warmer |
| Rim grip | Reinforced edge area | Fair | Often gets hot |
Loop handles (best for most people):
- Air gap keeps them cooler
- Easy to grab even with stiff hands
- Pot holder slides through easily
- Found on Calphalon, All-Clad, most quality brands
Stub handles (good alternative):
- More to grip (fuller handle)
- Stays somewhat cool but not as good as loops
- Comfortable when you can grab it
- Some Cuisinart, Lodge options
Rim grips (acceptable but not ideal):
- Just a reinforced section of the pan rim
- Gets hot because it’s part of the pan body
- Awkward grip angle
- Better than nothing, worse than dedicated handles
The Biomechanics of Safe Skillet Lifting with Arthritis
How Arthritis Affects Lifting Ability
Arthritis reduces grip strength by 40-60% while simultaneously causing wrist joint instability and slower pain-related reaction times, creating a dangerous combination where you can’t grip firmly enough for safety but also can’t react quickly when things go wrong.
The triple threat:
Reduced strength: What you could lift easily at 50, you struggle with at 70. Grip strength drops dramatically. Studies show 40-60% reduction in moderate to severe arthritis.
Joint instability: The wrist joint becomes wobbly. Less structural support. When you lift something heavy, the joint wants to collapse or shift. You compensate by gripping harder (which hurts more).

Slower reactions: Pain slows your neural response. You notice the pan slipping 0.5-1 second later than you used to. Doesn’t sound like much. It’s enough time to drop a pan.
Cumulative effect: Each individual factor is manageable alone. Combined? You’re operating with massively reduced safety margins.
Single-Handed vs. Two-Handed Lifting Comparison
Single-handed lifting of a 6-pound pan creates 6 pounds of force on one wrist joint and requires 8-10 pounds of grip force to maintain control, while two-handed lifting distributes 3 pounds per wrist and needs only 4-5 pounds of grip force per hand—a critical difference for arthritic joints.
The math:
| Lifting Method | Pan Weight | Load Per Wrist | Grip Force Needed | Safe for Arthritis? |
|---|---|---|---|---|
| One hand | 6 lbs | 6 lbs | 8-10 lbs | No |
| Two hands | 6 lbs | 3 lbs each | 4-5 lbs each | Maybe |
| One hand | 4 lbs | 4 lbs | 5-7 lbs | Risky |
| Two hands | 4 lbs | 2 lbs each | 2-3 lbs each | Probably |
Why grip force exceeds pan weight: You need extra force to control the pan, prevent tipping, compensate for movement. It’s not just holding static weight.
Safety margins: With moderate arthritis, you might have 6-7 pounds of grip strength available. One-handed lifting of a 6-pound pan leaves almost no safety margin. Grip fails, pan drops.
Why Traditional Lifting Methods Fail with Arthritis
People try to use one-handed lifting because it’s habit, but arthritis changes your biomechanics so drastically that what worked for decades suddenly becomes dangerous—compensatory movements create new injury risks and accelerate joint deterioration.
The habit problem:
You’ve been cooking for 40-50 years. You’ve always grabbed the handle with one hand. Your brain defaults to this. Even when you know better.
Compensatory damage:

When one wrist can’t handle the load, you twist your body. You bend weird. You use your shoulder and elbow to compensate. Now you’re creating new injury points.
Long-term accumulation:
Every time you lift heavy with one hand, you damage the wrist a tiny bit more. Micro-trauma. Inflammation. Cartilage breakdown. It compounds over weeks and months until simple cooking becomes impossible.
Proper Two-Handed Lifting Technique Using Helper Handles
Step-by-Step Lifting Method
The safe lifting sequence requires positioning both hands securely on handles before lifting, raising the pan with smooth simultaneous motion from both arms, keeping it level throughout the movement, and setting it down with controlled gradual lowering—rushing any step creates injury risk.
The complete sequence:
Step 1 – Position hands BEFORE lifting:
- Dominant hand grabs main handle
- Support hand grabs helper handle
- Check that both grips feel secure
- Adjust if needed while pan is still on surface
Step 2 – Lift simultaneously:
- Both arms lift at the same time
- Smooth upward motion (no jerking)
- Keep your core engaged
- Lift with your whole body, not just arms
Step 3 – Check level:
- Look at the pan edge
- Is it tilting forward or back?
- If tilted, you’re not lifting evenly
- Adjust pressure between hands
Step 4 – Move deliberately:
- Short distances only (stove to counter)
- Keep pan close to body
- Never reach or extend fully
- Clear the path first (before you lift)
Step 5 – Set down with control:
- Lower smoothly (don’t drop last inch)
- Both hands stay engaged
- Let trivet take weight before releasing
- Release grips only when pan is stable
Correct Hand Positioning
Place your dominant hand on the main handle with a firm but not desperate grip, while your support hand grasps the helper handle with palm facing up or down depending on helper handle style, ensuring both thumbs provide stability and wrists stay as neutral as possible.
Dominant hand (main handle):
- Full grip around handle
- Thumb on top or wrapped around
- Wrist relatively straight (not bent back)
- Forearm aligned with handle
Support hand (helper handle):
For loop handles:
- Grab through the loop
- Palm can face up or down (whichever feels stable)
- Pot holder fits through loop if needed
For stub handles:
- Grip like a second main handle
- Same grip style as dominant hand
- Often more comfortable than loops for some people
Common positioning mistakes:
- Fingertips only (need full hand grip)
- Wrist bent at extreme angle
- Gripping too far toward pan body (can get burned)
- Not using pot holders when needed
The test: Can you hold this position for 10 seconds without pain? If no, adjust before lifting.
Body Mechanics and Posture
Stand directly in front of where the pan is sitting with feet shoulder-width apart, engage your core for stability, avoid twisting your torso during the lift, and keep the pan close to your body rather than extended at arm’s length.
Optimal stance:
- Face the pan directly
- Feet stable and balanced
- Not reaching or stretching
- Close enough that pan stays near your center
Core engagement: Tighten your abs slightly. This protects your back and provides stability. You’re not doing weightlifting here, just basic core support.
The twisting danger: Don’t pivot your body while holding a heavy hot pan. Turn your whole body, feet and all. Twisting creates torque on your spine and wrists.
Height considerations: If the pan is too low, bend at knees (not back). If it’s too high (oven rack), pull the rack out first.
Weight Management Strategies
Assessing Whether a Pan is Too Heavy
Test whether a pan is too heavy by lifting it empty and assessing comfort, then adding estimated food weight and testing again before you start cooking—if you feel strain, hesitation, or pain during the empty test, the loaded pan will be dangerous.
The pre-cooking test:
- Lift empty pan with both hands – feels okay? Good.
- Hold for 10 seconds – still okay or starting to hurt?
- Estimate food weight (chicken breast = 0.5 lb, vegetables = 0.5 lb, liquid = varies)
- Add that weight mentally – can you handle empty + 2 lbs? Empty + 3 lbs?
- If uncertain, don’t cook with it
Safe weight limits by arthritis severity:
Mild arthritis (occasional pain):
- Empty pan: Up to 3 lbs
- Loaded pan: Up to 5-6 lbs total
- Two-handed lifting mandatory over 4 lbs
Moderate arthritis (regular pain, reduced strength):
- Empty pan: Up to 2.5 lbs
- Loaded pan: Up to 4 lbs total
- Two-handed lifting always
Severe arthritis (constant pain, significant weakness):
- Empty pan: Up to 2 lbs
- Loaded pan: Up to 3 lbs total
- Consider whether ANY skillet lifting is safe
Reducing Pan Load Weight
Cook smaller portions to reduce food weight by 30-50%, drain excess liquids before lifting whenever possible, and consider transferring half the food to a serving dish before moving the pan—reducing load by even one pound significantly improves safety.
Smart load reduction:
Smaller portions: One chicken breast instead of two. Cuts food weight in half. Still get a meal, dramatically safer pan weight.
Drain first: Sautéed vegetables? Drain off excess water or oil into sink before lifting pan. Might save 0.5-1 pound.
Transfer before moving: Use a spatula to transfer some food to a plate. Then move the lighter pan. Then transfer more food. More steps, way safer.
Less liquid cooking: One cup of liquid weighs about 0.5 pounds. Cook with less liquid, use thicker sauces, reduce water content.
Sequential cooking: Two batches in a light pan beats one batch in a heavy pan.
When to Use Helper Handles vs. Avoid Lifting Entirely
Use helper handles when loaded pan weight is 3-5 pounds and your grip strength can safely handle half that weight per hand, but avoid lifting entirely if the pan exceeds 6 pounds loaded, causes immediate pain to grip, or if you’ve experienced near-drops recently.
Decision matrix:
Safe to lift with helper handles:
- Loaded weight under 5 lbs for moderate arthritis
- Both wrists feel stable today
- Clear, short path to destination
- You’ve successfully lifted this weight before
Skip lifting, use alternatives:
- Loaded weight over 6 lbs
- Wrists feel especially painful or weak today
- Long distance or obstacles in path
- Recent drops or close calls
- Any hesitation or fear
Alternative methods (covered more later):
- Serve directly from pan on trivet at table
- Use ladle to transfer food before moving pan
- Cook in electric skillet that stays stationary
- Ask someone else to handle the lifting
Common Mistakes That Cause Injury
Lifting with Only the Main Handle
The most dangerous mistake is defaulting to one-handed lifting out of habit, which overloads a single wrist with the entire pan weight and creates the exact conditions that cause grip failure, dropped pans, burns, and accelerated joint deterioration.
Why people do this:
Force of habit. You’ve cooked this way for decades. Your brain defaults to the old pattern even though your body has changed.
What actually happens:
The 6-pound pan loads your wrist joint with 6+ pounds of compression. Your arthritic cartilage can’t handle it. The joint becomes unstable. You grip harder to compensate (damaging finger joints). The pan tips because it’s unbalanced. You’re fighting gravity and weight with one compromised wrist.
Injury scenarios:
- Immediate drop: Grip fails mid-lift, pan crashes down
- Delayed drop: Grip weakens over 5-10 seconds, pan slips away
- Controlled trauma: You make it without dropping, but wrist is inflamed for hours/days
- Burn injury: Unbalanced pan tips, hot contents spill
Breaking the habit: Physical reminder. Tape a note to your stove: “TWO HANDS ALWAYS.” Takes 2-3 weeks to retrain the habit.
Incorrect Grip Pressure
Gripping too tightly causes unnecessary finger joint pain and fatigue, while gripping too loosely creates drop risk—the optimal pressure is firm enough to prevent slipping but relaxed enough to avoid cramping, typically 60-70% of maximum grip strength.
Too tight:
Your knuckles turn white. Fingers hurt. Hand cramps. This is fear gripping—you’re terrified of dropping the pan so you strangle the handles.
Problem? You fatigue faster. Your grip gives out sooner. More likely to drop the pan from fatigue than if you’d gripped moderately.
Too loose:
Barely holding on. Pan shifts in your grip. Feels insecure.
Problem? Obvious. Pan slips right out of your hands.
Finding the right pressure:
Think of it like holding a bird. Tight enough the bird can’t escape. Gentle enough you don’t hurt it. That’s the pressure.
Test: Can you hold the pan for 20 seconds without cramping or slipping? That’s the right grip.
Poor Timing and Coordination
Lifting before both hands are securely positioned, raising the pan with jerky or uneven motion between hands, or rushing the movement creates unstable conditions where loss of control becomes likely even with proper helper handle use.
The premature lift:
One hand is positioned. Other hand is reaching for the helper handle. You start lifting. Bad. Pan tilts wildly because only one side is supported.
Wait. Both hands fully gripped. THEN lift.
Uneven lifting:
Right hand lifts fast. Left hand lifts slow. Pan tilts. Contents shift. You’re fighting an unbalanced load.
Jerky movements:
Yanking the pan up fast. Plopping it down hard. Your joints don’t like sudden forces. Smooth and controlled always.
Rushing:
You’re in a hurry. You grab and move without thinking. This is when accidents happen.
The fix: Slow down. Count to three. One: position hands. Two: lift smoothly. Three: move carefully.
Lifting at Wrong Temperatures
Attempting to lift extremely hot pans requires thick pot holders that reduce grip security, while moving pans before they’ve cooled enough creates burn risk when grip fails—wait 2-3 minutes after removing from heat before lifting, or use specialized heat-resistant grips.
Too hot:
Pan just off burner. Screaming hot. You need thick pot holders. The thick protection reduces your tactile feedback and grip security. More likely to fumble.
Better: Let it cool 2-3 minutes. Still hot, but not dangerous. Thinner pot holders work. Better grip.
The cooling balance:
Too short = burns if you mess up
Just right = manageable heat, good grip
Too long = food gets cold (sometimes okay, sometimes not)
For immediate transfer (stove to oven, can’t wait):
- Use your best, most secure pot holders
- Extra slow and careful
- Short distance only
- Helper handles mandatory
Selecting Skillets with Arthritis-Friendly Helper Handles
Essential Helper Handle Features
Arthritis-friendly helper handles must be at least 2.5 inches across for loop styles or 3 inches long for stub handles, positioned to allow natural hand placement without awkward wrist bending, made from materials that stay cool or accommodate pot holders easily.
Size minimums:
Loop handles: 2.5-3 inch opening. Smaller than this, you can’t fit your hand through comfortably (especially with pot holder).
Stub handles: 3-4 inches long. Shorter handles don’t give you enough to grip.
Too-small helpers: Decorative only. Can’t actually use them safely. Common on cheap pans.
Material matters:
Best: Stainless steel loop (stays coolest), silicone-coated stub (comfortable + cool)
Okay: Bare stainless stub (gets warm but usable)
Avoid: Thin metal that conducts heat fast, sharp edges
Positioning: Should align naturally with where your hand falls. If you have to twist your wrist weird to grab it, that’s poor design.
Best Helper Handle Designs for Arthritis
Loop-style helper handles on brands like Calphalon and All-Clad provide the most arthritis-friendly design because they stay coolest, accommodate thick pot holders or oven mitts easily, and offer multiple grip positions for hands of different sizes.
Brand comparison:
Calphalon Classic: Small loop, stays very cool, perfect size for most hands. Excellent for arthritis.
All-Clad: Slightly larger loop, very sturdy, accommodates any pot holder. Top tier.
Cuisinart: Mix of loops and stubs depending on line. Their helper handles are adequate but not exceptional.
Lodge (cast iron): Small loops on some pieces. Problem: the whole pan is too heavy for arthritis anyway.
What makes loops better for arthritis:
- Air gap = stays much cooler
- Can grab from multiple angles
- Pot holder slides through easily
- Less precise grip needed (more forgiving for stiff hands)
Pan Sizes That Require Helper Handles
Helper handles are mandatory on any skillet 12 inches or larger regardless of arthritis status, strongly recommended for 10-11 inch pans if you have moderate arthritis, and helpful even on 8-9 inch pans for seniors with severe arthritis or significant grip weakness.
The size breakdown:
| Pan Size | Helper Handle | For Arthritis |
|---|---|---|
| 8-9″ | Optional | Helpful for severe cases |
| 10-11″ | Recommended | Necessary for moderate arthritis |
| 12″+ | Mandatory | Absolutely required |
Why size matters:
Larger pans hold more food. More food = more weight. A 12-inch pan with dinner for 2-3 people easily hits 8-10 pounds loaded. You cannot safely one-hand this weight with arthritis.
Don’t trust your old habits: Maybe you used to flip a 12-inch skillet with one hand. That was then. Arthritis changes everything.
Brand Comparison: Best Helper Handle Designs
Skillets with Superior Helper Handles
Calphalon Classic hard-anodized skillets feature perfectly-sized loop helper handles that stay cool and position naturally, while All-Clad stainless steel offers slightly larger loops that accommodate even the thickest oven mitts—both brands prioritize helper handle functionality over aesthetics.
Calphalon Classic (best overall):
- Loop size: 2.75 inches across
- Material: Stainless steel
- Heat resistance: Excellent (stays cool 15+ minutes)
- Arthritis rating: 9/10
All-Clad D3 or HA1:
- Loop size: 3 inches across
- Material: Stainless steel
- Heat resistance: Excellent
- Arthritis rating: 9/10
- Downside: Heavy pans (stainless steel models)
Anolon Advanced:
- Stub handle style (not loop)
- Silicone-coated for comfort
- Gets warmer than loops but manageable
- Arthritis rating: 7/10
Cuisinart Chef’s Classic:
- Loop on most larger sizes
- Adequate size but sometimes positioned oddly
- Arthritis rating: 6/10
Helper Handles to Avoid
Decorative helper handles under 2 inches across or stubby grips under 2.5 inches long provide insufficient gripping surface for safe two-handed lifting, while helpers positioned too close to the pan body get dangerously hot and create awkward hand angles.
Red flags:
Too small: Can barely fit two fingers through. Useless for actual lifting. Purely decorative.
Too close to pan: Gets hot immediately because it’s part of the hot pan body. Can’t use without pot holder, pot holder barely fits.
Flimsy construction: Feels loose or wiggly. Do not trust your safety to this.
Sharp edges: Some cheap cast iron has helpers with rough edges. Uncomfortable, potentially cuts through pot holders.
Wrong positioning: Helper handle is angled weird, positioned off-center, or otherwise creates unnatural hand placement.
Aftermarket Helper Handle Solutions
Removable helper handle systems like those from Cristel allow adding handles to pans that lack them, but require finger dexterity to attach/detach that many arthritis sufferers lack—generally better to replace pans without adequate helper handles than attempt modifications.
Clip-on options:
Some companies make clip-on helper grips. Theory: attach to rim of pan without helper handle.
Reality: Usually unreliable. Can slip. Not designed for heavy loads. Safety risk.
DIY dangers:
Don’t drill holes in pans to add handles. Don’t jury-rig solutions with pliers or clamps. These create more danger than they solve.
Better solution: Replace the pan. A $50 Calphalon with proper helper handles beats a $200 pan you’ve modified dangerously.
Pot Holder and Grip Considerations
Choosing Pot Holders That Work with Helper Handles
Thin silicone pot holders provide the best combination of heat protection and grip security for helper handle use, while thick quilted pot holders reduce tactile feedback and can make precise hand positioning difficult—choose protection that allows you to feel the handle through it.
The thickness dilemma:
Thick pot holders (quilted, 1/2 inch thick):
- Excellent heat protection
- Terrible grip feel
- Hard to position precisely
- Can slip easier (less control)
Thin pot holders (silicone, 1/8-1/4 inch):
- Good heat protection (up to 450°F usually)
- Excellent grip feel
- Easy positioning
- Better control
For helper handle use: Thin wins. You need to feel what you’re doing.
Specific products:
- Gorilla Grip silicone pot holders (thin, grippy, affordable)
- OXO silicone trivets doubled as pot holders
- Any silicone with textured surface
When thick is necessary: Oven transfers at very high heat. But for stovetop-to-counter, thin works better.
Maintaining Grip Through Protective Gear
Test your grip with pot holders on before lifting a loaded pan by picking up the empty pan and holding for 10 seconds—if the pot holder feels slippery or shifts during the hold, choose different protection or wait for the pan to cool enough for safer gripping.
The pre-lift grip test:
- Put on pot holders
- Grab both handles on empty pan
- Lift pan off surface
- Hold for 10 seconds
- Does pot holder slip? Does grip feel secure?
If grip feels iffy: Different pot holder, or wait for pan to cool, or don’t lift this pan.
Silicone textures help: Raised dots or ridges on pot holder surface grip better than smooth fabric.
Moisture problems: Wet pot holders are dangerous (heat conducts through water). Always use dry pot holders.
Testing Grip Before Lifting
Always perform a two-second static hold before attempting to move a loaded pan—lift it one inch off the surface, pause, assess whether both grips feel secure, then proceed only if confident or set back down and reposition.
The safety hold:
Lift pan one inch. Stop. Check:
- Does left hand feel secure?
- Does right hand feel secure?
- Is pan level?
- Any shifting or slipping?
If everything feels good: proceed.
If anything feels off: set down, adjust, try again.
Don’t ignore warning signs: That little voice saying “this doesn’t feel right”? Listen to it. Set the pan down.
Specific Lifting Scenarios and Techniques
Stovetop to Counter Transfer
Clear the landing zone completely before lifting, position a trivet at the exact spot where you’ll set the pan down, keep the movement path short (under 3 feet ideally), and never reach across other burners or obstacles while carrying a hot pan.
The safe transfer sequence:
Before you lift:
- Place trivet on counter near stove
- Clear everything between stove and trivet
- Check path is wide enough (no squeezing through)
- Turn off burner
- Let pan cool 2-3 minutes
During transfer:
- Two-handed grip
- Lift straight up
- Move directly to trivet (shortest path)
- No reaching or extending
- Set down on trivet with control
Distance limits: Under 2 feet is ideal. Under 3 feet is acceptable. Over 3 feet, consider whether you should transfer food instead of moving pan.
Pan to Oven and Oven to Counter
Oven transfers require the thickest pot holders or oven mitts you can use while maintaining grip security, plus pulling the oven rack partially out before attempting to lift the pan rather than reaching deep into a hot oven.
Oven safety protocol:
Putting pan in oven:
- Pull rack out 6-8 inches first
- Use thick oven mitts (thin won’t cut it here)
- Lift pan with both hands
- Place on pulled-out rack
- Push rack in with oven mitt
- Close oven
Taking pan out:
- Pull rack out 6-8 inches
- Thick mitts on both hands
- Grab both handles
- Lift straight up and out
- Move to nearby trivet (have it ready!)
- Set down quickly but controlled
Why this is hardest: Hot oven air. High temperatures. Thick mitts reducing grip. Maximum difficulty and danger.
Alternative: Use rimmed baking sheets instead of skillets for oven cooking when possible. Easier to handle.
Draining Liquids Safely
Never attempt to drain liquids by holding a heavy pan with one hand while tilting—instead, use a ladle to remove most liquid before lifting, or place a colander in the sink and carefully pour using two-handed tilting with helper handle support.
Ladle method (safest):
Leave pan on stove. Use ladle to scoop out liquid. Pour ladle contents into container or sink. Repeat until most liquid is gone. THEN lift the lighter pan.
Two-handed drain (if you must):
- Position both hands on handles
- Lift pan
- Move to sink edge
- Both hands control tilt
- Pour slowly
- One hand prevents forward tipping
Colander method:
Place colander in sink. Transfer food to colander with spatula or tongs. Let liquid drain. Now lift empty pan. Safest option for heavy loads.
Serving from Pan at Table
Bring the entire pan to the table on a large trivet, serve directly from the pan using heat-resistant utensils, and leave the pan stationary rather than passing it around—if the pan must move again, enlist help from someone without arthritis.
Tableside serving:
- Trivet already on table (placed before you cook)
- Cook meal
- Transfer hot pan to table using two hands
- Set on trivet
- Serve using large spoon or spatula
- Pan stays put
Benefits:
- One transfer instead of multiple plate-filling trips
- Pan cools while you eat
- Less total handling
Cleanup: Let pan cool completely at table. When ready to clean (maybe after dinner), it’s cooled down and safer to handle.
Progressive Arthritis Planning
Adapting Technique as Arthritis Worsens
In early-stage arthritis, helper handles allow continued use of standard skillets with careful technique, but progressive arthritis requires shifting to lighter pans even with helper handles, and eventually may necessitate abandoning traditional skillets for stationary electric alternatives.
Stage 1 – Mild arthritis:
- Helper handles on 10+ inch pans work well
- Can still manage moderate pan weights (4-5 lbs loaded)
- Two-handed technique prevents most problems
Stage 2 – Moderate arthritis:
- Helper handles essential on all pans 8+ inches
- Maximum safe weight drops (3-4 lbs loaded)
- Need lighter cookware overall
- More frequent rest periods
Stage 3 – Severe arthritis:
- Even with helper handles, most pans too heavy
- Electric skillets that stay stationary
- Asking for help becomes necessary
- Traditional cooking may not be sustainable
Planning ahead: Don’t wait until you can’t lift anything. Start transitioning to lighter options while you still have choice.
Building Strength and Maintaining Function
Gentle hand exercises prescribed by occupational therapists can maintain grip strength and delay function loss, but never push through severe pain during exercise—strengthening works for mild to moderate arthritis but may worsen severe cases.
Exercises that help (ask your doctor first):
Grip strengthening:
- Squeeze soft stress ball 10 times
- Don’t squeeze to pain, just gentle resistance
- 2-3 times daily
Wrist stability:
- Wrist rotations (slow, gentle circles)
- Wrist flexion/extension (moving hand up and down at wrist)
- Again, pain-free range only
When exercise helps:
- Mild arthritis
- Stable condition (not actively inflamed)
- Under professional guidance
When to skip it:
- Severe pain during exercise
- Acute flare-ups
- Advanced arthritis
- Without medical clearance
Alternative Cooking Methods for Severe Arthritis
When lifting any skillet becomes painful or dangerous, electric skillets that remain stationary on the counter, slow cookers requiring minimal handling, and sheet pan cooking with lighter rimmed pans provide safer alternatives that maintain cooking independence.
Electric skillets:
- Pan stays on counter
- You add/remove food, don’t lift pan
- Temperature control via dial
- Covers 80% of skillet cooking tasks
Slow cookers:
- Add ingredients once
- Walk away for hours
- Minimal handling
- Works for soups, stews, braises
Sheet pans:
- Lighter than skillets (2-3 lbs vs. 4-6 lbs)
- Easier to handle
- Different cooking style but effective
- Two hands still recommended
When to transition: When you’re having close calls, dropping things occasionally, or avoiding cooking because it hurts too much.
Safety Equipment and Adaptive Tools
Grip Enhancers for Helper Handles
Silicone sleeve covers that slide over bare metal helper handles add cushioning and increase diameter by 0.5-1 inch, making gripping more comfortable for arthritic hands, though they can reduce heat resistance and should only be used for stovetop cooking.
Grip enhancer options:
Silicone sleeves ($5-10):
- Slide over existing handle
- Add cushioning
- Increase diameter
- Stay relatively cool
Limitations:
- Can’t use in oven (melts above 350-400°F)
- May slip if not fitted properly
- Not all handles are shaped right for sleeves
DIY foam grips: Some people wrap handles with foam pipe insulation. Cheap, works temporarily, but not heat-safe. Okay for cold pans only.
When they help: Bare metal loop handles that get warm. Added cushioning reduces pressure points.
Lifting Assists and Mechanical Aids
Pan lifters and gripper tools designed for heavy cookware rarely work well for arthritis because they require significant grip force to operate and often create more complexity than simply using proper two-handed technique with helper handles.
Why mechanical aids usually fail:
Most “pan lifter” gadgets work like large tongs. You squeeze to grip the pan. Guess what? Squeezing is what hurts with arthritis.
Plus: More complexity. One more thing to fumble with. Adds steps and confusion.
Better solution: Lighter pans, proper technique, asking for help when needed.
Exception: Oven rack pull-outs (the sliding drawers that replace standard oven racks). These actually help because they reduce reaching into hot oven.
Kitchen Organization for Reduced Lifting
Store heavy skillets at waist height in pullout drawers or on accessible shelves, place trivets adjacent to every cooking zone, and arrange your kitchen so loaded pans never need to travel more than 2-3 feet from stovetop to landing zone.
Strategic storage:
Heavy skillets: Waist-height drawer or shelf. Never high cabinets. Never low cabinets.
Trivets: One next to stove. One on dining table. Always accessible.
Workflow: Stove → Counter (2 feet) → Table (acceptable if necessary). No cross-kitchen transfers with hot heavy pans.
Counter space: Keep the area next to your stove clear. That’s your landing zone.
Teaching Others to Help Safely
When to Ask for Assistance
Ask for help anytime a loaded pan exceeds 5 pounds, when you feel uncertain or unstable, during arthritis flare-ups when even light pans feel too heavy, and always before you experience a near-drop or close call.
Scenarios requiring help:
- Large holiday meals (big pans, lots of food)
- Oven-to-table transfers with heavy roasts
- Draining pasta (pot + water = 10+ pounds)
- Days when arthritis is flaring badly
- Anytime you feel hesitant or scared
Pride vs. safety: Your independence matters. Your safety matters more. Asking for help isn’t weakness.
Building routine help: If you live with someone, establish which cooking tasks they always handle. Takes negotiation and communication, but it works.
Instructing Family Members
Explain to helpers that they should lift the entire pan themselves rather than trying to “assist” your lift, demonstrate the proper two-handed technique so they understand safe methods, and clarify which specific tasks you need help with versus what you can handle independently.
What to tell them:
“I need you to handle the heavy lifting. Not help me lift—just do it yourself. My arthritis makes certain weights unsafe for me.”
Show them the two-handed method: They should learn proper technique too. Even non-arthritic people benefit from safe lifting habits.
Be specific:
- “Please move the stockpot from stove to sink”
- “Can you handle the roasting pan when it comes out of the oven”
- “I’ll cook, you handle anything over 4 pounds”
What doesn’t work:
- Vague requests (“help me in the kitchen”)
- Expecting them to read your mind
- Getting frustrated when they don’t know what you need
Professional Caregiver Guidance
Train caregivers on your specific arthritis limitations during their first week, create written protocols for dangerous tasks like oven transfers, and ensure they understand that preventing injury is more important than maintaining your full independence in every kitchen task.
Initial training:
Show them which pans are too heavy. Demonstrate safe technique. Explain your specific pain triggers.
Written protocols: List of tasks they handle vs. tasks you handle. Reduces confusion and arguments.
Emergency procedures: What to do if you drop something, burn yourself, or have a close call. Who to call, first aid location, etc.
Medical and Occupational Therapy Perspectives
Professional Assessment of Lifting Capacity
Occupational therapists can measure your actual grip strength and wrist stability to determine safe lifting limits, provide customized kitchen safety recommendations, and teach compensatory techniques that protect joints while maintaining cooking independence.
What OT assessment includes:
Grip strength testing: Dynamometer measures pounds of force you can generate. Objective data on your actual capability.
Range of motion: How much can you move your wrists and fingers? Limitations affect safe techniques.
Kitchen evaluation: OT visits your kitchen, watches you cook, identifies hazards and improvements.
Custom recommendations: Based on YOUR specific limitations, not generic advice.
When to get assessed:
- Recent arthritis diagnosis
- Noticeable decline in function
- Multiple close calls or drops
- Planning kitchen remodel
Insurance coverage: Often covered with doctor referral.
Exercises to Improve Lifting Safety
Wrist strengthening exercises using 1-2 pound weights and grip exercises with therapy putty can improve stability and endurance, but should only be done under professional supervision and never during active inflammation or pain.
Exercises prescribed by professionals (examples only, get your own evaluation):
Wrist curls:
- Hold 1 lb weight
- Bend wrist up and down
- 10 reps, pain-free range
Therapy putty:
- Squeeze and release
- Various resistance levels
- Builds grip gradually
When exercise helps: Stable arthritis, not actively flaring, professional supervision, consistent routine.
When to stop: Any increase in pain, swelling, or stiffness. Exercise should help, not hurt.
Pain Management During Cooking
Time anti-inflammatory medication to peak during meal preparation, apply ice to inflamed joints for 10-15 minutes before cooking, and schedule rest periods during complex meals to prevent cumulative fatigue that increases injury risk.
Strategic timing:
If you take medication that works in 30-60 minutes, take it before you start cooking. Pain control during cooking improves safety.
Ice before cooking: 10-15 minutes of ice on sore wrists before meal prep. Reduces inflammation temporarily.
Rest periods: Don’t cook for 2 hours straight. Break complex meals into stages with rest between.
Heat after cooking: After you’re done, heat can help (hot compress, warm water soak). But cold before works better.
Real-World Testing and Practice
Safe Practice Methods
Practice the two-handed lifting technique with empty pans first, gradually add weight using canned goods or water to simulate food, and master the movement pattern before attempting it with hot cookware.
Progressive practice:
Week 1: Empty pans only
- Get comfortable with grip positions
- Practice smooth lifting motion
- Work on keeping pan level
Week 2: Add 1-2 lbs weight
- Canned goods work well
- Or bags of rice/flour
- Still manageable, builds confidence
Week 3: Add 3-4 lbs weight
- Close to real cooking weights
- Test your limits safely
- Cold pans, no burn risk
Week 4: Try with actual cooking
- Start with simple meals
- Low risk foods
- Build up to complex dishes
Why practice matters: Muscle memory. When you’re tired and distracted during actual cooking, you default to trained movements.
Identifying Your Personal Limits
Test different pan weights and note when strain begins, pay attention to next-day inflammation as an indicator that you’ve exceeded safe limits, and revise your safe weight threshold downward if you experience pain, near-drops, or prolonged inflammation.
Finding your limits:
Test day (when arthritis is moderate, not flaring):
- Try lifting 2 lbs loaded pan
- Okay? Try 3 lbs
- Okay? Try 4 lbs
- Where does it start feeling unsafe?
That’s your limit. Don’t push beyond it.
Next-day test: How do your joints feel 12-24 hours after lifting? Increased pain or stiffness means you exceeded safe limits.
Limits change: Bad arthritis days lower your limits. Adjust accordingly.
Emergency Procedures for Drops
If a pan starts to slip, immediately step back rather than trying to catch it—hot pans or contents can cause severe burns, and catching a falling pan risks wrist or hand injuries that worsen arthritis long-term.
What to do when grip fails:
DO: Step backward fast. Get out of the fall zone.
DON’T: Try to catch it. Your reflex is to grab. Resist this.
Why: Catching a falling hot pan can cause severe burns. Letting it fall damages the floor or stove. Burns are worse.
After a drop:
- Make sure you’re okay (not burned, not cut)
- Turn off all burners
- Let everything cool before cleaning
- Assess what went wrong
- Adjust technique or limits
Learning opportunity: Every close call teaches something. Why did grip fail? Too heavy? Wrong technique? Distraction? Fix that issue.
Evaluating When Pans Are Too Heavy
Weight Thresholds by Arthritis Severity
Mild arthritis allows loaded pan weights up to 5 pounds with proper helper handle use, moderate arthritis restricts safe weights to 3-4 pounds maximum, while severe arthritis typically cannot safely handle more than 2-3 pounds even with perfect technique and two-handed lifting.
Hard limits (loaded pan weight):
| Arthritis Severity | Maximum Safe Weight | Example |
|---|---|---|
| Mild | 4-5 lbs | 10″ pan with 2-3 servings |
| Moderate | 3-4 lbs | 8-10″ pan with 1-2 servings |
| Severe | 2-3 lbs | 8″ pan with 1 serving |
These are maximums. If you can stay under them, even better.
Individual variation: Some people with moderate arthritis can’t handle 3 lbs. Others can manage 4 lbs. Know YOUR limits.
Loaded Pan Weight Calculations
Calculate loaded pan weight by adding empty pan weight (check specifications or use kitchen scale) plus estimated food weight (8 oz chicken = 0.5 lb, 1 cup vegetables = 0.25 lb, 1 cup liquid = 0.5 lb) to determine if the total exceeds your safe threshold.
Quick estimates:
- Chicken breast (6-8 oz): 0.4-0.5 lbs
- Fish fillet: 0.3-0.4 lbs
- Cup of vegetables: 0.2-0.3 lbs
- Cup of liquid: 0.5 lbs
- Tablespoon oil: negligible
Example calculation:
- 10″ skillet empty: 2.5 lbs
- Two chicken breasts: 1 lb
- Cup of vegetables: 0.3 lbs
- Cooking oil: 0.1 lbs
- Total: 3.9 lbs
Is 3.9 lbs safe for you? Check your threshold.
Decision Matrix: Use or Replace
If a beloved heavy pan consistently exceeds your safe weight threshold even when cooking small portions, weighing whether to keep it requires balancing sentimental value against injury risk—in most cases, replacing with lighter cookware is safer than continued use.
The decision:
Keep if:
- Pan is under your weight limit
- You use it frequently
- Alternative methods don’t work
- Someone else can handle dangerous transfers
Replace if:
- Pan exceeds safe weight by more than 1 lb
- You’ve had close calls
- It causes pain every time
- Lighter alternatives exist
Sentimental pans: Grandma’s cast iron skillet. I get it. But if using it injures you, is that what she would want?
Compromise: Keep it, display it, don’t cook with it. Buy a lighter replacement for actual use.
Alternative Solutions to Heavy Pan Lifting
Cooking in Smaller Batches
Cook two separate smaller portions in a lightweight 8-inch pan rather than one large batch in a heavy 12-inch pan—the time increase of 5-10 minutes is negligible compared to the significant safety improvement from handling 2-3 pounds instead of 6-8 pounds per lift.
Sequential cooking example:
Instead of: 12″ pan with chicken for 3 people (7-8 lbs loaded)
Do this: 8″ pan, cook one portion, transfer to plate, cook second portion, cook third portion
Time cost: Maybe 10 extra minutes total
Safety benefit: Handling 3 lbs three times instead of 8 lbs once
Is it worth it? Absolutely.
Transferring Food Before Lifting
Use a large spoon or spatula to transfer most food to serving dishes while the pan remains on the stove, reducing pan weight by 50-70% before lifting, then move the significantly lighter pan with minimal contents.
The transfer method:
- Pan on stove with finished food
- Use large spoon to transfer food to serving bowl
- Transfer 75% of food
- NOW lift the pan (much lighter)
- Finish transferring, or wash lighter pan
Works great for:
- Stir-fries
- Sautéed vegetables
- Anything with distinct pieces
Doesn’t work well for:
- Liquidy dishes (soup transfers badly)
- Delicate foods that break apart
- Single pieces (whole fish)
Stationary Cooking Methods
Electric skillets that remain plugged in on the counter eliminate pan lifting entirely, allowing you to cook and serve from a stationary position—particularly beneficial for severe arthritis where even lightweight pans with helper handles pose injury risks.
Electric skillet advantages:
- Never lift the pan
- Cook in place
- Serve in place
- Temperature control via dial (easier than stove)
Limitations:
- Different cooking experience
- Another appliance (storage space)
- Initial cost ($30-80)
- Not suitable for all recipes
Who should consider: Severe arthritis, history of drops, fear of injury, anyone who’s avoiding cooking because pan handling hurts.
Long-Term Joint Protection Strategies
Cumulative Damage Prevention
Limit heavy lifting to once daily maximum, incorporate complete rest days where someone else handles cooking, and track pain patterns to identify activities that trigger prolonged inflammation requiring technique modification or elimination.
Daily limits:
Even with perfect technique, lifting heavy pans causes joint compression. Limit frequency.
One heavy lift per day maximum. Cook a big dinner? Someone else makes breakfast. Or vice versa.
Rest days: 1-2 days per week where you don’t cook at all. Let joints fully recover.
Pain tracking: Journal or app. Note what you cooked, pan weight, pain level after. Patterns emerge. “Every time I use the 12-inch pan, I hurt for two days.” That’s data. Adjust.
Maintaining Independence Safely
Balance the desire for cooking independence against injury risk by identifying which tasks you can safely perform alone, which require assistance, and which should be abandoned in favor of alternative methods—sustainable independence means working within limitations rather than fighting them.
The independence spectrum:
Can do alone safely:
- Lightweight pans (under 3 lbs loaded)
- Short movements (stove to nearby counter)
- Proper technique
- Good arthritis days
Need assistance:
- Heavy pans (over 4-5 lbs)
- Oven transfers
- Long distances
- Bad arthritis days
Should abandon:
- Anything causing repeated close calls
- Tasks triggering severe pain
- Situations where you feel unsafe
Redefining independence: It’s not about doing everything yourself. It’s about making smart choices that keep you cooking long-term.
Planning for Declining Ability
Invest in lighter cookware now while you can still use heavier options occasionally, build relationships with helpers before you absolutely need them, and accept that cooking methods will evolve as arthritis progresses—early adaptation prevents crisis situations later.
Proactive planning:
Today (mild-moderate arthritis):
- Start buying lighter pans
- Learn proper helper handle technique
- Establish which tasks need help
- Build support network
Tomorrow (moderate-severe):
- Rely more heavily on light cookware
- Need help more frequently
- Alternative cooking methods
- Prepared meals supplement
Future (severe-advanced):
- Electric appliances
- Full caregiver assistance
- Meal delivery
- Acceptance and adaptation
The timeline varies. Some people plateau. Others progress. Plan for worse, hope for stable.