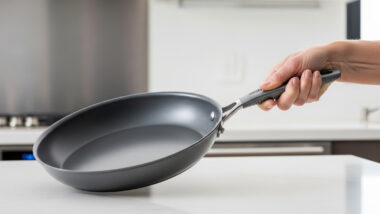
The best lightweight skillets for seniors with arthritis are nonstick aluminum or hard-anodized pans under 2 lbs, ideally paired with a wide, contoured handle or a second helper handle for two-handed lifting. Cast iron? Skip it. Fully clad stainless steel? Also skip it. Doesn’t matter how good the reviews are — if a pan weighs 4, 6, 8 pounds, it’s working against you, not for you.
Here’s the thing nobody tells you in most cookware guides: weight beats almost every other factor when arthritis is in the picture. A pan that sears beautifully but hurts to lift isn’t a good pan. Not for you, anyway.
If you want the short answer right now — the GreenPan Valencia Pro is the strongest all-around pick. Light, durable, and easy on the wrists.
| Skillet | Weight (10″) | Price | Handle | Best For |
|---|---|---|---|---|
| GreenPan Valencia Pro | ~1.3 lbs | $40–$60 | Single, contoured | Best overall pick |
| Ozeri Stone Earth Pan | ~1.1 lbs | $25–$35 | Single, soft-grip | Lightest option, period |
| T-fal Ultimate Hard Anodized | ~1.5 lbs | $30–$45 | Silicone-wrapped | Durability without the weight |
| Carote with Helper Handle | ~1.4 lbs | $25–$40 | Dual handle | Two-handed support |
| Caraway Ceramic | ~1.9 lbs | $90–$145 | Wide single grip | Looks good, still light |
Table of Contents
Why Weight Matters More Than Anything Else in a Skillet for Arthritis
Arthritis — whether it’s osteoarthritis wearing down the joint cartilage or rheumatoid arthritis causing inflammation — messes with grip strength, wrist rotation, and overall joint stability in the hands. That’s not a guess. That’s just how the condition behaves.
Now think about what cooking actually demands from your wrists. Lifting a pan off the burner. Tilting it to plate food. Pouring off excess fat. Flipping an omelet with a flick of the wrist (good luck with that one if your wrist already aches). None of that is a single quick motion — it’s repeated strain, over and over, across one cooking session. A pan that feels “fine” for the first lift can feel brutal by the fifth.
And look — most cookware advice you’ll find online wasn’t written with this in mind. At all.
Standard Cookware Advice Gets This Wrong
Most buying guides chase heat retention, durability, and how well a pan sears a steak. Which, fine, makes sense for the average reader. But that logic pushes you toward cast iron and heavy stainless — exactly the pans that’ll make your hands hurt the most.
So the “best” pan by traditional standards is often the worst pan for you specifically. That’s not a contradiction in your thinking. That’s just two different audiences needing two different answers. For this guide, weight comes first. Performance comes second. Period.
What Weight Actually Means in Practice
Rule of thumb: look for skillets under 2 lbs in the 10-inch size. That’s the threshold where things get genuinely manageable for most people dealing with hand or wrist arthritis.
For comparison — a 10-inch cast iron skillet runs 4 to 5 lbs. A 12-inch can hit 7 to 8 lbs. That’s not a small difference. That’s multiple times heavier than anything on this list.

Even stainless steel, which sounds “lighter” than cast iron in casual conversation, isn’t actually light. A fully clad tri-ply stainless 10-inch skillet still typically weighs 2.5 to 3 lbs. Heavier than every aluminum option here. Sneaky, right? People assume stainless is the gentler choice. It’s not.
It’s Not Just About Weight, Though
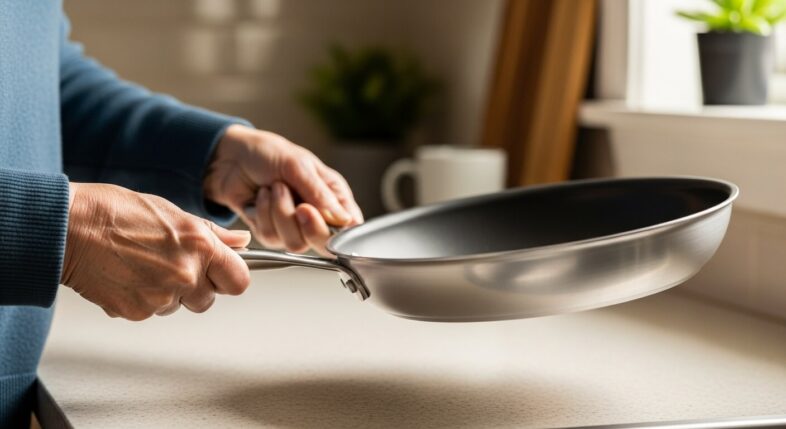
Handle design matters almost as much. A wide, contoured handle spreads grip pressure across your whole palm instead of concentrating it in your fingers — which is exactly where arthritis tends to hurt most.
Silicone or rubber-wrapped handles help too. Less force needed to hold on securely. And a second, smaller helper handle on the opposite side? That lets you split the weight across both hands instead of asking one wrist to do all the work alone.
Balance counts too, even if it’s easy to overlook. A poorly balanced pan — heavy on one side — forces your wrist to work harder just to keep it level. And shallower sides mean less wrist rotation needed to get a spatula under your food. Small things. They add up.
What Actually Makes a Skillet Arthritis-Friendly
Material Is Where It Starts
Aluminum is just less dense than cast iron or stainless steel. That’s basic physics, and it’s why nearly every genuinely lightweight skillet on the market is built on an aluminum base.
Hard-anodized aluminum takes that base and runs it through an electrochemical process that hardens the surface — more durable than plain aluminum, without piling on extra weight. Ceramic-coated aluminum is another lightweight route, often marketed as a “cleaner” alternative to traditional PTFE nonstick. Worth knowing if that’s something you care about.
What to actually avoid: cast iron in any form (yes, enameled too — still heavy), fully clad stainless steel, and carbon steel. Carbon steel’s lighter than cast iron, sure. But it’s still heavier than aluminum. Not what you want here.
Handles Deserve Real Attention
Wide and contoured beats narrow and round, every time, for arthritic hands. Silicone wraps improve grip and cut down on the squeeze-force needed to hold steady. Dual-handle setups let you lift with both hands — genuinely useful if one hand is weaker than the other, which happens often with arthritis.
Even the angle matters. Handles tilted slightly upward reduce wrist extension compared to a perfectly flat, horizontal handle. Small detail. Real difference.
Balance and Stability
A well-balanced lightweight pan won’t feel tippy when you go to plate food or pour off liquid. But here’s a fair trade-off to know about: ultra-thin aluminum can sometimes feel a little unstable if it’s poorly designed. Sometimes a slightly heavier, better-balanced pan beats an ultra-light wobbly one. Worth testing in person if you can.
A Few Extra Things Worth Checking

Dishwasher-safe matters more than you’d think — hand-scrubbing a pan is its own kind of wrist strain, and skipping that step helps. Oven-safe ratings? Less critical for this audience, honestly, since high-heat searing isn’t usually the goal here. And check the lid separately — glass lids can be surprisingly heavy, even when the pan itself is light as a feather.
The Best Lightweight Skillets for Seniors with Arthritis: Full Breakdown
GreenPan Valencia Pro Ceramic Nonstick Skillet
This one’s the strongest overall pick on this whole list. Ceramic-coated, hard-anodized aluminum body, built with durability and even heat in mind — but somehow still stays genuinely light.
- Weight: ~1.3 lbs (10″), ~1.7 lbs (12″)
- Price: $40–$60
- Diamond-infused ceramic coating, PFAS-free and PTFE-free
- Hard-anodized aluminum body
- Riveted, contoured stainless steel handle
- Oven-safe to 600°F, works on every cooktop including induction
Pros: Genuinely light despite the hard-anodized build. Excellent food release means you’re not fighting the pan to flip anything. PFAS-free coating, which matters to a lot of buyers in this age group. Dishwasher-safe — no scrubbing required.
Cons: Ceramic coatings wear faster than PTFE, usually 2–3 years with regular use. No helper handle. Costs more than the basic options on this list.
Best for: Anyone who wants real performance plus a health-conscious coating and doesn’t need that second handle.
Ozeri Stone Earth Pan
The lightest practical skillet you’re going to find. Full stop.
- Weight: ~1.1 lbs (10″) — the lightest on this entire list
- Price: $25–$35
- Stone-derived nonstick coating, APEO and PFOA-free
- Thin-gauge aluminum body (that’s the whole reason it’s this light)
- Bakelite handle, moderate heat resistance
- Not oven-safe above 300°F
Pros: Nothing else here gets close to this weight. Genuinely affordable. Releases food easily without needing much oil.
Cons: Thin construction means less heat retention and more risk of warping over time. The 300°F oven limit is restrictive. Won’t last as long as the hard-anodized options.
Best for: Anyone dealing with significant grip weakness where minimum weight matters more than anything else — including long-term durability.
T-fal Ultimate Hard Anodized Nonstick Skillet
A practical middle ground. Light enough to matter, durable enough to last.
- Weight: ~1.5 lbs (10″)
- Price: $30–$45
- Hard-anodized aluminum for scratch and warp resistance
- Thermo-Spot heat indicator
- Silicone-wrapped handle
- Oven-safe to 400°F, dishwasher-safe
Pros: Good balance between light weight and actual durability. The Thermo-Spot indicator takes the guesswork out of preheating — genuinely helpful if judging pan temperature by feel isn’t easy anymore. Silicone-wrapped handle gives you a more secure grip. Easy to find and replace, since it’s sold pretty much everywhere.

Cons: A touch heavier than the Ozeri, though still well within a comfortable range. Standard PTFE coating, which some buyers specifically want to avoid.
Best for: Anyone who wants a dependable, easy-to-find option without sacrificing too much weight savings.
Carote Nonstick Skillet with Helper Handle
This is the one built specifically around two-handed lifting. And honestly? That’s a bigger deal than it sounds.
- Weight: ~1.4 lbs (10″)
- Price: $25–$40
- Dual handles — main handle plus a smaller helper handle opposite it
- Granite-style nonstick coating, PFOA-free
- Die-cast aluminum body
- Oven-safe to 480°F, induction compatible
Pros: That helper handle is a real ergonomic win if one-handed lifting or pouring is hard for you. Splitting weight across two hands takes pressure off any single wrist. Looks good, too — modern design at a fair price. Decent nonstick performance means less force needed while cooking and cleaning up.
Cons: The helper handle adds a touch of weight versus single-handle pans. Granite-style coatings can show wear more visibly over time than a plain, solid-color nonstick.
Best for: Anyone who specifically struggles with one-handed lifting, pouring, or carrying a pan across the kitchen.
Caraway Nonstick Ceramic Skillet
The premium pick. Costs more, looks better, and still stays lighter than anything traditional.
- Weight: ~1.9 lbs (10.5″)
- Price: $90–$145 (often part of a set)
- Mineral-based ceramic coating — free of PTFE, PFOA, and PFAS
- Aluminum core for even heat
- Wide, easy-grip stainless handle
- Comes with a magnetic storage rack and lid system
- Oven-safe to 550°F
Pros: Health-conscious coating appeals to buyers who care about chemical exposure. That storage rack actually matters — less lifting and shuffling of lids and pans in a crowded cabinet, which is an underrated ergonomic perk. Wide handle spreads grip pressure nicely. Strong reputation for ceramic coatings that actually hold up.
Cons: Heaviest pan on this list — though still nowhere near cast iron or stainless territory. Noticeably more expensive than everything else here. Even premium ceramic coatings generally don’t outlast PTFE long-term.
Best for: Anyone who wants a lightweight pan but also cares about kitchen aesthetics, chemical-conscious materials, and smart storage.
How to Pick Between These Lightweight Skillets
Match the Pan to How Severe Your Symptoms Are

Mild symptoms? Honestly, any pan on this list will work. Go with whatever fits your budget and feature preferences.
Moderate symptoms, especially if one hand is noticeably weaker than the other? The Carote’s dual-handle design is worth prioritizing specifically for that reason.
Severe grip limitations? The Ozeri’s extreme lightness might be worth the durability trade-off, even if it won’t last as long as the hard-anodized options.
Weigh Durability Against Weight (Pun Intended)
Be honest about the trade-off here. The lightest pans — looking at you, Ozeri — sacrifice some durability and heat retention compared to slightly heavier hard-anodized options like the T-fal or GreenPan.
If you’re cooking daily, that slightly heavier, more durable pan might actually serve you better long-term. If you’re cooking occasionally, the absolute lightest option could be worth it even with the shorter lifespan.
Think About Coating Chemistry, If That Matters to You
Some people — and some caregivers shopping for a parent or older relative — specifically want PFAS-free or PTFE-free coatings. GreenPan, Ozeri, Carote, and Caraway all skip traditional PTFE. T-fal sticks with standard PTFE, which is still considered safe by regulatory standards, just not everyone’s preference. That’s a personal call, not a strict ergonomic one. But it comes up a lot, so it’s worth naming directly.
Budget Breakdown
- $25–$40: Ozeri Stone Earth Pan, T-fal Ultimate Hard Anodized, Carote with Helper Handle
- $40–$60: GreenPan Valencia Pro
- $90–$145: Caraway Nonstick Ceramic
And here’s something worth knowing: spending more doesn’t automatically buy you a lighter or more ergonomic pan. A lot of that premium pricing reflects aesthetics, brand reputation, or coating chemistry — not weight, not handle design. Don’t assume expensive means better suited to your hands. It often just means nicer-looking.
A Few More Things That Help, Beyond the Pan Itself
Cooking Habits That Take Pressure Off Your Wrists
Use a spatula or tongs to move food around instead of tilting and shaking the pan to “toss” things — that wrist motion is exactly what you’re trying to avoid. Slide the pan across the burner grates when repositioning it, rather than lifting and resetting it every time, if your stovetop allows for that. Pour off liquid or fat using a ladle or measuring cup instead of tipping the whole pan. And let a hot pan cool a bit before washing or moving it — grip fatigue plus heat is a bad combination, and that’s when drops happen.
Tools That Pair Well with a Lightweight Skillet
Built-up-grip or silicone-handled utensils reduce how much fine motor strength you need while cooking. A long-handled pan paired with a trivet placed close to the stove cuts down the distance (and effort) needed to move something hot. And jar openers, along with other adaptive kitchen tools, often show up alongside lightweight cookware as part of a bigger arthritis-friendly kitchen setup — not a coincidence.
When It’s Worth Talking to an Occupational Therapist
If your grip limitations are significant or getting worse, an occupational therapist can recommend equipment and techniques tailored to your specific joints — not just generic advice like what’s in this guide. They often suggest adaptive grips you can add to cookware you already own, which is worth knowing about. This article covers cookware selection. That’s it. For anything beyond that, a healthcare professional who actually knows your situation is going to give you better guidance than any blog post ever could.