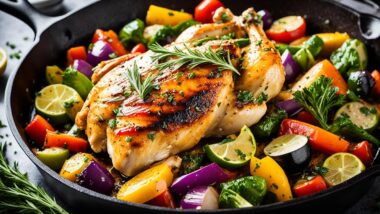
Ever thought about making a simple chicken thigh taste like gourmet food? With a cast iron skillet, it’s easy. I’ve got 11 delicious recipes that will level up your dinners.
These recipes are great for anyone who loves tasty dishes but is short on time. A cast iron skillet helps you cook like a pro at home. You’ll enjoy everything from classic crispy thighs to new and exciting meals.
Ready to look at the magic of cast iron skillet cooking? These meals are for everyone, whether you cook a lot or a little. They will surely amaze you and your friends. Let’s get cooking and have some fun with flavors!
The 11 unique cast iron skillet chicken thigh recipes in this article cover varieties such as Garlic Cream Sauce, Smoky Paprika and Thyme, Lemon Herb, Asian-Inspired Soy and Ginger, Mediterranean Olive and Tomato, Honey Mustard Glazed, Bacon-Wrapped with Maple Drizzle, Spicy Cajun, Creamy Spinach and Artichoke Stuffed, One-Pan Root Vegetable Medley, and Harissa Butter — each one cooked in a cast iron skillet and sized to serve four.
Table of Contents
- 1 Why People Love Cast Iron Cooking for Chicken Thighs
- 2 Essential Tools and Ingredients for Perfect Skillet Chicken
- 3 Mastering the Technique: Crispy Skin Secrets
- 4 Garlic Cream Sauce Skillet Chicken Thighs
- 5 Smoky Paprika and Thyme Infused Chicken Thighs
- 6 Lemon Herb Cast Iron Skillet Chicken Thighs
- 7 Asian-Inspired Soy and Ginger Chicken Thighs
- 8 Mediterranean Olive and Tomato Chicken Thighs
- 9 Honey Mustard Glazed Chicken Thighs
- 10 Bacon-Wrapped Chicken Thighs with Maple Drizzle
- 11 Spicy Cajun Cast Iron Skillet Chicken Thigh Recipes
- 12 Creamy Spinach and Artichoke Stuffed Chicken Thighs
- 13 One-Pan Chicken Thigh and Root Vegetable Medley
- 14 Harissa Butter Chicken Thighs
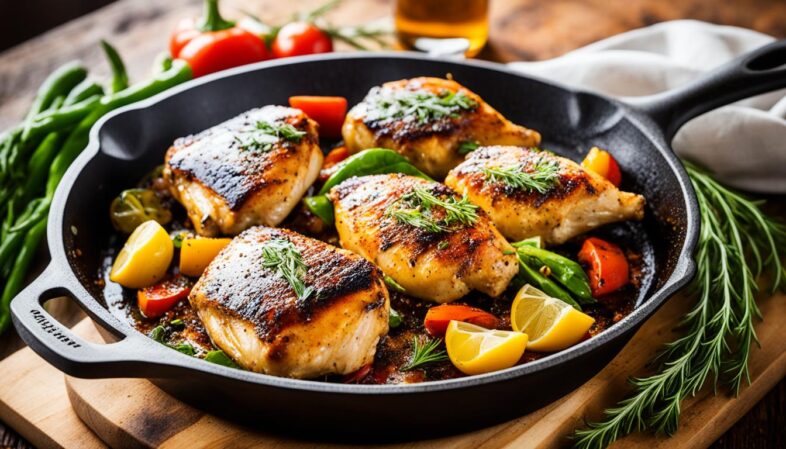
Why People Love Cast Iron Cooking for Chicken Thighs
Honestly, it comes down to one thing: that skin. Nobody talks about chicken thigh skin the way they should. When it renders properly in a cast iron pan — fat melting out, surface going from pale and flabby to deep amber and rigid — it becomes something genuinely worth eating on its own. Not just a protective layer. Not just the part you peel off. The actual best part of the whole dish.
Cast iron skillet cooking does something to chicken that other pans can’t match. The heat mass of cast iron is the reason. When cold chicken hits a thin stainless pan, the pan temperature drops immediately and the sear suffers. Cast iron barely notices. It stays hot, keeps the contact surface at searing temperature, and drives that fat out of the skin the way it needs to come out — fast, completely, with a crust forming underneath.
Thighs specifically — not breasts — because they have the fat content and muscle structure to hold up to high heat without drying out. Leave a breast in the pan two minutes too long and it’s done. Overcooked thigh is still fine. Forgiving in a way that makes cast iron chicken genuinely easy to pull off.
Why not nonstick? Why not stainless?
- Nonstick coatings degrade at the temperatures you need for proper searing — and you need high heat, full stop
- Stainless drops temperature too fast when the chicken goes in; that cold-chicken moment ruins the sear
- Cast iron is super for the stovetop-to-oven move — sear it, flip it, slide the whole pan into a 400°F oven, done
- The fond — that dark, sticky crust on the bottom of the pan after searing — is pure flavor and the starting point for every sauce in this list
All 11 recipes below serve four. Most call for bone-in, skin-on thighs. A couple use boneless, skinless for structural reasons. Check the ingredients before you start because two of these need marinating time.
Essential Tools and Ingredients for Perfect Skillet Chicken
Before anything else — pan size. Twelve-inch, not ten. Four thighs in a ten-inch pan are too close together. They steam. The skin goes soft and pale and you’ve already lost the whole reason for using cast iron in the first place. Give the thighs room. Twelve-inch gives them room.
The short list of what you actually need
| Item | What it does for you |
|---|---|
| 12-inch cast iron skillet | Four thighs with space between them |
| Heavy oven mitts | That handle is brutally hot after 25 minutes at 400°F |
| Instant-read thermometer | 165°F internal — don’t guess on poultry |
| Paper towels | Dry skin before searing, every single time |
| Tongs | Better control than a fork and doesn’t pierce the meat |
On the pantry side
Most skillet chicken thighs on this list share a foundation. A few things worth having on hand before starting any of them:
- Avocado oil — not olive oil, which burns at actual searing temperatures
- Kosher salt — not table salt; the grain size gives more control and it adheres to skin better
- Fresh garlic — jarred garlic is wetter and won’t brown cleanly, which matters
- Unsalted butter — for finishing sauces off the heat, where it emulsifies properly
- Decent chicken stock — water works for deglazing but stock builds a sauce
One non-negotiable thing before any of this: dry the chicken skin. Both sides. Paper towels, real pressure. Wet skin creates steam, steam prevents browning, and no browning means no crust. This takes 20 seconds and it’s the difference between a good dish and a great one.
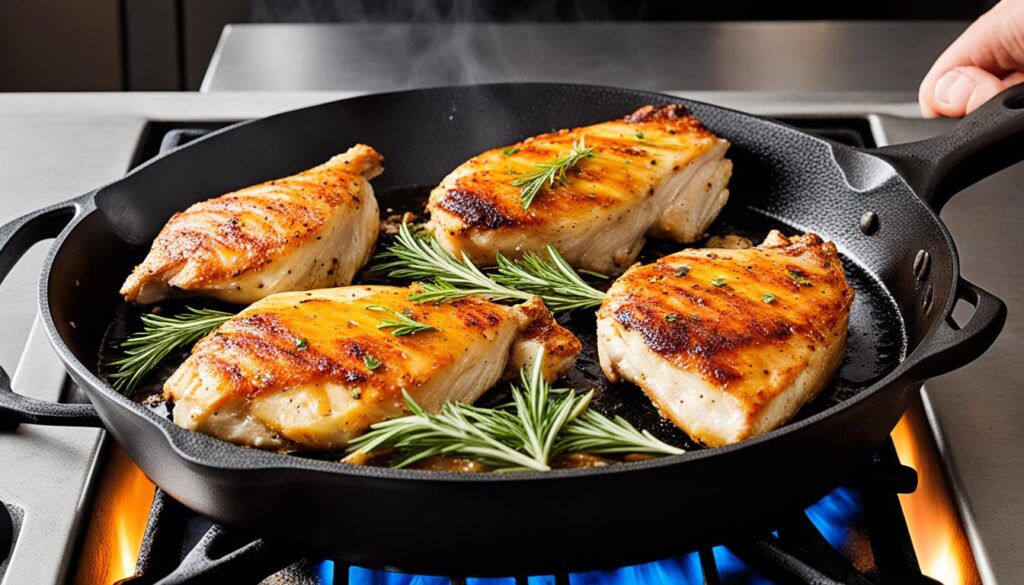
Mastering the Technique: Crispy Skin Secrets

The mistake almost everyone makes the first time: flipping too soon. The skin sticks — because it always sticks at first — they panic, they try to force it, the crust tears off in the pan. Then they spend the rest of the cook time trying to fix something that can’t be fixed. Rubbery, torn skin doesn’t crisp in the oven. That particular problem is permanent.
What actually makes the sear work
Cast iron over medium-high for 3 full minutes before oil goes in. Not 90 seconds. Three minutes. The pan needs to be hot all the way through its thickness, not just warm on the cooking surface. Then oil, then wait 30 seconds until you see it shimmer — shimmer is hot enough, smoke is too hot — then chicken skin-side down, away from you so any spatter goes toward the back of the pan.
Seven minutes. Walk away. The skin sticks at first and that’s expected and fine. As the fat renders out and the crust forms underneath, the chicken releases on its own. Try lifting it at 4 minutes and it holds on — that means the crust isn’t built yet, put it back down. The moment it slides cleanly when you nudge it with tongs, the skin looks deep amber, and pressing on it feels rigid rather than soft — that’s when it flips.
Pale gold skin is not done. Pale gold skin going into the oven comes out pale gold. It will not improve.
The oven finish, and why it matters
Like stir-fries where the initial high-heat sear is followed by gentler finishing heat, stovetop-to-oven gives you control that pure stovetop cooking doesn’t offer. The sear builds the crust. The oven cooks the interior through without burning the outside.
| Thigh size | Skin-down sear time | Oven temp | Oven time |
|---|---|---|---|
| Small (4-5 oz) | 6 min | 375°F | 18-20 min |
| Medium (6-7 oz) | 7-8 min | 375°F | 22-25 min |
| Large (8+ oz) | 8-9 min | 400°F | 25-28 min |
165°F at the thickest point, away from the bone. Then rest — 5 minutes minimum. The skin firms back up during that rest after softening slightly when pulled from heat. Skip the rest and cut into it immediately, and you push all the juices out onto the cutting board instead of keeping them in the meat.
Garlic Cream Sauce Skillet Chicken Thighs
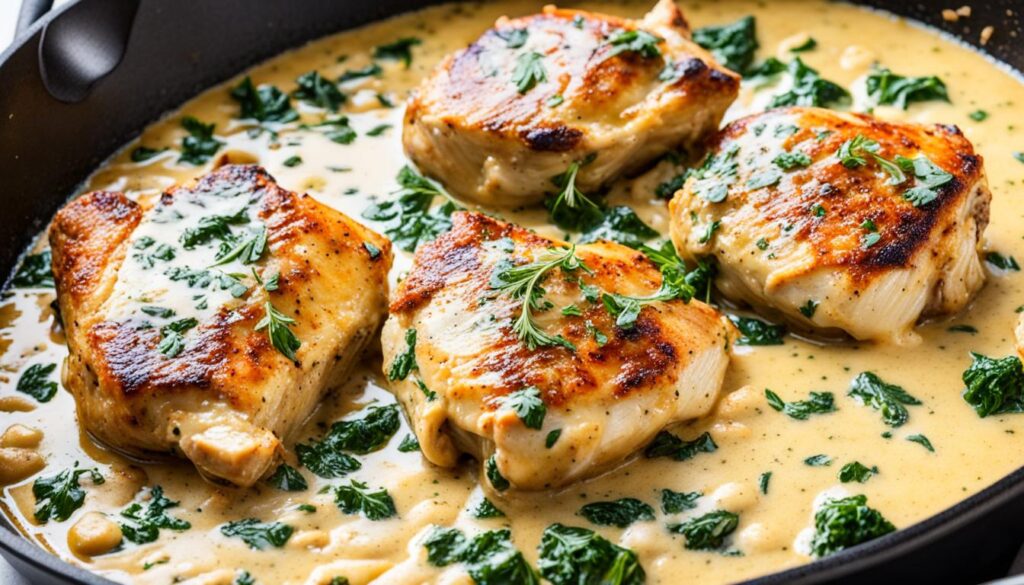
If I’m cooking for people I want to impress — this one. The cream sauce looks involved. It isn’t. It comes together in the same pan the chicken seared in, using all that rendered fat and fond as its base, and the finished result is rich and garlicky and herby in a way that makes people ask for the recipe. Fresh garlic cooking in hot chicken fat is one of the better smells a kitchen can produce. I’ll just say that.
Don’t use jarred garlic here. The whole point is fresh garlic softening slowly in rendered chicken fat — the smell, the flavor, the way it turns pale gold without going brown. Jarred garlic doesn’t behave the same way and the sauce won’t be as good.
If you want a similarly easy pan-sauce approach for a seafood night, the shrimp and broccoli stir fry works off the same basic principle.
Ingredients
- 4 bone-in, skin-on chicken thighs (about 6-7 ounces each)
- 1-1/2 teaspoons kosher salt
- 1 teaspoon black pepper
- 1 tablespoon avocado oil
- 6 cloves garlic, minced
- 1 cup chicken stock
- 1 cup heavy cream
- 1 teaspoon fresh thyme leaves (or 1/2 teaspoon dried)
- 1/2 teaspoon Italian seasoning
- 2 tablespoons unsalted butter
- 2 tablespoons fresh parsley, roughly chopped
- 1/4 cup freshly grated Parmesan
Instructions
Paper towels on the chicken — both sides, pressing firmly, until the skin feels dry rather than slick. Season all over with the salt and pepper and let them sit out for 10 minutes. Cold chicken in a hot pan isn’t a disaster, but room-temperature chicken sears more evenly.
Cast iron on medium-high and leave it alone for 3 minutes. Add the oil, give it 30 seconds, then lay the thighs in skin-side down. Seven to 8 minutes without touching anything. The skin will feel stuck to the pan for the first several minutes — that’s the crust forming. When the chicken slides slightly when nudged and the skin has gone deep amber-gold, flip. Three minutes on the flesh side, then pull the thighs to a plate.
The pan at this point looks like a mess — dark bits stuck to the bottom, a pool of golden fat, the smell of roasted chicken everywhere. That’s exactly what you want. Turn the heat down to medium. Minced garlic goes directly into that fat. It sizzles the moment it hits — 30 seconds of stirring and it smells extraordinary, softened and fragrant and pale gold. The moment it starts edging toward brown, the next thing goes in.
Stock into the pan. It steams hard and everything lifts off the bottom immediately — a wooden spoon gets the last bits. Three minutes at a steady simmer reduces it by roughly half, and the liquid goes from thin and stock-colored to darker and more concentrated. Heavy cream, thyme, and Italian seasoning next. Stir once and let it simmer another 2 minutes. By now the sauce coats the back of a spoon and the whole pan smells like the kind of thing you’d pay $22 for at a bistro. Taste it, adjust salt, then stir the cold butter in off heat until the sauce looks glossy.
Chicken back in skin-side up. Into a 375°F oven for 20 to 22 minutes until the internal temperature reads 165°F. Rest 5 minutes. Parmesan and parsley go on right before the pan hits the table.
Nutritional Information (Per Serving)
| Nutrient | Amount per Serving |
|---|---|
| Calories | 548 |
| Carbohydrates | 4g |
| Protein | 38g |
| Fat | 42g |
| Fiber | 0.5g |
| Sodium | 710mg |
Smoky Paprika and Thyme Infused Chicken Thighs
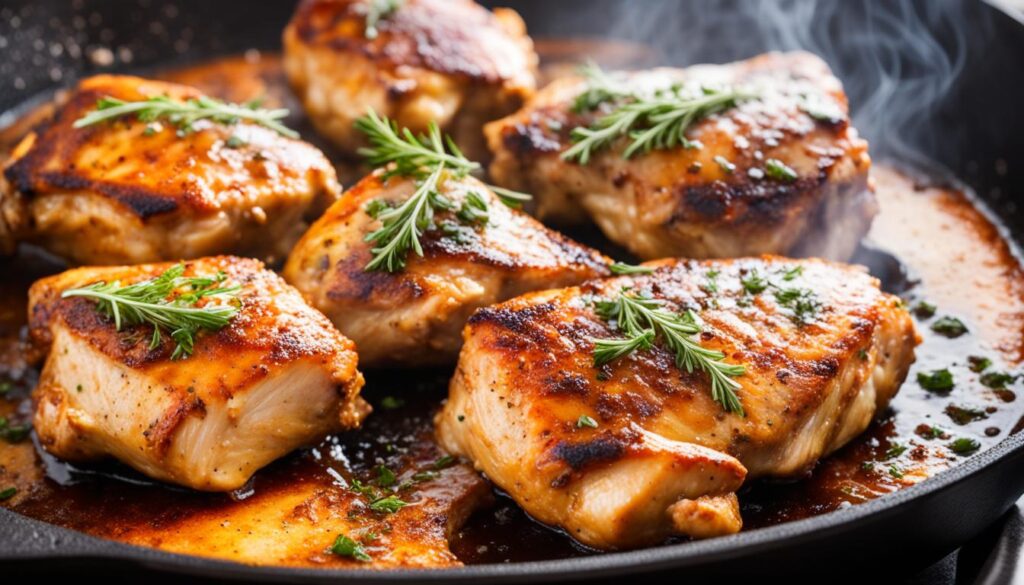
Three minutes to mix the spice blend. That’s the hardest part of this recipe. The cast iron does everything else — it takes that reddish-orange spice-covered skin and turns it into something deeply burnished and smoky-smelling that looks like it required much more skill than it did.
Smoked paprika, not sweet. This is a real distinction and it matters enormously. Sweet paprika adds color but very little depth. Smoked paprika blooms in hot fat and creates a crust with actual character — that wood-fire quality is the whole flavor foundation of this recipe.
Ingredients
- 4 bone-in, skin-on chicken thighs (about 6-7 ounces each)
- 1-1/2 teaspoons smoked paprika
- 1 teaspoon kosher salt
- 3/4 teaspoon black pepper
- 1/2 teaspoon garlic powder
- 1/2 teaspoon onion powder
- 1/4 teaspoon cayenne pepper
- 1 tablespoon avocado oil
- 4 sprigs fresh thyme
- 3 cloves garlic, smashed
- 1/2 cup chicken stock
- 2 tablespoons unsalted butter
- 1 tablespoon fresh lemon juice
Instructions
Small bowl, smoked paprika and salt and black pepper and garlic powder and onion powder and cayenne — stir them together. Pat the chicken as dry as possible on both sides; the drier the skin, the better the spice rub grips and stays in place during cooking. Press the mixture all over each thigh, getting it into the edges of the skin and underneath where you can. The chicken should look vivid and evenly colored, no pale patches showing through the seasoning.
Fifteen minutes at room temperature while the oven heats to 375°F. Cold chicken is the enemy of an even sear.
Cast iron over medium-high, 3 minutes. Add oil, wait for it to shimmer. Thighs go in skin-side down — the smashed garlic cloves and thyme sprigs get tucked right alongside the chicken in the fat. Within seconds the paprika blooms and the kitchen takes on that smoky, spiced smell that means something good is happening. Eight minutes without touching the chicken. As it approaches the flip point the skin edges go from vivid orange-red to a deeper burgundy-brown. When it releases cleanly, flip. Three minutes on the flesh side.
Pull the thyme sprigs and set the chicken aside. Deglaze with stock, scraping hard — the liquid turns rust-red immediately as it picks up all that paprika-stained fond. Two minutes of simmering to reduce slightly, then off the heat for the butter and lemon juice. Stir until the sauce looks slightly glossy. Drizzle it all over the chicken and serve right away — this one doesn’t wait well once the sauce is on.
Nutritional Information (Per Serving)
| Nutrient | Amount per Serving |
|---|---|
| Calories | 420 |
| Carbohydrates | 2g |
| Protein | 36g |
| Fat | 29g |
| Fiber | 0.5g |
| Sodium | 620mg |
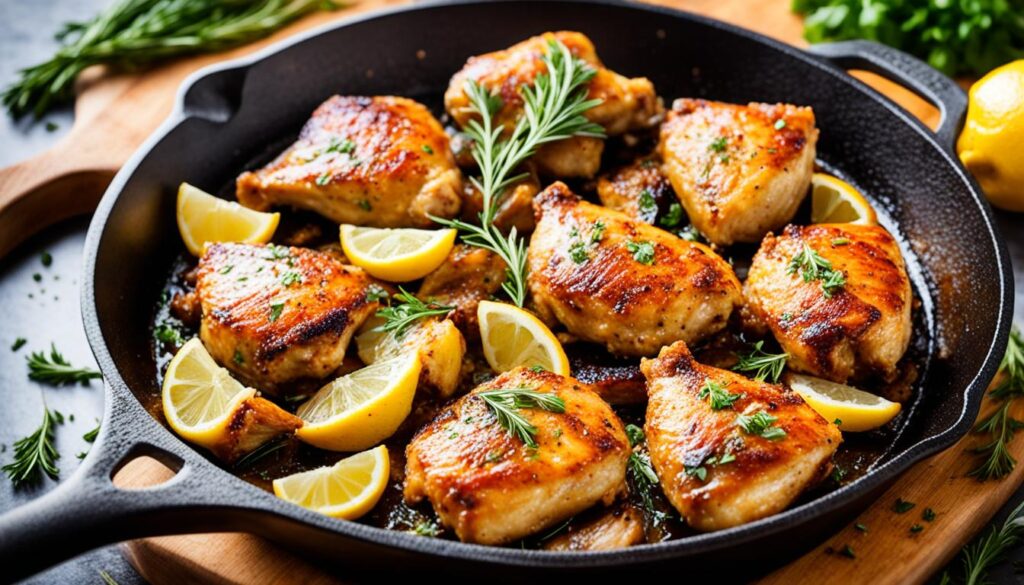
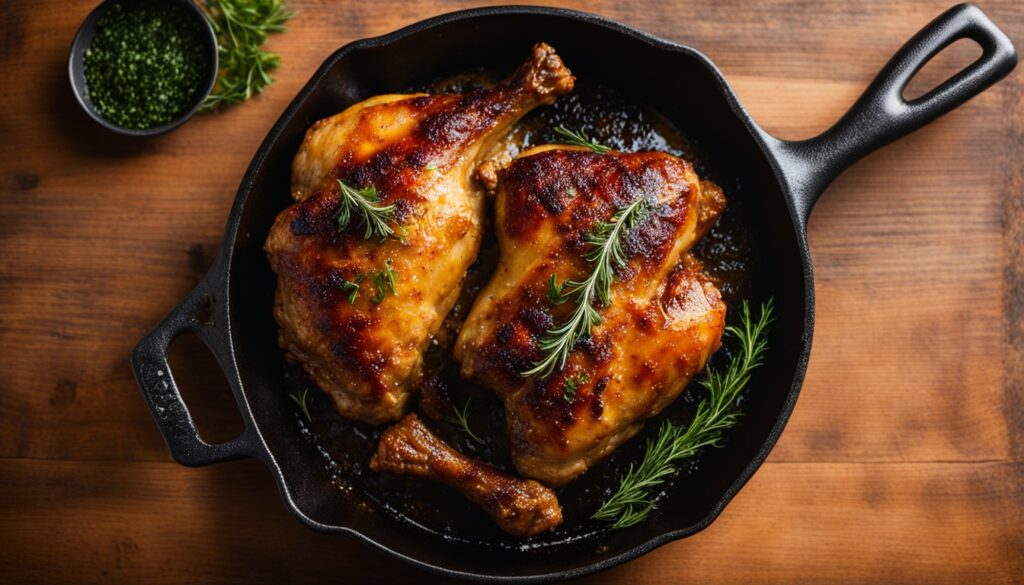
Lemon Herb Cast Iron Skillet Chicken Thighs
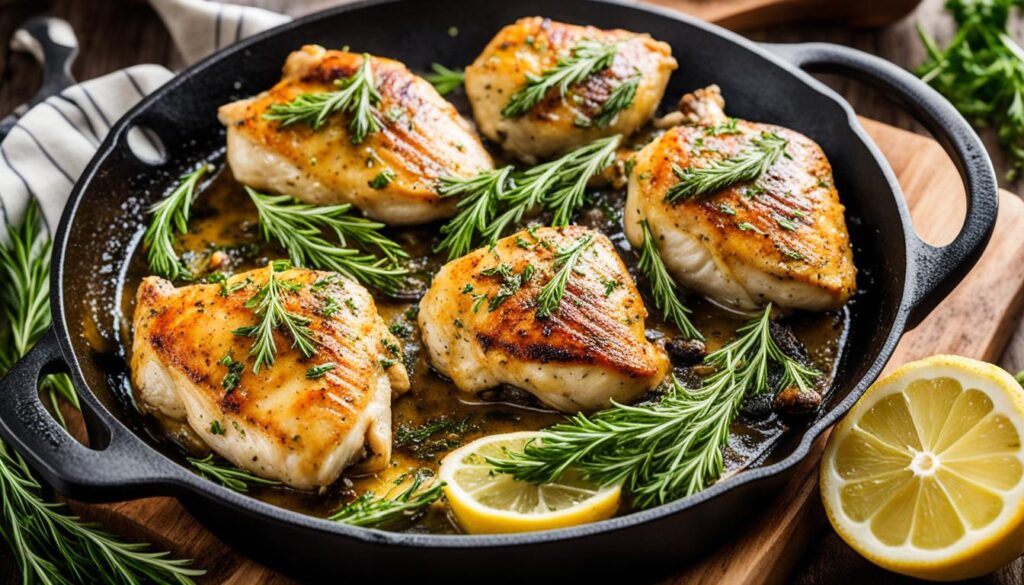
Lighter than most of the others. Not light in a boring way — light in the sense that the lemon and herbs cut through the richness of the skin and fat in a way that makes this feel fresh and bright rather than heavy. The lemon zest goes directly into the seasoning rub rather than being squeezed over at the end, which makes a real flavor difference. Zest in the rub perfumes the skin from the outside in during cooking. Finishing juice is just acid on top.
Rosemary and thyme can handle a screaming hot cast iron pan without turning bitter. Basil or parsley can’t — save those for finishing.
Ingredients
- 4 bone-in, skin-on chicken thighs (about 6-7 ounces each)
- 1-1/2 teaspoons kosher salt
- 1 teaspoon black pepper
- Zest of 1 large lemon
- 1 tablespoon avocado oil
- 4 cloves garlic, thinly sliced
- 2 sprigs fresh rosemary
- 4 sprigs fresh thyme
- 1/3 cup chicken stock
- 3 tablespoons fresh lemon juice (about 1-1/2 lemons)
- 2 tablespoons unsalted butter
- 1 tablespoon fresh flat-leaf parsley, chopped
- 1/2 teaspoon red pepper flakes
Instructions
Salt, pepper, and lemon zest mixed together and pressed into the dried chicken skin on all surfaces. The zest makes the seasoning mixture smell immediately and intensely citrusy — that perfume is what goes into the skin as it cooks. Let it sit 10 minutes while the oven comes up to 400°F.
Cast iron over medium-high for 3 minutes. Oil in and shimmering, then chicken skin-side down with the rosemary and thyme sprigs nestled right alongside the pieces in the pan. The herbs sit in the rendered fat as the skin cooks and slowly perfume the oil — after a few minutes the kitchen smells like a rotisserie combined with a garden. Seven to 8 minutes until the skin goes uniformly golden and lifts cleanly. Flip. Two minutes on the flesh side. Whole skillet into the 400°F oven for 20 to 22 minutes.
The herb sprigs come out before the pan sauce — they’ve done everything they’re going to do. Transfer the cooked chicken to a plate while the skillet goes back over medium heat. Sliced garlic into the residual fat, just 60 seconds until it’s pale gold and fragrant but not browning. Stock and lemon juice go in together and the fond comes up off the bottom. Two minutes of simmering, then cold butter goes in off heat and gets stirred until the sauce looks glossy and slightly thickened.
Pour over the resting chicken. Parsley and red pepper flakes across the top before serving.
Nutritional Information (Per Serving)
| Nutrient | Amount per Serving |
|---|---|
| Calories | 415 |
| Carbohydrates | 3g |
| Protein | 36g |
| Fat | 28g |
| Fiber | 0.5g |
| Sodium | 590mg |
Asian-Inspired Soy and Ginger Chicken Thighs
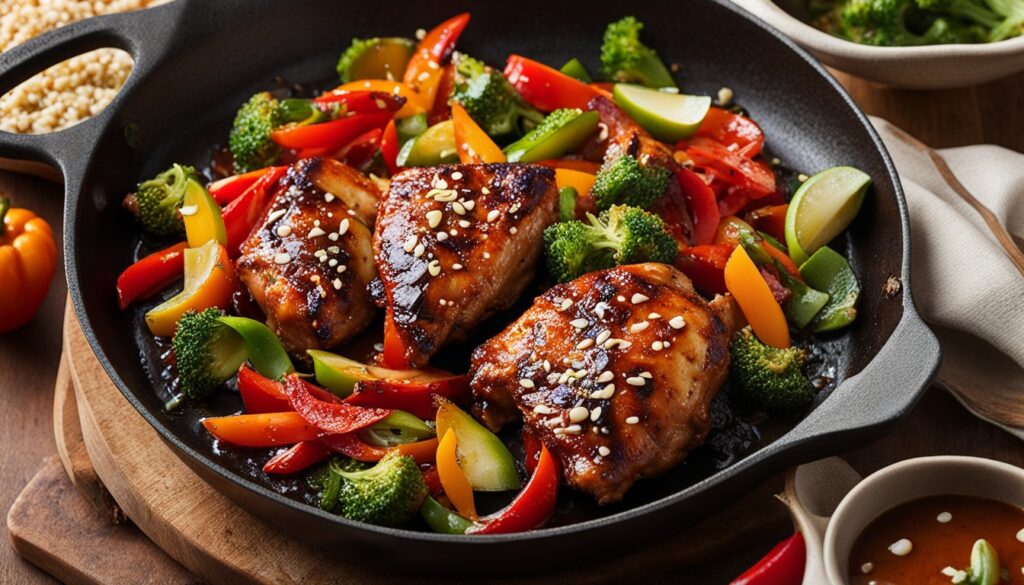
The marinade does most of the work, and it needs time. One hour is acceptable. Overnight is considerably better — by morning the skin has absorbed enough of the soy and ginger that the finished chicken is flavored all the way through, not just on the surface. The cast iron sear turns that marinated skin into something lacquered and sticky and genuinely hard to stop eating.
Low-sodium soy sauce. Not regular. Regular soy sauce concentrating in a hot pan turns this aggressively salty before the chicken is even cooked through. Low-sodium reduces to something intensely flavorful rather than just salty.
Ingredients
- 4 bone-in, skin-on chicken thighs (about 6-7 ounces each)
- For the marinade:
- 1/3 cup low-sodium soy sauce
- 2 tablespoons honey
- 1 tablespoon sesame oil
- 1 tablespoon rice vinegar
- 1-1/2 tablespoons fresh ginger, grated
- 4 cloves garlic, minced
- 1/2 teaspoon red pepper flakes
- 1 tablespoon avocado oil (for searing)
- 2 green onions, thinly sliced
- 1 teaspoon sesame seeds
- 1 tablespoon cornstarch mixed with 2 tablespoons cold water (optional, for thickening)
Instructions
Combine all the marinade ingredients in a zip-lock bag or shallow bowl. Add the chicken, press out the air if using a bag, and make sure every surface is coated. Refrigerate for at least 1 hour — overnight if possible. When you pull it out the next day, the skin will look slightly darker where the soy has penetrated and the whole thing will smell like ginger and garlic and something you want to eat immediately.
Twenty minutes out of the fridge before cooking. Reserve the marinade in a bowl — it becomes the pan sauce. Preheat oven to 375°F.
Blot the surface of the chicken lightly — not dry, just lighter. The honey in the marinade caramelizes fast in a hot pan and will start burning before the skin has time to properly sear if there’s too much of it sitting on the surface. A light blot is all it needs.
Cast iron 3 minutes over medium-high. Avocado oil in, shimmer, then chicken skin-side down. The sizzle sounds more intense than usual because of the sugars and the color deepens quicker — 5 to 6 minutes, watching the skin edges carefully. If it looks like it’s darkening too fast in spots, nudge the heat down just slightly. Flip and give the flesh side 2 minutes.
Pour the reserved marinade into the pan. It steams hard and bubbles up — let it come to a full simmer for 2 minutes to cook off the raw chicken contamination from soaking. Slide the skillet into the oven for 18 to 20 minutes. When the internal temperature reads 165°F, pull the pan.
For a thicker sauce, set the skillet back on medium heat, stir in the cornstarch mixture, and watch it go from thin and glossy to sauce-like in under a minute. Spoon it over the chicken and finish with green onions and sesame seeds.
Nutritional Information (Per Serving)
| Nutrient | Amount per Serving |
|---|---|
| Calories | 460 |
| Carbohydrates | 14g |
| Protein | 37g |
| Fat | 28g |
| Fiber | 0.5g |
| Sodium | 780mg |
Mediterranean Olive and Tomato Chicken Thighs
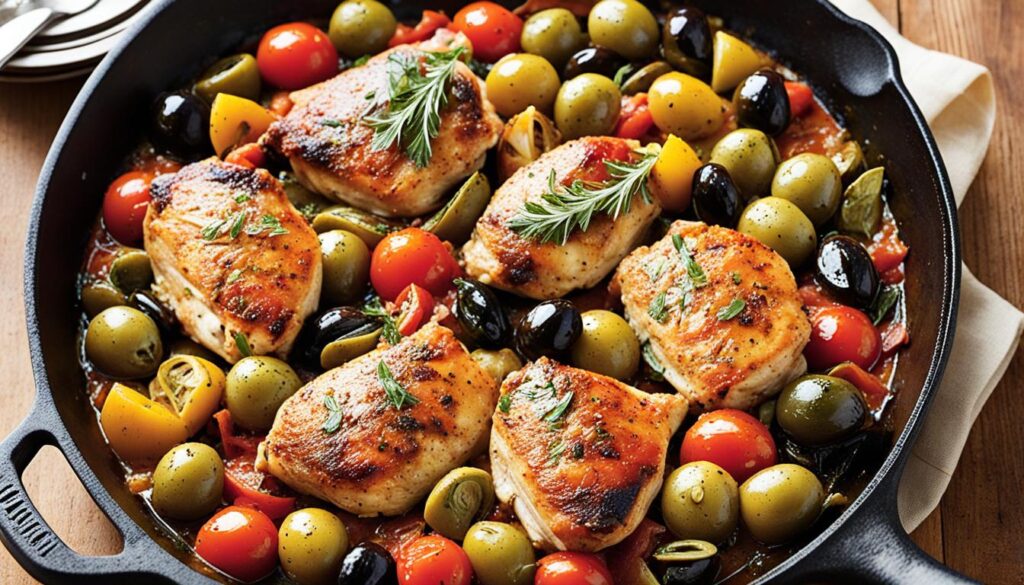
Kalamata olives and capers are salty enough that this sauce barely needs seasoning on its own. The canned tomatoes break down into something jammy and slightly sweet. The white wine picks up all the fond from the sear and carries it into the braising liquid. All of this happens in one pan and tastes like something that spent three hours on the stove. It didn’t. Forty-five minutes, maybe.
Kalamata olives here, not green. Green olives work but they’re sharper and less mellow — kalamata has a richness that fits the tomato braising liquid better.
Ingredients
- 4 bone-in, skin-on chicken thighs (about 6-7 ounces each)
- 1-1/2 teaspoons kosher salt
- 1 teaspoon black pepper
- 1 tablespoon olive oil
- 1 medium yellow onion, thinly sliced
- 4 cloves garlic, thinly sliced
- 1/2 cup dry white wine
- 1 can (14-1/2 ounces) diced tomatoes, drained
- 1/2 cup kalamata olives, pitted and halved
- 2 tablespoons capers, drained
- 1 teaspoon dried oregano
- 1/2 teaspoon red pepper flakes
- 2 tablespoons fresh basil, torn
- 1 tablespoon lemon zest
Instructions
Dry the chicken, season with salt and pepper. Oven to 375°F.
Cast iron over medium-high, 3 minutes. Olive oil in, then chicken skin-side down. Seven to 8 minutes, and by the time the skin releases cleanly it should look almost mahogany at the thickest edges — deep golden-amber moving toward brown where the fat has crisped up the hardest. Flip, 2 minutes, then the chicken comes out to a plate.
Same pan, heat dropped to medium. The sliced onion goes into the chicken fat left in the pan and immediately starts softening — it looks stiff and pale going in and within 4 minutes it’s translucent and slightly sweet-smelling, the edges just beginning to color. Sliced garlic goes in for another minute, stirring.
White wine — it steams immediately and all the fond lifts off the bottom. Scrape as it simmers. Two minutes to reduce by half, then in go the drained tomatoes, the olives, capers, oregano, and red pepper flakes all at once. Stir everything together and taste the sauce — it’s already salty from the olives and capers, so go easy before adding more salt.
Chicken back in skin-side up. The sauce should come up around the sides of the thighs but not over the skin. That’s important — skin submerged in braising liquid goes soft. Skin above it stays crispy. Twenty-five minutes in the oven uncovered, until 165°F internal and the sauce has thickened and gone slightly jammy around the edges of the pan.
Rest 5 minutes, then lemon zest and torn basil right before serving.
Nutritional Information (Per Serving)
| Nutrient | Amount per Serving |
|---|---|
| Calories | 438 |
| Carbohydrates | 10g |
| Protein | 37g |
| Fat | 26g |
| Fiber | 2.5g |
| Sodium | 890mg |
Honey Mustard Glazed Chicken Thighs
Not the honey mustard from a squeeze bottle. Whole grain mustard — visible seeds, sharper flavor, actual texture — combined with honey and apple cider vinegar and a bit of thyme. The ratio is two parts mustard to one part honey. More honey than that and the glaze burns on the skin before the chicken finishes cooking. At this ratio, the honey caramelizes in the oven and turns the skin sticky-lacquered in a way that’s very hard to stop eating.
Ingredients
- 4 bone-in, skin-on chicken thighs (about 6-7 ounces each)
- 1-1/2 teaspoons kosher salt
- 1 teaspoon black pepper
- 1 tablespoon avocado oil
- For the glaze:
- 3 tablespoons whole grain mustard
- 1-1/2 tablespoons honey
- 2 cloves garlic, minced
- 1 tablespoon apple cider vinegar
- 1 teaspoon fresh thyme leaves
- 1/4 teaspoon smoked paprika
- 2 tablespoons chicken stock (if it needs loosening)
Instructions
Mustard, honey, minced garlic, apple cider vinegar, thyme, smoked paprika — whisk together in a small bowl. It’ll look thick and textured, almost chunky, with the mustard seeds visible throughout. If it’s stiff and won’t spread easily, add the stock a tablespoon at a time to loosen it. Taste it before it goes on the chicken. It should be sharp, slightly sweet, herby, with a back-of-the-throat warmth from the paprika.
Dry the chicken, season with salt and pepper. Oven to 400°F.
Cast iron over medium-high for 3 minutes. Add oil and let it shimmer. Skin-side down, 7 minutes — the skin should build up to a rich golden-brown that feels firm and rigid under the tongs rather than soft and yielding. Flip, 2 minutes on the flesh side, then flesh-side down in the pan, and brush the glaze generously over the entire skin surface. Thick, covering every part, right into the edges. Flip back to skin-side up and the whole pan slides into the 400°F oven.
Eighteen to 20 minutes in, pull the pan and brush another full coat of glaze over the skin. Back in for 5 to 8 more minutes — the glaze on top will have gone from shiny and wet-looking to lacquered and slightly caramelized at the edges, the honey darkened to a deep amber-brown. Internal at 165°F.
Rest 5 minutes. Whatever glaze is left in the bowl, warm it slightly and serve alongside as a sauce.
Nutritional Information (Per Serving)
| Nutrient | Amount per Serving |
|---|---|
| Calories | 445 |
| Carbohydrates | 11g |
| Protein | 36g |
| Fat | 28g |
| Fiber | 0.5g |
| Sodium | 660mg |
Bacon-Wrapped Chicken Thighs with Maple Drizzle
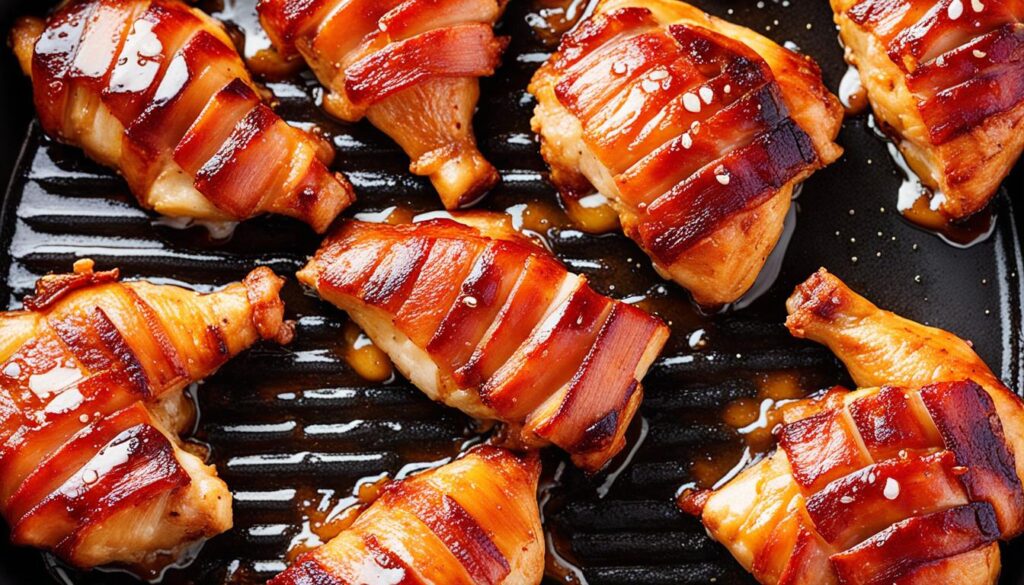
Boneless, skinless thighs for this one — the bacon provides all the fat and the exterior crust, so the skin would be redundant and would create a strange texture problem under the bacon. Each thigh gets wrapped snugly in two slices of thick-cut bacon and seared on every side in the cast iron before finishing in the oven. The outside gets smoky and crispy. The inside stays incredibly juicy.
Thick-cut bacon is not optional. Thin bacon burns before the chicken is cooked through — they’re simply not on the same schedule. Thick-cut bacon and boneless chicken thighs reach their respective done points at roughly the same time. And real maple syrup for the drizzle. Not pancake syrup. The difference is obvious.
Ingredients
- 4 boneless, skinless chicken thighs (about 5-6 ounces each)
- 1 teaspoon kosher salt
- 3/4 teaspoon black pepper
- 1/2 teaspoon garlic powder
- 1/2 teaspoon smoked paprika
- 8 slices thick-cut bacon
- 1 tablespoon avocado oil
- For the maple drizzle:
- 3 tablespoons pure maple syrup
- 1 tablespoon whole grain mustard
- 1 teaspoon apple cider vinegar
- Pinch of cayenne
Instructions
Season the thighs on all sides with salt, pepper, garlic powder, and smoked paprika. Fold each thigh so it’s as compact and even-thickness as possible — a thigh that’s thicker on one end and thin on the other will cook unevenly wrapped in bacon. Wrap each one with 2 slices of thick-cut bacon, overlapping the slices slightly and tucking both ends firmly underneath. Secure with toothpicks if the ends won’t stay. The wrapping should feel snug but not constricting — bacon shrinks as it cooks and too-tight wrapping squeezes the chicken.
Whisk together maple syrup, mustard, apple cider vinegar, and cayenne. Set aside.
Oven to 375°F. Cast iron over medium — not medium-high — because bacon needs lower heat to render properly without burning. A small splash of avocado oil in the pan, though the bacon will produce a significant amount of its own fat almost immediately.
Wrapped thighs seam-side down. Four minutes — the bacon against the pan goes from raw and pale to golden-brown and starting to crisp at the edges, and you can hear it rendering. Rotate to the next side. Four minutes. Keep rotating every 4 minutes until all exterior surfaces have been in contact with the hot pan and look uniformly golden-brown — 12 to 15 minutes total. By the end the kitchen smells heavily of rendered bacon and the pieces feel firmer to the touch.
Into the 375°F oven for 15 to 18 minutes until 165°F internal. Five minutes from the end, brush the maple glaze over each piece. Back in the oven — the glaze goes shiny and slightly caramelized on the bacon surface, the maple and mustard cooking into the fat.
Rest 5 minutes, remove toothpicks, drizzle remaining glaze over the top at the table.
Nutritional Information (Per Serving)
| Nutrient | Amount per Serving |
|---|---|
| Calories | 530 |
| Carbohydrates | 12g |
| Protein | 40g |
| Fat | 34g |
| Fiber | 0g |
| Sodium | 820mg |
Spicy Cajun Cast Iron Skillet Chicken Thigh Recipes
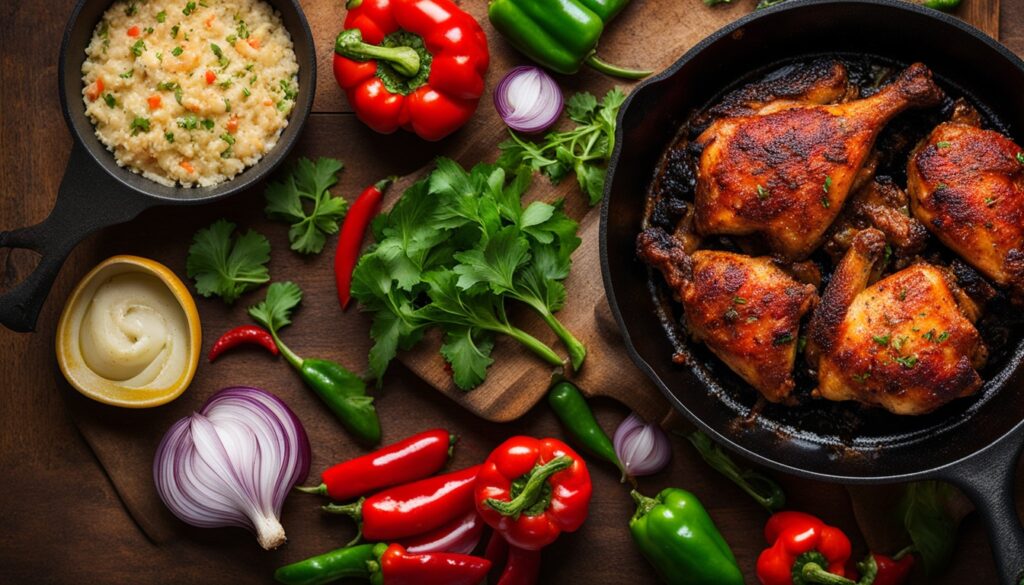
The homemade Cajun blend is the whole recipe, essentially. Mix it right — smoked paprika, cayenne, white pepper, oregano, thyme, garlic powder — and what forms on that cast iron-seared skin is a crust that’s deeply smoky, boldly spiced, and complex in a way that commercial Cajun blends rarely are. Commercial blends tend to be heavily salted and flat. This takes 3 minutes to mix and tastes noticeably better.
Ingredients
- 4 bone-in, skin-on chicken thighs (about 6-7 ounces each)
- 1 tablespoon avocado oil
- Cajun spice blend:
- 1 tablespoon smoked paprika
- 1 teaspoon garlic powder
- 1 teaspoon onion powder
- 1 teaspoon dried oregano
- 1 teaspoon dried thyme
- 3/4 teaspoon kosher salt
- 1/2 teaspoon black pepper
- 1/2 teaspoon cayenne (or 1 teaspoon for serious heat)
- 1/4 teaspoon white pepper
- For serving:
- 1 cup long-grain white rice, cooked
- 2 green onions, sliced
- 1 lemon, cut into wedges
Instructions
All the spice blend ingredients into a small bowl and stir together. Dry the chicken thoroughly — every surface, pressing firmly with paper towels. Press the spice blend into the skin on all sides, working it into the edges and under the skin where possible. No pale patches. The chicken should look uniformly reddish-orange, almost vivid.
Fifteen to 20 minutes at room temperature. Oven to 400°F.
Cast iron over medium-high, 3 minutes. Oil in and shimmering. Chicken skin-side down — the spices bloom the instant they contact the hot fat and the smell is immediate and extraordinary. Smoky, peppery, savory. Eight minutes without touching it. The crust builds slowly and the color at the edges shifts from orange-red toward a burnished burgundy-red as the crust deepens and the fat fully renders out. When the skin releases cleanly and that deep color looks uniform rather than just at the edges — flip. Two to 3 minutes on the flesh side.
Whole skillet skin-side up into the 400°F oven for 20 to 22 minutes. The crust deepens further in the oven — the thickest parts go almost mahogany-burgundy, with visible crisping at the very edge of the skin where it meets the pan.
Internal at 165°F, rest 5 minutes, serve over rice. Green onions scattered on top, lemon wedges alongside. Squeeze the lemon over everything before eating — the acid lifts the spiced crust and brightens the whole plate in a way that matters.
Nutritional Information (Per Serving)
| Nutrient | Amount per Serving |
|---|---|
| Calories | 468 |
| Carbohydrates | 28g |
| Protein | 38g |
| Fat | 22g |
| Fiber | 1g |
| Sodium | 580mg |
Creamy Spinach and Artichoke Stuffed Chicken Thighs
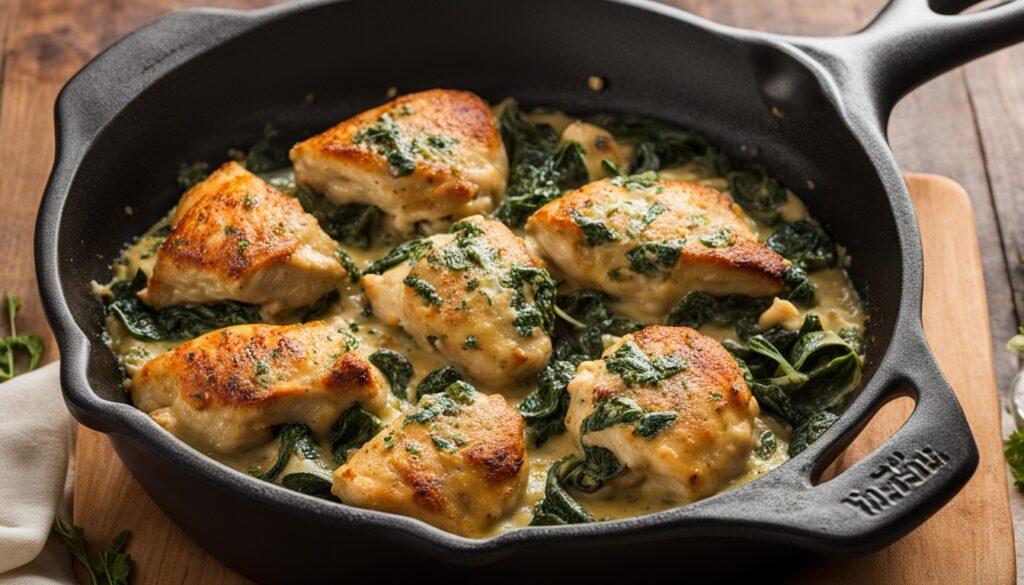
More work than anything else on this list. Worth it by a significant margin. Boneless thighs pounded flat, stuffed with a cream cheese and spinach-artichoke filling, rolled tightly and seared on all sides before finishing in the oven. When you slice through the finished roll and see that green-white spiral against the golden exterior — it looks like a cooking competition and tastes like it too.
The filling is spinach-artichoke dip, essentially. That’s not a shortcut description, it’s literally what it is, and the flavors work here for the exact same reason they work as a party appetizer.
Ingredients
- 4 boneless, skinless chicken thighs (about 5-6 ounces each), pounded to 1/4-inch thickness
- 1 teaspoon kosher salt
- 3/4 teaspoon black pepper
- 1 tablespoon avocado oil
- For the stuffing:
- 4 ounces cream cheese, softened
- 1/2 cup frozen spinach, thawed and squeezed bone dry
- 1/2 cup artichoke hearts (canned or jarred), drained and roughly chopped
- 1/3 cup shredded mozzarella
- 2 tablespoons grated Parmesan
- 2 cloves garlic, minced
- 1/4 teaspoon red pepper flakes
- 1/4 teaspoon kosher salt
Instructions
The spinach first. Thaw it, then wring it out inside a clean kitchen towel — really wring it, twisting hard until almost nothing drips out when you squeeze. The spinach should feel nearly dry to the touch. Wet spinach makes the filling loose enough to leak out through the chicken as it cooks and the whole roll falls apart. This step takes 2 minutes and it’s the difference between a clean roll and a mess.
Stir the cream cheese until smooth, then work in the squeezed spinach, chopped artichoke hearts, mozzarella, Parmesan, garlic, red pepper flakes, and salt. The filling should look thick and hold its shape when scooped on a spoon — soft but not runny, cohesive without being stiff. If it looks wet or loose, the spinach needs more wringing.
Pound each thigh between sheets of plastic wrap to about 1/4-inch thickness. Season both sides with salt and pepper. Divide the filling evenly, spreading it across the center of each piece and leaving a 1/2-inch border on all sides. Roll each thigh over the filling and tuck the ends under as you go, then secure with 2 or 3 toothpicks. A compact, firm roll is what you’re after. If filling pushes out the sides while rolling, remove a spoonful — it’s overfilled.
Oven to 375°F. Cast iron over medium-high, 3 minutes. Add oil. Rolls go in seam-side down and sear for 3 minutes until that side looks golden and firm. Rotate to the next surface — 2 minutes each side, working around the entire exterior of each roll until it’s uniformly golden-brown. About 10 minutes total and the outside smells like searing chicken while the filling inside has just started to warm up and become fragrant.
Eighteen to 20 minutes in the oven, 165°F internal. The mozzarella will have fully melted — you may see small amounts of filling at the ends, which is fine. Rest 5 minutes, remove toothpicks, and slice each roll crosswise. The cut surface shows the spiral of green filling inside — that’s the payoff for the extra effort.
Nutritional Information (Per Serving)
| Nutrient | Amount per Serving |
|---|---|
| Calories | 480 |
| Carbohydrates | 5g |
| Protein | 42g |
| Fat | 32g |
| Fiber | 1.5g |
| Sodium | 720mg |
One-Pan Chicken Thigh and Root Vegetable Medley
Bone-in thighs sitting on top of root vegetables in one cast iron skillet going into a 425°F oven. As everything cooks, the chicken fat renders and drips down through the vegetables — not quite basting them in the traditional sense, but close enough that the effect is real and the vegetables taste noticeably better for it.
The vegetables listed here are a starting point, not a strict requirement. Turnips, sweet potatoes, beets, celeriac, fennel — any of them work with this method. The only thing that matters is cutting them to a similar size so they finish cooking at the same time.
For a lighter one-pan option on a seafood night, the shrimp and dumpling stir-fry uses a similar single-skillet approach.
Ingredients
- 4 bone-in, skin-on chicken thighs (about 6-7 ounces each)
- 1-1/2 teaspoons kosher salt
- 1 teaspoon black pepper
- 1 teaspoon garlic powder
- 1 teaspoon dried rosemary
- 2 tablespoons olive oil, divided
- 2 medium carrots, peeled and cut into 1-inch pieces
- 2 medium parsnips, peeled and cut into 1-inch pieces
- 1 pound baby potatoes, halved
- 1 medium red onion, cut into wedges
- 4 cloves garlic, smashed
- 1/2 teaspoon dried thyme
- 2 tablespoons fresh parsley, chopped
- 1 tablespoon balsamic vinegar
Instructions
Oven to 425°F — higher than most recipes in this list because root vegetables need genuine dry heat to caramelize. Lower temperatures and they steam and go mushy rather than developing any color or sweetness.
Dry the chicken, mix salt with pepper and garlic powder and rosemary, press the seasoning all over the thighs. Set aside.
Carrots, parsnips, potatoes, red onion wedges, and smashed garlic into a bowl with 1-1/2 tablespoons of olive oil, thyme, and a pinch of salt and pepper. Toss until everything looks glossy and evenly coated.
Cast iron over medium-high, 3 minutes. Remaining 1/2 tablespoon of olive oil in the pan. Chicken skin-side down for 6 to 7 minutes — golden-brown, though not as deep as the stovetop-only recipes because the 425°F oven is going to push the color further. Flip, 2 minutes on the flesh side, then the thighs come out to a plate temporarily.
The vegetables go directly into the hot pan with all that rendered chicken fat. They hit the fat and sizzle immediately — within a minute there’s already slight caramelization beginning on the cut sides of the potatoes. Arrange the seared chicken on top of the vegetables skin-side up. That positioning matters: skin above the vegetables means it stays dry and continues crisping in the oven heat, while the rendered fat drips down and bastes everything underneath.
Thirty to 35 minutes in the 425°F oven. The chicken at 165°F, the potatoes golden-brown on their cut sides, the onion wedges softened and charred slightly at the tips, the parsnip and carrot edges with real color on them. Rest 5 minutes, then balsamic drizzled over everything and parsley scattered on top. Serve directly from the pan.
Nutritional Information (Per Serving)
| Nutrient | Amount per Serving |
|---|---|
| Calories | 512 |
| Carbohydrates | 36g |
| Protein | 37g |
| Fat | 24g |
| Fiber | 5g |
| Sodium | 640mg |
Harissa Butter Chicken Thighs
Harissa — the North African chili paste — mixed with softened butter and used in two ways: packed under the skin before cooking, and brushed over the top in the final minutes of oven time. The under-skin application means the butter melts directly into the meat as it cooks, flavoring the thigh from the inside out rather than just coating the surface. The finish brush caramelizes on the skin. Both matter, and neither is particularly hard.
Rose harissa is milder and slightly floral. Regular harissa has more heat. Both work here — pick based on how much spice you want at the table. Most grocery stores carry at least one version now, usually in the international aisle.
Ingredients
- 4 bone-in, skin-on chicken thighs (about 6-7 ounces each)
- 1 teaspoon kosher salt
- 3/4 teaspoon black pepper
- 1 tablespoon avocado oil
- For the harissa butter:
- 4 tablespoons unsalted butter, softened
- 3 tablespoons harissa paste
- 3 cloves garlic, minced
- 1 teaspoon lemon zest
- 1/2 teaspoon ground cumin
- 1/4 teaspoon smoked paprika
- For serving:
- 1/2 cup plain Greek yogurt
- 1 tablespoon fresh lemon juice
- 2 tablespoons fresh cilantro or flat-leaf parsley, chopped
- Lemon wedges
Instructions
Softened butter, harissa paste, minced garlic, lemon zest, cumin, and smoked paprika — mix everything together until combined. It’ll look orange-red and smell intensely of chili, earthy spice, and raw garlic all at once. That’s quite a lot going on in a small bowl. Divide it roughly in half.
Dry the chicken thighs. Slide your fingers under the skin on each thigh to loosen it without tearing — work gently from the edge inward, creating a pocket between the skin and the meat. Push half a tablespoon of harissa butter into that pocket on each thigh and spread it as evenly as possible across the meat beneath. Press the skin back down flat so the butter stays in place. Season the outside of each thigh with salt and pepper.
Fifteen minutes at room temperature. Oven to 400°F.
Cast iron over medium-high for 3 minutes. Oil in, shimmer, then the chicken skin-side down. As the skin heats up, the harissa butter underneath starts rendering into the fat in the pan — you can see the color underneath the skin shifting to a deeper reddish-orange as it melts. Seven to 8 minutes until the skin looks deeply golden with a reddish cast and lifts cleanly from the pan. Flip, 2 to 3 minutes on the flesh side.
Skillet into the 400°F oven for 20 to 22 minutes. In the last 5 minutes, pull it out and brush the remaining harissa butter over the skin surface — it melts and sizzles on the hot skin and the color deepens to a rich amber-red almost immediately.
While the chicken rests, stir the Greek yogurt and lemon juice together. The lemon yogurt is not decoration — harissa butter is rich and the cool, acidic yogurt cuts through that richness in a way nothing else quite does. Serve the chicken with a spoonful of yogurt alongside, cilantro or parsley over the top, and lemon wedges for squeezing.
Nutritional Information (Per Serving)
| Nutrient | Amount per Serving |
|---|---|
| Calories | 498 |
| Carbohydrates | 5g |
| Protein | 38g |
| Fat | 36g |
| Fiber | 1g |
| Sodium | 650mg |