Yes, you can season a cast iron skillet in an air fryer—it’s faster than using your oven (takes about 35 minutes per coat versus an hour in your oven) and keeps your kitchen cooler.
Here’s the thing though. Your air fryer needs to hit at least 400°F. And your skillet? It’s gotta fit inside with room for air to circulate.
Not all cast iron works for this method. We’re talking 8-inch skillets max, maybe 10-inch if you’ve got one of those massive air fryer ovens. Anything bigger won’t fit or won’t season evenly.
But when it works? It really works.
Table of Contents
- 1 Why Season a Cast Iron Skillet in an Air Fryer
- 2 What You Need to Season Cast Iron in an Air Fryer
- 3 Preparing Your Cast Iron Skillet for Air Fryer Seasoning
- 4 Step-by-Step Guide: How to Season a Cast Iron Skillet in an Air Fryer
- 5 Troubleshooting Common Air Fryer Seasoning Issues
- 6 Air Fryer vs. Traditional Oven Seasoning Methods
- 7 Maintaining Your Air Fryer-Seasoned Cast Iron Skillet
- 8 Cooking with Your Newly Seasoned Cast Iron Skillet
- 9 Advanced Tips for Seasoning Cast Iron Skillets in Air Fryers
Why Season a Cast Iron Skillet in an Air Fryer
Seasoning cast iron in an air fryer gives you precise temperature control, uses less energy than your oven, and won’t heat up your entire kitchen—perfect for summer or small spaces.
The Benefits of Air Fryer Seasoning
Your air fryer maintains consistent temps. No hot spots, no temperature swings when you open the door to check (though you shouldn’t be doing that anyway).
Energy efficiency. Running an air fryer for 40 minutes beats heating your entire oven for an hour. Your electric bill will thank you.
Kitchen stays cool. Ever seasoned cast iron in July? With a full oven running at 450°F for hours? Miserable.
Faster preheating too—most air fryers hit temp in 3-5 minutes versus 10-15 for a standard oven.
And here’s what sold me: it’s perfect for maintenance seasoning. Quick touch-ups without committing to the whole oven production.
When Air Fryer Seasoning Makes Sense

Got a small skillet? 6, 7, or 8-inch pans are ideal candidates.
Living in an apartment with a tiny oven (or maybe just a hot plate situation)? This method’s your friend.
Touch-ups and maintenance work best here. That spot where your spatula scraped off some seasoning? Air fryer handles it.
Quick re-seasoning sessions. When you don’t want to block your oven for half a day.
New to cast iron? Start here. Less intimidating than the traditional method with all its rules and timing.
Limitations to Consider Before You Start
Size kills this method for most people.
Your 12-inch workhorse skillet? Not happening. Even if it technically fits, you won’t get proper air circulation. The seasoning’ll come out blotchy and uneven.
You might need 4-6 coats instead of the 3-4 you’d do in an oven. Each coat’s thinner because of how air fryers circulate heat.
And forget about seasoning multiple pieces at once. One skillet per session. Period.
What You Need to Season Cast Iron in an Air Fryer
You’ll need high-heat cooking oil (grapeseed or flaxseed work best), paper towels, and an air fryer that reaches 400°F—plus your cast iron skillet and about 3-4 hours of total time.
Choosing the Right Oil for Seasoning Your Skillet
Flaxseed oil creates the hardest finish. It polymerizes into something close to enamel when done right. But it’s pricey and can flake if you’re not careful with your technique.

Grapeseed’s my go-to. Smoke point around 420°F, forms durable layers, won’t break the bank. It’s sneaky good for this.
Canola works fine. Not fancy, but it gets the job done. Smoke point’s 400°F—right at the edge of what we need.
Some people swear by Crisco. Old-school approach. Makes sense—that’s what grandma used and her pans lasted 50 years.
Avocado oil handles heat like a champ (520°F smoke point) but costs more than it’s worth for seasoning. Save it for cooking.
Skip olive oil completely. Too low a smoke point (325-375°F). You’ll just make sticky, gummy residue that never properly hardens.
And butter? Come on. Wrong tool for the job.
| Oil Type | Smoke Point | Best For | Cost |
|---|---|---|---|
| Flaxseed | 225°F | Hard finish (tricky) | $$$ |
| Grapeseed | 420°F | All-around winner | $$ |
| Canola | 400°F | Budget option | $ |
| Avocado | 520°F | Overkill for seasoning | $$$ |
Essential Tools and Materials
Here’s your shopping list:
- Paper towels (you’ll use a whole roll, basically)
- Dish soap and a stiff brush for the first clean
- Heat-resistant gloves—don’t burn yourself
- Your chosen oil
- Aluminum foil if you’re worried about drips (optional, honestly)
That’s it. Don’t overthink this.
Verifying Your Air Fryer Can Season Cast Iron
Check your air fryer’s max temp. If it only goes to 350°F or 375°F, this method won’t work properly. You need 400°F minimum.
Measure your air fryer basket. Then measure your skillet—including the handle. Add an inch of clearance all around.

Air circulation matters. If your skillet’s crammed in there touching the sides, the seasoning won’t cure evenly.
Test with an oven thermometer if you’re paranoid about accuracy (not a bad idea). Some air fryers run 25°F hotter or cooler than the display shows.
Preparing Your Cast Iron Skillet for Air Fryer Seasoning
Strip your cast iron down to bare metal by scrubbing with hot soapy water, removing all rust and old flaking seasoning, then dry it completely—any moisture left behind will ruin your seasoning before you start.
Cleaning a New Cast Iron Skillet
New skillets come coated in protective wax or oil from the factory. Feels slick, looks weird. Gotta go.
Hot water. Lots of dish soap. Scrub hard with a stiff brush or the rough side of a sponge.
You’re trying to see bare gray iron. Keep scrubbing until the water runs clear and nothing slippery remains on the surface.
Rinse thoroughly. Soap residue will interfere with oil bonding to the metal.
Dry it immediately. And I mean immediately—bare cast iron rusts in minutes if you leave it wet.
Restoring an Old or Rusty Cast Iron Pan
Rusty skillet? First, how bad is it?
Light surface rust (orangish dust that wipes off): scrub with steel wool and kosher salt. Takes about 5 minutes of elbow grease.

Heavy rust (thick, crusty, pitted): you need white vinegar. Mix 50/50 with water, soak for 30 minutes to 2 hours. Check every 30 minutes—don’t leave it longer than needed or the vinegar eats the iron itself.
After de-rusting, scrub thoroughly with soap and water again.
Old flaking seasoning? If it’s coming off in chunks, remove it all. Use a metal spatula or scraper to get under the edges, then steel wool to smooth everything down to bare metal.
When to keep existing seasoning: If it’s smooth, even, and stuck tight, you can build on top of it. Just clean and add new layers.
The Critical Drying Step
Moisture’s the enemy. Period.
Towel dry first—get every visible drop.
Then put the skillet on your stovetop over medium-low heat for 5-10 minutes. You’ll see wisps of steam coming off. Keep it there until the steam stops completely.
Every surface needs this treatment. Inside, outside, handle, underside. All of it.
Touch it. Feels bone dry and slightly warm? Perfect. That’s your starting point.
Step-by-Step Guide: How to Season a Cast Iron Skillet in an Air Fryer
Apply a thin layer of oil to every surface of your cast iron skillet, wipe away all excess until it looks almost dry, place it upside-down in your air fryer at 400°F for 35-40 minutes, let it cool completely, then repeat this process 4-6 times for a proper non-stick finish.
Step 1: Apply a Thin Layer of Oil
Pour about a tablespoon of oil into your skillet. Maybe less—you don’t need much.
Use a paper towel to spread it everywhere. And I mean everywhere:
- Inside cooking surface (obviously)
- Exterior bottom and sides
- Handle (yes, really)
- That little helper handle if you’ve got one
- The pouring spouts
Get into the corners where the sides meet the bottom. Those spots trap excess oil if you’re not careful.
Step 2: Wipe Away Excess Oil
Now here’s the part people mess up.
Take a clean, dry paper towel and wipe that skillet like you’re trying to remove all the oil you just applied. Buff it hard.
The pan should look almost dry. Matte finish, not shiny. If light reflects off the surface, you’ve got too much oil.
Think of it like this: you want a molecular-thin layer. Oil you can see is oil that’ll turn sticky and gummy instead of creating hard seasoning.
Check for drips pooling at the bottom or in the handle junction. Wipe them out.
This step makes or breaks your results. Don’t skip it. Don’t half-do it.
Step 3: Set Up Your Air Fryer for Seasoning
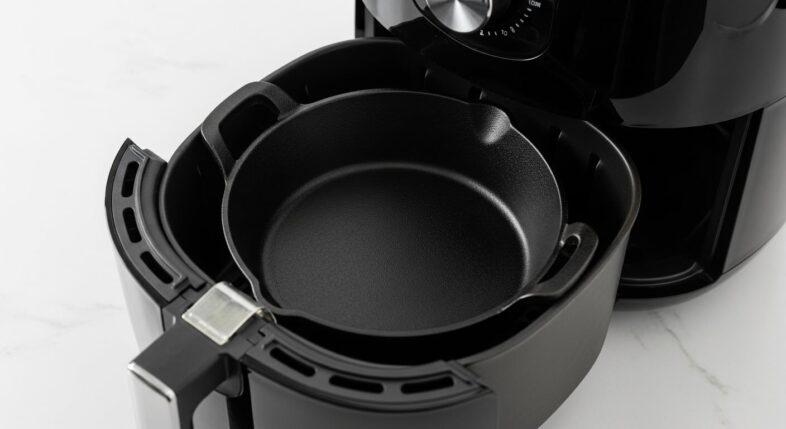
Place your skillet upside-down in the air fryer basket.
Why upside-down? Gravity pulls excess oil away from the cooking surface instead of letting it pool in the pan. Basic physics working in your favor.
Make sure the handle’s not blocking the air circulation vents. Tilt it if you need to.
Leave space around the skillet. Hot air needs to flow around all sides for even seasoning.
Optional: put foil in the bottom tray to catch drips. I don’t usually bother, but some oils drip more than others (looking at you, vegetable oil).
Step 4: Heat the Skillet in the Air Fryer
Set temperature to 400°F. If your air fryer maxes out at 400°F, use that. If it goes higher, stick with 400°F anyway—hotter doesn’t mean better here.
Timer: 35-40 minutes.
Hit start. Walk away.
Don’t open it to check. Don’t peek. You’ll drop the temperature and extend the process. The air fryer’s doing its thing—let it work.
You might smell smoke. That’s normal. It’s the oil polymerizing—turning into that hard, glassy coating you want. Crack a window if it bugs you.
Step 5: Let the Skillet Cool Completely
When the timer goes off, turn off the air fryer. Leave the skillet inside.
Seriously. Don’t touch it.
It needs to cool slowly—30 to 60 minutes minimum. Rapid temperature changes can cause the fresh seasoning to crack or separate from the metal.
Grab a coffee. Watch TV. Do something else.
The skillet’s still curing during the cooldown. This isn’t wasted time.
Step 6: Repeat the Seasoning Process
One coat? That’s a start. Not enough.
You need 4-6 coats minimum for proper seasoning. Some people go up to 10 (seems excessive, but you do you).
For each coat:
- Apply thin oil layer
- Wipe until almost dry
- Heat at 400°F for 35-40 minutes
- Cool completely
Total time commitment: About 3-4 hours for 5 coats when you factor in cooling periods.
Yeah, it’s tedious. But you’re building something that’ll last years if you maintain it right.
After 3-4 coats, you’ll notice the pan’s getting darker. Kind of bronze or brown instead of gray. Good sign.
By coat 5-6, it should look almost black with a subtle sheen. Touch the surface—feels smooth and slightly slick? You’re done.
Troubleshooting Common Air Fryer Seasoning Issues
Sticky seasoning means you used too much oil—fix it by heating the pan again at 400°F to fully polymerize the excess, or wipe it down and start that layer over.
Sticky or Tacky Seasoning After Cooling
Your skillet feels sticky or tacky instead of smooth and dry? Too much oil. Every single time.
Here’s what happened: excess oil didn’t fully polymerize. Instead of forming a hard layer, it created a gummy polymer that never fully cures.
The fix: Put it back in the air fryer at 400°F for another 30-40 minutes. Sometimes the extra heat finishes the job.
If that doesn’t work, wipe the sticky surface with a paper towel dampened with fresh oil, buff it nearly dry, and re-season that layer.
Prevent it next time by wiping more aggressively during step 2. When in doubt, wipe more. Can’t use too little oil for seasoning—but you can definitely use too much.
Uneven or Blotchy Seasoning Coverage
Some spots dark brown, others still grayish? Or maybe one side’s perfect and the other looks barely seasoned?
Air circulation problem. Your skillet’s positioned wrong or your air fryer has hot spots (some models do).
Rotate the pan 180 degrees between coats. If the handle was pointing left for coat 1, point it right for coat 2.
Don’t freak out about slight unevenness. It’ll even out over time with cooking and additional seasoning layers.
If it’s really bad (like one whole side barely got seasoned), reposition and add extra coats to the light areas.
Flaking or Peeling Seasoning
Seasoning coming off in flakes? Something went wrong with the foundation.
Common causes:
- Skillet wasn’t completely clean before you started (oil on top of factory coating = bad bonding)
- Moisture was present during oiling
- Temperature fluctuated too much
- You cooled it too quickly
If you’re getting flakes, strip it back down and start over. I know, I know. But building more layers on top of flaking seasoning just makes a bigger mess later.
Use steel wool to remove the flaking bits, clean thoroughly, dry completely, and begin again.
Smoke and Odors During Air Fryer Seasoning
Some smoke’s normal—the oil’s reaching its smoke point and polymerizing. That’s literally the process.
Excessive smoke (like, can’t-see-across-the-kitchen smoke)? You used way too much oil or your air fryer’s running hotter than indicated.
Reduce the amount of oil for the next coat. Buff more aggressively. The pan should look practically oil-free before it goes in.
Open windows. Turn on your range hood even though you’re not using the stove. The smell sticks to fabrics if you’re not careful.
Flaxseed oil smokes more than others—another reason I prefer grapeseed.
Air Fryer vs. Traditional Oven Seasoning Methods
Air fryers season cast iron faster (35-40 minutes vs. 60 minutes per coat) and use less energy, but ovens can handle bigger skillets and multiple pans simultaneously—choose based on your cookware size and how many pieces you’re seasoning.
Temperature and Time Comparisons
Traditional oven method: 450-500°F for 60 minutes per coat.
Air fryer method: 400°F for 35-40 minutes per coat.
You’re saving 20-25 minutes per coat. Over 5 coats, that’s nearly two hours saved.
But (there’s always a but)—oven seasoning often needs fewer total coats because the higher temp creates harder polymerization.
Energy-wise? Your air fryer draws 1200-1500 watts. Your oven pulls 2500-4000 watts. Do the math.
| Method | Temp | Time Per Coat | Energy Use | Coats Needed |
|---|---|---|---|---|
| Oven | 450-500°F | 60 min | High | 3-4 |
| Air Fryer | 400°F | 35-40 min | Low | 4-6 |
Quality of Seasoning Results
Here’s the honest truth: oven seasoning at 500°F produces slightly harder, more durable layers.
The higher heat creates better polymerization. Chemistry doesn’t lie.
But. (And this is important.)
For everyday cooking and normal use, air fryer seasoning holds up fine. You won’t notice a practical difference unless you’re running a restaurant kitchen or treating your pans roughly.
Appearance-wise, both methods produce that classic dark, slightly glossy finish. Air fryer seasoning might take an extra coat or two to get there.
Long-term? I’ve got skillets seasoned both ways. Can’t tell which is which by cooking performance after six months of use.
Practical Considerations for Your Kitchen
Got multiple cast iron pieces to season? Oven wins. You can fit 3-4 pans on different racks.
Air fryer’s strictly one-at-a-time.
Summer cooking? Air fryer all the way. Running your oven at 450°F for hours when it’s already 85°F outside is misery.
Small kitchen, limited counter space? Consider where you’ll put a hot air fryer for the cooldown periods. Ovens keep things contained.
Budget matters too. If you’re already paying for heat in winter, running the oven’s basically free. Summer A/C costs offset air fryer savings.
Maintaining Your Air Fryer-Seasoned Cast Iron Skillet
Wash your seasoned cast iron with hot water while it’s still warm, dry it immediately and completely, then rub a light coat of oil on the surface after every use—this maintains the seasoning between touch-up sessions.
Daily Cleaning Best Practices
Clean your skillet while it’s still warm (not screaming hot, just warm). Food comes off easier and you won’t forget to do it.
Hot water and a stiff brush handle most cleanup. Scrub firmly—you won’t damage good seasoning.
The soap debate: Modern dish soap won’t strip seasoning. The lye-based soaps from grandma’s era would, but those don’t exist anymore. Use soap if the pan’s greasy or you cooked something pungent.
Dry immediately with a towel. Then—this part’s crucial—put it on the stove over low heat for 2-3 minutes to evaporate any remaining moisture.
While it’s still slightly warm, rub a tiny amount of oil on the cooking surface with a paper towel. Like, barely any. This maintains the seasoning layer.
Don’t soak your cast iron. Ever. Not even for “just a few minutes.”
When to Re-Season Your Skillet
Your pan needs touch-up seasoning when:
- Food starts sticking (especially eggs)
- The surface looks dull or dry instead of slightly glossy
- You see gray patches where seasoning’s worn through
- Small rust spots appear (wipe them off with oil first, but then re-season)
Relax though. You don’t need to re-season after every use. That’s overkill.
Most well-used cast iron needs touch-ups every 6-12 months. Maybe sooner if you’re cooking acidic foods regularly (tomato sauce strips seasoning faster).
For touch-ups, 1-2 coats in the air fryer usually does it. No need for the full 5-6 coat treatment unless you really messed up.
Building Seasoning Through Regular Cooking
Every time you cook with oil, you’re seasoning your pan. For real.
Frying, sautéing, roasting—these all add microscopic layers to your existing finish.
Best foods for building seasoning:
- Bacon (fat city)
- Pan-fried chicken thighs
- Sautéed vegetables with butter or oil
- Cornbread (classic for a reason)
- Hash browns
Avoid cooking tomato sauce, chili, or other acidic stuff in the first month. They’ll strip your new seasoning before it has a chance to harden completely.
Cooking with Your Newly Seasoned Cast Iron Skillet
Start with fatty foods like bacon or sausage to strengthen new seasoning, avoid acidic dishes and eggs for the first few weeks, and always preheat your skillet thoroughly before adding ingredients—this builds the non-stick surface faster.
Breaking In Your Seasoning Layer
Your freshly-seasoned pan isn’t ready for eggs yet. Don’t care what YouTube says.
First few cooks should be greasy:
- Bacon (my go-to first cook every time)
- Sausage links or patties
- Pan-fried pork chops
- Grilled cheese sandwiches
These add fat layers and help the seasoning cure further through use.
After 5-6 cooks, try something less fatty. Chicken breast. Burgers. Stir-fry vegetables.
Wait at least 10-15 cooking sessions before attempting eggs. Eggs are the final boss of cast iron cooking—don’t fight that battle until your seasoning’s battle-tested.
Optimal Cooking Techniques for Cast Iron
Preheat properly. Can’t stress this enough.
Put your skillet on medium heat for 5 minutes before adding food. Test by flicking water on it—should sizzle and evaporate immediately.
Use enough fat. Cast iron’s not completely non-stick (even well-seasoned). A tablespoon of oil or butter prevents sticking and adds flavor.
Temperature control matters more than with other cookware. Cast iron holds heat intensely—you don’t need high heat for most cooking.
Medium heat handles probably 80% of your cooking tasks. High heat’s for searing steaks and that’s about it.
Let food release naturally. If it’s sticking, it’s not ready to flip. Give it another minute.
Foods That Strengthen Your Seasoning
Anything with fat makes your seasoning better:
Pan-frying fish in butter? Perfect. The fat bonds to existing seasoning and hardens with heat.
Roasting vegetables tossed in olive oil? Same deal. You’re seasoning while cooking.
Baking cornbread or biscuits (with butter or shortening in the batter)? Traditional for good reason—builds beautiful seasoning.
Even deep-frying works if your skillet’s big enough. All that hot oil does wonders for the finish.
Don’t fear cooking in your cast iron. The pan gets better with use, not worse. That’s the whole point.
Advanced Tips for Seasoning Cast Iron Skillets in Air Fryers
Layer different oils for better results—start with two coats of flaxseed for hardness, then finish with 3-4 coats of grapeseed for durability and easier maintenance.
Experimenting with Different Oil Combinations
Want the best of both worlds? Mix your oils strategically.
The hybrid approach:
- Coats 1-2: Flaxseed oil (hard base layer)
- Coats 3-6: Grapeseed oil (durable, less finicky)
Flaxseed creates an incredibly hard foundation but it’s temperamental. Easy to mess up if your technique’s not perfect.
Grapeseed’s more forgiving. Builds strong layers without the fuss.
Starting with flaxseed gives you that rock-hard base. Finishing with grapeseed gives you durability without the risk of flaking that pure flaxseed seasoning sometimes develops.
Some people swear by this method. Others think it’s unnecessary complication. Try it and see.
Seasoning Other Cast Iron Cookware in Your Air Fryer
Got a Dutch oven lid that fits? Season it the same way.
Small cast iron accessories work great:
- Mini skillets (those 5-inch ones)
- Corn stick pans (if they fit)
- Trivets and small griddles
Size restrictions still apply. If it doesn’t fit with clearance for air circulation, don’t force it.
I’ve seasoned grill presses in my air fryer. Worked perfectly—they’re flat and small enough to not block airflow.
Cast iron lid handles? Yep. Those too.
Adjusting for Different Air Fryer Models
Basket-style air fryers: tighter space, needs more attention to positioning. Rotate between coats.
Oven-style air fryers: basically toaster ovens. Give you more room, better for slightly larger skillets (up to 9-inch sometimes).
Hot spots happen. Test your air fryer with bread slices if you’re paranoid—see which areas brown faster.
If your model runs hot (some do), drop temp to 375°F and extend time to 45 minutes. Check after coat 1—if seasoning looks darker than coffee, your air fryer’s running above its stated temp.
If it runs cool, crank it to max and maybe add 10 minutes per coat.
Creating a Maintenance Seasoning Schedule
Don’t overthink this, but having a routine helps.
My approach:
- After each use: quick wipe with oil
- Monthly: visual inspection for wear spots
- Every 6 months: 1-2 touch-up coats in the air fryer if needed
- Annually: deep clean and full re-season if the pan’s looking rough
Mark it on your calendar if you’re the type who forgets this stuff. Or tie it to other routines—”first day of summer and winter, re-season cast iron.”
Some people go years without re-seasoning. If you cook with fat regularly and maintain it properly, that’s totally possible.
But life happens. Pans get neglected. Better to have a schedule than wait until things get bad.
Cast iron seasoned in an air fryer works. It’s not the traditional method, won’t work for big pans, and requires slightly more coats than oven seasoning. But it’s faster, cooler, cheaper to run, and produces results that’ll last years with proper care.
Start with a small skillet. Get your technique down. Then decide if it beats the oven method for your situation.