Table of Contents
- 1 Seasoning Cast Iron Skillets Over a Campfire
- 2 Why Season Cast Iron Skillets Over a Campfire
- 3 Understanding the Science of Seasoning Cast Iron Over Fire
- 4 Essential Materials and Preparation
- 5 Building and Managing Your Seasoning Campfire
- 6 Step-by-Step: How to Season Cast Iron Over a Campfire
- 7 Advanced Campfire Seasoning Techniques
- 8 Troubleshooting Campfire Cast Iron Seasoning
- 9 Comparing Campfire Seasoning to Other Methods
- 10 Safety Protocols for Campfire Cast Iron Seasoning
- 11 Specialty Campfire Seasoning Scenarios
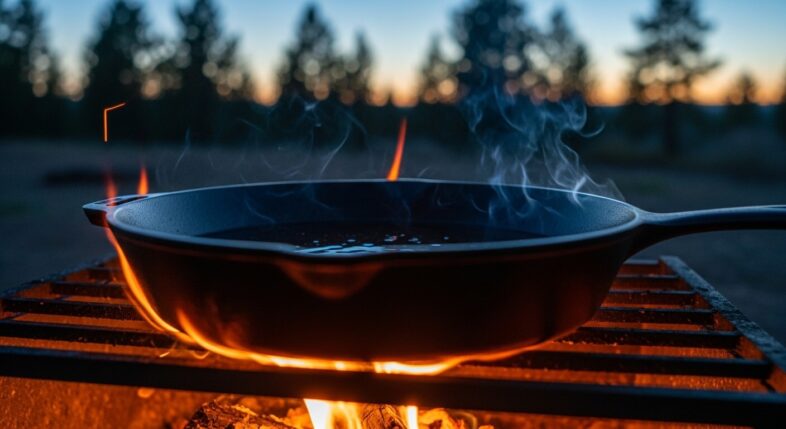
Seasoning Cast Iron Skillets Over a Campfire
You can season a cast iron skillet over a campfire by heating the pan over hot coals to 450-500°F, applying thin oil coats, and maintaining that temperature for 45-60 minutes per layer—repeating 4-6 times for complete seasoning.
No oven? No problem.
Maybe you’re camping for a week. Found a rusty skillet at a mountain estate sale. Living off-grid. Whatever the reason, you’re stuck with a campfire as your heat source.
Good news. It works.
The chemistry is identical to oven seasoning. Oil gets hot. Bonds to iron. Creates that black, slick coating. The heat source doesn’t care if it’s electric coils or burning oak.
What makes campfire seasoning different:
- Less temperature control (fire does what it wants)
- Takes longer (uneven heat, manual rotation)
- More hands-on (you’re managing everything)
- Requires patience you didn’t know you had
- Actually kind of satisfying once you get it right
When this guide matters:
- Extended camping trips where your pan needs help
- Off-grid living situations
- Teaching yourself traditional outdoor skills
- Emergency restoration in the field
- You just want to try it because why not
Not gonna lie—oven seasoning is easier. But campfire seasoning? It’s doable. And sometimes it’s your only option.
Why Season Cast Iron Skillets Over a Campfire
Benefits of Campfire Seasoning for Cast Iron
Campfire seasoning lets you restore and maintain cast iron cookware anywhere you can build a fire—no electricity, no kitchen, just wood and coals.
Freedom. That’s what this gives you.
Why people do this:
- Camping for days or weeks (pan degrades, needs maintenance)
- Cabins without power or gas
- Found cast iron while traveling (flea markets, estate sales in the middle of nowhere)
- Self-sufficiency mindset
- Traditional skills worth knowing

Plus there’s something cool about doing it the old way. Before electric ovens. Before temperature dials. Just fire and iron.
Practical advantages:
- Season while you’re already camping
- Use the fire you’re cooking on anyway
- No utility costs
- Works literally anywhere you can have a fire
- Multiple pans at once if you set it up right
Is it necessary? Usually not. Is it useful to know how? Yeah.
When Campfire Seasoning Is Your Best Option
Choose campfire seasoning when you’re outdoors for extended periods, living off-grid, or need to restore cast iron at remote locations without access to conventional cooking appliances.
Perfect scenarios:
Multi-week camping trips:
- Your seasoning takes a beating from outdoor cooking
- Touch-ups needed between meals
- Full restoration during downtime
Off-grid situations:
- Cabin with no electricity
- Homesteading setup
- Remote hunting or fishing camps
Field finds:
- Bought cast iron at rural market
- Don’t want to transport unseasoned (rust risk)
- Season it right there before packing
Emergency needs:
- Pan got damaged during trip
- Need it usable for remaining days
- No other options available
Teaching moments:
- Kids learning outdoor skills
- Traditional craft practice
- Building self-reliance

Sometimes it’s necessity. Sometimes it’s choice. Either way, you’re here.
Limitations and Challenges of Campfire Seasoning
Campfire seasoning is harder than oven seasoning because fires provide uneven heat, require constant attention, and lack precise temperature control—expect longer processing times and more hands-on management.
Let’s be real. This isn’t easy.
What you’re dealing with:
Temperature control? Forget it.
- Fire doesn’t have a dial
- Hot spots everywhere
- Wind affects everything
- Guessing temps by eye
Time investment? Brutal.
- 5-7 hours for 4-6 coats (minimum)
- Constant fire management
- Can’t just walk away
- Weather delays things further
Consistency? Good luck.
- Every fire is different
- Wind patterns change
- Coal beds shift
- Results vary pan to pan
Environmental challenges:
- Rain ruins everything
- Wind blows ash onto your oiled pan
- Cold weather makes maintaining heat harder
- Altitude affects fire behavior
But here’s the thing—people did this for hundreds of years. You can too. Just know what you’re getting into.
Understanding the Science of Seasoning Cast Iron Over Fire
How Polymerization Works with Open Flame
Polymerization over a campfire works identically to oven seasoning—oil heated beyond its smoke point (400°F+) breaks down and bonds to iron, creating hard, protective layers regardless of heat source.

The science doesn’t change. Just the method.
When oil hits 400-500°F, fat molecules break apart. Rearrange themselves. Bond to the iron surface. Bond to each other. You get polymerized oil—basically a plastic-like coating.
Fire provides that heat. Sometimes too much. Sometimes too little. But it provides it.
What fire gives you:
- Adequate temperature (wood fires hit 600-900°F easily)
- Dry heat (moisture evaporates)
- Direct contact with heat source (through coals)
- Long burn times (if managed right)
What makes it tricky:
- Uneven heat distribution
- Hot and cool spots on the same pan
- Temperature swings as fire evolves
- No thermostat to maintain consistency
The polymerization still happens. You just work harder to make it happen evenly.
Temperature Requirements for Campfire Seasoning
Cast iron needs to reach and maintain 450-500°F over campfire coals for proper seasoning—hotter than most cooking but well within what a good coal bed provides.
You’re aiming for that sweet spot. Not too hot. Not too cool.
Temperature targets:
- Minimum: 400°F (polymerization begins)
- Ideal: 450-475°F (best bonding)
- Maximum: 525°F (before you start burning off what you’re building)
Wood fires burn hot. Way hotter than you need. Direct flames hit 1000°F+. That’ll burn your seasoning off faster than you can apply it.

Coals are the answer. Hot coals sit around 450-550°F. Perfect range.
Without a thermometer, here’s how you estimate:
| Temperature | Visual Cue | What Happens |
|---|---|---|
| 350-400°F | Coals glowing orange | Too cool for seasoning |
| 450-500°F | Bright red-orange coals, oil smokes steadily | Perfect zone |
| 550°F+ | Yellow-white coals, oil smokes immediately | Too hot |
Hold your hand 6 inches above the coals. Can’t keep it there more than 2-3 seconds? You’re in range.
(Don’t touch the pan. Don’t be stupid.)
Differences Between Campfire and Oven Seasoning
Campfire seasoning produces similar results to oven seasoning but requires manual pan rotation, takes longer due to uneven heating, and demands constant fire management throughout the process.
Same destination. Different road.
Oven seasoning:
- Even heat all around (enclosed space)
- Set temp and forget it
- 60 minutes per coat, very predictable
- Total control
Campfire seasoning:
- Bottom gets most heat, sides get less
- Rotate every 10-15 minutes manually
- 60-90 minutes per coat (sometimes more)
- Control is an illusion
Results comparison:
After 6 coats from each method? Pretty similar. The campfire pan might have slightly less seasoning on the sides and handle. The cooking surface? Equally good if you did it right.
Durability is the same. The polymerized oil doesn’t care how it got polymerized.
Time reality check:
- Oven: 6 coats = 6-7 hours total
- Campfire: 6 coats = 8-10 hours total (includes fire management)
Worth it? Depends on your situation.
Essential Materials and Preparation
Choosing the Right Oil for Campfire Cast Iron Seasoning
Use high smoke point oils like grapeseed (420°F), canola (400°F), or vegetable oil (400-450°F) for campfire seasoning—avoid olive oil and butter which smoke too early and create sticky residue.
Oil selection matters even more over fire. Because temperature control is rough.
Best options for campfire:
- Grapeseed oil – Smoke point 420°F, thin consistency, durable results
- Canola oil – Smoke point 400°F, cheap, widely available
- Vegetable oil – Smoke point 400-450°F (blend dependent), works fine
- Flaxseed oil – Smoke point 225°F but polymerizes hard (controversial, can flake)
Skip these:
- Olive oil (325-375°F smoke point, too low)
- Butter (burns immediately)
- Coconut oil (350°F, wrong temp range)
- Whatever random oil you found in the cabin
Portability considerations:
- Small leak-proof bottle (4-8 oz for multiple coats)
- Plastic squirt bottle works
- Store in cool spot at camp (hot car = degraded oil)
- Bear country? Treat it like food storage
You’ll use about ½ teaspoon per coat. A 4 oz bottle does 15-20 coats easy.
Required Equipment and Tools
Bring heat-resistant gloves, long tongs, a metal grate or tripod, wire brush, lint-free cloths, and a small oil container—plus fire management tools like a poker and extra firewood.
Pack smart. You can’t run to the kitchen for forgotten items.
Must-have list:
- Heavy-duty gloves rated to 500°F+ (welding gloves work great)
- Long-handled tongs (for moving pan and handling cloths)
- Cooking grate or tripod (stable pan platform over fire)
- Wire brush or chain mail scrubber
- Lint-free rags or paper towels (bring extras)
- Small container for oil (separate from main bottle)
- Fire poker or long stick
Nice to have:
- Infrared thermometer (if you’re fancy)
- Extra cloths (you’ll drop some in the dirt)
- Small bowl for oil application
- Headlamp (if seasoning continues after dark)
Fire tools:
- Shovel for coal management
- Firewood (more than you think—plan for 5-7 hours)
- Kindling and fire starter
- Water bucket for safety
Don’t skimp on gloves. Cast iron over fire gets crazy hot. Second-degree burns aren’t fun at camp.
Preparing Your Cast Iron Skillet for Campfire Seasoning
Clean your cast iron thoroughly, strip old damaged seasoning if needed, dry completely over low fire heat, and inspect for cracks or warping before starting the campfire seasoning process.
Start with clean iron. Period.
New/unseasoned pan:
- Scrub with soap and water (yes, soap is fine)
- Remove any factory coating or wax
- Dry over low heat near fire
- Should look dull gray
Used pan needing re-season:
- Assess existing seasoning (good base? keep it. Flaky or sticky? strip it)
- Heat over fire and scrub with wire brush to remove loose seasoning
- Or do full lye strip at home before the trip (easier)
Rust removal at camp:
- Heat pan over moderate fire
- Scrub with wire brush while hot
- Use sand or ash as abrasive if desperate
- Keep scrubbing until you hit clean metal
- Dry immediately
Drying is critical:
- Put pan over low heat for 5 minutes
- Every drop of moisture must go
- Moisture under oil = weak seasoning
- You’ll see steam if it’s there
Inspect the pan. Cracks? Warping? Major damage? Might not be worth seasoning. But minor stuff? Send it.
Campfire Setup and Safety Preparation
Build your seasoning fire in an established fire ring, gather 2-3 hours of hardwood fuel, set up stable grating, and position safety equipment (water, extinguisher) within reach before beginning.
Fire setup makes or breaks this.
Location requirements:
- Established fire ring or clear dirt area (check local regulations)
- Away from overhanging branches
- Protected from wind (or build a windbreak)
- Flat ground for stability
- Space to work around fire safely
Fire structure:
- Start with small fire, burn down to coals
- Don’t rush this (takes 30-45 minutes)
- Build up good coal bed (3-4 inches deep)
- Keep firewood staged nearby
Safety setup:
- 5-gallon water bucket full
- Fire extinguisher if you have one
- Clear working area (no trip hazards)
- First aid kit accessible
- Tell someone your plan (if in backcountry)
Grate positioning:
- Stable (won’t tip when you move pan)
- Right height above coals (6-10 inches usually)
- Room to adjust if heat’s wrong
- Can add/remove coals underneath
Get this right first. Don’t try to season on a sketchy fire setup.
Building and Managing Your Seasoning Campfire
Creating the Ideal Campfire for Cast Iron Seasoning
Build a hardwood fire, let it burn down to a deep coal bed (3-4 inches), and maintain moderate flame with stable heat output—oak, maple, or hickory work best for long-lasting, consistent coals.
Not all fires are created equal.
Wood selection matters:
Hardwoods (use these):
- Oak, maple, hickory, ash
- Burn hot and long
- Create lasting coal beds
- Minimal sparking
Softwoods (avoid if possible):
- Pine, fir, spruce
- Burn fast and cool
- Poor coal development
- Excessive smoke and sparks
Fire building strategy:
- Start with kindling and small splits
- Build up to 4-6 inch diameter logs
- Let it burn aggressively for 30 minutes
- Stop adding wood, let it collapse into coals
- Rake coals into even bed
Size considerations:
- Too small: can’t maintain heat, dies out mid-coat
- Too large: wastes wood, hard to manage, dangerous
- Just right: moderate fire that burns to usable coals in 30-45 minutes
You want glowing red-orange coals. Not raging flames. Not gray ash.
Heat Zone Management Around the Fire
Create distinct heat zones by raking coals into concentrated areas for high heat (center) and spreading them thin for medium heat (edges)—giving you temperature options for different seasoning stages.
One fire. Multiple temperatures.
Zone setup:
Hot zone (center):
- Thick coal bed (4-5 inches)
- Tight concentration
- 475-550°F
- For main polymerization
Medium zone (inner ring):
- Moderate coal spread (2-3 inches)
- 400-450°F
- For warming pan, gentle heating
Cool zone (outer edge):
- Thin coals or none
- 200-300°F
- For oil application, cooling
Using the zones:
- Heat pan in medium zone initially
- Move to hot zone for smoking
- Return to medium for monitoring
- Cool zone for oil application between coats
Adjust by adding or removing coals under your grate. Simple but effective.
Fire management during seasoning:
- Refresh hot zone every 45-60 minutes
- Push fresh coals from fire perimeter to center
- Keep a small flame going at edge to create new coals
- Don’t let everything burn to ash
Think of it like zone cooking on a grill. Same concept.
Estimating Temperature Without Thermometers
Estimate campfire temperature using the hand test (2-3 seconds at 6 inches = 450-500°F), coal color (bright red-orange = ideal range), and oil smoke behavior (steady smoke within 30 seconds = proper heat).
No thermometer? No problem. People did this for centuries.
The hand test (be careful):
- Hold hand palm-down, 6 inches above coals
- Count seconds until unbearable
- 1-2 seconds = too hot (550°F+)
- 2-3 seconds = perfect (450-500°F)
- 4-5 seconds = too cool (350-400°F)
- 6+ seconds = way too cool
Don’t be a hero. Pull your hand away when it’s uncomfortable.
Visual coal indicators:
| Coal Appearance | Approximate Temp | Good for Seasoning? |
|---|---|---|
| Dark red, some black | 350-400°F | Too cool |
| Bright red-orange | 450-500°F | Perfect |
| Orange-yellow | 550-650°F | Too hot |
Oil smoke test:
- Apply tiny drop of oil to pan edge
- Should start smoking within 20-30 seconds
- Steady thin smoke = good
- Immediate thick smoke = too hot
- No smoke after 60 seconds = too cool
Water test (before you oil):
- Drop water on pan
- Immediate violent sizzle and evaporation = hot enough
- Slow bubble and steam = needs more heat
Combine these methods. Build your intuition.
Maintaining Consistent Heat During Seasoning
Keep campfire heat stable by adding 1-2 small logs every 30-45 minutes, raking new coals into your heat zone, and avoiding large wood additions that spike temperature or smother existing coals.
Consistency is the hardest part.
Fires evolve. Burn down. Change character. Your job is managing that evolution.
Fuel addition strategy:
- Small pieces only (2-3 inch diameter max)
- Add to perimeter, not center
- Let them burn down to coals before raking to center
- Never dump a big log on your coal bed
Timeline for a single coat:
- Minute 0-15: Initial heating (coals are fresh)
- Minute 15-30: Prime temperature (maintain these coals)
- Minute 30-45: Starting to cool (add small wood to perimeter)
- Minute 45-60: Fresh coals ready (rake them in)
What kills consistency:
- Adding wet or green wood (temperature crash)
- Big wood directly on coals (smothers heat)
- Wind picking up (blows heat away, cools coals faster)
- Running out of fuel (rookie mistake)
Emergency adjustments:
- Too hot: spread coals thinner, raise pan higher
- Too cool: concentrate coals, add more, lower pan
- Fire dying: have backup coals ready from perimeter fire
Plan ahead. Keep a small flame going at the fire’s edge specifically to create replacement coals.
Step-by-Step: How to Season Cast Iron Over a Campfire
Step 1: Building Your Campfire and Establishing Coals
Start your hardwood fire 45-60 minutes before seasoning, let it burn down to stable red-orange coals 3-4 inches deep, then rake them into an even bed under your grate.
First things first. Build the fire.
Lighting sequence:
- Kindling teepee with fire starter
- Small splits once kindling catches (5-10 minutes)
- Medium splits for heat buildup (15-20 minutes)
- Let it burn without adding more wood
- Watch it collapse into coals (15-20 minutes)
Don’t rush. I know you want to start seasoning. But crappy coals = crappy results.
Ready indicators:
- Flames mostly died down
- Coal bed is consistent depth
- Red-orange glow across the bed
- Hand test shows 450-500°F
- Stable (not rapidly changing)
Not ready:
- Still lots of active flame
- Coals are black or gray
- Uneven coal distribution
- Temperature fluctuating wildly
While waiting, prep your workspace. Lay out oil, cloths, tools. Get organized.
Step 2: Initial Heating and Pan Preparation
Place your clean, dry cast iron skillet over medium heat coals for 10-15 minutes until it’s uniformly hot and any residual moisture has evaporated—the pan should be too hot to touch and ready for oil.
Warm it up. Get it ready.
Heating process:
- Set pan on grate over medium zone
- Let it sit without touching (resist the urge)
- Watch for color change (slight darkening)
- Any water will steam off visibly
Temperature check:
- Water droplet test: drops should dance and evaporate in 2-3 seconds
- Visual: pan looks darker, slightly smoky
- Time: 10-15 minutes usually does it
Rotation during preheat:
- Rotate 90 degrees every 3-4 minutes
- Ensures even heating
- Bottom heats faster than sides over coals
- Handle stays cooler (good for moving it)
You’re not seasoning yet. Just prepping. Getting the pan uniformly hot. Bone dry.
Signs it’s ready:
- Uniform heat across surface
- No cold spots when hovering hand over it
- Looks slightly hazy from heat
- Been at temp for at least 10 minutes
Now you can start.
Step 3: First Oil Application Over the Fire
Remove the hot pan to your cool zone, immediately apply ½ teaspoon of oil using a cloth held in tongs, spread across all surfaces, then wipe aggressively until the pan looks almost dry.
Time to oil. Work fast—pan’s cooling.
Application technique:
- Move pan to cool zone (or off fire completely)
- Pour tiny amount of oil in center (½ teaspoon max)
- Fold cloth, grab with tongs
- Spread oil everywhere—cooking surface, sides, handle, bottom
- Switch to clean cloth
- Wipe like you’re trying to remove it all
How much oil:
- Way less than you think
- ¼ to ½ teaspoon for 10-12 inch skillet
- Should look nearly dry when done
- Shiny = too much
Common mistake:
Too much oil. Everyone does it first time. You’ll end up with sticky, gummy seasoning.
The pan should look like you barely oiled it. Almost the same as before. Maybe slightly darker.
All surfaces need coverage:
- Cooking surface (obviously)
- Sides (as much as you can)
- Handle (if you care about it being seasoned)
- Bottom (why not, it’s already oiled)
Work quickly. The longer the pan cools, the less effective your first heating will be.
Step 4: Heating to Polymerization Temperature
Move your oiled pan over the hot coal zone and maintain 450-500°F for 45-60 minutes—you’ll see smoke within the first 5-10 minutes which should continue steadily then gradually decrease as polymerization completes.
Now we cook it.
Positioning:
- Over hot zone (thick coal bed)
- 6-8 inches above coals (adjust based on heat)
- Stable (won’t tip or shift)
- Accessible for rotation
What happens:
- Minute 0-5: Oil heats up, starts getting slick
- Minute 5-10: First smoke appears (this is good)
- Minute 10-20: Steady smoking (polymerization happening)
- Minute 20-40: Smoke decreases (layer forming)
- Minute 40-60: Minimal smoke (nearly complete)
Smoke expectations:
- Should be visible but not thick
- Smells like burnt oil (kinda unpleasant)
- More smoke early, less smoke later
- Consistent throughout, not billowing
Temperature monitoring:
- Check coal color every 10-15 minutes
- Hand test if you’re unsure
- Add fuel to perimeter if coals are fading
- Adjust pan height if too hot or cool
Don’t walk away. This is active work. Stay with it.
Step 5: Monitoring and Rotating Your Pan
Rotate your cast iron skillet 180 degrees every 10-15 minutes during heating to compensate for uneven fire heat—the bottom and center heat fastest while edges and sides need rotation for complete coverage.
Fire doesn’t heat evenly. You compensate with rotation.
Rotation schedule:
- Every 10 minutes: 180-degree rotation
- Every 20 minutes: check overall progress
- Every 30 minutes: assess coal quality and adjust
Why rotation matters:
- Center of coal bed is hottest
- Edges get less heat
- One side often hotter than other (wind, coal distribution)
- Without rotation: dark center, light edges
How to rotate safely:
- Put on your heavy gloves
- Lift with both hands (it’s hot and heavy)
- Rotate on the grate
- Set down carefully
- Step back
What you’re looking for:
- Even color developing across surface
- No obvious hot spots (super dark areas)
- Uniform smoke production
- Pan darkening consistently
Some unevenness is fine. Perfect is impossible over fire. But rotation gets you close.
Step 6: Cooling and Inspection
After 45-60 minutes of heating, move your pan to the medium zone for 10 minutes of gradual cooling, then to cool zone for another 10-15 minutes before inspecting the first seasoning layer.
Don’t shock it. Cool gradually.
Cooling sequence:
- Hot zone → medium zone (10 minutes)
- Medium zone → cool zone (10-15 minutes)
- Cool zone → off fire completely (10+ minutes)
- Total cool down: 30-40 minutes before handling comfortably
Why gradual cooling:
- Prevents thermal shock (rare but possible)
- Allows polymerization to complete
- Safer handling
- Better layer development
Inspection checklist:
- Color: Slightly darker than before (brown to dark brown after first coat)
- Texture: Smooth, matte finish
- Feel: Dry to touch, not sticky or tacky
- Coverage: Relatively even (some variation okay)
Good first coat:
- Uniform appearance
- No wet or sticky spots
- Slightly darker overall
- Smooth when you run your finger across
Problem first coat:
- Sticky (too much oil or not hot enough)
- Blotchy (uneven heating or application)
- Wiping off easily (didn’t polymerize)
If it’s good, proceed. If it’s sticky, heat it again for another 20-30 minutes.
Step 7: Building Multiple Layers
Repeat the oil application and heating process 4-6 times total, allowing partial cooling between coats—each layer darkens the pan progressively from tan to brown to dark brown to black.
One coat isn’t enough. You know this.
Multi-coat strategy:
- Coat 1: Light brown, lots of visible iron still
- Coat 2: Medium brown, better coverage
- Coat 3: Dark brown, starting to look seasoned
- Coat 4: Very dark brown, almost black in spots
- Coat 5: Black with maybe some brown
- Coat 6: Solid black, looks properly seasoned
Between-coat cooling:
- Don’t need full cool-down
- 15-20 minutes is enough
- Just cool enough to handle with gloves
- Still warm is actually better for next oil coat
Time management:
- Single coat: 60-75 minutes (heat + partial cool)
- Six coats: 6-8 hours total
- Plan accordingly
- This is an all-day project
Fire maintenance across coats:
- Keep perimeter fire going
- Rake fresh coals as needed
- Don’t let it die between coats (rebuilding wastes time)
- Add small wood every hour or so
Overnight option:
- Do 2-3 coats
- Bank the fire (cover coals with ash)
- Resume in morning
- Not ideal but sometimes necessary
By coat 6, you should have legitimate seasoning. Dark, smooth, ready to cook.
Advanced Campfire Seasoning Techniques
Managing Uneven Heat Distribution
Compensate for fire hot spots by rotating your pan frequently, using rocks to diffuse direct heat, and accepting minor unevenness as unavoidable—focus on getting the cooking surface right even if sides are lighter.
Perfect even heating over fire? Forget it.
But you can get close.
Hot spot identification:
- Center usually hottest
- Edges cooler
- Wind side cooler (if windy)
- One side often darker than other
Compensation techniques:
- Aggressive rotation (every 8-10 minutes instead of 15)
- Tilt pan to expose cooler sides to more heat
- Rocks placed strategically around coals to reflect heat
- Accept reality: sides will be lighter than bottom
Using rocks for heat diffusion:
- Place flat rocks around coal perimeter
- They absorb and radiate heat
- Creates more even heat zone
- Reduces direct hot spots
Priority zones:
- Cooking surface: must be well-seasoned
- Lower sides: good to season well
- Handle: who cares (honestly)
- Bottom exterior: nice but not critical
Put your energy into the cooking surface. That’s what matters.
Seasoning Multiple Pans Simultaneously
Season 2-3 cast iron pieces at once by creating multiple heat zones at different fire locations and staggering start times by 15-20 minutes—keeping rotation schedules manageable.
Got multiple pans? Smart planning lets you do them together.
Setup for multiple pans:
- Larger fire with multiple coal zones
- Two grates or one large grate
- Stagger start times (don’t begin all at once)
- Track which pan is where in the process
Staggering strategy:
- Pan 1: Start first coat
- Wait 15 minutes
- Pan 2: Start first coat while Pan 1 is mid-smoke
- Wait 15 minutes
- Pan 3: Start first coat
Rotation logistics:
- Each pan needs rotation every 10-15 minutes
- With 3 pans, you’re rotating something constantly
- Label them if they look similar (chalk mark on handle)
- Don’t lose track
Efficiency gains:
- Share one fire for multiple pans
- Better use of time and fuel
- Can do full camp cookware set in one session
Practical limit:
- Three pans is manageable
- Four is chaos
- More than that, split into two sessions
Keep notes. Seriously. You’ll forget which pan is on which coat.
Using Grates, Tripods, and Suspension Methods
Position cast iron 6-10 inches above coals using adjustable tripods for height control, cooking grates for stability, or hanging chains for even heat exposure—each method offers different advantages for campfire seasoning.
Your pan needs to hover above coals. Several ways to do it.
Cooking grate (easiest):
- Stable platform
- Fixed height (adjust by adding/removing coals)
- Can fit multiple pans
- Most campgrounds have these
Tripod with chain (adjustable):
- Hang pan from S-hook
- Raise or lower easily
- Great for heat adjustment
- Pan hangs level automatically
Rocks/bricks (improvised):
- Four rocks around fire
- Grate across them
- Stable if rocks are flat
- Adjust height by rock size
Height guidelines:
| Height Above Coals | Approximate Temp | Best For |
|---|---|---|
| 4-6 inches | 525-600°F | Too hot usually |
| 6-8 inches | 450-500°F | Perfect for seasoning |
| 10-12 inches | 350-425°F | Gentle heating, oil application |
Start at 8 inches. Adjust based on results.
Suspension advantages:
- Heat hits bottom evenly
- Easy to rotate
- Can tilt for side heating
- Looks cool (bonus)
Grate advantages:
- More stable
- Easier to manage multiple pans
- Less equipment needed
Use what you’ve got.
Wind and Weather Adaptations
Protect your campfire from wind using rocks, logs, or natural terrain features—strong wind accelerates coal burn and creates uneven heating that requires more frequent rotation and coal adjustment.
Weather doesn’t care about your seasoning project.
Wind management:
- Build windbreak with rocks or logs
- Position fire in natural depression
- Use terrain (behind boulder, in tree line)
- Accept you’ll need more fuel (wind increases burn rate)
Wind effects:
- Cools one side faster
- Blows ash onto oiled pan (annoying)
- Makes fire burn hotter and faster
- Uneven heat distribution gets worse
Rotation in wind:
- Every 8 minutes instead of 15
- Pay attention to wind-facing side (it’ll be cooler)
- Extra time on that side
Rain (worst case scenario):
- Don’t season cast iron in rain if you can avoid it
- Water drops on hot oiled pan = spots
- If you must: build shelter over fire (tarp roof)
- Or wait it out
Cold weather:
- Fire burns fine, but you burn more fuel staying warm
- Longer to establish good coals
- Pan cools faster between coats
- Plan for 25% more time
Altitude:
- Above 5,000 feet: fire burns differently
- Less oxygen = cooler fire
- May need closer pan placement
- More fuel required
Check weather before starting. Save yourself the headache.
Troubleshooting Campfire Cast Iron Seasoning
Addressing Uneven or Blotchy Seasoning
Fix blotchy campfire seasoning by applying an additional thin coat focused on light areas, heating with extra rotation on those spots, and accepting that some unevenness is normal for fire-seasoned cast iron.
Blotchy pan after all that work? Frustrating.
Why it happens over fire:
- Uneven coal heat (nearly unavoidable)
- Inconsistent rotation
- Too much oil pooling in spots
- Wind cooling one side
The fix:
- Identify light/dark areas
- Apply super-thin oil coat to whole pan
- During heating, position light areas over hottest coals
- Extra rotation toward light side
- Additional coat if needed
Spot treatment:
- Tiny drop of oil on light patch only
- Heat that specific area
- Feather it into surrounding seasoning
- Takes patience
Acceptance:
Some blotchiness is fine. Your pan isn’t a museum piece. It’s a tool.
If it cooks okay, it’s seasoned okay.
When to worry:
- Bare metal showing (not seasoned at all)
- Sticky patches (re-heat to fix)
- Flaking areas (strip and redo)
When not to worry:
- Color variation from dark brown to black
- Slightly lighter sides
- Handle different color than cooking surface
Function over appearance.
Fixing Sticky or Gummy Seasoning
Sticky campfire seasoning means too much oil or insufficient heat—fix it by heating the pan over hot coals for another 30-45 minutes with no additional oil, wiping with a dry cloth halfway through.
Sticky pan. The classic beginner mistake.
Why it’s sticky:
- Too much oil applied (most common)
- Heat wasn’t high enough
- Didn’t cook long enough
- All of the above
The fix:
- No new oil
- Heat over hot coals (475-500°F)
- Cook for 30-45 minutes
- Wipe with dry cloth after 15 minutes
- Continue heating
This accomplishes:
- Completes polymerization of excess oil
- Burns off some of the gummy layer
- Dries out the stickiness
If still sticky after one treatment:
- Repeat the process
- Or scrub it off and start that coat over
- Don’t add more oil to stickiness (makes it worse)
Prevention for next coat:
- Half the oil you just used
- Wipe three times instead of two
- Pan should look almost dry
Everyone makes this mistake once. Learn from it.
Dealing with Excessive Smoke
Reduce excessive campfire seasoning smoke by using less oil (¼ teaspoon instead of ½), ensuring adequate ventilation, and positioning yourself upwind—some smoke is normal, thick clouds mean too much oil.
Smoke is part of the process. But there’s normal and there’s too much.
Normal smoke:
- Thin, steady wisps
- Visible but not choking
- Strongest for first 10-15 minutes
- Gradually decreases
Problem smoke:
- Thick clouds
- Makes you cough
- Continues heavily entire time
- Stinks badly
Causes of excessive smoke:
- Too much oil (usual culprit)
- Oil dripping from pan onto coals
- Pan too close to coals (oil overheating)
Fixes:
- Use less oil next coat
- Wipe more thoroughly
- Raise pan height
- Better ventilation (move upwind)
Smoke direction:
- Position yourself upwind
- Smoke blows away from you
- Makes process more pleasant
- You can actually see what you’re doing
Fire smoke is already happening. Seasoning smoke adds to it. Just manage it.
Managing Soot and Ash Contamination
Prevent ash from settling on your oiled pan by positioning it away from active flames, working during calm periods between wind gusts, and gently wiping off any ash that lands before continuing the heating process.
Ash on your oiled pan? Pain in the ass.
How it happens:
- Wind blows ash up onto pan
- Flare-ups send ash flying
- Disturbing fire creates ash clouds
- Just being over a fire
Prevention:
- Season over coals, not flames
- Don’t stir/poke fire during heating
- Wind breaks help
- Higher pan position (less ash reaches it)
If ash lands on oiled surface:
Before heating:
- Blow it off gently
- Wipe with clean cloth
- Re-oil if you removed too much
During heating:
- Let it be (it might bond into seasoning—not ideal but not terrible)
- Or carefully wipe hot pan with tongs and cloth
Ash in seasoning:
Small amounts won’t ruin it. The ash bonds in. Creates tiny rough spots. Not great. Not disaster.
Big chunks? Those need removal.
Best practice:
- Apply oil away from fire (at cool zone)
- Move to hot zone once oiled
- Minimizes exposure time
Handling Temperature Fluctuations
Manage campfire temperature swings by maintaining a backup coal supply, adding small fuel pieces gradually, and extending heating time if temperature drops mid-session—consistent heat matters more than perfect timing.
Fire doesn’t hold temperature like an oven. It fluctuates.
Common fluctuations:
Fire dying:
- Coals burning to ash
- Temperature dropping
- Add small wood to perimeter 15 minutes ago (you’re late)
Fire spiking:
- New wood flames up
- Temperature jumps
- Raise pan or spread coals
Wind changes:
- Sudden gusts cool coals
- Or fan them hotter
- Adjust height as needed
Recovery techniques:
Temperature dropped:
- Don’t panic
- Concentrate coals tighter
- Lower pan closer
- Add time to compensate (if it was cool for 10 minutes, add 10 minutes)
Temperature spiked:
- Raise pan
- Spread coals thinner
- Remove some coals temporarily
- Wait for stabilization
Philosophy:
Time isn’t sacred. 60 minutes at proper temp is the goal. If temp drops for 15 minutes, pause your mental clock. Resume when back at temp.
Better to take 90 minutes at right temp than 60 minutes with wild swings.
Comparing Campfire Seasoning to Other Methods
Campfire vs. Oven Seasoning Results
Campfire-seasoned cast iron performs identically to oven-seasoned iron for cooking—both create polymerized layers around 450-500°F, though campfire seasoning typically shows more color variation and requires more attention during the process.
Let’s settle this. Which is better?
Results after 6 coats:
Cooking performance: Identical
- Both create polymerized oil layers
- Same non-stick properties
- Equal rust protection
- Durability is the same
Appearance:
- Oven: More uniform black color
- Campfire: Some variation, possible blotchiness
- Both look seasoned
Durability testing:
I’ve used both. Can’t tell them apart after 20 cooking sessions.
Why oven might be better:
- Easier process
- More consistent
- Less time investment
- Better for beginners
Why campfire holds its own:
- Same chemistry
- Builds character (literally and figuratively)
- Works anywhere
- The only option in some situations
Bottom line:
If you have an oven, use it. But if you’re stuck with fire, don’t worry. You’ll get good results.
Campfire vs. Stovetop Seasoning
Stovetop seasoning offers better temperature control than campfire but less than oven—campfire falls between full oven enclosure and stovetop direct heat in terms of ease and results.
Three methods. Where does campfire rank?
Temperature control:
- Oven (best—enclosed, even heat)
- Stovetop (good—visible, adjustable)
- Campfire (rough—manual, variable)
Time required:
- Stovetop (fastest—quick heat-up)
- Campfire (slow—building coals takes time)
- Oven (medium—preheat needed but then automatic)
Attention needed:
- Oven (least—set and forget)
- Stovetop (medium—occasional monitoring)
- Campfire (most—constant management)
Results quality:
All three: Equal (chemistry doesn’t care)
When to use each:
- Oven: Default choice when available
- Stovetop: Quick touch-ups, maintenance
- Campfire: Outdoor situations, no alternatives
They’re tools. Use the right one for your situation.
Speed and Efficiency Considerations
Campfire seasoning takes 8-10 hours total for 6 coats including fire building and management—compared to 6-7 hours for oven seasoning—making it slower but not prohibitively so for outdoor situations.
Time breakdown, honest numbers:
Campfire seasoning timeline:
- Fire building: 45-60 minutes
- First coat: 75 minutes (heating + partial cooling)
- Coats 2-6: 60-70 minutes each
- Fire management throughout: constant
- Total: 8-10 hours
Oven seasoning timeline:
- Preheat: 15 minutes
- First coat: 90 minutes (baking + cooling)
- Coats 2-6: 90 minutes each
- Total: 6.5-7.5 hours
Stovetop:
- Each coat: 45-60 minutes
- 6 coats: 5-6 hours
Efficiency factors:
Campfire:
- Can multitask (cook meals, tend camp)
- But requires presence
- Fuel gathering adds time
Oven:
- Walk away and do other things
- But ties up oven for hours
Real talk:
Campfire is slower. But if you’re camping anyway, who cares? You’re sitting around the fire regardless.
Safety Protocols for Campfire Cast Iron Seasoning
Fire Safety Essentials
Keep 5 gallons of water, a fire extinguisher, and a clear 10-foot radius around your seasoning fire—never leave campfire seasoning unattended and fully extinguish coals before sleeping or leaving camp.
Safety isn’t optional. It’s mandatory.
Required safety equipment:
- 5-gallon water bucket (full)
- Shovel for smothering
- Fire extinguisher if you have one
- Clear area (no dry grass, no overhanging branches)
- Proper fire ring or cleared dirt area
Rules:
- Never leave fire unattended (seriously, never)
- Someone always present
- Extinguish completely before bed
- Check local fire restrictions (they change)
- Have evacuation plan if things go wrong
Weather assessment:
- Dry, windy conditions = high fire risk
- Consider postponing if red flag warnings
- Wildfire risk isn’t worth seasoning a pan
- Use judgment
Extinguishing procedure:
- Spread out coals
- Drown with water
- Stir with shovel
- More water
- Touch test (should be cool)
- More water if any warmth
Legal stuff:
- Follow local regulations
- Get permits if required
- Use established rings when possible
- Don’t be the person who starts a wildfire
Your pan isn’t worth burning down a forest.
Handling Hot Cast Iron Over Open Flame
Wear heavy leather gloves rated to 500°F+, use both hands when moving hot cast iron, keep a clear path to safe placement areas, and never grab the pan without gloves regardless of how long it’s been cooling.
Cast iron over fire gets stupid hot. Respect that.
Glove requirements:
- Leather welding gloves (best option)
- Thick oven mitts rated to 500°F minimum
- NOT regular kitchen mitts (they’ll fail)
- Two pairs (one gets oily, switch to backup)
Lifting technique:
- Both hands always
- Firm grip (won’t get second chance)
- Lift straight up (no tilting)
- Move smoothly (no jerking)
- Set down gently (don’t drop)
Common accidents:
- Grabbing pan handle thinking it’s cool (it’s not—handles stay hot 30+ minutes)
- One-handed lift (heavy + hot = dropped pan + burned foot)
- Setting pan on unstable surface (it falls, you grab instinctively, you burn yourself)
- Bumping into pan while managing fire (happens more than you’d think)
Safe placement zones:
- Flat rock away from fire
- Metal stand or table
- Grate in cool zone
- Never: grass, wood, plastic, anything flammable
Burns happen:
- Have first aid kit
- Know where your nearest medical help is
- Cool water for minor burns
- Don’t mess around with serious burns
Second-degree burns at a remote campsite are a real bad time.
Smoke and Fume Management
Position yourself upwind of campfire seasoning smoke, work in open areas with good air circulation, and take breaks if smoke becomes irritating—oil fumes are unpleasant but typically not dangerous in outdoor settings.
Seasoning smoke stinks. Manage it.
Smoke types:
Wood smoke:
- Normal campfire smell
- Not great for you but unavoidable
Seasoning smoke:
- Burnt oil smell
- Acrid, unpleasant
- Combine with wood smoke = special kind of awful
Mitigation:
- Stay upwind (wind at your back)
- Pick open area (not enclosed space)
- Don’t season in tent or tarp shelter (smoke accumulates)
- Take breaks (go walk around, breathe fresh air)
Health considerations:
- Outdoor smoke disperses quickly
- Not like indoor oven seasoning (that requires ventilation)
- Still not great to breathe heavily
- People with asthma: be aware
Kids and pets:
- Keep them upwind too
- Don’t let them play in smoke
- Dogs don’t understand and will sit in it
- Cats won’t care (they’re cats)
If smoke is really bad:
- You used too much oil
- Position yourself better
- Next coat, use less
Fresh air is your friend. Use it.
Environmental Considerations and Leave No Trace
Dispose of oily rags in sealed containers, fully extinguish fires, scatter cold ashes, and pack out all trash—campfire seasoning should leave minimal environmental impact following Leave No Trace principles.
You’re in nature. Don’t trash it.
Oil disposal:
- Oily rags can spontaneously combust (seriously)
- Put in metal container with lid
- Or burn them in fire completely
- Never leave in camp
Ash and coal:
- Fully extinguish (water until cold)
- Scatter in woods away from camp (once cold)
- Or pack out if required
- Don’t leave big ash pile
Area cleanup:
- Pack out all trash
- Return fire ring to pre-use condition
- Remove any spilled oil residue
- Leave it better than you found it
Local regulations:
- Some areas: pack out ashes
- Some areas: no fires at all
- Check before you start
- Follow the rules
Wildlife:
- Oil smells attract animals
- Store oil containers properly (bear canister if needed)
- Don’t leave oily rags lying around
- Clean hands before touching food
Water sources:
- Don’t wash oily stuff near streams
- Oil contamination is serious
- Use designated wash areas
- Or pack dirty stuff out
Be a good steward. Simple.
Specialty Campfire Seasoning Scenarios
Seasoning During Multi-Day Camping Trips
Integrate cast iron seasoning into multi-day camping by applying 1-2 coats per evening after dinner cooking, using the existing fire for dual purpose and building up 6-8 total layers across a week-long trip.
Week-long trip? Perfect opportunity.
Daily integration:
- Cook dinner over fire (6-7 PM)
- After eating, repurpose fire for seasoning
- Apply 1-2 coats per evening
- By end of trip: fully seasoned pan
Workflow:
- Cook dinner
- Eat and clean up
- Rebuild fire to good coals (20 minutes)
- Season first coat while socializing around fire
- Second coat if you’re ambitious
- Bank fire for the night
Benefits:
- Using fire you’d have anyway
- Makes productive use of evening time
- Pan improves throughout trip
- No dedicated seasoning day
Challenges:
- Tired after hiking (might skip it)
- Rain days mess up schedule
- Need to carry seasoning oil
- Fire restrictions might apply
Maintenance approach:
- Start trip with okay seasoning
- Touch up 1-2 coats during trip
- Finish trip with great seasoning
- Actually works really well
Trip planning:
- Bring small oil bottle (2-4 oz)
- Extra rags (they get dirty)
- Factor in time (30-60 min per evening)
- Choose campsites where fires are allowed
This is how people used to do it. Still works.
Emergency Re-Seasoning in the Wilderness
Restore damaged cast iron during backcountry trips by scrubbing with sand or ash as abrasive, applying 2-3 quick coats over cooking fire, and prioritizing the cooking surface for immediate use even if incomplete.
Your pan got messed up mid-trip. Fix it enough to keep cooking.
Damage scenarios:
- Someone washed it with soap and left it wet (rust started)
- Dropped it in creek (rust everywhere)
- Cooked something acidic that stripped seasoning
- Buddy used it wrong
Field assessment:
- How bad is it really?
- Surface rust only? Easy fix.
- Deep rust? Tougher.
- Stripped seasoning? Rebuild what you need.
Minimal restoration:
- Scrub rust with sand + water
- Heat dry over fire
- Quick 2-3 coats on cooking surface only
- Good enough to finish trip
Improvised tools:
- Sand as abrasive (works surprisingly well)
- Ash mixed with water (mild abrasive)
- Smooth river rock for scraping
- Your cooking oil for seasoning
Priority:
- Cooking surface first
- Sides can wait
- Handle doesn’t matter
- Just make it usable
Time crunch:
- 30-minute coats instead of 60
- Less perfect but functional
- Finish properly at home
- Get it working now
Prevention:
- Educate trip mates on cast iron care
- Don’t let people wash it
- Keep it dry
- Light oil coat daily
Sometimes good enough is good enough.
Restoring Vintage Cast Iron at Remote Locations
Season vintage cast iron finds at estate sales or flea markets over campfire before transporting—preventing rust during travel and testing the cookware’s usability before committing to full restoration.
Found a Griswold at a rural estate sale. 100 miles from home. Season it now or risk rust.
Why on-site seasoning:
- Prevents rust during transport
- Tests if pan is worth keeping
- Saves bringing home trash
- You’re already there
Quick assessment:
- Cracks? Walk away.
- Warping? Check carefully.
- Pitting? Minor okay, deep pits skip it.
- Rust? Totally fine, you’re seasoning anyway.
Minimal restoration process:
- Buy pan
- Build fire at campground
- Heat and scrub rust
- Apply 2-3 coats
- Transport home safely
Tools to have:
- Wire brush in vehicle
- Small oil bottle
- Rags
- Knowledge that you might do this
Time required:
- 3-4 hours for basic seasoning
- Worth it for quality vintage
- Skip it for cheap stuff
Transport after seasoning:
- Wrap in paper or cloth
- Cardboard box
- Keep dry
- Don’t stack other stuff on it
Home finishing:
- Complete 3-6 more coats in oven
- You’ve got the foundation
- Prevents rust problem
- Smart strategy
I’ve done this. Works great.
Seasoning Large or Specialty Cast Iron Pieces
Season large dutch ovens and griddles over campfire by using bigger fires, longer heating times (90 minutes per coat), and multiple coal zones for even heat distribution across oversized cooking surfaces.
Big iron. Big fire.
Dutch ovens:
- 12-14 inch models need serious fire
- Lid can be seasoned separately (easier)
- Inside bottom gets hottest (watch for over-heating)
- Exterior needs attention too
Griddles:
- Larger surface area than round skillets
- Create coal bed matching griddle size
- Rotate end-to-end, not just spin
- Takes more oil (still thin coats though)
Larger fire requirements:
- Double the wood
- Wider coal bed
- More heat zones
- Longer burn time
Heating times:
- 12-inch skillet: 60 minutes
- 14-inch Dutch oven: 90 minutes
- Griddle: 75-90 minutes
- Give it more time
Managing weight:
- Dutch ovens are heavy (20+ lbs)
- Need strong grate or tripod
- Two people for moving
- Serious gloves
Multi-zone approach:
- Create hot zone for one end
- Medium zone for middle
- Rotate piece through zones
- More complex but works
Big iron is extra work. But a campfire handles it fine.