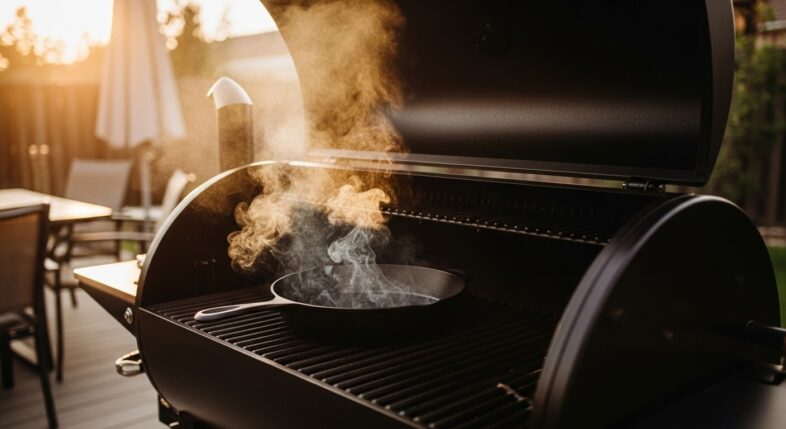
Seasoning a cast iron skillet on a pellet grill means heating oil on the pan’s surface at high temperatures (usually 400-500°F) to create a protective, non-stick coating through polymerization—and your pellet grill does this better than your kitchen oven.
Here’s why.
The process transforms liquid oil into a hard, plastic-like layer that bonds to the iron. Each seasoning session builds on the last. You’re creating armor for your skillet. Protection against rust. A naturally non-stick surface that gets better with time.
But why drag your pellet grill into this?
Understanding Cast Iron Seasoning
Seasoning isn’t actually adding spices (common misconception). It’s baking oil into the metal’s pores until it becomes part of the pan itself.
The chemistry is straightforward. When you heat oil past its smoke point, the fat molecules break down and reorganize into polymers. These polymers fill the microscopic ridges and valleys in cast iron. Layer after layer. The result? That signature black patina everyone talks about.
Think of it like this—unseasoned cast iron is porous and reactive. Water causes rust. Food sticks like crazy. A properly seasoned skillet becomes smooth, protected, and ready to handle everything from cornbread to steak.
The bonds are permanent (mostly). You’d need serious heat or aggressive scrubbing to remove them.
Benefits of Seasoning Cast Iron on a Pellet Grill
Your pellet grill isn’t just for ribs anymore.
Space and convenience. You’re keeping the heat outside. No smoke filling your kitchen. No setting off alarms at 3 PM on a Saturday. Your oven stays clean.
Temperature stability. Pellet grills hold steady heat better than most home ovens. Once you set it to 450°F, it stays there. No fluctuations. No hot spots. Just consistent polymerization across the entire skillet surface.
Even heat distribution. The convection-style airflow in pellet grills circulates heat around your cookware. Top, bottom, sides—everything gets seasoned uniformly.
Season multiple pieces at once. Got three skillets and a Dutch oven that need work? Load them all up. Your pellet grill has the real estate.
And here’s something sneaky good: the slight smoke flavor. It’s minimal (we’re talking barely noticeable), but some folks swear their pellet grill-seasoned cast iron has a certain character to it.
How Pellet Grills Create Superior Seasoning
Temperature control is everything in seasoning. Period.
Pellet grills nail this. The digital controllers maintain precise temps for hours. You set it to 425°F, and it holds within 5-10 degrees. Try getting that consistency from a gas grill (not happening).
The indirect heat matters too. In a pellet grill, flames don’t touch your skillet directly. Heat radiates evenly from all directions. Compare that to a stovetop where one side gets hotter than the other—uneven seasoning, patchy results.
Convection airflow does the heavy lifting. As pellets burn, the fan circulates hot air throughout the cooking chamber. This moving air prevents cold spots and ensures every inch of your cast iron reaches the target temperature simultaneously.
Length of cook time? Not an issue. Pellet grills run for hours without babysitting. You can do a proper 60-minute seasoning session and walk away. Check your phone. Mow the lawn. Whatever.
What You’ll Need to Season Your Cast Iron Skillet
Getting your gear together before you start saves headaches later.
High smoke point oil – about 1-2 tablespoons per layer
Paper towels or lint-free cloths – you’ll use several
Heat-resistant gloves – because hot cast iron doesn’t care about your confidence
Your pellet grill – with enough pellets for 2-3 hours of cooking
Dish soap and scrub brush (for initial cleaning only)
Aluminum foil (optional, but helpful for catching drips)
That’s it. Don’t overthink this.
Choosing the Right Oil for Seasoning Cast Iron
Oil selection makes or breaks your seasoning. Wrong oil? Sticky, gummy mess. Right oil? Hard, glassy finish.
Best Oils for High-Heat Seasoning
The smoke point is your deciding factor. You want oils that can handle 400-500°F without breaking down too early.
Flaxseed oil – The purist’s choice. Super high smoke point (around 450°F). Creates the hardest seasoning layer. Downside? Expensive. And it can flake if you’re not careful with application.
Grapeseed oil – Smoke point around 420°F. Affordable. Readily available. Builds excellent seasoning that’s durable and smooth. This is what most people should use.
Avocado oil – Smoke point hits 520°F. Fantastic for high-temp seasoning. Bit pricey but worth it if you’re serious about cast iron maintenance.
Crisco or vegetable shortening – Old school. Works great. Smoke point around 360°F, so you’ll season at lower temps (375-400°F). Creates a reliable, slick surface.
Canola oil – Budget-friendly. Smoke point 400°F. Gets the job done without fuss.
Olive oil – Too low a smoke point (325-375°F depending on type). Burns before it polymerizes properly. You’ll get sticky residue instead of seasoning.
Butter or animal fats – Same issue. Low smoke points. Plus they contain proteins and water that interfere with polymerization. Save these for cooking, not seasoning.
Coconut oil – Smoke point around 350°F. Marginal at best. And the seasoning tends to be softer than you want.
Preparing Your Pellet Grill for the Process
Get your grill ready before you start messing with the skillet.
Fill the hopper with pellets. You’ll burn through more than you think during a 2-3 hour session. Check your drip tray—empty and clean prevents flare-ups.
Set up a foil drip pan if you want. Place it on the grates below where your skillet will sit. Catches any oil that drips off. Keeps cleanup simple.
Preheat is crucial. Don’t put your oiled skillet on a cold grill and let it heat up together. Bad idea. Preheat to your target temp first, then add the cast iron.
Preparing Your Cast Iron Skillet Before Seasoning
You can’t season dirty cast iron. Or wet cast iron. Get it right or start over.
Cleaning a New Cast Iron Skillet
New skillets come with a factory coating. Wax or protective oil. Sometimes both. This stuff has to go.
Wash with hot water and dish soap. Yeah, soap. (The “never use soap on cast iron” rule applies to seasoned pans, not bare ones.) Scrub thoroughly with a stiff brush.
You might need to do this 2-3 times. Keep going until the water runs clear and nothing feels waxy or slick.
Dry completely. Not mostly dry. Completely. Put it on your stovetop burner over medium heat for 5 minutes. Let all moisture evaporate. Any water left behind will cause problems during seasoning.
Stripping and Restoring Old or Damaged Cast Iron
Got a rusty thrift store find? Or a pan with flaking seasoning?
Strip it bare. You’ve got options:
Lye bath method – Soak in lye solution (Easy-Off oven cleaner works) for 24 hours. Strips old seasoning clean. Doesn’t damage the iron.
Vinegar soak – For rust removal. Mix 50/50 white vinegar and water. Soak for 1-6 hours max (longer causes pitting). Scrub away rust with steel wool.
Electrolysis – The nuclear option. Sets up an electrolysis tank if you’re dealing with serious neglect. Overkill for most situations.
After stripping, wash thoroughly with soap and water. Dry on the stovetop. Now you’ve got bare iron ready for fresh seasoning.
Drying Your Skillet Completely
This deserves its own section because people screw it up constantly.
After washing, towel dry first. Then heat dry. Put the skillet on a burner set to medium. Let it sit for 3-5 minutes. You’ll see any remaining moisture evaporate. The pan will start to look dry and slightly dull.
That’s your signal. It’s ready.
Water is the enemy of seasoning. Even microscopic amounts cause issues—steam pockets under your oil layer, uneven polymerization, rusty spots forming during the process.
Step-by-Step: Seasoning a Cast Iron Skillet on a Pellet Grill
Time to actually do this thing.
Step 1: Preheat Your Pellet Grill to the Correct Temperature
Set your pellet grill to 450°F and let it preheat for 15-20 minutes.
Don’t rush this. The entire cooking chamber needs to reach temperature. Not just the grates. The air circulating inside needs to be consistently hot.
Most pellet grills have a “preheat” cycle or you can just set your target temp and walk away. When it beeps or the display shows it’s ready, give it another 5 minutes. (Trust issues with temperature sensors? Justified.)
Optimal Temperature Range for Seasoning
Here’s what works:
400-425°F – Good for oils with lower smoke points like Crisco or canola
450°F – Sweet spot for grapeseed and flaxseed
475-500°F – Best for avocado oil or if you want faster polymerization
Lower temps take longer but give you more control. Higher temps work faster but require attention to prevent burning off your oil before it polymerizes.
What’s your pellet grill’s actual running temperature? Might be different from what the display says. Use a separate thermometer if you’re paranoid (I am).
Why Temperature Matters for Polymerization
Chemistry time (quick version).
Polymerization happens when oil molecules bond together into long chains. This requires specific heat. Too low? The oil just sits there. Too high? It burns to carbon before bonding properly.
The smoke point is where oil starts breaking down—exactly where you want to be. Just past the smoke point, actually. That’s when the molecules reorganize into polymers and bond to the iron.
Temperature too inconsistent? You get partial polymerization. Sticky patches. Uneven coating. The seasoning won’t be durable.
Step 2: Apply a Thin Layer of Oil to Your Skillet
Pour about 1 tablespoon of oil into your clean, dry skillet.
Not enough? Add more. Too much? You’ll find out in a minute.
How to Apply Oil Properly
Use a paper towel or lint-free cloth. Rub the oil all over the cooking surface. Then flip it over and coat the bottom. Don’t forget the handle and sides.
Every exposed iron surface gets oil. Top, bottom, inside, outside, handle. Everything.
Work the oil in with circular motions. You’re trying to fill all those microscopic pores in the iron. Press firmly. Get it everywhere.
The Importance of Thin, Even Coating
Here’s where most people fail.
They leave too much oil on the pan. Thick oil = sticky, gummy seasoning. Always. No exceptions.
Think “oil stain” not “oil puddle.” The skillet should look wet but not dripping. If you can see oil pooling anywhere, you’ve got too much.
Wiping Away Excess Oil
After coating everything, take a clean paper towel and wipe it all off.
Sounds weird? Do it anyway.
Wipe like you’re trying to remove the oil completely. Press hard. You’ll leave behind a microscopic layer—exactly what you want. The pan should look almost dry when you’re done. Maybe a slight sheen. That’s it.
This step matters more than any other. Thin layers season properly. Thick layers turn into varnish.
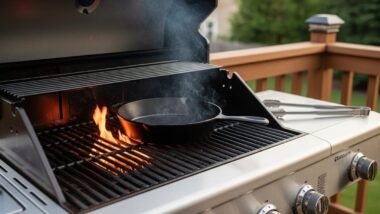
Step 3: Place the Skillet on Your Pellet Grill
Open your preheated grill. Put the skillet directly on the grates.
Best Placement for Even Heat Distribution
Center of the grill works best. That’s where airflow and heat distribution are most consistent.
Avoid the edges if possible. Temperature can vary by 20-30 degrees near the walls.
Positioning for Smoke Circulation
Place your skillet upside down if you want. This prevents oil from pooling in the middle during heating. Any excess drips down and away.
Or leave it right-side up. Honestly? If you wiped the oil properly, positioning doesn’t matter much. The layer is thin enough that gravity won’t affect it.
Step 4: Season for the Recommended Time
Close the lid. Set a timer for 60 minutes.
Don’t open the grill. Don’t check on it. Don’t peek. Let the heat do its work.
How Long to Season Cast Iron on a Pellet Grill
One hour per layer is the standard. Some people do 45 minutes. Others go 90.
Here’s what’s actually happening: For the first 10-15 minutes, the oil is smoking hard (assuming you hit the smoke point). That’s normal. After 20-30 minutes, the smoking decreases. By 45-60 minutes, the polymerization is complete and the coating has hardened.
Shorter times work if your temperature is on the higher end (475-500°F). Longer times are safer if you’re running cooler (400-425°F).
Monitoring the Seasoning Process
You shouldn’t need to monitor much. That’s the beauty of pellet grills—stable temps.
But if you’re paranoid (or it’s your first time), check the temperature display every 20 minutes. Make sure it’s holding steady.
Smell something burning? That’s usually normal (it’s literally smoking oil). But if it smells like a grease fire, you used too much oil. Learn from it. Do better next layer.
Step 5: Cool Down Gradually
After 60 minutes, turn off the pellet grill.
Leave the skillet inside. Let it cool down naturally as the grill temperature drops. This takes 45-60 minutes depending on weather and your grill model.
Why gradual cooling? Rapid temperature changes can cause the seasoning to crack or separate from the iron. Unlikely with one layer, but it’s a risk with multiple layers built up.
Plus, cast iron holds heat forever. Pull it out too soon and you’ll burn yourself (obviously).
Step 6: Repeat for Multiple Layers
One layer isn’t enough. Not even close.
How Many Seasoning Layers Do You Need?
Minimum three layers. Better? Five or six.
Each layer adds depth and durability. The first layer seals the pores. The second strengthens it. By the third, you’ve got legitimate non-stick properties forming. Layers 4-6 make the surface noticeably smoother and darker.
Some people do 8-10 layers on a fresh skillet. That’s dedication (or obsession).
Building a Durable Seasoning Foundation
Let the skillet cool completely between layers. Once it’s cool enough to handle comfortably (warm but not hot), you’re ready for the next round.
Wipe it down with a clean towel first. Sometimes a little carbon or residue forms during seasoning. Remove it.
Apply oil again. Wipe it off again (remember: thin layer). Back on the grill for another hour.
Repeat until you hit your target number of layers. Yes, this takes all day. That’s the price of properly seasoned cast iron.
Temperature Control and Timing for Perfect Seasoning
Getting scientific about this helps. Sort of.
Setting Your Pellet Grill Temperature
Match your temperature to your oil choice:
Crisco/shortening: 375-400°F
Canola: 400-425°F
Grapeseed/flaxseed: 425-450°F
Avocado: 450-500°F
The goal is reaching just above the oil’s smoke point. Too far above and you burn the oil to carbon (black, sooty coating instead of smooth seasoning). Too far below and polymerization happens slowly or incompletely.
Start at the lower end if you’re unsure. You can always increase temperature for subsequent layers.
Using Smoke Settings vs. High Heat
Some pellet grills have a “smoke” setting that runs around 180-225°F. Don’t use it for seasoning.
Way too low. Oil won’t polymerize. You’ll just make your skillet smell like smoke (and not season it).
Stick with the standard temperature control. Set it to your target temp and forget about smoke settings entirely for this project.
Timing Each Seasoning Layer
60 minutes is the sweet spot for most oils and temperatures.
But here’s the thing—every pellet grill runs a bit different. Every oil behaves slightly differently. And environmental factors (wind, outside temp, humidity) affect cooking times.
So use 60 minutes as your baseline. If after an hour the seasoning looks perfect (smooth, dark, hard to the touch when cool), you’re good. If it seems underdone (still slightly tacky or lighter than expected), add 15 minutes to your next layer.
Troubleshooting Common Issues When Seasoning on a Pellet Grill
Things go wrong. Here’s how to fix them.
Sticky or Tacky Seasoning Surface
The most common problem. And the most annoying.
Cause: Too much oil. Or not enough heat/time for complete polymerization.
Fix: Put the skillet back on the grill at 450°F for another 30-60 minutes. No additional oil. Just heat. This will finish polymerizing what’s there. If it’s still tacky after that, you used way too much oil and might need to strip this layer off with steel wool and start over.
Prevention is easier than fixing. Wipe more aggressively next time.
Uneven Seasoning or Blotchy Spots
Looks patchy. Some areas dark and smooth, others lighter or rough.
Cause: Uneven oil application. Or temperature inconsistencies in your grill (less common).
Fix: Keep building layers. Seriously. More layers will even things out. Make sure you’re applying oil consistently to all surfaces on subsequent rounds.
If one spot refuses to take seasoning (stays light or rough), focus extra attention there with oil application. Or check if that spot has damage or pitting in the iron itself.
Flaking or Peeling Seasoning
The seasoning chips off in flakes. Not good.
Cause: Usually from using flaxseed oil too thick, or from thermal shock (rapid heating/cooling). Can also happen if the iron wasn’t clean before seasoning.
Fix: Strip the flaking areas with steel wool. Clean thoroughly. Re-season those spots (or the whole pan if it’s bad).
Prevention: Use thinner coats. Cool gradually. Consider switching from flaxseed to grapeseed—it’s more forgiving.
Too Much Smoke Flavor on Your Skillet
Your cast iron tastes like a campfire. Every dish comes out tasting smoked.
Cause: You’re probably running the grill at temperatures where heavy smoke production occurs (under 300°F) or using super smoky pellets like mesquite or hickory.
Fix: Can’t really remove it once it’s in the seasoning. You’ll just have to use the pan until the flavor mellows (it will after a few cooking sessions).
Prevention: Use mild pellets for seasoning (oak, apple, or competition blend). Keep temperatures at 400°F+ where smoke production is minimal.
Maintaining Your Seasoned Cast Iron Skillet
Seasoning isn’t one-and-done. It’s a relationship.
Proper Cleaning After Each Use
Let the skillet cool after cooking. Not all the way—still warm is fine.
Rinse with hot water. Use a stiff brush or plastic scrubber to remove food particles.
The soap debate? Modern dish soap won’t hurt your seasoning. It’s not the lye-heavy stuff from decades ago. A small amount of mild soap is fine if you’ve got stuck-on food. But water and scrubbing work for most cleaning jobs.
Dry immediately and thoroughly. Towel first, then 2 minutes on the stovetop to evaporate all moisture.
Wipe with a very thin layer of oil while still warm (optional but recommended). This maintains and builds on your existing seasoning.
When to Re-Season Your Cast Iron
You’ll know.
Signs you need a refresh:
Food sticking consistently where it didn’t before
Dull gray patches appearing
Visible rust spots
The surface feels rough instead of smooth
For full re-seasoning, strip the pan and start from scratch. For minor touch-ups, clean well and add 2-3 fresh layers on the pellet grill.
Well-maintained cast iron might go years between full re-seasoning sessions. Poorly maintained? Every few months.
Storage Tips to Preserve Seasoning
Store in a dry place. Humidity is cast iron’s enemy.
Don’t stack other pans directly on top without protection. Put a paper towel or cloth between them. Prevents scratching the seasoning.
If storing long-term, coat with a thin layer of oil first. Acts as additional rust protection.
Never put cast iron away wet. Not even slightly damp. Dry it completely first.
Advantages of Using a Pellet Grill vs. Other Seasoning Methods
Let’s compare approaches.
Pellet Grill vs. Kitchen Oven Seasoning
Pellet Grill Wins On:
Temperature stability (better than most home ovens)
No kitchen smoke or smell
More space (season multiple pieces)
Convection-style heat circulation
You can walk away without worrying
Kitchen Oven Wins On:
Convenience (it’s already inside)
Weather doesn’t matter
Slightly faster preheating
Bottom line? If you own a pellet grill, use it. The results are consistently better and you won’t stink up your house.
Pellet Grill vs. Stovetop Seasoning
Stovetop seasoning is tricky. Uneven heat. Hot spots. Requires constant attention.
Sure, you can season cast iron on a burner. People do it. But you’ll get inconsistent results—the bottom gets seasoned well, the sides not so much.
Pellet grill surrounds the skillet with even heat. No hot spots. No cold zones. Just uniform seasoning across every surface.
Not even close. Pellet grill beats stovetop every time.
Why Pellet Grills Offer Consistent Results
Set it and forget it. That’s the pellet grill advantage.
The digital controller maintains temperature precisely. The auger feeds pellets automatically. The convection fan circulates heat evenly. You’re getting commercial-grade temperature control in a backyard cooker.
Ovens cycle on and off (temperature swings of 25-50 degrees). Gas grills have hot and cool spots. Charcoal grills require constant adjustment.
Advanced Tips for Seasoning Cast Iron on Your Pellet Grill
Ready to level up?
Seasoning Multiple Pieces Simultaneously
Load up your grill with every piece of cast iron that needs attention.
Skillets, Dutch ovens, griddles, cornbread pans—throw it all on there. As long as air can circulate around each piece, you’re good.
Space them at least an inch apart. Don’t stack them or let them touch. Heat needs to reach all surfaces.
This is massively efficient. One pellet grill session seasons your entire collection.
Using Different Wood Pellets for Flavor
Most people use whatever pellets they have. That’s fine.
But if you’re choosing specifically for seasoning? Go with mild woods. Oak, apple, cherry, competition blend. These produce minimal flavor compounds at high temperatures.
Avoid heavy smoke woods like mesquite or hickory. They can leave residual flavor in the seasoning that affects your first few cooking sessions.
Honestly though? At 450°F the smoke flavor impact is minimal regardless of pellet type. Don’t overthink this one.
Creating a Non-Stick Surface Through Proper Seasoning
Want non-stick performance that rivals Teflon? (Almost.)
It’s all about layer quantity and smoothness. Six or more thin layers create a glassy surface that releases food easily.
But here’s the secret most people miss: you need to cook with the pan to truly develop non-stick properties. Seasoning provides the foundation. Cooking with fats builds on it.
Use your freshly seasoned skillet for high-fat dishes first. Bacon, sausage, anything with oil. These early cooking sessions add natural seasoning layers and smooth out the surface further.
After 10-15 cooking sessions, your cast iron will be noticeably slicker than right after pellet grill seasoning.
Seasoning Other Cast Iron Cookware on Your Pellet Grill
Skillets aren’t special. The same process works for all cast iron.
Dutch ovens: Season the pot and lid separately. Remove the lid during seasoning so heat reaches the interior. Same temps, same timing, same thin oil application.
Griddles: Large flat surface area means you might use slightly more oil (maybe 1.5-2 tablespoons). But still wipe it thin. Same process otherwise.
Cornbread pans and specialty molds: These can be tricky because of crevices and details. Use a brush to get oil into tight spots. Wipe excess carefully with a cloth. May take extra time.
Grill grates: If you have cast iron grill grates, season them right on the pellet grill (obviously). Higher temps work better here—475-500°F. These see more abuse so build 5-6 layers minimum.
The process doesn’t change. Clean, dry, thin oil coat, heat, cool, repeat. Works for any cast iron piece you own.