Table of Contents
- 1 Seasoning Cast Iron on Induction Burners
- 2 Understanding Cast Iron Seasoning Basics
- 3 Why Use a Portable Induction Burner for Seasoning Cast Iron
- 4 Essential Equipment and Materials Needed
- 5 Preparing Your Cast Iron Skillet for Seasoning
- 6 Step-by-Step: How to Season Cast Iron Using an Induction Burner
- 7 Temperature Control Techniques for Induction Seasoning
- 8 Troubleshooting Cast Iron Seasoning on Induction Burners
- 9 Induction vs. Oven Seasoning: Key Differences
- 10 Maintaining Your Seasoned Cast Iron Skillet on Induction
- 11 Advanced Techniques for Induction Cast Iron Seasoning
- 12 Safety Considerations for Induction Seasoning
- 13 Optimizing Results: Tips from Cast Iron Experts
- 14 Seasoning Different Types of Cast Iron on Induction
- 15 Achieving Professional-Grade Seasoning at Home
Seasoning Cast Iron on Induction Burners
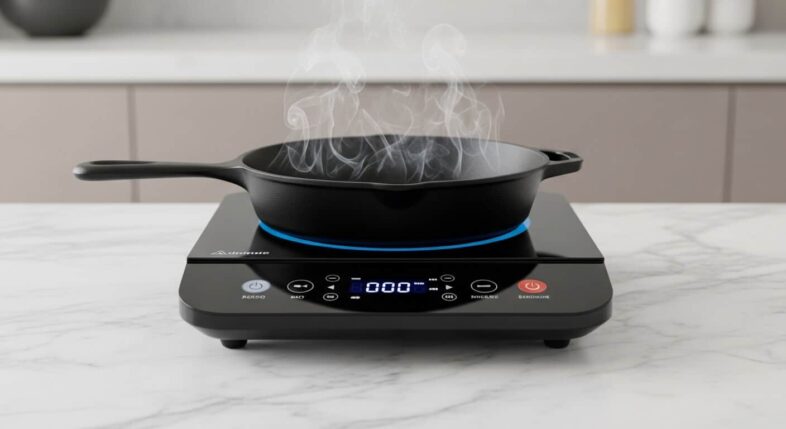
You can season a cast iron skillet using a portable induction burner by heating the pan on the portable electric cooktop, applying thin layers of high smoke point oil, and bringing it to polymerization temperature (400-500°F) for 45-60 minutes per coat.
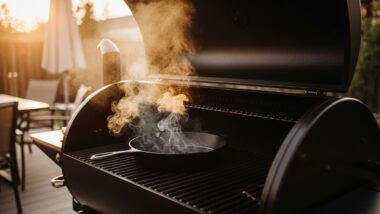
Here’s the thing—most guides tell you to use your oven. But what if you don’t have one? Or it’s 95 degrees outside and you’re not heating up the entire house?
That’s where induction comes in.
Portable induction burners give you precise temperature control. They heat fast. Cool faster. And they won’t turn your kitchen into a sauna.
What you’ll learn:
- Why induction actually works better for some people
- Exact temperature settings (not just “medium heat”)
- How to avoid sticky, blotchy seasoning
- The real timeline—no shortcuts
Not complicated. Just different from what you’re used to.
Understanding Cast Iron Seasoning Basics
Seasoning is polymerized oil bonded to the iron surface through high heat, creating a natural non-stick coating that protects against rust.
Think of it like this. You’re not just coating the pan with oil. You’re chemically changing it.
When oil gets hot enough (beyond its smoke point), the fat molecules break down and reorganize. They bond to the iron. They bond to each other. The result? Hard, slick, protective layer.
Why this matters:
- Each layer builds on the previous one
- Temperature is everything—too low and you get sticky residue, too high and you burn it off
- The pan literally changes color (silver-gray to black)
- It’s permanent until you strip it

Induction affects this how? Bottom-up heat instead of all-around oven heat. You’ll adjust for that.
Why Use a Portable Induction Burner for Seasoning Cast Iron
Advantages of Induction Seasoning
Using a portable induction burner for cast iron seasoning offers precise temperature control, energy efficiency, and the ability to season without heating your entire kitchen.
Control. That’s the big one.
Most induction burners show actual temperature. Not just “medium” or “6” on a dial. You’ll know when you hit 450°F.
Other benefits:
- Heats in 2-3 minutes (ovens take 15-20)
- Only the pan gets hot—your kitchen stays cool
- Uses less electricity than running an oven for an hour
- Perfect for small spaces, RVs, dorm rooms
- Can do this outside if you’ve got an outlet
And here’s what nobody mentions—you can watch it happen. With oven seasoning, you just wait and hope. With induction, you’re right there. You see the oil smoke. You smell when it’s polymerizing. You adjust in real-time.
When Induction Seasoning Makes Sense
Go with induction when you don’t have oven access, want better temperature visibility, or need to season during hot weather without heating your living space.
Best scenarios:
- Apartment with a tiny oven (or broken one)
- Summer months
- You’re seasoning multiple pans and don’t want the oven tied up
- Testing different oils and want quick iterations
- Outdoor cooking setup
Not always the right move, though. If you’re seasoning a 15-inch skillet, induction has limits. More on that later.
Essential Equipment and Materials Needed
Induction Burner Requirements
Your portable induction burner should provide 1500-1800 watts, precise temperature controls up to 500°F, and a flat surface large enough to match your skillet’s base.

Wattage matters. A lot.
Those cheap 1000-watt burners? They’ll struggle to maintain high temps. You want 1500 minimum. 1800 is better.
Key features to check:
- Temperature display (not just power levels)
- Holds steady heat without cycling on/off constantly
- Auto-shutoff override (some turn off after 2 hours—annoying mid-season)
- Flat glass surface without warping
- Fits your skillet’s base (8-inch pan needs smaller burner zone than 12-inch)
The skillet needs to be induction-compatible. Cast iron always is—it’s magnetic. You’re good there.
Selecting the Right Oil for Seasoning Cast Iron
Choose oils with smoke points above 400°F—grapeseed (420°F), refined canola (400°F), or vegetable oil (400-450°F)—for successful polymerization on induction burners.
Flaxseed oil gets recommended everywhere. It polymerizes hard. Real hard.
Too hard, sometimes. It can flake off.
Better options for induction:
| Oil Type | Smoke Point | Seasoning Quality | Cost |
|---|---|---|---|
| Grapeseed | 420°F | Durable, smooth | $$ |
| Canola (refined) | 400°F | Solid, reliable | $ |
| Vegetable | 400-450°F | Good enough | $ |
| Avocado | 520°F | Excellent (overkill) | $$$ |
Skip these:
- Olive oil (smoke point too low, gets sticky)
- Butter (just no)
- Coconut oil (smokes too early)
- Unrefined anything
Grapeseed is sneaky good. High smoke point. Thin consistency. Doesn’t gum up. That’s what I’d use.
Additional Tools and Supplies

Gather lint-free cloths, chain mail scrubber, mild dish soap, heat-resistant gloves, and good ventilation before starting the induction seasoning process.
You don’t need much. But what you need matters.
The actual list:
- Paper towels or clean rags (old t-shirts work)
- Chain mail scrubber OR stiff brush
- Regular dish soap (yes, soap—we’ll get to that)
- Oven mitts that can handle 500°F
- Box fan or open windows
- Infrared thermometer (optional but helpful)
That thermometer? Not required. But if you’ve got one, you’ll know exactly what temp your pan is hitting. Takes the guesswork out.
Preparing Your Cast Iron Skillet for Seasoning
Cleaning New Cast Iron Skillets
New cast iron skillets need thorough washing with dish soap and hot water to remove factory wax, protective coatings, or machine oil before seasoning on induction.
Straight from the box? Don’t season it yet.
There’s coating on there. Wax. Oil. Whatever they used to keep it from rusting in the warehouse.
Wash it. Hot water. Dish soap. Scrub hard.
(Yeah, you can use soap on cast iron. That myth needs to die. Soap won’t hurt polymerized seasoning—and you don’t have any seasoning yet anyway.)
Steps:
- Hot water + generous dish soap
- Scrub with stiff brush or chain mail
- Rinse until water runs clear
- Dry immediately with towel
- Put it on the induction burner on low for 3 minutes to evaporate any remaining moisture

The pan should look dull gray. Slightly rough. That’s what you want.
Stripping Old or Damaged Seasoning
Strip existing seasoning when you see rust, flaking, or sticky patches that won’t clean off—use the induction burner’s high heat and a chain mail scrubber to remove damaged layers.
Sometimes you’re not starting fresh. Maybe you got a pan from a yard sale. Or your seasoning went wrong somewhere.
You’ll know it needs stripping if:
- Black flakes coming off
- Sticky spots that won’t go away
- Rust patches
- Uneven, blotchy surface
Induction stripping method:
- Heat pan on medium-high until very hot
- Scrub with chain mail while still warm (use gloves)
- Rinse, heat again, scrub again
- Repeat until you’re down to bare metal
The lye bath method works better for serious restoration. But for light damage? Heat and scrubbing gets you there.
Step-by-Step: How to Season Cast Iron Using an Induction Burner
Step 1: Initial Heating and Drying
Heat your cast iron skillet on the induction burner at medium (around 300°F) for 3-5 minutes until all moisture evaporates and the pan is completely dry.
Start here. Every time.
Water is the enemy. Even tiny amounts. You need bone-dry iron.
Set the burner to medium. Let the pan sit there. You’ll see any water droplets evaporate. Then you’ll see—nothing. That’s when it’s ready.
What you’re watching for:
- Steam stops rising
- Pan feels hot to hover your hand over (don’t touch)
- Surface looks uniform, no wet spots
- Takes about 3-5 minutes from cold
Don’t rush this. Seasoning over moisture creates weak spots that’ll flake off later.
Step 2: Applying the Oil Layer
Apply a tiny amount of oil (½ teaspoon for a 10-inch skillet) to the warm pan, spread it completely, then wipe away excess until the surface looks almost dry.
Less is more. No, really.
Too much oil = sticky, gummy seasoning that never fully hardens. You want a microscopically thin layer.
The technique:
- Put ½ teaspoon oil in the pan (yes, that’s it)
- Use a paper towel to spread everywhere—cooking surface, sides, handle, bottom
- Take a clean towel and wipe it like you’re trying to remove the oil
- Wipe again
- It should look like there’s barely anything there
If it looks shiny or wet, you used too much. Wipe more.
The pan should look almost the same as before you oiled it. Maybe slightly darker. That’s it.
Step 3: Heating to Polymerization Temperature
Set your induction burner to 450°F and maintain that temperature for 45-60 minutes, allowing the oil to smoke and polymerize into a hard, protective layer.
Now we cook it.
Crank the heat. You need to pass the oil’s smoke point and stay there.
The process:
- Set burner to 450-500°F
- Oil will start smoking within 5 minutes (this is good)
- Keep it there for 45 minutes minimum
- The smoke will slow down after 10-15 minutes
- Pan will darken slightly
Open your windows. Turn on fans. It’s gonna smoke.
That smoke? It’s the oil breaking down. The polymerization happening. You want it.
Temperature troubleshooting:
| What You See | What It Means | Fix |
|---|---|---|
| No smoke after 10 min | Too cool | Increase temp to 475-500°F |
| Heavy smoke entire time | Too much oil | Normal for first 10 min, then should slow |
| Smoke smells burnt | Too hot | Drop to 425°F |
Stay close. Don’t just set it and walk away.
Step 4: Cooling and Inspection
Turn off the induction burner and let the cast iron skillet cool naturally on the surface for 20-30 minutes before inspecting the seasoning layer for evenness and proper polymerization.
Power down. Wait.
Don’t rush the cool-down. Thermal shock can warp cast iron (rare, but possible).
Cooling protocol:
- Turn burner off completely
- Leave pan sitting on the burner
- Don’t move it for 15 minutes
- After 15 minutes, you can carefully move it to a heat-proof surface
- Wait until it’s cool enough to touch (another 15-20 minutes)
What should you see? A slightly darker surface. Matte finish, not shiny. Smooth to the touch. No sticky spots.
Run your finger across it. Should feel dry. Slightly slick, but not oily.
If it’s sticky—you either used too much oil or didn’t heat it long enough. You’ll need to heat it again.
Step 5: Building Multiple Seasoning Layers
Repeat the oil application and heating process 3-6 times, with each layer building on the previous one to create durable, non-stick seasoning on your induction burner.
One coat isn’t enough. Not even close.
You need layers. Three minimum. Six is better.
The cycle:
- Cool completely from previous layer
- Apply new oil (same amount—barely any)
- Wipe thoroughly
- Heat to 450°F for 45 minutes
- Cool
- Repeat
Each layer should take about 75 minutes total (heating + cooling). So 3 layers = 4 hours. 6 layers = 7-8 hours.
Yeah. It’s a project.
Can you do multiple coats in one day? Sure. Can you spread it over a weekend? Also fine. The pan doesn’t care about your schedule.
You’ll notice the pan getting darker with each coat. By coat 3, it’ll look actually seasoned. By coat 6, it’ll be smooth and dark.
Temperature Control Techniques for Induction Seasoning
Understanding Induction Heat Settings
Induction burners heat cast iron from the bottom up, requiring you to monitor the actual pan temperature (not burner settings) and adjust based on oil smoke and visual cues.
Your burner might say “450°F” but that’s the burner temp. The pan? Different story.
Cast iron is thick. Takes time to heat through. The bottom might be 500°F while the sides are 350°F.
How to manage this:
- Use an infrared thermometer pointed at the cooking surface center
- Give the pan 5 minutes to heat evenly after hitting target temp
- Adjust burner 25-50°F higher than your target (to compensate for heat loss)
- Watch the oil behavior more than the numbers
The oil tells you everything. When it smokes steadily, you’re there.
Avoiding Common Temperature Mistakes
Maintain consistent 450°F heat throughout the polymerization process—going too low creates sticky residue while too high burns off the layer you’re trying to build.
What goes wrong:
Too low (under 400°F):
- Oil doesn’t polymerize, just sits there getting sticky
- You’ll end up with a gummy coating
- Smells like old grease instead of neutral
Too high (over 525°F):
- Burns the oil before it can polymerize properly
- Creates weak, flaky seasoning
- Acrid smoke smell
Temperature swings:
- Burner cycling on and off disrupts the process
- Some cheap induction units do this constantly
- You’ll get uneven results
Stay steady. Boring is good here.
Troubleshooting Cast Iron Seasoning on Induction Burners
Addressing Sticky or Tacky Surfaces
Fix sticky seasoning by heating the pan on your induction burner to 475°F for another hour to complete polymerization, or strip and restart if the stickiness won’t resolve.
Sticky pan after seasoning? Frustrating.
But fixable.
Why it happens:
- Too much oil applied
- Heat wasn’t high enough
- Didn’t cook long enough
- All of the above
The fix:
- Heat the pan to 475°F (no new oil)
- Let it cook for 60 minutes
- This should finish polymerizing whatever’s sticky
- If still sticky after cooling—strip it and start over
Sometimes you just gotta admit defeat. If three attempts at fixing it don’t work, you’ve got oil that’s not going to cooperate. Strip it. Try different oil next time.
Fixing Uneven Seasoning Coverage
Rotate your cast iron skillet 180 degrees every 15 minutes during induction heating to compensate for hot spots and achieve even seasoning coverage across the entire surface.
Induction creates concentrated heat right where the coils are. Usually the center.
This means the middle of your pan might be 475°F while the edges are 400°F. You’ll get dark center, lighter edges.
Solutions:
- Rotate the pan quarter-turns every 15 minutes during heating
- Use a burner that matches your pan size (don’t put a 12-inch pan on an 8-inch burner zone)
- Apply slightly more oil to the edges before heating
For the sides and handle? They won’t get as hot from induction alone. That’s normal. You can finish those in the oven if you want perfect coverage, or just let them season naturally through cooking.
Managing Excessive Smoke Production
Reduce smoke during induction seasoning by using less oil, improving ventilation with fans and open windows, and confirming your temperature isn’t exceeding 500°F.
It’s gonna smoke. Accept that.
But there’s “normal seasoning smoke” and “your neighbors are calling the fire department” smoke.
Normal smoke:
- Starts within 5 minutes of hitting temp
- Visible but not thick
- Smells like hot oil, slightly acrid
- Slows down after 10-15 minutes
Problem smoke:
- Thick clouds
- Doesn’t slow down
- Burns your eyes
- Keeps going the entire hour
If you’re in problem territory:
- Check temp—might be too high
- Next time use half the oil
- Set up cross-ventilation (fan in window blowing out, door open)
- Do it outside if you can
I’ve done this in an apartment with one window open and a box fan. Worked fine. But I also used very little oil.
Preventing Warping During Induction Seasoning
Avoid warping cast iron on induction by heating gradually to your target temperature, cooling slowly on the burner surface, and using appropriately-sized pans for your burner zone.
Warping is rare. But it happens.
Cast iron can warp if you shock it—rapid heat changes, cold water on hot pan, that kind of thing.
Prevention:
- Don’t start at max temp (ramp up over 5 minutes)
- Don’t run cold water on hot pan to speed cooling
- Match pan size to burner (a 14-inch skillet on a small burner can create stress points)
- Quality matters—thin, cheap cast iron warps easier than thick, quality pieces
If your pan develops a slight wobble? Sometimes you can fix it. Heat it thoroughly, put it upside down on a flat surface, press down (carefully—it’s hot), let it cool. Sometimes that works.
Mostly, though? Just avoid the problem by treating your pan gently during temp changes.
Induction vs. Oven Seasoning: Key Differences
Heat Distribution Comparison
Induction heats cast iron from the bottom only, while ovens provide all-around heat—meaning induction requires pan rotation and may leave sides less seasoned than oven methods.
Bottom-up versus all-around. That’s the core difference.
Induction:
- Heat concentrated on cooking surface
- Sides and handle get less heat
- Requires rotating for evenness
- You control and see the process
Oven:
- Even heat all around
- Entire pan seasons uniformly
- Set it and forget it
- Can’t easily monitor progress
Neither is “better.” Different tools for different situations.
Want perfect handle seasoning? Oven wins. Want to see exactly what’s happening and adjust in real-time? Induction wins.
Time and Energy Efficiency
Induction seasoning takes 75 minutes per layer (45 heating, 30 cooling) while oven seasoning takes 90+ minutes per layer (60 heating, 30+ cooling, plus preheat time).
Let’s do the math on a 3-layer season:
Induction:
- No preheat needed
- 45 min per layer x 3 = 135 minutes heating
- 30 min cooling between layers = 60 minutes
- Total: ~3.5 hours
Oven:
- 15 min preheat per layer = 45 minutes
- 60 min per layer x 3 = 180 minutes heating
- 30 min cooling between = 60 minutes
- Total: ~5 hours
Induction is faster. Uses less energy. Doesn’t heat your house.
But—oven lets you do other things. With induction you’re more tied to the process.
Results and Durability
Both induction and oven seasoning produce durable, functional coatings when done correctly, though oven seasoning may provide more uniform coverage while induction offers better process control.
After six months of cooking? You won’t be able to tell which method was used.
Seriously. The differences are minor.
What matters more than method:
- Oil choice
- How thin you applied it
- Number of layers
- Consistency in temperature
I’ve got pans seasoned both ways. They’re equally non-stick. Equally durable. The oven one has slightly better handle seasoning. The induction one has a marginally smoother cooking surface.
Could be the method. Could be random variation. Hard to say.
Bottom line—use what you’ve got access to. Both work.
Maintaining Your Seasoned Cast Iron Skillet on Induction
Daily Cooking and Care
Cook with your freshly seasoned cast iron on medium to medium-high induction heat, clean with hot water and a brush after each use, and apply a light oil coat if the surface looks dry.
Your new seasoning isn’t fragile. Use the pan.
Cooking tips for induction:
- Medium heat is enough for most tasks (induction is efficient)
- Preheat 3-4 minutes before adding food
- A little oil or fat helps protect seasoning early on
- Metal utensils are fine (your seasoning is harder than you think)
Cleaning routine:
- Let pan cool slightly (not completely)
- Hot water + brush or chain mail
- Scrub out food bits
- Dry immediately
- Rub with tiny bit of oil if surface looks dull
Soap? If you need it, use it. Won’t hurt polymerized seasoning. But usually hot water and scrubbing is enough.
Building Seasoning Through Regular Use
Every time you cook with fat on your induction burner, you’re adding micro-layers of seasoning—meaning your cast iron actually improves with use over time.
This is the cool part.
Each time you cook bacon. Sear a steak. Fry potatoes. You’re adding seasoning.
Best foods for building seasoning:
- Bacon (fat content is perfect)
- Seared meats
- Roasted vegetables with oil
- Cornbread
- Anything fried
Foods to avoid early on:
- Acidic stuff (tomato sauce, vinegar) breaks down new seasoning
- Boiling water (does nothing for seasoning)
- Delicate fish (will stick to new seasoning)
After 20-30 cooking sessions? Your seasoning will be way better than after that initial six-layer build. Use it. That’s what makes it great.
Long-Term Seasoning Maintenance
Re-season your cast iron on the induction burner once or twice yearly, or whenever you notice the surface looking dull, food sticking more than usual, or dry patches appearing.
You’ll know when it needs a refresh.
Signs it’s time:
- Food sticking in certain spots
- Dull, grayish patches
- Surface feels rough instead of smooth
- Water doesn’t bead up anymore
When that happens:
- Clean thoroughly
- Do 1-2 new seasoning layers on the induction burner
- Back to cooking
Storage matters too. If you’re stacking pans, put a paper towel between them. Keeps them from scraping each other.
Humid climate? Wipe with oil before storing. Prevents rust.
That’s it. Cast iron isn’t high-maintenance. It just needs occasional attention.
Advanced Techniques for Induction Cast Iron Seasoning
Seasoning the Sides and Handle
Season cast iron sides and handles by tilting the pan at angles on your induction burner or briefly finishing these areas in a 450°F oven after completing the induction seasoning process.
The cooking surface is easy. Flat. Sits right on the heat.
Sides and handles? Different challenge.
Induction workarounds:
- Tilt the pan so sides sit directly on the burner (carefully—support it)
- Rotate through different angles during the 45-minute heating
- Use a heat gun to supplement induction heat on vertical surfaces
- Accept that sides won’t be perfect and let them season through use
Or just cheat:
- Finish in the oven at 450°F for 30 minutes
- Everything gets even heat
- Not pure induction, but who cares—it works
Handles are tricky on induction. They just don’t get hot enough. Oven or cooking will handle those over time.
Speed Seasoning Methods
Apply multiple oil coats back-to-back during a single heat cycle on your induction burner to build 3-4 layers in about 2 hours instead of the usual 4-5 hours.
Want to cut the time? There’s a way.
Not ideal. But it works okay.
The speed method:
- Heat pan to 450°F for 30 minutes
- Cool for just 5 minutes (not fully)
- Apply new oil coat while still very warm
- Heat again for 30 minutes
- Repeat
You can stack 3-4 layers this way in a couple hours.
Downsides:
- Slightly less durable than full-cycle seasoning
- Higher risk of sticky spots
- Need to be more careful with oil amounts
Good for getting a pan usable quickly. Not great for ultimate quality.
Your call.
Specialty Oil Combinations
Experiment with oil blends—starting with grapeseed for the first 3 layers, then switching to canola for the final coats—to balance hardness and flexibility in your induction seasoning.
Most people use one oil. But you can mix it up.
Hybrid approach:
- Layers 1-3: Grapeseed (builds hard base)
- Layers 4-6: Canola (adds flexible top coat)
- Result: Hard foundation with durable finish
Does this matter? Honestly? Probably not much.
But some people swear by it. If you’re already doing 6 layers, trying different oils costs nothing.
Other combos worth testing:
- Flaxseed base (hard) + vegetable top (durable)
- Avocado for everything (expensive but excellent)
- Canola throughout (cheap, reliable, boring)
The differences are subtle. Don’t overthink it.
Safety Considerations for Induction Seasoning
Handling High-Heat Cast Iron
Always use heat-resistant gloves rated to 500°F or higher when moving cast iron during induction seasoning, and wait at least 15 minutes after turning off heat before touching the pan.
Cast iron holds heat forever. Seriously.
That pan will burn you 20 minutes after you shut off the burner. Don’t get casual about it.
Safety rules:
- Oven mitts rated for high heat (not regular kitchen mitts)
- Silicone gloves work well
- Keep kids and pets away from your seasoning station
- Don’t put hot pan on anything that can melt or burn
- Assume it’s hot even when it looks cool
Burns from cast iron are no joke. Full thickness. Slow to heal. Just don’t.
Induction Burner Safety
Keep your induction burner surface clean, ensure proper ventilation during seasoning smoke, never leave the burner unattended, and place it on a stable, heat-resistant surface.
Induction burners are pretty safe. But you can still mess up.
Watch out for:
- Oil dripping onto the burner surface (pain to clean, potential fire hazard)
- Overloading electrical circuit (use dedicated outlet)
- Leaving it running unattended
- Using on unstable surface where pan could tip
Smoke management:
- Open windows before you start
- Set up a fan blowing toward the window
- Don’t do this in a tiny enclosed bathroom or closet
- If smoke alarm goes off, you need better ventilation
Most smoke alarms will tolerate seasoning smoke if there’s airflow. But maybe warn your roommates first.
Fire Safety Precautions
Have a fire extinguisher nearby when seasoning cast iron on induction, never use water on an oil fire, and know that oil ignition points are around 600°F—well above proper seasoning temperatures.
Oil fires are rare during seasoning. You’re not hitting temps that high.
But rare isn’t impossible.
If oil ignites:
- Turn off burner immediately
- Cover pan with metal lid (cuts oxygen)
- DO NOT use water
- Keep fire extinguisher within reach
- If flames spread, evacuate and call 911
At proper seasoning temps (450°F), oil smokes but doesn’t ignite. You’d need to hit 600°F+ for actual fire.
Still. Be prepared.
Optimizing Results: Tips from Cast Iron Experts
Professional Seasoning Strategies
Professional cast iron restorers using induction burners apply 6-8 ultra-thin oil layers, maintain exact 465°F temperature, and inspect between each coat for consistency.
What do the pros do differently?
Their tricks:
- They use way less oil than you think (maybe ¼ teaspoon for a 10-inch pan)
- Temperature precision matters—they hit 465°F and hold it
- They inspect with a flashlight between coats, checking for any imperfections
- More thin layers beats fewer thick ones every time
- They’re patient—no rushing the cooling
You don’t need professional tools. Just professional patience.
Common Mistakes to Avoid
The biggest induction seasoning mistakes are applying too much oil, rushing the polymerization time, and not doing enough layers—all fixable by being more conservative with oil and patient with process.
What ruins seasoning:
Too much oil:
- Leaves sticky residue
- Never fully hardens
- Most common mistake by far
Inconsistent temperature:
- Some spots season, others don’t
- Creates patchy results
- Leads to uneven cooking later
Not enough layers:
- Seasoning looks good but scratches off easily
- Food sticks more than it should
- Needs rebuilding sooner
Impatience:
- Not waiting for full cooling
- Pulling pan too early
- Trying to use it immediately
The fix for all of these? Slow down. Use less. Wait longer.
Maximizing Your Portable Induction Burner’s Potential
Set your induction burner to exactly 450-465°F using the temperature controls, position your cast iron skillet centered on the burner zone, and verify temperature with an infrared thermometer for consistent results.
Get to know your specific burner.
They all run a little different. Some run hot. Some run cool. Some cycle temperature like crazy.
Dialing it in:
- First time? Use the infrared thermometer and note what setting gives you 450°F
- Check at 10 minutes, 25 minutes, 40 minutes—does it hold steady?
- If it cycles, adjust baseline higher to compensate
- Mark your ideal settings on a piece of tape on the burner
Center the pan. Obvious, but people forget. Off-center = uneven heating = uneven seasoning.
Clean the burner surface between coats. Any oil residue interferes with heat transfer.
Seasoning Different Types of Cast Iron on Induction
Bare Cast Iron Skillets
Season bare, unseasoned cast iron from scratch using 5-6 complete induction cycles to build a durable foundation, starting with grapeseed or canola oil applied extremely thin.
Starting from raw iron? You’ve got work ahead.
But also—best case scenario. No old seasoning to strip. No mystery about what’s been done to it.
Timeline for bare iron:
- Day 1: Clean, then apply 3 layers (5-6 hours)
- Day 2: Apply 2-3 more layers (3-5 hours)
- Total: 6 layers minimum before first cook
Pre-seasoned pans from the store need fewer layers. Maybe 2-3 to build on what’s there.
But bare iron? Commit to 5-6. Worth it.
Vintage and Restored Cast Iron
Season vintage cast iron on induction the same way as new pans but expect to use 7-8 layers since older, smoother iron surfaces need extra seasoning build-up for good non-stick performance.
Old Griswold? Wagner? That smooth vintage iron?
It seasons beautifully. But needs more layers than modern rough-surface pans.
Vintage differences:
- Smoother surface = less for seasoning to grip initially
- Needs extra coats to build thickness
- End result is actually better than modern cast iron
- Takes more patience up front
The process is identical. Just plan for 7-8 layers instead of 5-6.
And be careful with temps. Some vintage iron is thinner. Can heat faster. Watch for hot spots.
Enameled Cast Iron Considerations
Never season enameled cast iron on induction or anywhere else—the enamel coating provides non-stick properties and additional seasoning will damage the enamel surface.
Enameled? Different beast.
Le Creuset. Staub. Whatever brand. If it’s got that glossy colored coating—don’t season it.
Why:
- Enamel is already non-stick (ish)
- Doesn’t need seasoning
- Adding polymerized oil can cause enamel to chip or crack
- You’ll ruin an expensive pan
Just cook with it. Clean it gently. Leave it alone.
Induction works great for enameled cast iron. Just for cooking. Not seasoning.
Achieving Professional-Grade Seasoning at Home
Visual Quality Indicators
Properly seasoned cast iron on induction shows a deep black color with matte finish, smooth to the touch, and water beads up on the surface rather than spreading out.
How do you know when you’re done?
What success looks like:
- Dark brown to black color (not shiny, not dull—matte)
- Uniform appearance across cooking surface
- Smooth feel when you run your hand over it
- No sticky or rough patches
- Slight sheen but not glossy
The water test:
- Splash a few drops of water on the cool pan
- Should bead up like water on a waxed car
- If it spreads out flat, needs more seasoning
Each layer adds slightly more color. By layer 6, should be distinctly black.
Performance Testing Your Seasoning
Test your induction-seasoned cast iron by frying an egg with minimal oil—if it releases easily and slides around the pan, your seasoning is ready for regular cooking.
The egg test. Classic for a reason.
How to run it:
- Heat pan on medium induction heat
- Add small amount of butter or oil
- Crack an egg
- Let it cook without touching for 2 minutes
- Try to slide it with a spatula
Good seasoning = egg slides around freely, minimal sticking.
Bad seasoning = egg welds itself to the pan, tears when you try to move it.
If it fails? Do 2-3 more seasoning layers.
Other first-cook options:
- Grilled cheese (easier than eggs)
- Bacon (adds seasoning while you cook)
- Hash browns (good intermediate test)
Save the delicate fish for after 20 cooks.
Taking Your Seasoning to the Next Level
Achieve mirror-smooth, competition-level cast iron seasoning by applying 10-12 ultra-thin layers on induction, polishing between coats with 0000 steel wool, and cooking fatty foods regularly.
Want showpiece-quality seasoning?
It’s possible. Takes forever. Probably not worth it unless you’re obsessive.
Advanced approach:
- 10-12 layers instead of 6
- Polish with ultra-fine steel wool between coats (removes any texture)
- Use only grapeseed oil (most consistent results)
- Temperature precision within 5°F
- Inspect with magnifying glass for imperfections
Some people do this. Their pans look like black glass.
Does it cook better than a regular 6-layer season? Not really.
But it looks incredible.
If that’s your hobby? Go for it. Just know you’re in deep.