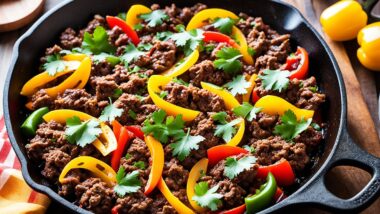
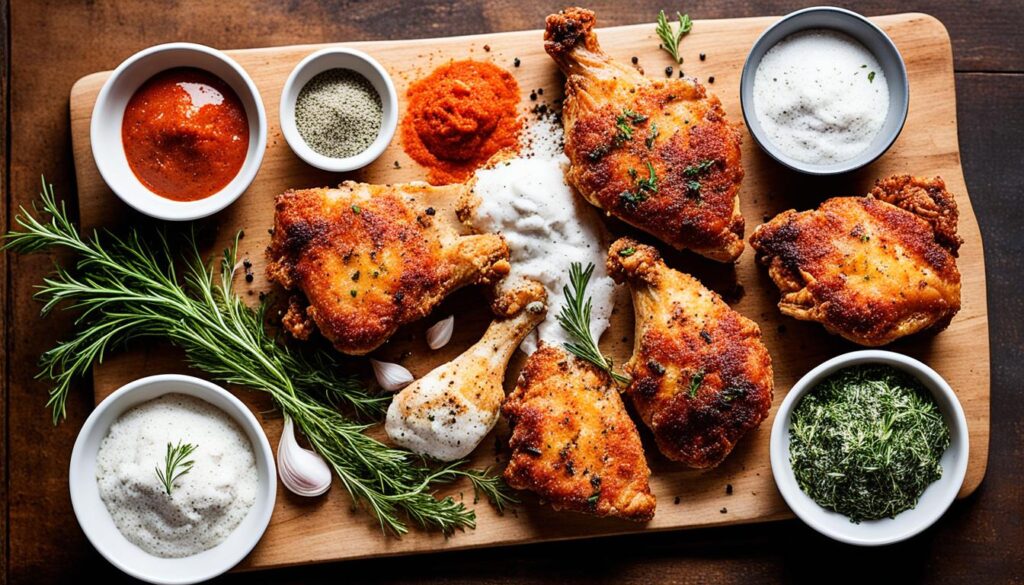
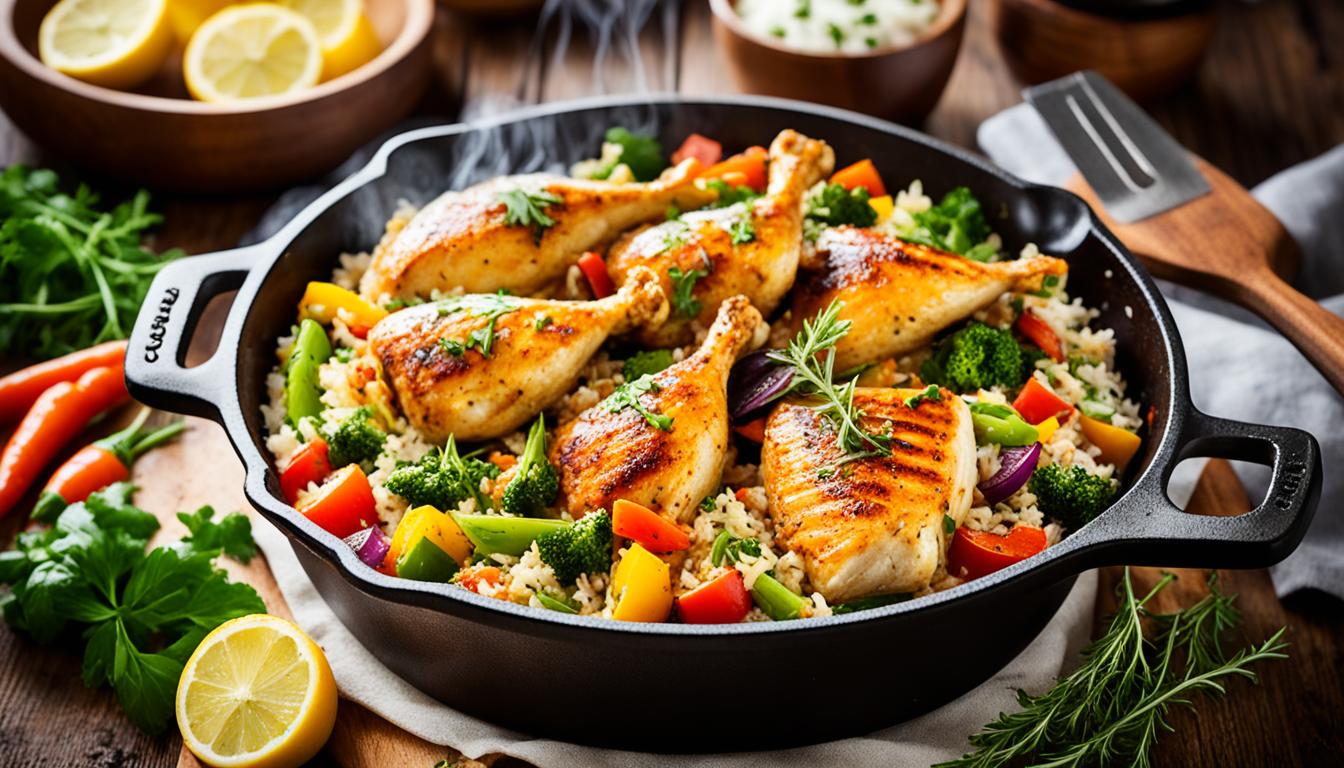
Cast iron skillet fried chicken means eleven recipes here — classic Southern, overnight buttermilk brine, herb-crusted, Cajun spiced, gluten-free, keto, double-dredged, Korean-style, lemon rosemary, honey-drizzled, and a vegetarian seitan version — every one built for four people and tested more times than I can honestly count.
Table of Contents
- 1 Why People Love Cast Iron Skillet Fried Chicken
- 2 Essential Tools and Ingredients for Perfect Fried Chicken
- 3 Classic Southern-Style Cast Iron Skillet Fried Chicken
- 4 Buttermilk Brined Fried Chicken
- 5 Crispy Herb-Crusted Fried Chicken
- 6 Spicy Cajun Fried Chicken
- 7 Gluten-Free Cast Iron Skillet Fried Chicken
- 8 Low Carb Keto-Friendly Fried Chicken
- 9 Vegetarian “Fried Chicken” Using Seitan or Tofu
- 10 Korean-Style Fried Chicken in Cast Iron
- 11 Lemon and Rosemary Infused Fried Chicken
- 12 Double-Dredged Extra Crispy Fried Chicken
- 13 Honey-Drizzled Southern Fried Chicken
- 14 Troubleshooting Common Fried Chicken Issues
- 15 Tips for Cleaning and Maintaining Your Cast Iron Skillet After Frying
Why People Love Cast Iron Skillet Fried Chicken
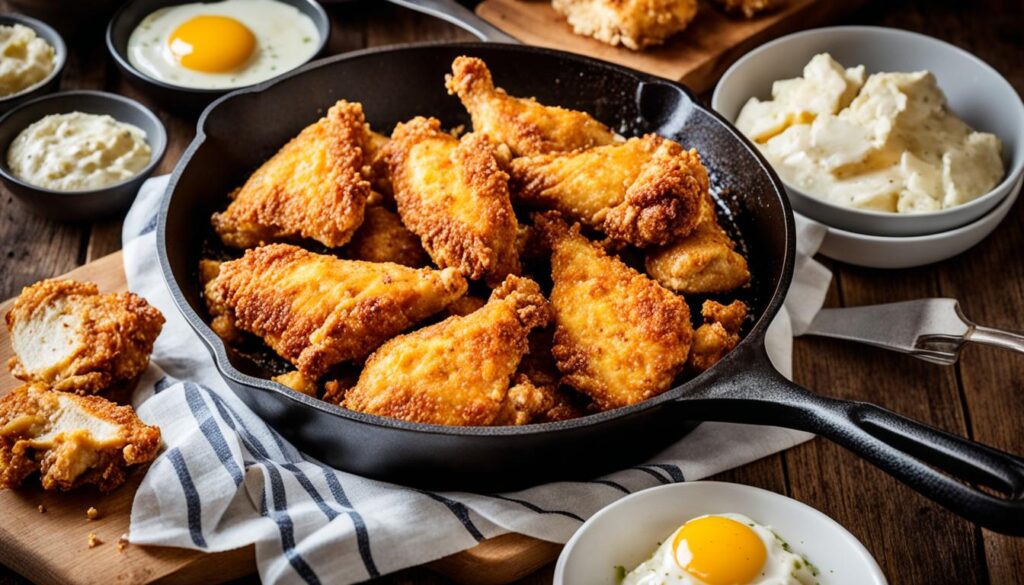
The crust is the only reason cooking fried chicken in a cast iron skillet is the preferred method. That’s it. That’s the entire reason. The even, sustained heat from cast iron creates a crust that other pans simply can’t match — not a Dutch oven, not a wok, definitely not a non-stick pan. When cold chicken hits properly preheated cast iron with hot oil, the surface temperature barely dips. That consistent heat is what seals the coating immediately and builds a crust that’s genuinely different in texture from anything else.
My older son requested fried chicken for his birthday dinner six years ago instead of going out. I’ve made it probably a hundred times since. I’ve worked on my fried chicken skills constantly and the cast iron version has been better than every other approach I’ve tried — no close second.
Fried chicken is my thing in this family. My wife will cook anything else, but fried chicken she hands off to me, and I’m genuinely not complaining. My younger son stands in the kitchen “to learn” during every fry session — what he actually means is he wants first access to the hot pieces coming off the rack.
According to the USDA Economic Research Service, in 2021 Americans had 68.1 pounds of chicken per person available for consumption, compared to 56.2 pounds of beef — chicken surpassed beef in 2010 and hasn’t looked back. A lot of that chicken gets fried. The numbers back up what everyone already knows: Americans are deeply committed to this dish.
If temperature control is a concern for you, an electric skillet with a removable pan can help with the Korean-style and double-dredge versions specifically — both benefit from precise heat management. For the classic versions though, straight cast iron is the move.
Read the section on cleaning tips and tricks before you start. Post-fry cleanup is manageable, but doing it wrong is very easy. More on that at the end of this article.
Essential Tools and Ingredients for Perfect Fried Chicken
Short list. Pay attention to it.
A 12-inch seasoned cast iron skillet is the right size for a family of four — you’re still doing two batches, but you can fit 3 pieces comfortably with room to manage them. Ten-inch works but the crowding issue gets real fast. Well-polymerized seasoning matters because it lets the crust release when it’s ready rather than tearing when you try to flip.
Oil. Peanut oil is the traditional Southern choice and the results show it — the crust color, the crunch, the slightly nutty background note. Vegetable oil works. Canola works. The requirement is a high smoke point. You’re frying at 325 to 350°F depending on the recipe — anything that breaks down at that temperature ruins the whole thing.
Two thermometers. One clip-on for the oil, one instant-read for the chicken. Not optional. A pinch-of-flour test for oil temperature is guesswork. A meat thermometer removes the guess from the most important question, which is whether the chicken is actually done. Breasts at 165°F, thighs and drums at 175°F — dark meat stays juicier at the higher temp.
The chicken itself: bone-in, skin-on. Thighs and drumsticks are the forgiving pieces — they stay moist even if your oil temperature bounces around a bit. Breast halves need more precision. I usually buy a mix: two thighs, two drums, two breast halves. That covers everyone.
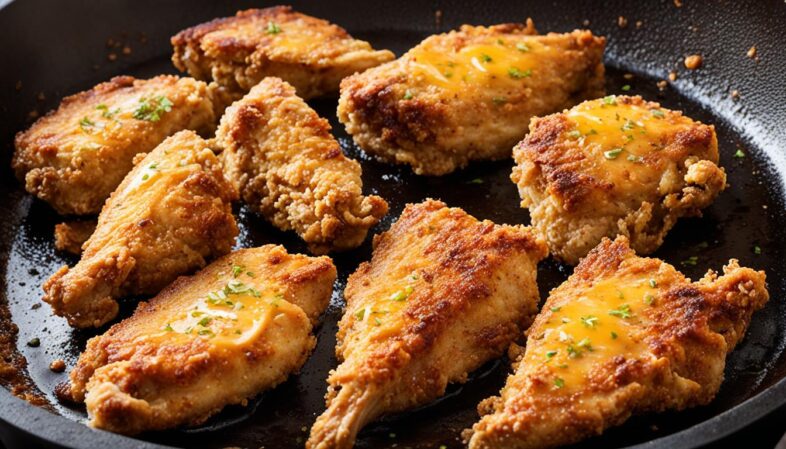
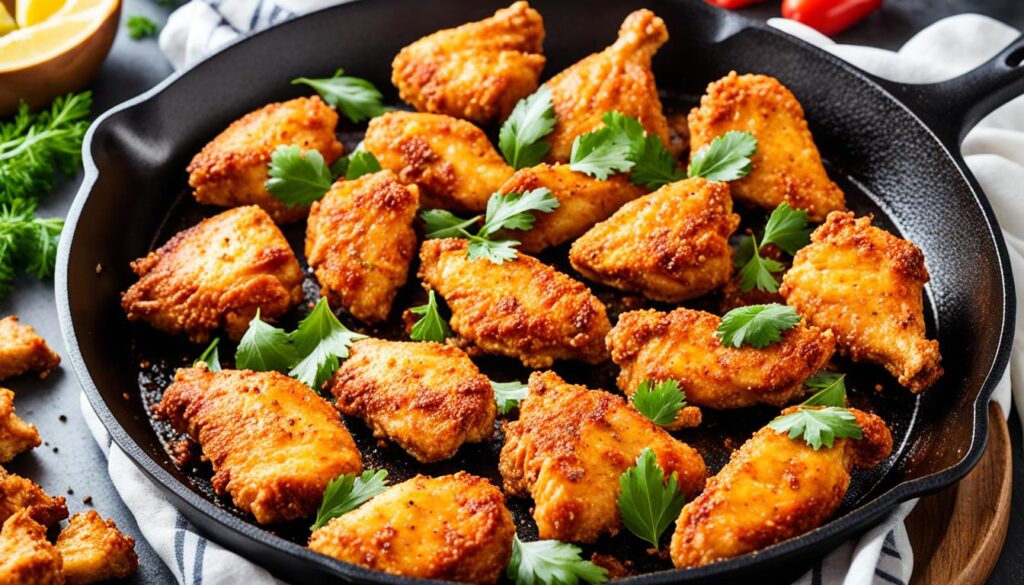
Classic Southern-Style Cast Iron Skillet Fried Chicken
This is the one I make most. No brine, simple seasoned dredge, 35 minutes. My older son has requested it for his birthday three years in a row without variation. I stopped suggesting other options after year one.
It’s the baseline for everything else in this article. Like the cast iron deep dish pizza recipe I’ve made probably two hundred times — some things just get refined and then left alone.
Ingredients (Serves 4)
- 3 lbs bone-in, skin-on chicken pieces
- 1-1/2 cups all-purpose flour
- 1 tsp each: salt, black pepper, garlic powder, onion powder, smoked paprika
- 1/2 tsp cayenne
- 2 eggs beaten with 2 tbsp water
- About 2 cups peanut or vegetable oil
Instructions
Pat every surface of the chicken dry. Paper towels, firm pressure, hold for a second. Moisture on the surface of the chicken becomes steam the moment it hits hot oil — that steam is what separates the crust from the skin and causes it to slide off during flipping. Dry chicken. Always.
Mix all the flour and seasonings in a shallow dish. Beat the eggs in a separate bowl. Dip each piece in flour first, shake off the loose excess — not all of it, just the excess — then egg wash, letting it drip, then back into the flour pressing in firmly on every surface. Flat sides, curves, anywhere the coating can grab. Set the coated pieces on a wire rack, not touching each other. Let them rest 10 minutes. This rest is the difference between a crust that holds and a crust that falls off — the flour absorbs moisture from the egg wash and bonds.
Oil into the cast iron over medium-high heat. Clip the thermometer on. You want 350°F. A pinch of flour should sizzle immediately and vigorously when it’s ready.
Chicken in, skin-side down. Space between pieces. No moving for 5 to 7 minutes — the crust is building. If you lift a piece and try to move it and it resists, it’s telling you it’s not done yet. It’ll release on its own when the crust has set. Flip, reduce to medium, another 5 to 7 minutes. Internal temps. Rack to drain — not paper towels, ever.
Nutritional Information (Per Serving)
| Nutrient | Amount per Serving |
|---|---|
| Calories | 520 |
| Carbohydrates | 28g |
| Protein | 38g |
| Fat | 26g |
| Fiber | 1g |
| Sodium | 680mg |
Buttermilk Brined Fried Chicken
Takes planning. Requires overnight. Worth everything.
My wife’s version — the one she asks for. She says this is the only fried chicken that doesn’t need a dipping sauce, and she’s been right every time I’ve made it. The brine does something the quick-dip egg wash version can’t approximate.
Here’s the actual science: buttermilk’s mild lactic acid operates at a pH of around 4.5 — gentle enough to break down muscle protein from the exterior inward without toughening the surface the way stronger acids do. As Tyner Pond Farm explains, lactic acid works more gently than vinegar or citrus, breaking down proteins while the fats and enzymes in dairy help retain moisture during cooking. The result is chicken that stays genuinely moist through the entire fry — even breast meat, which normally dries out fastest and is the hardest piece to get right. Brine overnight. This is the recipe I’d use to convert someone who doesn’t think they like fried chicken.
On nights when I want something lighter and faster as a weeknight backup, a healthy beef and broccoli stir fry can fill that gap — different pan, different world, both completely satisfying.
Ingredients (Serves 4)
- 3 lbs bone-in, skin-on chicken pieces
Brine — make the night before:
- 2 cups whole buttermilk
- 1 tbsp kosher salt
- 1 tsp garlic powder
- 1 tsp onion powder
- 1 tsp hot sauce
- 1/2 tsp black pepper
Dredge:
- 1-1/2 cups all-purpose flour
- 1 tsp salt, 1 tsp smoked paprika, 1 tsp garlic powder, 1/2 tsp black pepper, 1/2 tsp cayenne
- Oil for frying
Instructions
Brine mixed, chicken in, refrigerator. Eight hours minimum. Twenty-four is too long — somewhere in between is perfect, overnight hits it right.
Pull the chicken the next day. Let excess brine drip off. Do not rinse, do not pat dry — the residual buttermilk coating is the adhesive that holds the flour. Press each piece into the seasoned flour firmly on all sides. Rack. Ten minutes rest.
Oil to 325°F — this is lower than the classic version, and it’s intentional. The natural sugars in buttermilk brown at lower temperatures and the crust will go very dark very fast if your oil is too hot. Medium heat, 325°F, 7 to 8 minutes per side. The crust color will be deeper amber than standard fried chicken — slightly dark, almost caramelized-looking. That’s exactly correct.
Rack to drain. Five minutes rest before eating.
Nutritional Information (Per Serving)
| Nutrient | Amount per Serving |
|---|---|
| Calories | 540 |
| Carbohydrates | 30g |
| Protein | 40g |
| Fat | 26g |
| Fiber | 1g |
| Sodium | 720mg |
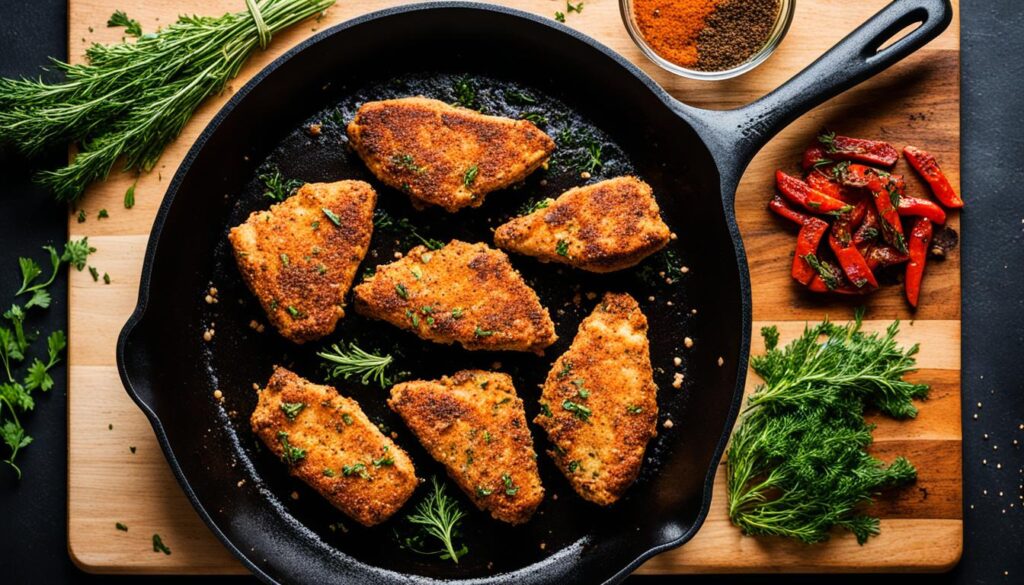
Crispy Herb-Crusted Fried Chicken
Dried rosemary, thyme, oregano, and parmesan in the dredge. The herbs bloom in the hot oil and the kitchen smells genuinely extraordinary. My wife’s favorite variation — she claims it adds an extra crunch and more aromatic complexity than plain fried chicken.
Dried herbs only. Fresh herbs contain water — they steam inside the crust during frying rather than crisping, and the crust goes soft in those spots. Dried rosemary, dried thyme, dried oregano. Crush the rosemary between your fingers before it goes in — it releases more oil that way.
Ingredients (Serves 4)
- 3 lbs bone-in, skin-on chicken pieces
- 1-1/2 cups all-purpose flour
- 1/3 cup finely grated parmesan
- 2 tsp dried rosemary, crushed
- 1-1/2 tsp dried thyme
- 1 tsp dried oregano
- 1 tsp each: garlic powder, salt
- 1/2 tsp black pepper, 1/4 tsp red pepper flakes
- 2 eggs beaten with 2 tbsp water
- Oil for frying
Instructions
Mix everything into the flour in a shallow dish. The mixture looks speckled — green flecks from the herbs, pale yellow from the parmesan. It smells like a good Italian kitchen before anything even goes in.
Pat chicken dry. Egg wash, then the herb-flour mixture pressed firmly in on all sides. The parmesan creates a slightly rougher, more textured surface than plain flour alone — more surface area means more crunch points.
Oil to 340°F. Skin-side down, 6 to 8 minutes. The herbs in the crust will go darker in spots — that’s toasting, not burning. The moment they smell like they’re going from toasted to acrid, flip immediately. Usually that’s the 7-minute mark. Another 6 to 7 minutes on the second side.
Rack. Temps. Done.
Nutritional Information (Per Serving)
| Nutrient | Amount per Serving |
|---|---|
| Calories | 530 |
| Carbohydrates | 26g |
| Protein | 42g |
| Fat | 26g |
| Fiber | 1g |
| Sodium | 710mg |
Spicy Cajun Fried Chicken
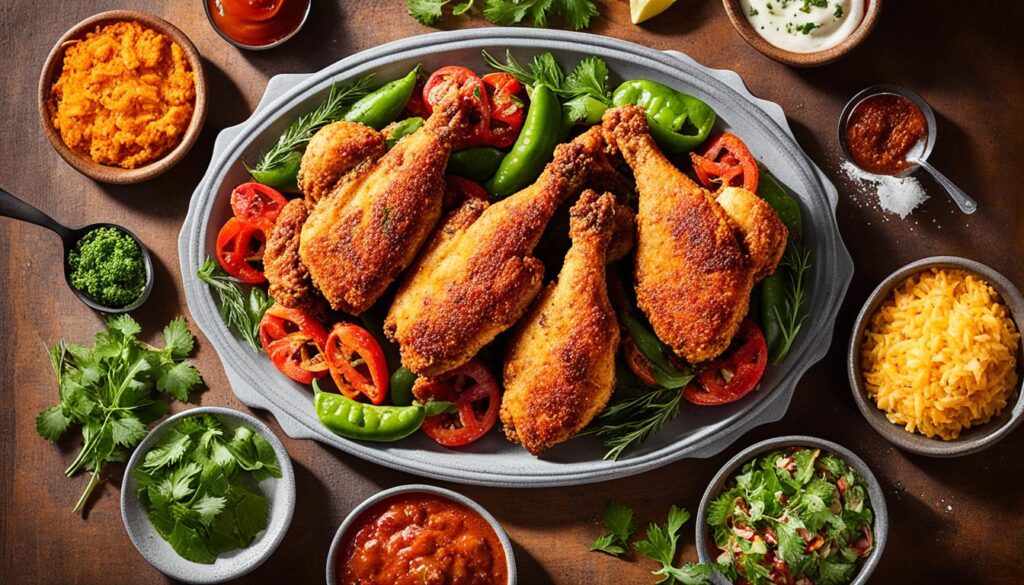
This one uses the same Cajun spice blend twice — some goes into the buttermilk brine, the rest goes into the flour dredge. Heat in the meat and heat in the crust. It tastes completely different from just adding cayenne to the standard recipe, and that difference is the whole reason to make it.

My sons were skeptical the first time. They are not skeptical now. On nights when I want to serve something spicy alongside seafood, this pairs well with a shrimp and broccoli stir fry — separate pans, separate flavor directions, both on the table around the same time.
Ingredients (Serves 4)
- 3 lbs bone-in, skin-on chicken pieces
Cajun spice blend:
- 2 tsp smoked paprika, 1-1/2 tsp garlic powder, 1 tsp each onion powder / dried thyme / dried oregano / cayenne, 1/2 tsp each black pepper and white pepper
Brine:
- 1-1/2 cups buttermilk + 2 tsp spice blend + 1 tsp salt
Dredge:
- 1-1/2 cups all-purpose flour + remaining spice blend + 1 tsp salt
- Oil for frying
Instructions
Mix the full spice blend. Pull out 2 teaspoons for the brine, the rest goes into the flour. Brine the chicken at least 2 hours in the buttermilk mixture. Remove, shake off excess, press into the spiced flour.
Oil to 340°F. Skin-side down, 7 to 8 minutes. The crust will go almost brick-red from the smoked paprika — this is alarming the first time. It’s correct. It is not burnt. Flip. Six to 7 more minutes.
The spice heat arrives at the back of the bite, not the front. That delay is characteristic of Cajun seasoning done properly.
Nutritional Information (Per Serving)
| Nutrient | Amount per Serving |
|---|---|
| Calories | 515 |
| Carbohydrates | 27g |
| Protein | 38g |
| Fat | 25g |
| Fiber | 1g |
| Sodium | 700mg |
Gluten-Free Cast Iron Skillet Fried Chicken
Rice flour with tapioca starch. Not a GF all-purpose blend — those produce a crust that’s dense and heavy in a way that feels like a compromise. Rice flour produces something lighter and crispier than even wheat flour, and the tapioca starch amplifies that crispness. It stays crunchier longer after coming off the rack, too.
I’ve made this version and the classic version at the same dinner for the same table and not one person identified which was which without being told. Including my wife, who I told about this test afterward. She did not believe me at first. I have a witness. Also try the shrimp and dumpling stir-fry recipe on nights when you want something naturally GF without any substitutions at all.
Ingredients (Serves 4)
- 3 lbs bone-in, skin-on chicken pieces
- 1-1/2 cups white rice flour
- 1/2 cup tapioca starch
- 1 tsp each: salt, garlic powder, smoked paprika
- 1/2 tsp each: onion powder, black pepper
- 1/4 tsp cayenne
- 2 eggs beaten with 2 tbsp water
- Oil for frying
Instructions
Pat the chicken dry. Mix the rice flour and tapioca starch with all the seasonings — the texture is slightly grainier than wheat flour, which is correct and is what produces the extra crunch. Egg wash first, then flour mixture pressed firmly.
Oil to 350°F. This is one of the few recipes where I keep the temperature at the high end — rice flour benefits from slightly hotter oil to develop proper color. Six to 7 minutes per side. Watch the color because rice flour crust transitions from golden to dark more quickly than wheat. Rack to drain.
Nutritional Information (Per Serving)
| Nutrient | Amount per Serving |
|---|---|
| Calories | 500 |
| Carbohydrates | 30g |
| Protein | 38g |
| Fat | 24g |
| Fiber | 0g |
| Sodium | 640mg |
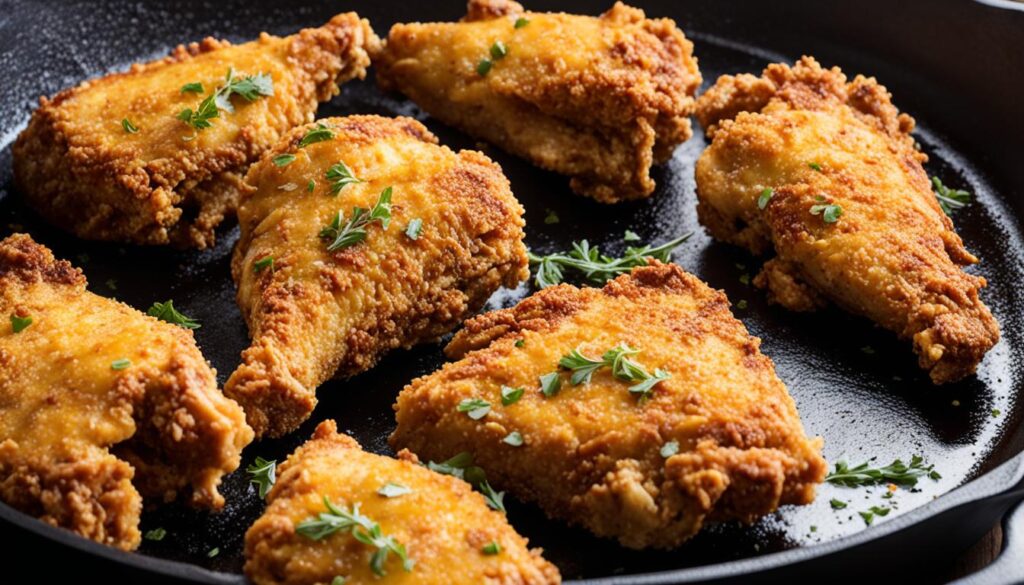
Low Carb Keto-Friendly Fried Chicken
Almond flour and parmesan. The texture is genuinely different from wheat flour — denser, more substantial, almost like a thick shell rather than a crispy shatter. But it’s an actual crust. Not the sad, crumbly, falls-off-in-the-pan coating most keto recipes produce.
My wife asked me to develop this and I tested it six times before I was satisfied. The main technical issue is that almond flour browns dramatically faster than wheat flour — at the same temperature, you’d have a scorched crust before the chicken is halfway cooked. Medium heat is the adjustment. Not medium-high. Medium.
Ingredients (Serves 4)
- 3 lbs bone-in, skin-on chicken pieces
- 1-1/2 cups fine almond flour
- 1/2 cup finely grated parmesan
- 1 tsp each: garlic powder, smoked paprika, salt
- 1/2 tsp each: onion powder, black pepper
- 1/4 tsp cayenne
- 2 eggs beaten with 2 tbsp heavy cream
- Avocado oil for frying
Instructions
Mix almond flour, parmesan, and all seasonings. The mixture feels slightly oily compared to regular flour — that’s the fat content of almond flour and it’s fine.
Pat chicken dry. Egg-cream wash first. Then into the almond flour mixture, pressing firmly. The coating will look noticeably thinner than a wheat flour dredge. Don’t try to compensate by adding more — it won’t help and the extra coating will just fall off in the oil.
Cast iron over medium heat. Oil to 325°F. Skin-side down, 8 to 10 minutes — longer than the classic version, because the lower temperature means slower cooking. The coating goes darker than you’d expect almond flour to go, but as long as it smells nutty rather than burnt, it’s fine. Flip carefully. Seven to 9 more minutes. If the crust has gone too dark before the internal temp hits 165°F, finish the pieces on a rack in a 350°F oven for 10 to 15 minutes.
Nutritional Information (Per Serving)
| Nutrient | Amount per Serving |
|---|---|
| Calories | 480 |
| Carbohydrates | 6g |
| Protein | 42g |
| Fat | 32g |
| Fiber | 2g |
| Sodium | 680mg |
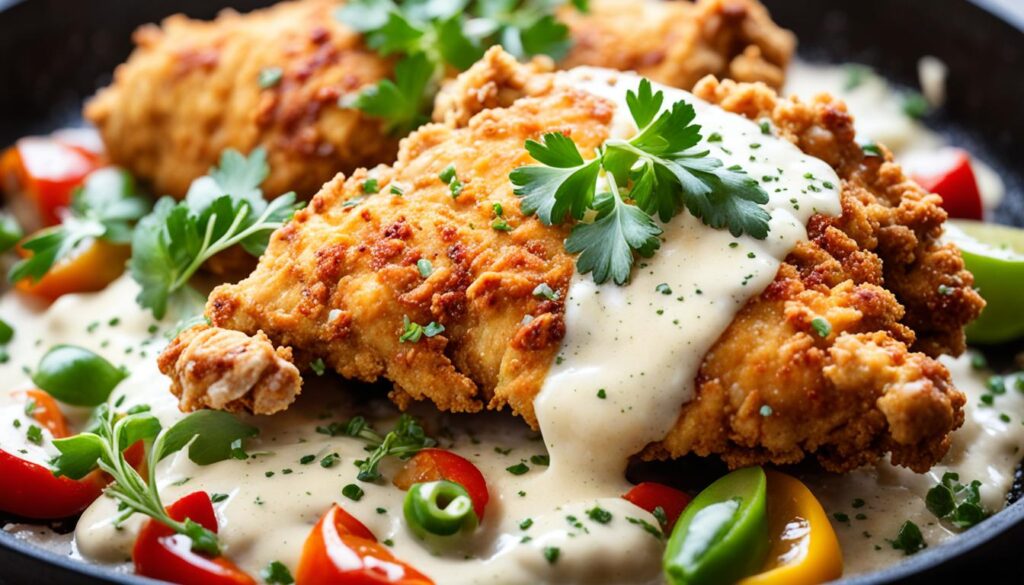
Vegetarian “Fried Chicken” Using Seitan or Tofu
Seitan is better here. Chewy, substantial, protein-dense, and it handles the dredge-and-fry process without falling apart. Tofu works if you’ve frozen it overnight first — freezing changes the cellular structure and produces something chewier and more substantial than fresh tofu. Either way, I’m not going to tell you it tastes like chicken. It doesn’t. It tastes like very good fried food, which is its own compelling argument.
My wife makes this version on nights she doesn’t want meat. I have eaten it alongside her and finished my portion without feeling like I missed out. That’s the honest assessment.
Ingredients (Serves 4)
- 1 lb seitan torn into large irregular pieces — or 1 lb extra-firm tofu, frozen overnight, thawed, pressed very dry, torn into chunks
- 1-1/2 cups all-purpose flour
- 1 tsp each: salt, garlic powder, smoked paprika, onion powder
- 1/2 tsp each: black pepper, dried thyme
- 1/4 tsp cayenne
- 1 cup unsweetened oat milk + 1 tbsp apple cider vinegar (let this sit 5 minutes, it’ll curdle slightly into a vegan buttermilk)
- Oil for frying
Instructions
Soak the seitan or tofu pieces in the oat milk mixture for 20 minutes. Mix flour and seasonings in a shallow dish.
Lift each piece from the soak, let excess drip off, press firmly into the seasoned flour on all sides. Rest 5 minutes on a rack.
Oil to 350°F. Fry 3 to 4 minutes per side. Seitan crust forms quickly and goes golden fast. Tofu crust is more fragile — flip gently. Both are done when the exterior is deeply golden and feels firm when pressed. Rack to drain. Flaky salt on top immediately while still hot.
Nutritional Information (Per Serving, seitan)
| Nutrient | Amount per Serving |
|---|---|
| Calories | 380 |
| Carbohydrates | 36g |
| Protein | 28g |
| Fat | 12g |
| Fiber | 2g |
| Sodium | 620mg |
Korean-Style Fried Chicken in Cast Iron
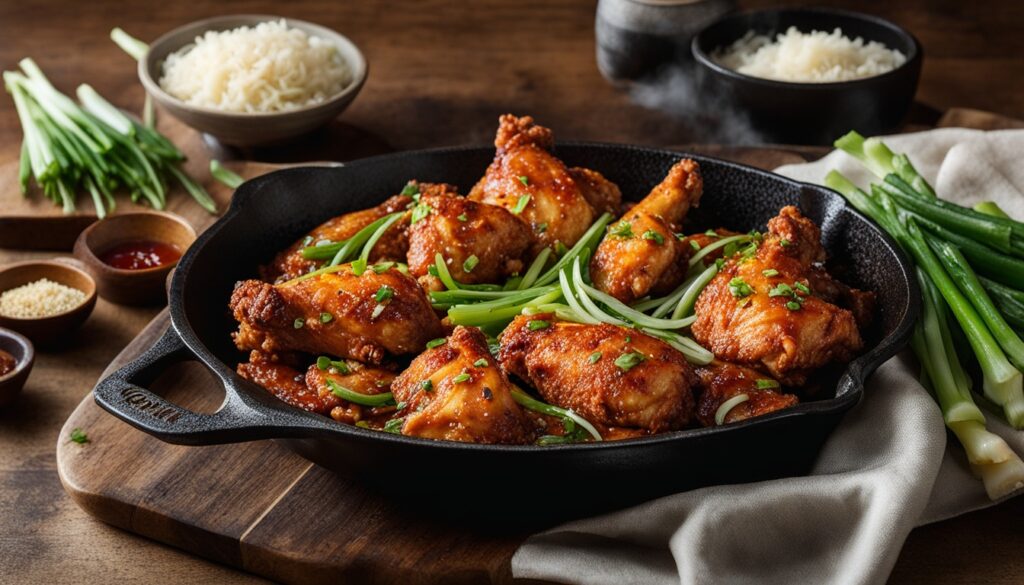
Double-fried. Potato starch coating. Gochujang sauce.
My sons argue over the saucy pieces. Not politely — actually argue. This is the version that generates the most kitchen theater and I’ve come to enjoy both the chicken and the spectacle.
The double-fry isn’t optional. First fry cooks the chicken through at a lower temperature. Rest. Second fry at higher temperature crisps the potato starch coating to something almost translucent and shattering. The sauce goes on right after the second fry hits the rack. Potato starch is key — cornstarch won’t give you the same thin, crackling crust.
Ingredients (Serves 4)
- 3 lbs bone-in, skin-on chicken pieces
Marinade:
- 1 tbsp soy sauce, 1 tsp sesame oil, 1 tsp each garlic powder and ginger powder, 1/2 tsp black pepper
Coating:
- 1 cup potato starch, 1/2 tsp salt, oil for frying
Sauce:
- 3 tbsp gochujang, 2 tbsp honey, 2 tbsp soy sauce, 1 tbsp rice vinegar, 1 tbsp sesame oil, 2 cloves garlic minced, 1 tsp fresh ginger grated
Instructions
Marinate the chicken 30 minutes minimum. Pat off excess marinade — just the wet surface, not the flavor. Toss in potato starch until every surface is lightly coated.
First fry: oil to 325°F. Six to 8 minutes per side. The crust will look pale golden — almost underdone-looking. That’s intentional. Remove to a rack and rest 10 full minutes. This rest lets internal steam escape. Skip it and the second fry creates steam pockets that balloon the crust and make it soft.
While the chicken rests, combine all sauce ingredients in a small saucepan over low heat. Stir until smooth. Off heat.
Second fry: oil to 375°F. Two to 3 minutes per side. The change from the first fry is dramatic — the crust goes from pale to deep amber and develops an audible crackle. When you tap a piece with a finger it sounds hollow. That’s the sound of a properly set Korean fried chicken crust.
Toss immediately in the sauce. Serve at once — the crunch is best in the first 5 minutes.
Nutritional Information (Per Serving)
| Nutrient | Amount per Serving |
|---|---|
| Calories | 580 |
| Carbohydrates | 40g |
| Protein | 38g |
| Fat | 28g |
| Fiber | 1g |
| Sodium | 890mg |
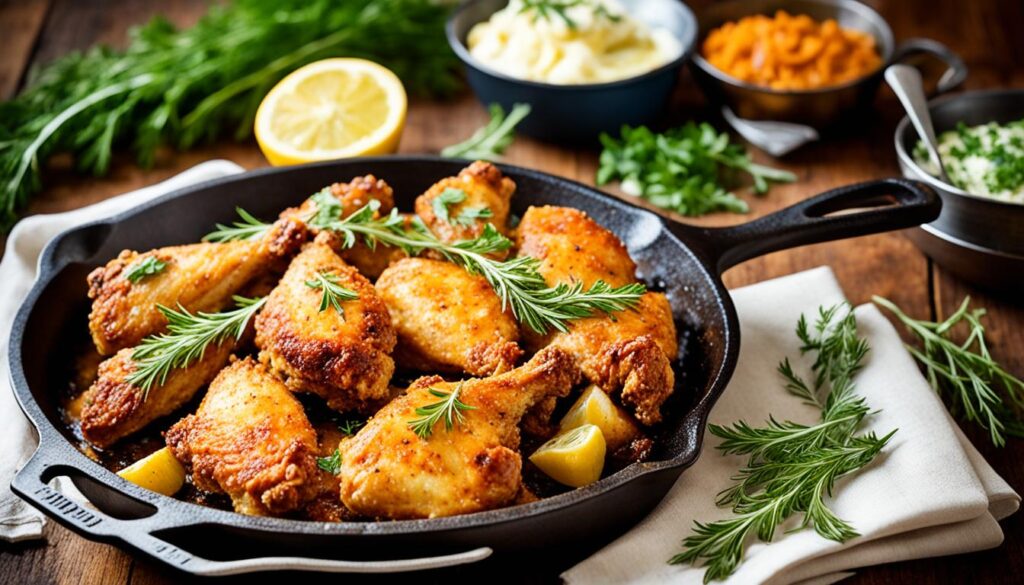
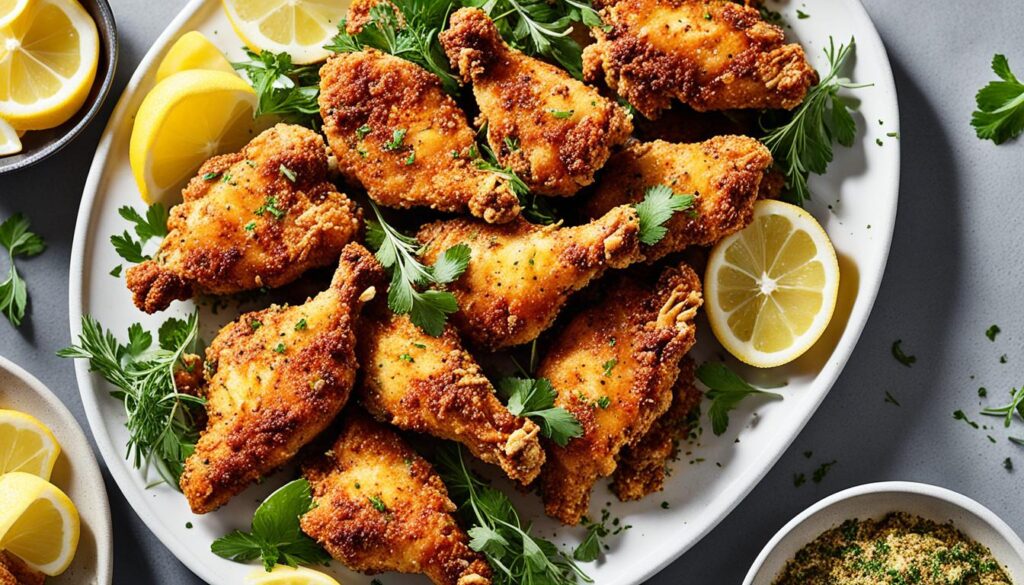
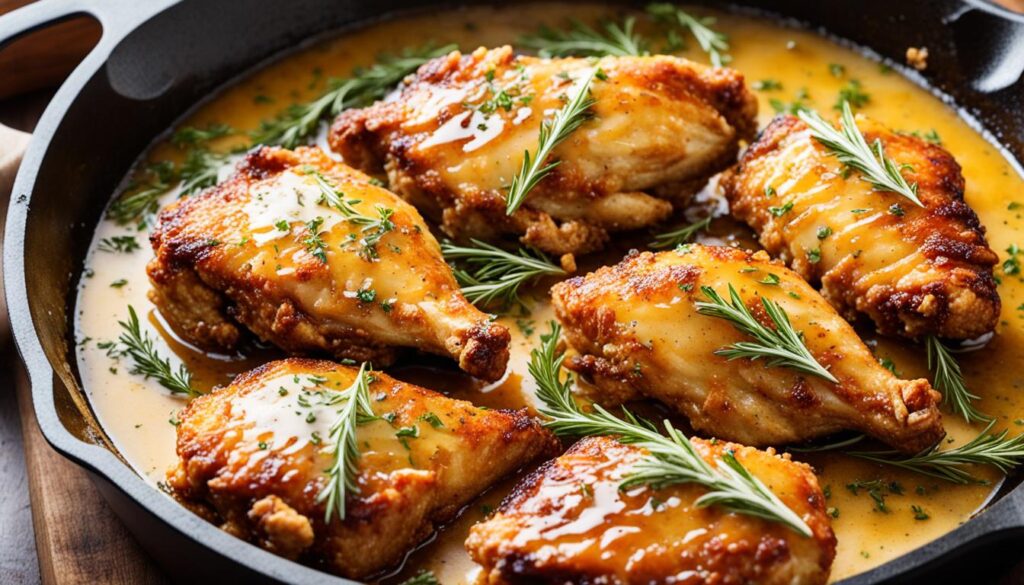
Lemon and Rosemary Infused Fried Chicken
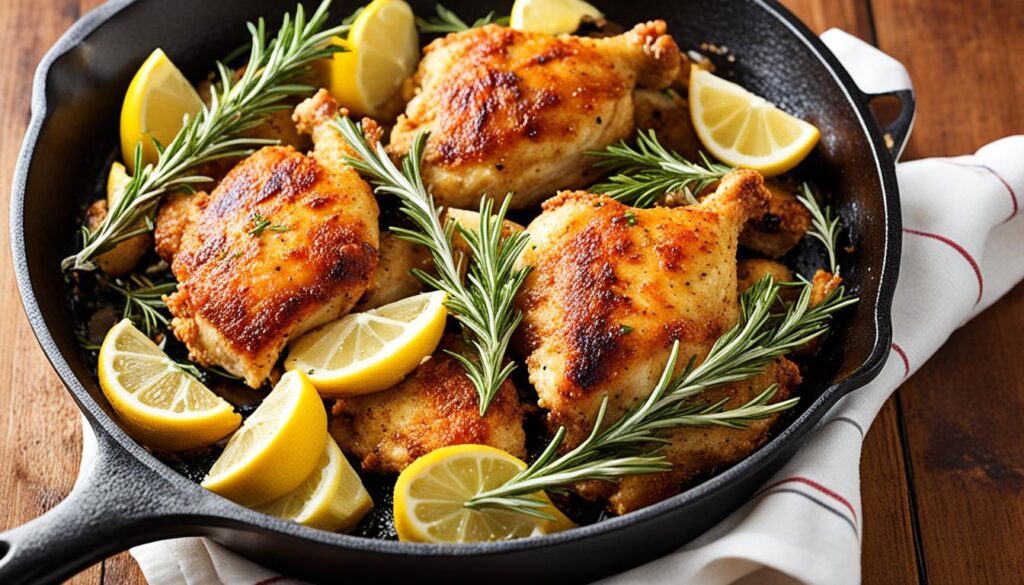
Lemon zest goes into both the brine and the flour. Fresh rosemary in the brine, dried rosemary in the flour — fresh herbs brine well, dried herbs fry well. The lemon cuts through the richness of the fried crust and makes the whole piece taste lighter and brighter than standard fried chicken. Less heavy. More aromatic. Different.
I make this in spring and early summer. My wife requests it when she wants fried chicken that doesn’t feel like a commitment. That’s an accurate description.
Ingredients (Serves 4)
- 3 lbs bone-in, skin-on chicken pieces
Brine:
- 1-1/2 cups buttermilk, zest of 2 lemons, 2 tbsp fresh rosemary very finely chopped, 1 tsp salt, 1/2 tsp garlic powder
Dredge:
- 1-1/2 cups all-purpose flour, 1 tsp dried rosemary crushed, zest of 1 lemon worked directly into the flour, 1 tsp salt, 1/2 tsp each garlic powder and black pepper
- Oil for frying + fresh lemon wedges for serving
Instructions
Brine at least 4 hours. Overnight is noticeably better for this one — the lemon zest in the brine needs time to work through the meat.
Mix the dredge. When you work the lemon zest directly into the flour, rub it in with your fingers — this releases the oils in the zest and distributes them throughout rather than leaving clumps.
Remove chicken from brine, don’t rinse. Press into the flour firmly. Rest on a rack 10 minutes.
Oil to 340°F. Skin-side down, 6 to 8 minutes. The lemon zest in the crust creates small darker speckled spots as it fries — not burning, just concentrating. Flip, 6 to 7 more minutes.
Squeeze fresh lemon over each piece immediately as it comes off the rack. The acidity on a hot crust brightens everything.
Nutritional Information (Per Serving)
| Nutrient | Amount per Serving |
|---|---|
| Calories | 510 |
| Carbohydrates | 27g |
| Protein | 38g |
| Fat | 25g |
| Fiber | 1g |
| Sodium | 660mg |
Double-Dredged Extra Crispy Fried Chicken
Two passes through flour, one egg wash in between. The second dredge builds on top of the first and creates a shaggy, irregular, deeply textured crust with peaks and ridges that fry into something almost violent in its crunchiness. My younger son calls this “the crunchy one.” He’s been asking for it by that name since he was twelve.
More mess. More time. Worth it for a specific kind of crunch that the single-dredge versions simply cannot produce.
Ingredients (Serves 4)
- 3 lbs bone-in, skin-on chicken pieces
Brine:
- 1-1/2 cups buttermilk, 1 tsp salt, 1/2 tsp garlic powder, 1/2 tsp hot sauce
Double dredge:
- 2 cups all-purpose flour
- 1 tsp each: salt, garlic powder, smoked paprika
- 1/2 tsp each: onion powder, black pepper
- 1/4 tsp cayenne
- 2 eggs beaten with 3 tbsp buttermilk — this middle layer is what makes the second coat stick
- Oil for frying
Instructions
Brine minimum 4 hours.
Mix the seasoned flour. Beat the eggs with buttermilk separately.
First dredge: remove chicken from brine, shake off most of the excess, press into the seasoned flour on all sides. Shake off what comes off easily.
Middle layer: dip the floured chicken into the egg-buttermilk mixture completely. Let excess drip.
Second dredge: press into the flour again, hard — work it into all the ridges and surfaces of the first coat. The goal is a thick, uneven, almost lumpy coating that looks almost too much. It’s not too much. That’s the crust you want.
Rack. Fifteen minutes — the hydration rest for double-dredge is longer than single. This matters more here. The second coat needs time to bond with the first or it separates in the oil.
Oil to 325°F. Lower temperature, longer cook — the thick crust needs time to cook through without the outside burning. Eight to 10 minutes per side. The finished crust looks extraordinary: deeply golden, rough and shaggy with ridges, almost aggressively textured.
Rack. Rest 5 minutes.
Nutritional Information (Per Serving)
| Nutrient | Amount per Serving |
|---|---|
| Calories | 580 |
| Carbohydrates | 44g |
| Protein | 38g |
| Fat | 27g |
| Fiber | 1g |
| Sodium | 740mg |
Honey-Drizzled Southern Fried Chicken
Hot honey on crispy fried chicken needs no defense. The honey goes on hot — the moment the pieces come off the rack — and it soaks into the crust surface slightly while the rest stays on top. Sweet, salty, spicy, crispy. Every element at once.
My wife had this at two places on a Nashville trip a few years ago and came home asking if I could replicate it. I spent about a month working on it. She declared this version correct on the sixth or seventh try and I haven’t changed it since.
Ingredients (Serves 4)
- 3 lbs bone-in, skin-on chicken pieces
Brine:
- 1-1/2 cups buttermilk, 1 tsp salt, 1/2 tsp garlic powder, 1/2 tsp hot sauce
Dredge:
- 1-1/2 cups all-purpose flour, 1 tsp salt, 1 tsp smoked paprika, 1/2 tsp each garlic powder and black pepper, 1/4 tsp cayenne
- Oil for frying
Hot honey:
- 1/3 cup raw honey, 1 tbsp hot sauce, 1/2 tsp red pepper flakes, pinch of salt — mix in a bowl and keep at room temperature so it stays pourable
Instructions
Brine at least 4 hours. Mix the hot honey while the brine is happening and set it aside — you want it ready to go the moment the chicken comes out.
Standard dredge process. Rack. Ten minute rest.
Oil to 340°F. Six to 8 minutes per side until deeply golden and internal temps are right.
Chicken onto a serving plate. Drizzle the hot honey immediately — don’t wait for it to cool. Hot crust absorbs the honey slightly rather than just letting it pool on top, and that absorption is what makes the honey feel part of the chicken rather than a condiment sitting on it.
Nutritional Information (Per Serving)
| Nutrient | Amount per Serving |
|---|---|
| Calories | 580 |
| Carbohydrates | 46g |
| Protein | 38g |
| Fat | 26g |
| Fiber | 1g |
| Sodium | 690mg |
Troubleshooting Common Fried Chicken Issues
The problems that come up most, and what’s actually causing them.
Crust slides off during flipping. Wet chicken before dredging. Skipped the rack rest. Moved the chicken before the crust released on its own. Usually all three together. Pat dryer. Rest longer. Wait for the release.
Pale, oily crust. Oil temperature too low — below 300°F the chicken absorbs oil instead of being sealed by it. Get the thermometer. Guessing doesn’t work.
Burnt outside, raw inside. The opposite problem. Oil too hot. Crust cooked in three minutes, inside needs twelve. Keep it between 300 and 340°F for bone-in pieces and accept that it takes time.
Soggy bottom after draining. Paper towels. Switch to a wire rack over a sheet pan. Air has to circulate under the crust or the bottom steams itself soft in the first two minutes off the heat.
No flavor in the crust. Seasoned only the flour, not the brine. Or seasoned the flour too lightly. The dredge is thick — taste it before you dip anything. It should taste aggressively seasoned, almost too much. It won’t be once it’s on the chicken.
Tips for Cleaning and Maintaining Your Cast Iron Skillet After Frying
Post-frying cleanup sounds terrible. It’s actually about ten minutes.
Let the oil cool completely first. Hot oil and water will cause a violent splatter reaction. Cool fully.
If the oil isn’t dark, doesn’t smell off, and has been used at appropriate temperatures, strain it through a fine mesh strainer and store it in a covered container at room temperature. Frying oil from a clean batch of chicken is good for one or two more uses.
Pour off the remaining oil before washing. Into a container, not the drain — solidified oil clogs pipes over time.
While the pan is still warm from sitting — not hot, warm — scrub with a chain mail scrubber or stiff brush and hot water. No soap necessary most nights; the residue from frying is mostly polymerized flour and oil and comes right off.
Burner, low heat, 2 to 3 minutes to dry completely. Cast iron cannot stay wet.
Light oil wipe on the cooking surface while still warm from the burner. A paper towel with a thin coat of neutral oil. Just enough sheen, not enough to pool. This maintains the seasoning.
Cast iron that’s used for frying regularly develops excellent seasoning over time — the high-temperature cooking builds polymerized layers on top of the existing ones. A pan used for fried chicken is almost always better-seasoned after than before. That’s not a reason to do it more often than you want. But it’s not a bad side effect.